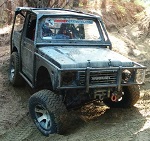
MihiT wrote:Just landed myself a Y60 truck, mainly for pulling heavy shit and as a work vehicle, but I'm sure I could justify a few "charity" events offroad.
...Bog stock at the minute but I'll be looking for some pointers and upgrades, I haven't done much research just yet, but if anyone knows of a 2 speed diff that will go in the back of the 'troll, links would be neat, and the rev counter is spastic (I have bought the Haynes bible today) so any debugging there would be good.
MihiT wrote:She's had a good clean up though, running gear is now running as it should.
15th February '15
MihiT wrote:Hubs fitted are not stock, but SurperWinch's. I filled them both up with EP Blue - the result, quiter engagement, no heat (they were smoking prior, which is why I had to tear them down), anti-seize on all the bolts, job-done.
I've also bled both brake and clutch, replaced engine oil, filters, boxes and diffs, ran injector cleaner through it last week so It's had it's birthday and ready for action.
Is there a gasket or something that is supposed to be in the square connection just before the air cleaner? Seemed loose as a goose and living on gravel I'm sure it's not helping sucking in dusty shit from the engine bay. So I've put some of that draught-stop foam to give it a better seal.
The end game, I will be adding a RAI/ snorkel - possibly exhaust steel, maybe alloy depending what i can find in 3" that's cheap enough. I do NOT want to go PVC.
The Isolator, shown where I want it mounted, and to the left (second picture is top-down view) the vacuum tank.
I had the same problem with that square hose on mine. Probably stretches from years of heat. When I put a snorkel on I siliconed the pipe on to make sure it was sealed. The best way I have seen if your good at welding thin steel is to cut that whole square section off the airbox and profile a piece of 3in pipe to fit the shape of the airbox and weld that on.
-------------------------------------------------
Newly brought currently bog standard Discovery V8i with a drinking problem
So while I'm waiting for other things to happen, I want to debug my Tacho.
For reference, Sensor on 1990 is under the thermostat manifold. Why oh why is everything in this engine bay so damned difficult?! Even with a half dozen japanese hands I struggle to see why everything is always in the way!
3VILC wrote:I had the same problem with that square hose on mine. Probably stretches from years of heat. When I put a snorkel on I siliconed the pipe on to make sure it was sealed. The best way I have seen if your good at welding thin steel is to cut that whole square section off the airbox and profile a piece of 3in pipe to fit the shape of the airbox and weld that on.
Sounds awesome, but I don't think I'll be handling that with my arc welder! I will probably go the silicone way when I do snorkel it, Not that I ever plan on wading that deep, just, y'know.
Yup I only had an arc at the time too so left it as it was and just sealed the joint up to watertight it. I hadn't planed on wading that deep either, until skirting a lake I had done before, said to my mate nah these holes arent very deep, famous last words, the lake was a fair bit higher than the previous time andthe bow wave was just below the bonnet and sloshing over the bonnet, with a 4inch lift
-------------------------------------------------
Newly brought currently bog standard Discovery V8i with a drinking problem
Well, The continuity to the cluster checks out, But I'm left with "now what?"
Pic shows the rear of the cluster the top 2 pins (indicated) are the ones that the sensor feeds, the third is also connected to the rev gauge, but it doesn't come from anywhere I can poke. (maybe an a/t signal?)
The daughterboard for the rev gauge (PCB# XP-729F) doesn't show signs of blown caps, arcing, shorts etc. The varistor (32kR) is set to max. There's also an IC, which I never like, but again, no tracks or blisters.
Top right to bottom left of needle coils is 155.6R, Top left to bottom right is 125R Would this imbalance cause malfunction? very fine windings so I would have thought they'd be better matched...
The pcb for my gauge looked good to but I went over all the soldering anyway and it fixed it. That was 2 years ago now and no problems since. You will want a good soldering iron and a steady hand.
quick6 wrote:The pcb for my gauge looked good to but I went over all the soldering anyway and it fixed it. That was 2 years ago now and no problems since. You will want a good soldering iron and a steady hand.
Ahh crap, I've put it all back together. for reference, dousing it in CRC 66 has not worked.
A bit of a blow-by-blow picture diary of running the wiring for alarm and central locking.
1) Remove door cards - generally, one screw behind the handle, two in the arm rest, one in the ash tray, then there's the clip that holds the window winder. The rest are pop-off connectors around the perimeter.
2) Find the lock actuating rod, some run horizontally, in this Saf, they run vertically.
3) Line up where you want the motor to go, on the inside of the door skin, make sure that the window can still open and close without contacting it. Once you've got the alignment right, hold the motor against the side you can see and mark where your holes are going to go.
4) Drill 'em. Then screw through the skin into the motor fixing holes.
5) Line up the motor actuator rod next to the door lock actuating rod. Unlock the door and fully extend the motor. Clamp the rods together.
6) Make sure it functions correctly and that there's still nothing that will catch on the window.
7) Run your wires. If you're like me, you wont be happy with a few crappy wires kicking around your footwell and then running up the door card. Also, if you're running low loss OFC for your speakers (and you should) you dont want that being crushed by your door. - Pop the gromets/glands/bungs that have the OEM wiring going through them. If there is no OEM wiring, there is usually still rubber bungs in the door and body.
If you need it watertight - drill the bung slightly smaller than your cable bundle. If not - you can cut an X with a sharp knife and push the wiring through. If it's OEM, chances are that all the wiring you're adding will not fit throgh the original rubber hose. If you need it water tight you'll want to find some glue-filled heat shrink tubing big enough to accomodate your bundle. don't fit it yet.
Feed the wiring out of the cab, through that bung, through your heatshrink (about 10", if you're using it - don't shrink it yet) through the door bung, then pull it through until it reaches the motor. - Be wary of pulling it while it's running through exposed steel holes, it helps to push-pull to get it where it needs to be.
Whether it's watertight or not, it's still a good idea to have a drip-loop inside the door - simply make sure the wire runs lower than the lowest connection then form a bight and cable tie it.
Jiggle the wiring until it's in place and not under tension, and not in the way of the window mechanism. line up approximately where your bungs and wires are going to be. Pull the wiring half-out between the body and the door, now you know where it's going, you can shrink your tubing if you're using it, or wrap it up in tape if you're not - extend the tape an inch or two past the bungs.
Push the bungs back into place, connect the bullet connectors to the motor, connect the speaker connector to the speaker. Cable tie any wiring you need to to the door skin.
Inside the cab is a bundle of laughs and there's no generic routing. You can try to follow OEM wiring if you like, but keep in mind that they fitted the wiring loom before any of that plastic stuff was in the way.
For the Saf. and this particular central locking control unit, the wiring from the master (drivers) motor only reached to the steering column, so that's where it's going. (I can't be arsed soldering anything today) Again, making sure it's not going to get stuck in anything that moves (pedals, heater controls, steering column) I ran the wiring over the steering column, over the central air duct, behind the passenger side air duct and down on the other side. Again. position in loosely first, and once you're sure it reaches everything, cable tie it.
The speaker wiring for my passenger side door runs underneath the glove box, rather than with the central locking.
8.) That's basically it, connect red to red (constant 12v not ACC) and black to black and you have central locking. I also have a grey and white which are triggered by the alarm.
The Alarm:
1) Find somewhere for it. I have an all-in-one Uniden which fits under the fuel filter bracket. Ones with central units and seperate speakers, immobiliser relays etc, you want to DISMANTLE your dash to hide the CPU. If they have a "hush" button (I don't think they do anymore) I don't connect em
2) Run the wiring. For an alarm you want to spend a bit more time on this - where possible open up OEM cable sheaths and run it through them - out of the way of thieves side cutters
I wont go into so much detail here, suffice to say that mine's not coming out in a hurry.
3) The door-open sensor taps into the interior light, The central lock triggers go to the wires on that unit, the little flashing light goes wherever you want it in the cab. It is supposed to be a visual deterrent, so many people put it up high, close to the steering wheel or in the windscreen
4) The indicator flashers: Depending on your alarm set up: if it injects 12v into the circuit, just splice into the indicator wiring somewhere between the control stick and relay box. if it only has a trigger, you need to wire a standard relay into your hazard flashers, or a flashing relay (indicator relay) into your parking light circuit. 4a) The horn chirper, if your unit does not have it's own siren, a flasher relay on the horn circuit.
5) Immobiliser circuits/relays. There's not many to choose from. ACC to ECU (AFTER thre ignition switch so that ripping the wires out and twisting them together still wont work); the existing starter relay trigger (can still be bypassed with a flying hot lead); fuel pump; igniter module; fuel cut solenoid (diesel)
6) You can add a relay to drop out the tail lights - if your car is stolen at night, the thieves wont know they're out and if they're seen by the cops or *555d it's game over fairly smartly. (might not work in Northland, the number of cars I see with one headlight, tail light, broken lenses...)
That's about it. Some pics. more to come.
Attachments
bit of rust in passenger side speaker mounts. I'll hit it with acid and etch.
Hey look, a 24-12v reducer, which has no grounding wire it was (obviously) running the radio but is supposed to also run lights and clock. neither working. And my multimeter skills ran out, but it seems the harness in isn't getting the volts in needs.
hard to see, but it looks almost OEM!
Not-quite waterproof, but budled in tape.
Wiring threaded through car, bungs and door and spaced as needed.
シガライタ‐ 7口ワモ‐クー エ7コン l | DA 西 .ざ ■ r I ヽ ヽ オーテイオ い A/T コン巾一ル エンンン コン卜口ール c->->-r |.\ DA 凹 ノーター |▼ <`+y>3>>o ターン シケナル へソ卜 . DA E ^`yh`` |;\ 9>7(6) |`< テール . ■ .. ランフ~ |O ド7pック |6 /\^F9>> ホ-ン XlTy7o ランフ。 Z,>: | . .ィ DA ■ + .. | iJ リャテフォソヵ| ニ ヽ フijワ | : モークー | \ リヤワイハD | J ウオッシャー | < ■ ■ 7ロン 卜r7イ/` l 、ニ Y」 `] D T/ ユ∴ # <K A「」 lq [I =] . . . [ : 【∴ヽ ウオ 「ンヤー | i;:: ;!i; [ l {\.l l. ゝ 6卸 碑 S へ ノ卜ランブ | 描 も ヮイ<ウオソシV ご こ . L .
Ran it through google translate, got:
Shigaraita - 7-neck Wamo - Koo D 7 Con l | DA west . Seat ■ r I ヽ ヽ Oteio physician A / T Con Habaichiru En'n'n Con Bok opening Lumpur . c -> -> - r | \ DA concave NOTAR | ▼ <`+ Y> 3 >> o Turn Shikenaru Seo Bok to . DA E ^ `Yh`` |; \ 9> 7 (6) | `< Tail . ■ .. Ranfu ~ | O De 7p-click | 6 / \ ^ F9 >> Ho - down XlTy7o Ranfu. Z,>: |. . ~I DA ■ + .. | IJ Ryatefoso~ka | two ヽ Off ij Wa |: Moku | \ Riyawaiha D | J Washer | < ■ ■ 7 Ron Bok r7 Lee / `l, two Y " `] D T / Yu ∴ # <K A "" lq [I =]. .. [: [∴ ヽWalsh "N'ya | i;! ::; I; [L {\ .l l. ゝ 6 wholesale Monument S To Bruno Bok dancing | drawing also ~Wa Lee <Uososhi V you this . L.
Now, half of those words are conceivably to do with a car. But I'm not too sure about the Ho-Down.
Is there a Japanese forum (or anyone here) who can translate?
Those are all in katakana script which is used mostly to translate foreign words. So you can use this chart to decipher the meanings. For example the first one is 'shi-ka-ra-i-ta' = cigarette lighter
Attachments
TOYOTA - The Official Vehicle of ISIS! And makers of the '92 Camry, where you got your first backseat handjob.
So, thinking about my snorkel, I want to re-route it so instead of doing a silly S bend infront of the battery, it goes straight out the side. Well, straight except for a 75mm offset. This also (hopefully) gives me space to hang another (12v) alternator off. Anyway. round peg square hole, not much to do but fabricate an adaptor, and here's that. Not finished yet so you'll excuse it looking hoary.
The original steel one has the flanges on the side, not sure if I'm going to use them or not, they were mainly to give me something to clamp for when it gets the seams welded...
Attachments
same thing from the other end
*some images missing* - bendy work
markout
layout
Last edited by MihiT on Fri Mar 20, 2015 4:38 am, edited 1 time in total.
So I'm back into the dash. Since my last foray, I've now lost all gauges except voltmeter. I found a blown 5A fuse, which I'm assuming wont help matters, but it's not labelled according to the translation, so I find out when I reassemble, again.
The tacho board had one loose connection (diode in picture), and one shat diode. all the resisitors measure OK. so I'm assuming it's been one of those two problems. Of course no-one's open on a sunday so I wait until next week to get a damned diode!
Just for the record: I have replaced the sagged stock springs with Dobinson "Heavy Duty" (got a 2" lift right there!) - that was November last year.
This week-ish, I have a clunk (viewtopic.php?f=13&t=46186&p=457889#p457889)
On getting under it the only thing I could wriggle with a prybar was the drivers' side shock. Infact even with the suspension loaded I could move it by hand and the rubber mounts looked like sh*t.
My theory is that the sagged springs had over-compressed the shock(s) and with the new springs, weren't extending fully.
$430 later (and a plug for Owens suspension, who are pretty much the only shop I bother dealing with - and they're great every time, they also supplied the dobbys) and I'm fitted new Munroe 4x4 "Heavy duty" shocks.
But my clunk persists, although less.
Also fitted an awesome Alpine USB, Bluetooth, Aux, Stereo unit and 200w JVC coaxial speakers.
A small amp under the dash is on the list as the stereo output is only 50w/channel and cant be bridged, so the speakers are well under driven.
Last edited by MihiT on Thu May 26, 2016 2:26 pm, edited 1 time in total.
I fitted a 20A 24-12 reducer, through a 6 way fuse box. This all fits, more or less neatly, screwed to the base of the glove box.
Connected the stereo, and wired in a 12v cigarette lighter socket and I'm guessing dash, since everything works now except the tacho which is still on my bench, and the odo which may be unplugged - this causes the speedo to react slowly, but it still reads accurately.
I've got mail...
I really curse the P.O.s lineage, I'm having to do 30 years worth of maintenance that he seems to have ignored!
Drive it into the ground and flick it off to some dumb mug! She'll be right!
Enough ranting. I also have an electric fuel pump on it's way, and relays and hoses and fittings for my endless air, yet ANOTHER weekend spending all this weeks pay!