Page 1 of 3

Rocky Rover 1955 Series 1

Posted: Mon Sep 03, 2012 10:39 pm
by DieselBoy
She's one of the family. I was 3, my brother was 6mnths. So roughly 30 years in the family.

1955 Series 1 86", 2L F head side valve engine.

This is her in action the last time she ventured further than the front gate:

Image

Image

Image

Image


She has done just about every track north of Waiouru at some stage in her career, wires loop, grapevine, neevesville, waitawheta you name it, shes probably been through it quite a few times up to the early 90's.

I will have to scan some photo's, they were awesome club trips back then!!!

I bet Lilpigzuk and LR90NZ have some also :lol: :lol:

Re: Rocky Rover 1956 Series 1

Posted: Mon Sep 03, 2012 10:50 pm
by LR90NZ
Probably a few from the funs days we had on the Horsham Downs farm as well.
Is it to receive one of your special make overs very soon?

Re: Rocky Rover 1956 Series 1

Posted: Mon Sep 03, 2012 11:15 pm
by DieselBoy
She has spent the last couple of years languishing in the back corner of one of the sheds with Suzuki LJ50 parts piled up on her, growing mold and providing convenient accommodation to a few generations of Rat families.

She was parked up mainly due to steering issues, a snapped stud on one of the king pin caps, worn king pin bushes causing uncontrollable wheel shimmy, completely disfunctional brakes, the list goes on..........

The plates were kept live though :twisted: :twisted:

So its time for some TLC.

The list was:

Fix brakes
Fix steering
Fix rear cross member and spring hangers
New soft top
Get WOF

My list now includes:

Fuel tank support
Re-condition engine or try out spare engine in unknown cond
Fix dragging clutch
Fix dodgy patch work and stress cracks on fire wall
Recondtion/replace steering box
Clean up body work esp front guards as best as can be done with bent alloy panels

The idea is to tidy it up so it can be used regularly and taken out wheeling.

I don't want to do a mint resto, as shes just another series 1 that's been well used and abused over the years. There's not a straight panel on it and its beyond the budget and my skills to do anyways :lol: :lol: :lol: :lol:

Tidy, legal and usable is enough :D


I raided dads collection of "special" tools for working on it. Metric doesn't fit, Imperial does't fit. Ever heard of Whitworth???

Try having a full box of tools lying in the corner utterly useless cause none of them fit. Frustrating. It looks like a 14mm, but its not. Grrrrrrr :evil: :evil:

So the strip down has begun. Took all of an hour to strip doors, roof etc off:

Image

Image

Image

The monster power plant. Love the oil bath aircleaner!
Image

Fire wall looked good:
Image

Doors are really good:
Image

And then it stopped for a few weeks while i got my head arond the wiring and how I was going to strip the loom out in such a way as to be able to put it all back together. No nice plastic plugs back in the 50's here folks, its all individual wires and separate terminals.

Re: Rocky Rover 1956 Series 1

Posted: Mon Sep 03, 2012 11:37 pm
by DieselBoy
A pile of parts out here:
Image

A grubby semi stripped chassis in here:
Image

I thought long and hard about the wiring issues, and in the end, decided that the simplest method was the best. Do it in one hit to aid memorising it, and just methodically go through labeling each terminal and associated wire. Slow, but hopefully accurate enough to be able to trouble shoot any issues as it goes back together.

So now its covered in blue tags every where marking wires and terminals:

Image

Image

Image

Now that's out of the way, the fire wall can come off, and the front panel with radiator can come off.

The fire wall looks good from a distance:

Image

but is not......
Image
Image
Image

neither is the fuel tank support:
Image

Nothing a grinder, some plate and a welder can't fix :D :D :D

Grubby gearbox and T.Case. Bring on the degreeser and water blaster!!
Image

Somewhere from the deep dark depths under the house a replacement rear cross member emerged. God knows where it came from and how long it had be hiding under there for :lol: :lol:
Image

Its obviously not a series 1 cross member, but it does line up with the chassis rails, so there is potential.......
Image

My plan with what to do about that cross member keeps changing every time I look at it :lol: :lol:

Image

Onwards :D :D

Re: Rocky Rover 1956 Series 1

Posted: Mon Sep 03, 2012 11:39 pm
by Taz
DieselBoy wrote:I raided dads collection of "special" tools for working on it. Metric doesn't fit, Imperial does't fit. Ever heard of Whitworth???


:lol: yeah have a few of those that are kicking around. Confused the crap out of me when I first read the sizing on them.

Going to sell them at some stage, good to know what market to target :D

That paint colour hides the dents well. Will be watching with interest.

Re: Rocky Rover 1956 Series 1

Posted: Mon Sep 03, 2012 11:47 pm
by niblik
Ah..... a true landrover lover.

Re: Rocky Rover 1956 Series 1

Posted: Tue Sep 04, 2012 6:46 am
by Rotazuk
If you get stuck I have a far collection of witworth spanners and sockets from working on RR darts :)

Re: Rocky Rover 1956 Series 1

Posted: Tue Sep 04, 2012 10:43 am
by lilpigzuk
Bloody O for awesome :mrgreen: Will raid the old mans album and see what pics he still has of it
Dads 1957 landy still wofed I think 8)

Re: Rocky Rover 1956 Series 1

Posted: Tue Sep 04, 2012 11:26 am
by UBZ
bout time you posted some pic of this up .
good to see you finally got brave enough to tackle the wiring .
Yell out if ya want a hand some time .

Re: Rocky Rover 1955 Series 1

Posted: Fri Apr 18, 2014 10:07 am
by snotgoblin
Almost anything British of that era is full of Whitworth, or British Standard Whitworth (BSW). All the British aircraft I have worked on use it too.

The sizes I think are more to do with thread sizes vice nut sizes, from memory. There is also British Association (BA) sizing out there too. Although these have all been on Rolls Royce Viper engine.

That is a cool looking Landy though.

Re: Rocky Rover 1955 Series 1

Posted: Fri Apr 18, 2014 11:31 am
by chrome
:D

Re: Rocky Rover 1955 Series 1

Posted: Sun May 04, 2014 9:03 pm
by DieselBoy
There's a little bit of a gap in this thread!!!!!

I got busy with this:

http://www.offroadexpress.co.nz/Forums/ ... 21&t=36132

And then I was about to get back on to it, and then this happened:

http://www.offroadexpress.co.nz/Forums/ ... &start=150

So had to rebuild a new one!!!!!!!

Now that's done, and it's ready for our trip to OZ in July, i have a window of opportunity to smash out some work on Rocky Rover.

Just to add some pressure in the mix, our property has been sold to a developer, so we have to be out by the end of June.

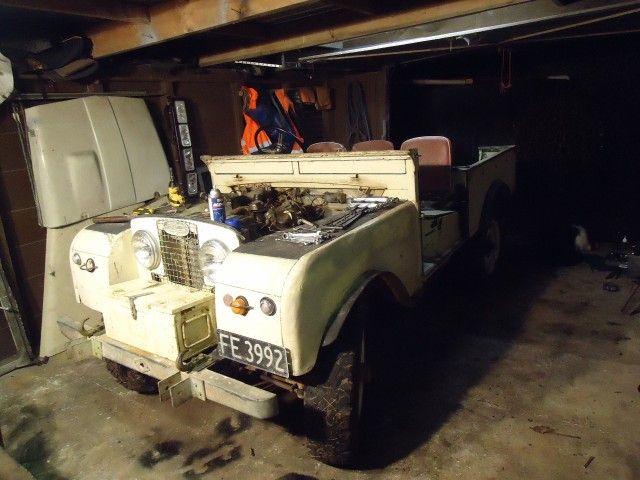
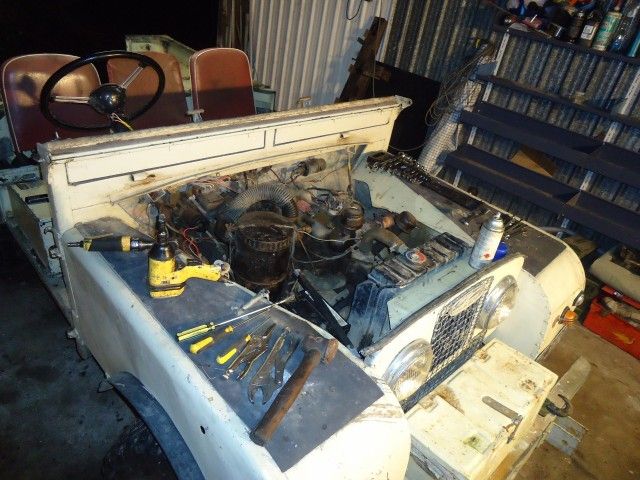
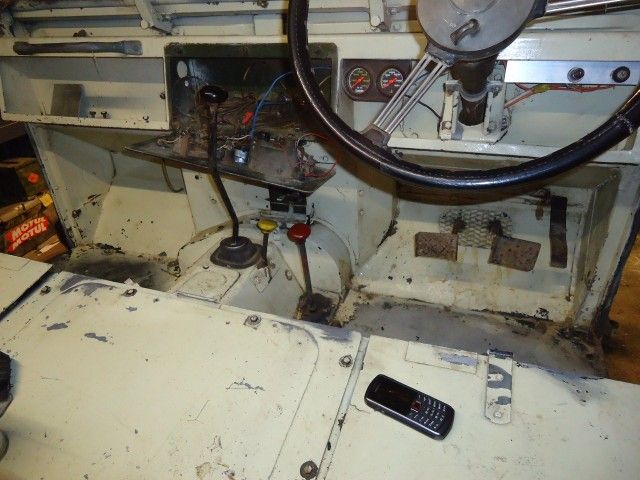
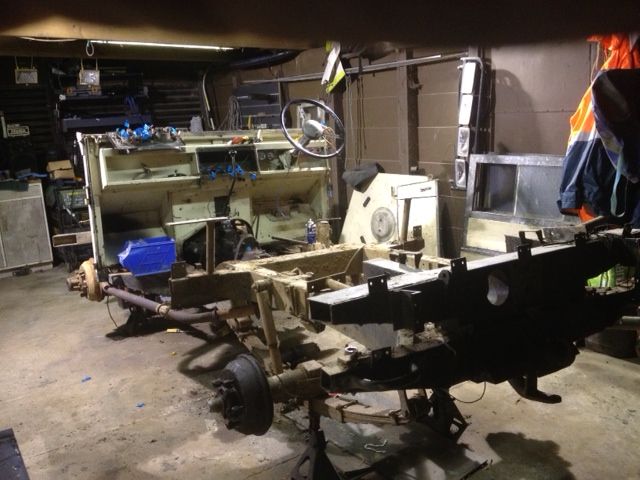
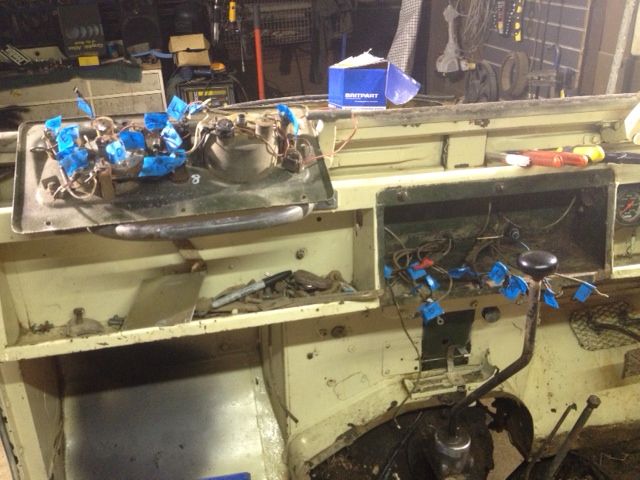
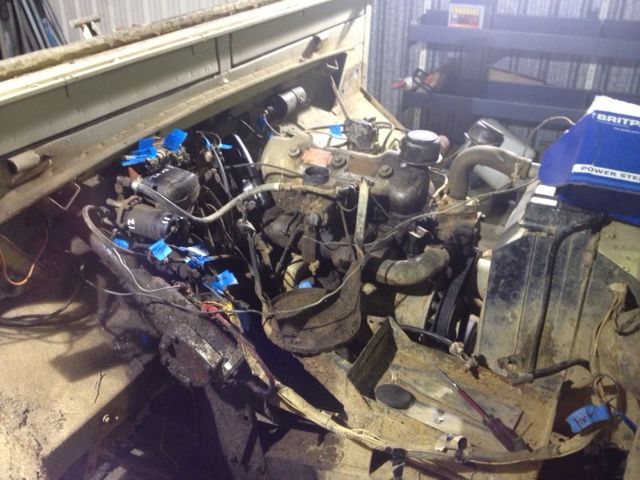
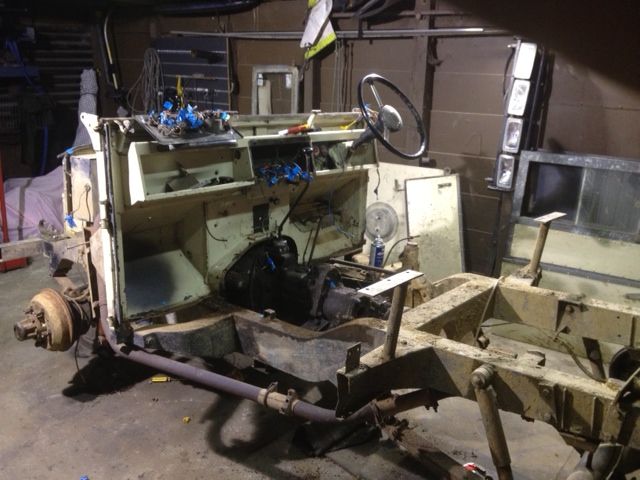
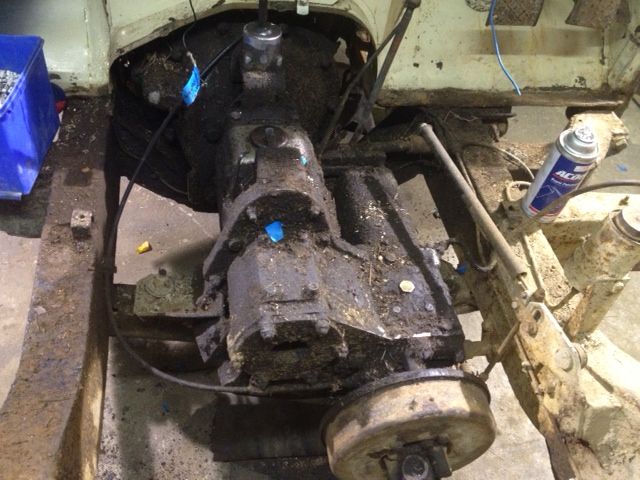
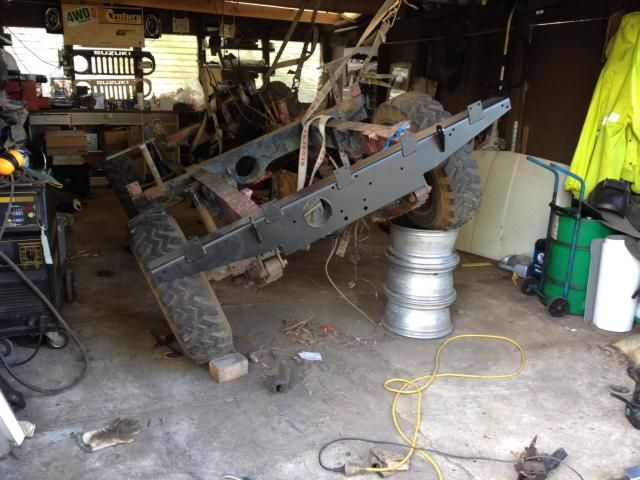
To fill in the gap in the thread, the fire wall was worse than we thought, so that came off too, then the engine and gearbox came out, and basically its sat as a semi rolling chassis for quite a while.

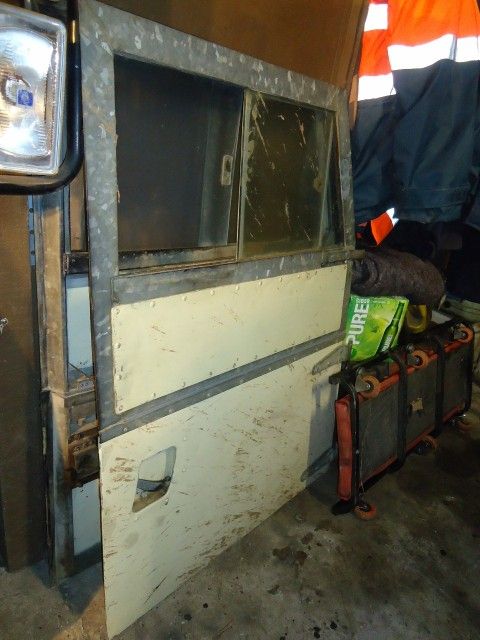
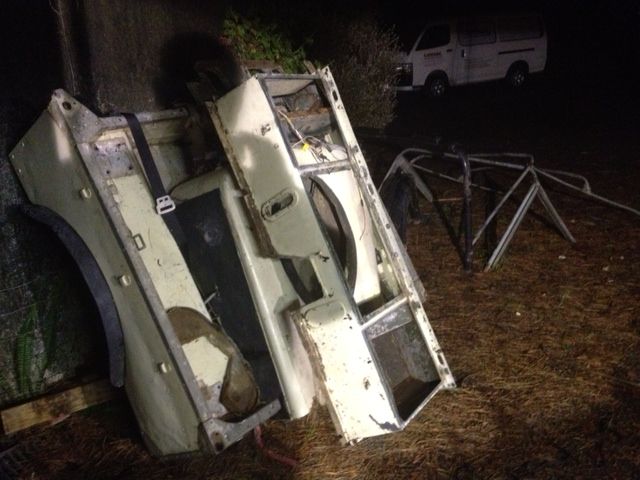
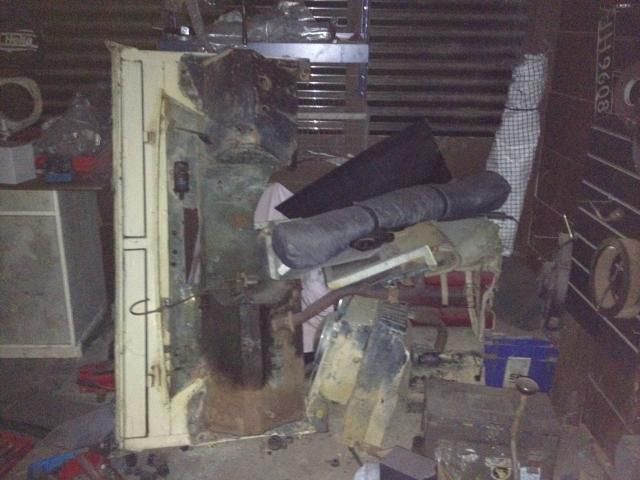
The old engine and gear box, fire wall and other parts are lurking in various corners of the work shop :lol: :lol:
Image
Image

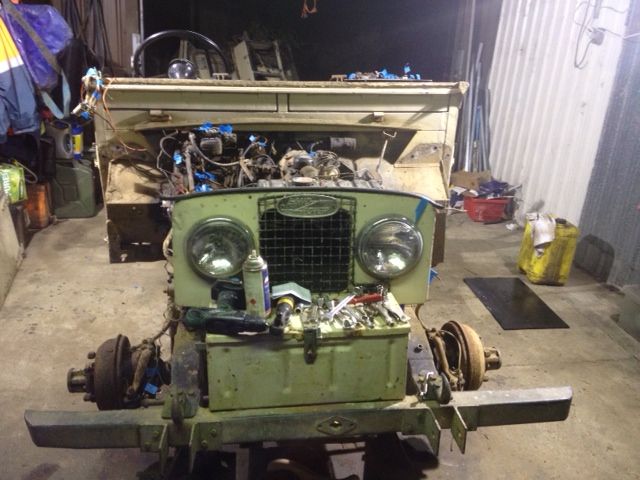
We sent the front guards to a retired panel beater who tinkers with stuff from home for fun, and he fixed those up for us. They are perfectly straight. In fact he's set the bar pretty bloody high for the rest of the body work :oops: :oops: :oops:

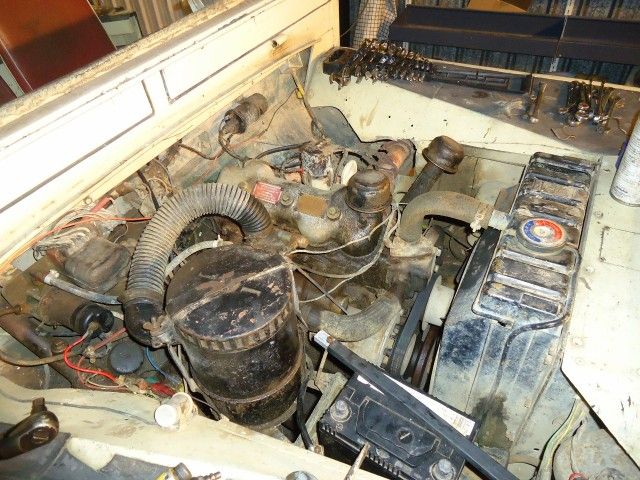
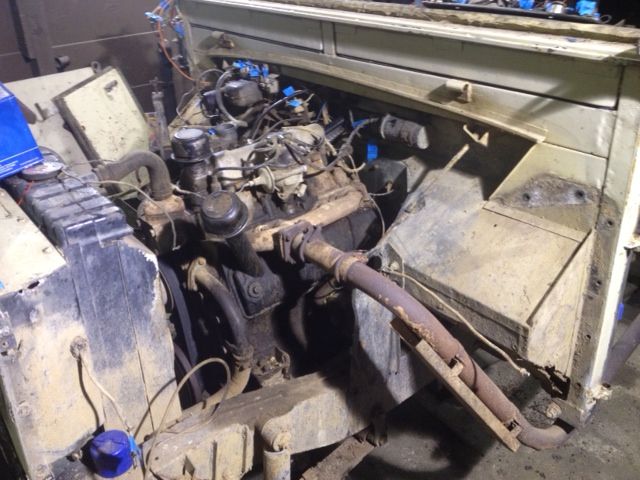
Dad dragged the spare motor out of the crate and stripped it down. He's given it a valve grind, and a bit of a clean up in the combustion chambers, new water pump, new head gasket, pinched the copper water gallery from the old motor and swapped that in, checked the bottom end bearings and i think its ready to slap in and see what it does.

Me in the mean time, have done a whole lot of procrastinating :lol: :lol: :lol:

Over the years Dad had collected bits and pieces to do the chassis repairs.Trouble was the replacement bits were pretty tired them selves. Especially the replacement rear cross member. Luckily Rex at www.landroverspares.co.nz had a Series 2 Rear Cross member sitting on the shelf ready to go, so grabbed that and came up with a plan to make it work.

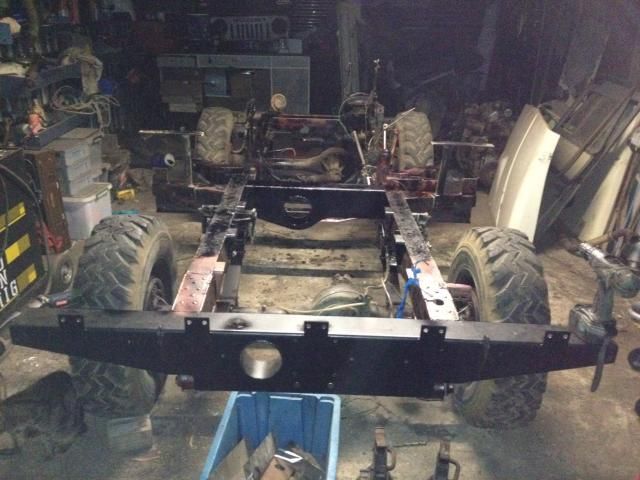
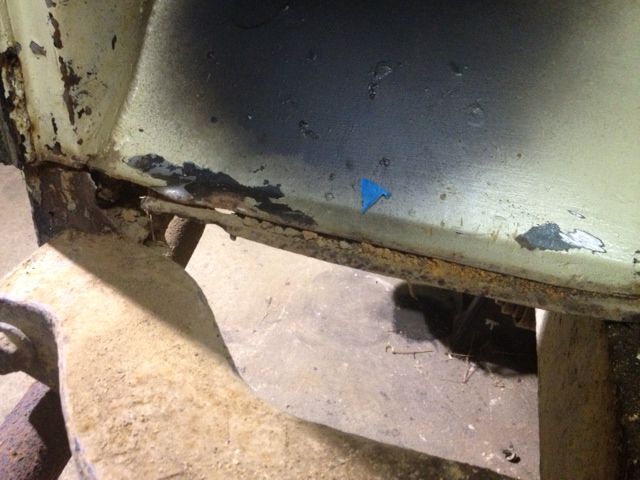
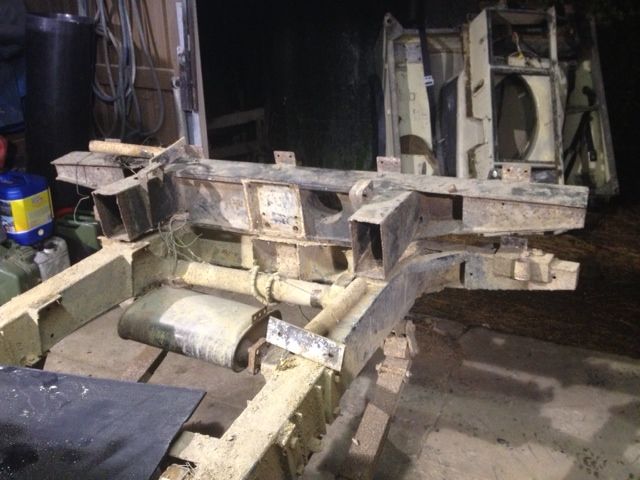
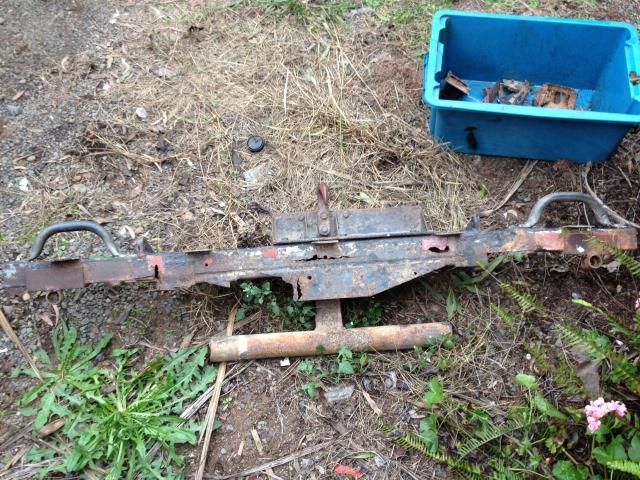
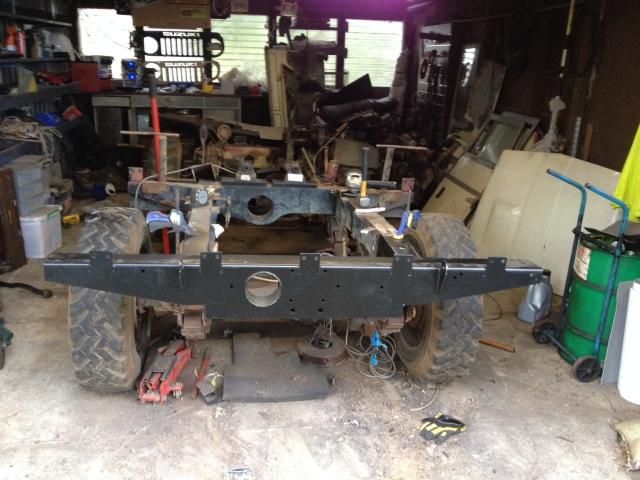
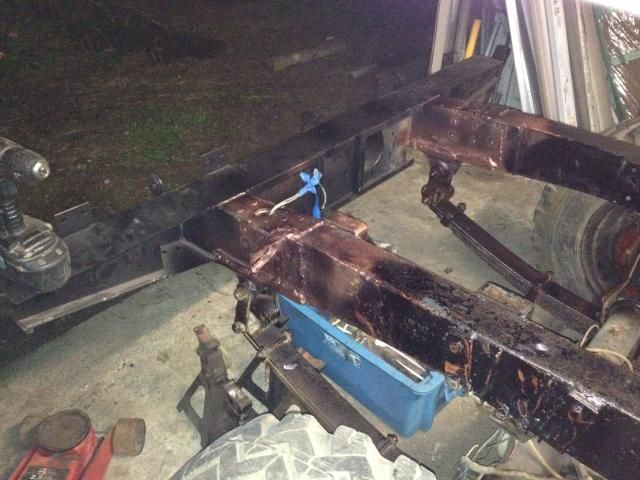
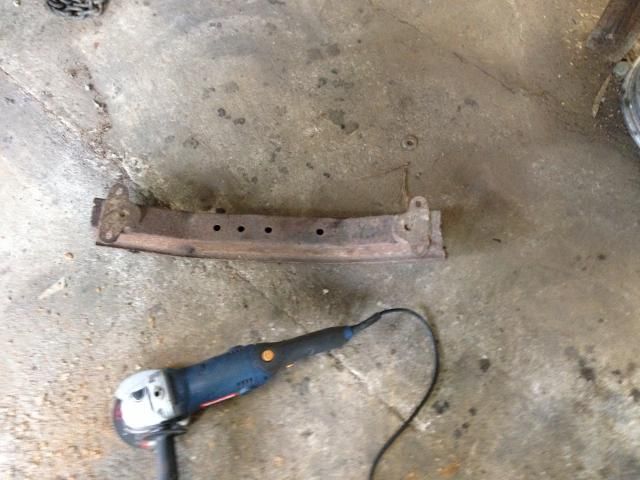
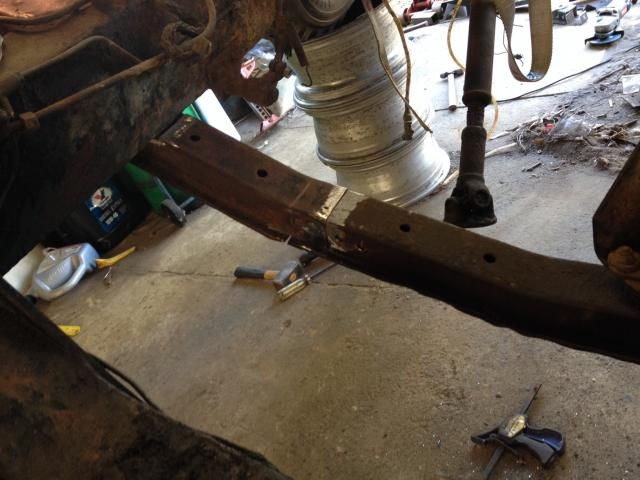
This is the result, one farked rusty patched up cross member mercilessly hacked off and discarded :twisted: :twisted:
Image
Image

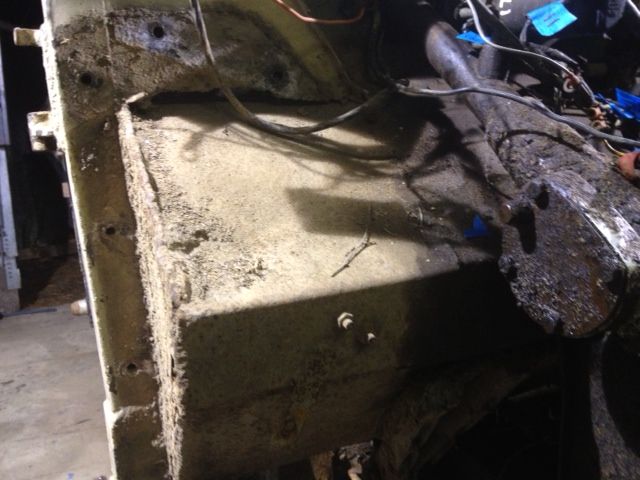
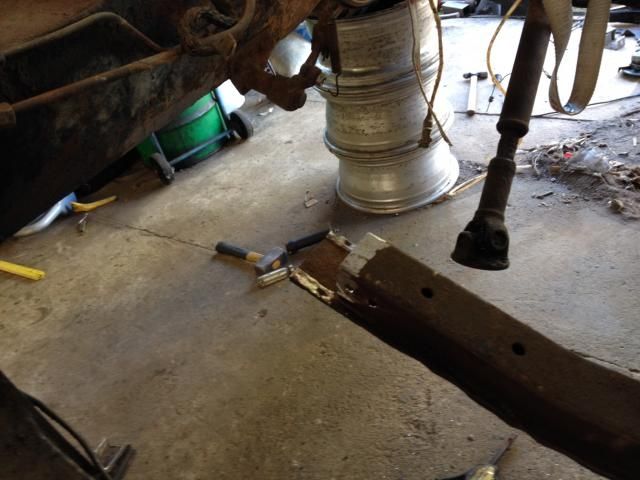
Then it was time to clean up the chassis and make it suitable to receive the new cross member:
Image
Image

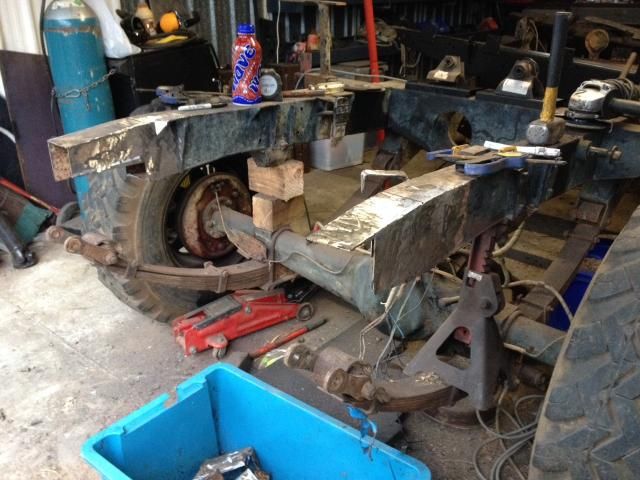
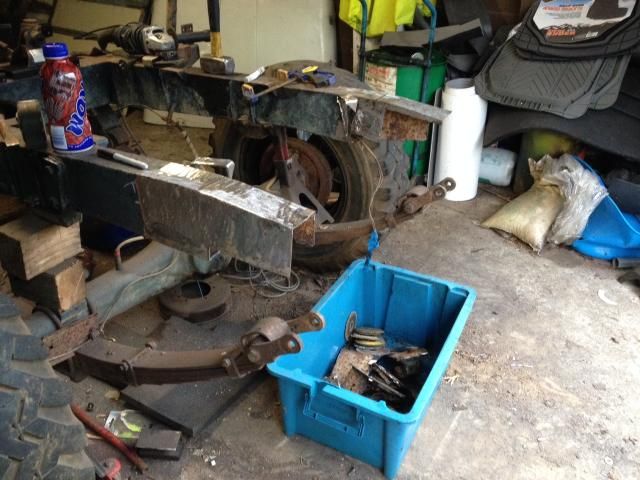
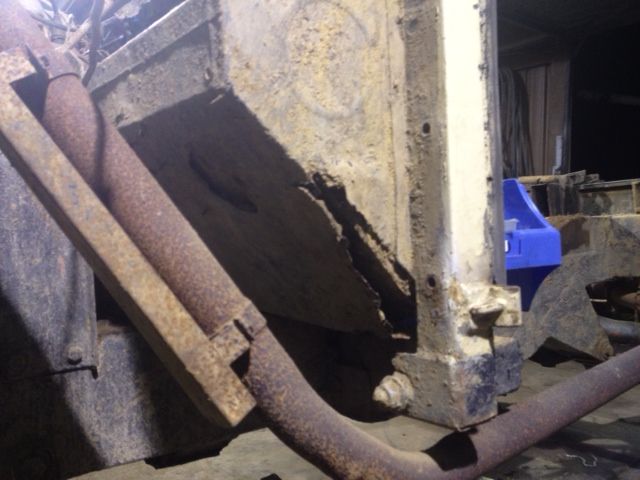
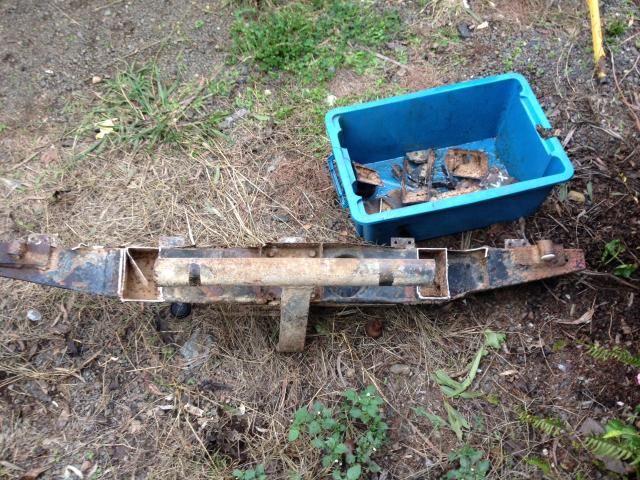
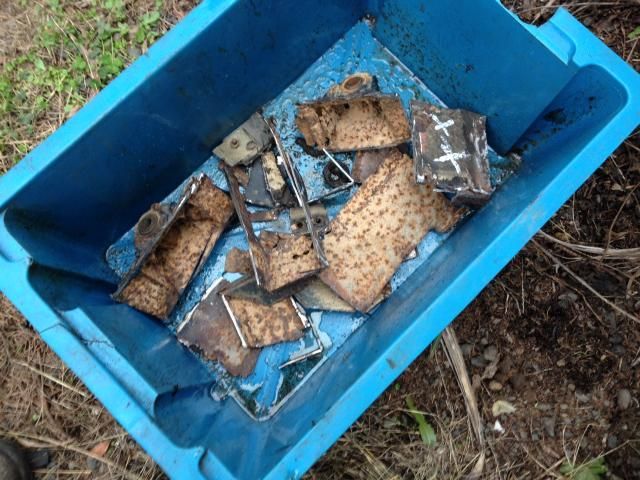
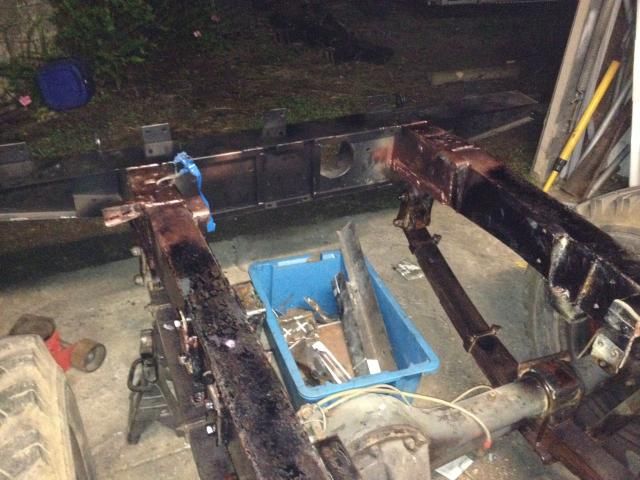
In order to get it to this stage, this the rusty rotten crap that had to be removed. A lot of it was old patches that had been welded on, hiding a lot of good chassis underneath them. Spring perches also got cut off and chucked in the scrap:
Image


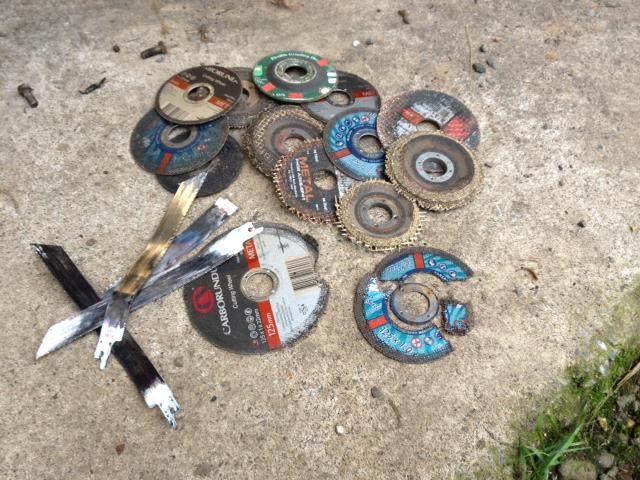
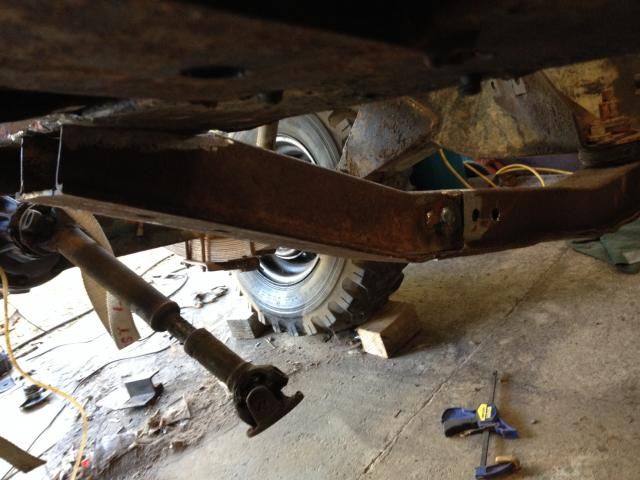
It was a mission as I was trying to preserve as much of the original chassis as possible so I had something to weld the new cross member to. This is the pile of grinding and cuttings discs at the end
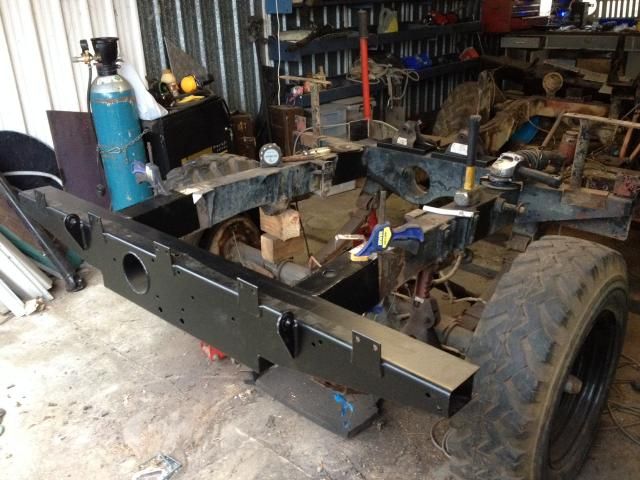
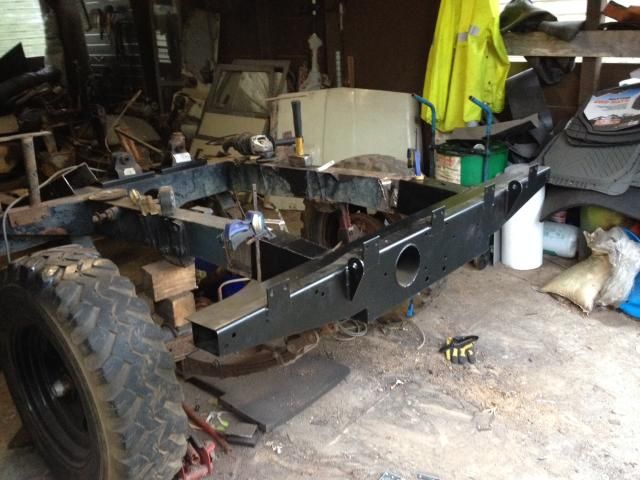
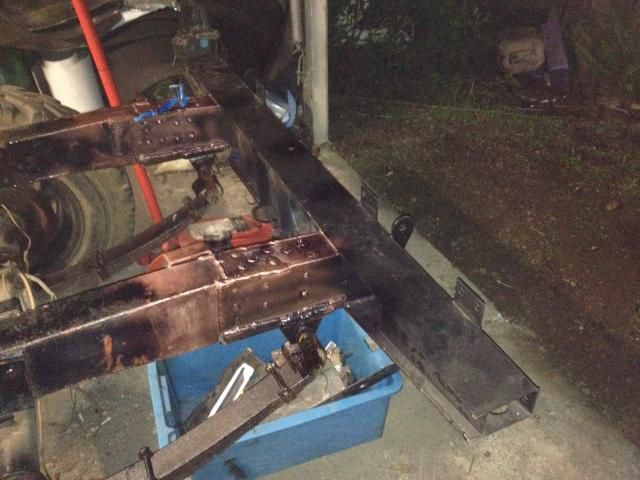
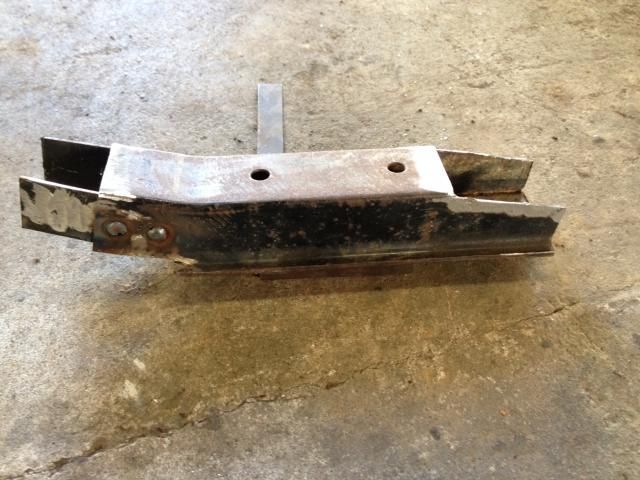
 :lol: :lol:
Image


The first test fit:
Image
Image
Image

The new spring perches:
Image

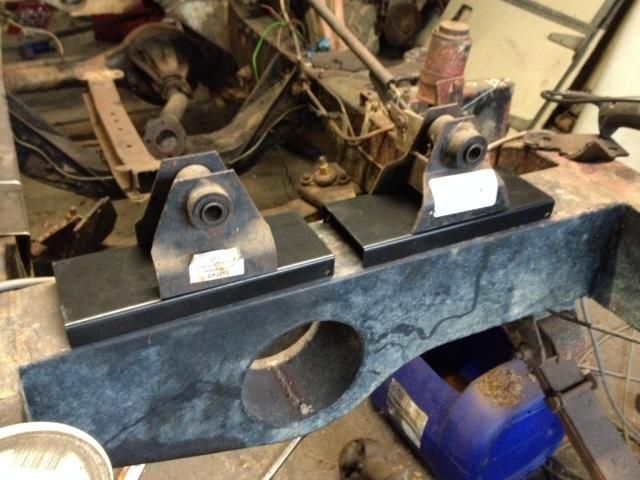
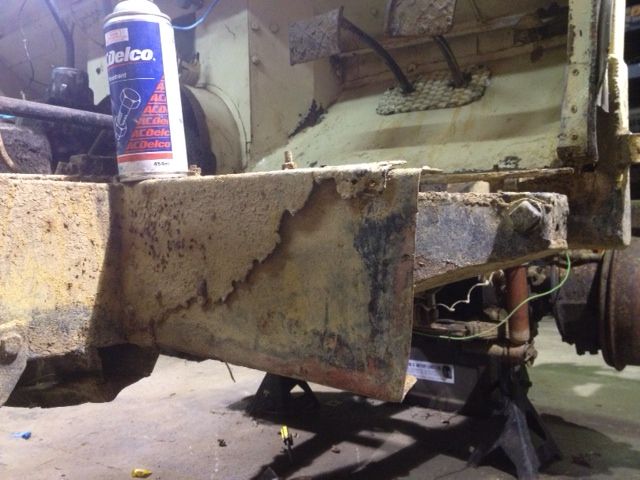
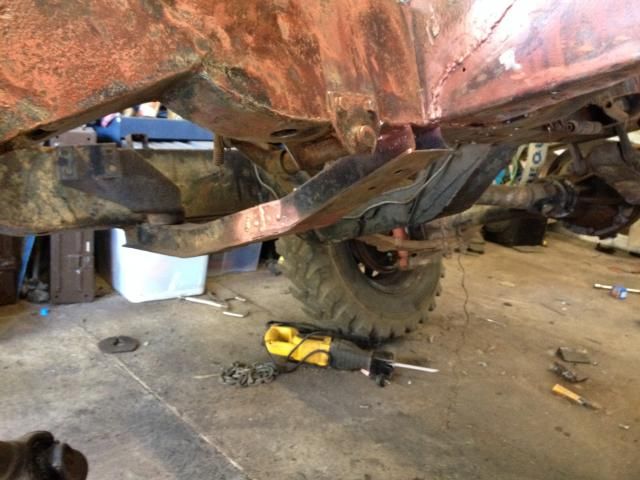
A fair bit of welding later and its on. That puppy ain't going nowhere, which is especially important as the spring perches are hanging purely off the welded on cross member :D :D :D
Image
Image
Image

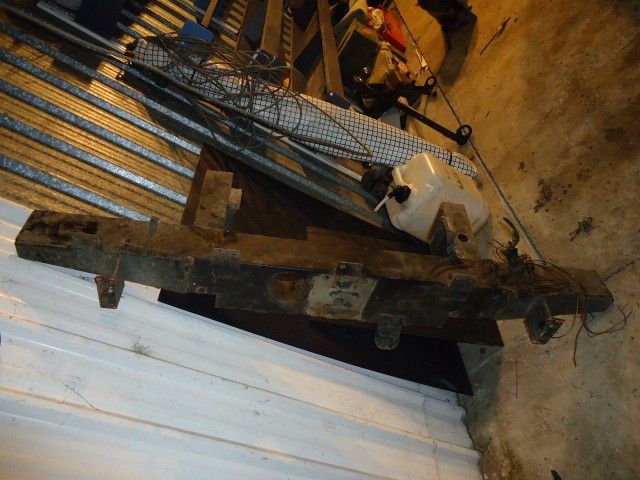
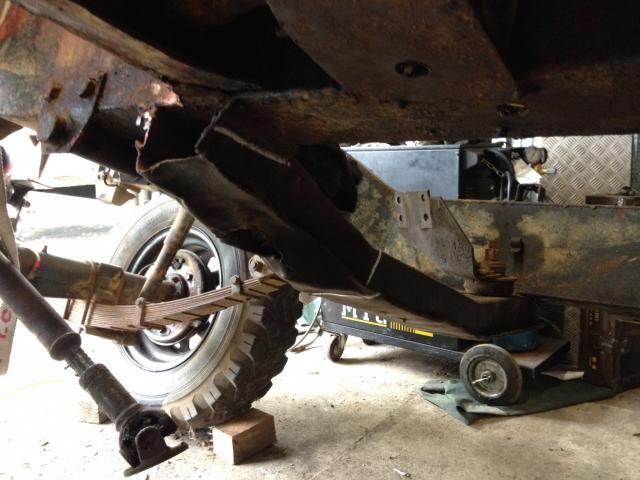
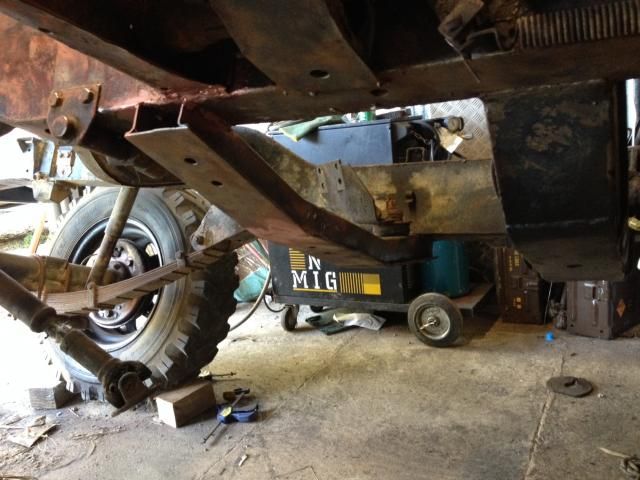
Next up was this disaster. Meet one messed up gearbox crossmember. Apparently it happened coming down a hill in Maramarua forest. Judging by the damage, i would say it's the kinda hit you would remember :shock: :shock:

Image

I made myself some space to work on it because i suck at welding upside down:
Image


Dad had salvaged this piece of cross member from one of his mates that was doing an engine conversion way back in the day, so at least I had some thing to work with. Problem was it had been cut between the chassis rails so was way to short to be used as a direct replacement.
Image

So i hacked the damaged piece of the chassis:

Image

Cut a replacement piece out of the otger cross member:
Image

A quick test fit:
Image
Image

Should do the trick, so blazed it in:
Image
Image
Image

Following that, i hit the chassis with the wire brush and sprayed on a coat of Brunox Epoxy Rust Converter. Operation bling has begun 8) 8)
Image

Re: Rocky Rover 1955 Series 1

Posted: Sun May 04, 2014 9:56 pm
by DieselBoy
I have been meaning to dig out some of the photos of Rocky Rover from the 80's. Must get round to it.

I did find some more recent ones that are only about 20 years old.

This one is not very exciting to look at, but this is after 3 days hand winching around Waitapheta in the early 90's just after the full loop had been re-opened. The plan was two days. Yay for always packing more food than you need :lol: :lol:
Image

Playing at Taumatatotara with LR90NZ and another back in the days:
Image

Skids at Horsham Downs, Rocky Rover, Kevin, Brent and Ashley
Image

Same Crew at Taumatatotara
Image

And just as teaser of some of the 80's photos that I have lurking in albums stashed away:
Image

That's me on the far right holding the pink balloon with Rocky Rover in the back ground. Toyoda is the one sitting on the ground with the hat on. Lilpigzuk is in that photo too :wink: :wink:

Must scan some more :lol: :lol: :lol: :lol:

Re: Rocky Rover 1955 Series 1

Posted: Sun May 04, 2014 11:15 pm
by callum007
DieselBoy
Image

Lilpigzuk is in that photo too :wink: :wink:
Found him: the paedophile looking fella in the red suit surrounding himself with little kids...

Re: Rocky Rover 1955 Series 1

Posted: Mon May 05, 2014 8:47 pm
by ChurchurDan
Cool project and photos.

Im sure those of us that grew up in the 80's had a much cooler childhood than kids now.

Re: Rocky Rover 1955 Series 1

Posted: Tue May 06, 2014 10:11 pm
by DieselBoy
The Chassis rebuild is done. Finished. Completed. Happy :D :D

As I mentioned in a previous post, following the repairs, i wire brushed the entire chassis and sprayed on a coat of Brunox Epoxy Rust Convertor.

On Monday night, once the rust convertor had hardened, it got two coats of gloss black Acrathane, which is an industrial/marine grade two pack paint.

Tonight, once the Acrathane had set, I sprayed underbody sealer on all of the rust prone places, on the underside of all of entire chassis and on all those places dirt and crud collects and causes rot.

The end result: (the under body sealer is freshly applied, it changes colour to black as it sets :wink: :wink: )

Image
Image
Image

All the rust prone places on the new cross member sealed up :D
Image
Image

The repaired fuel tank mount and repaired out rigger:
Image
Image

You wouldn't even know that the gearbox cross member had been touched!!!
Image
Image

So there you have it, ready to be relocated, and probably receive the engine and gearbox sometime soon :D :D
Image

Re: Rocky Rover 1955 Series 1

Posted: Wed May 07, 2014 7:28 am
by noexitroad
nice

Re: Rocky Rover 1955 Series 1

Posted: Wed May 07, 2014 5:17 pm
by slidenyo
top work chap!

Re: Rocky Rover 1955 Series 1

Posted: Wed May 07, 2014 6:55 pm
by UBZ
bout time ya did some more on this! :mrgreen:
Hope Mr T is being enlisted to help :wink:
be great to see it out again next summer ......

Re: Rocky Rover 1955 Series 1

Posted: Wed May 07, 2014 9:40 pm
by mike
Dam that’s inspiring :D

Re: Rocky Rover 1955 Series 1

Posted: Wed May 07, 2014 10:02 pm
by Smurf
Looking good
8)

Re: Rocky Rover 1955 Series 1

Posted: Fri Mar 20, 2015 9:54 am
by DieselBoy
I'm missing having a cool toy to cruise round in, so obvious solution is to get this finished :D :D :D :D

I went to the storage shed and collected some parts :lol: :lol:

image.jpg
Parts


Mission number 1, finish repairing the fire wall. All patched, rust treated and ready for primer.

image.jpg
Firewall 1


image.jpg
Firewall 2


A good dose of 2K Epoxy primer to seal it up for a few more years:

image.jpg
Primer 1


On hard wearing areas where mud and dirt is going to accumulate and be hard to clean, and in the foot wells that get hammered I have sprayed on some underbody sealer. The whole thing will get sprayed over with the top coat colour.

image.jpg
Ready to paint 1

Re: Rocky Rover 1955 Series 1

Posted: Fri Mar 20, 2015 2:55 pm
by DieselBoy
I need some parts too!!!!

Anyone got a pair of front springs kicking around??

Late series 1 with the wide springs, or any series 2 springs would do the job.

And as a real long shot, anyone come across a Series 1 wreck that has a good front panel?? The panel goes between the front guards, and the grill, head lights and radiator mount into it.

I have two, but both are damaged :lol:

Re: Rocky Rover 1955 Series 1

Posted: Fri Mar 20, 2015 4:11 pm
by Smurf
DieselBoy wrote:I need some parts too!!!!

Anyone got a pair of front springs kicking around??

Late series 1 with the wide springs, or any series 2 springs would do the job.

And as a real long shot, anyone come across a Series 1 wreck that has a good front panel?? The panel goes between the front guards, and the grill, head lights and radiator mount into it.

I have two, but both are damaged :lol:


Bulletproof may have some parts, he a small collection of Landys.

Re: Rocky Rover 1955 Series 1

Posted: Sun Mar 22, 2015 8:56 pm
by DieselBoy
This is the orginal front panel:
IMG_4255.JPG


IMG_4270.JPG


IMG_4272.JPG


This is one potential substitute, but its probably just as bad, if not worse :lol: :lol: :lol:

IMG_4254.JPG


IMG_4259.JPG

Re: Rocky Rover 1955 Series 1

Posted: Sun Mar 22, 2015 9:02 pm
by DieselBoy
Its pretty bad :lol: :lol:

IMG_4263.JPG


IMG_4266.JPG


IMG_4268.JPG


Gotta be a good one out there lurking under a tree or in a barn that hasn't been to hell and back beating around the bush on Club Trips for the majority of its life!!!!

Re: Rocky Rover 1955 Series 1

Posted: Sun Mar 22, 2015 9:05 pm
by DieselBoy
A seat box of the same wreck if it exists would also be handy :lol: :lol: :lol:

IMG_4282.JPG


IMG_4274.JPG


IMG_4275.JPG

Re: Rocky Rover 1955 Series 1

Posted: Sun Mar 22, 2015 9:15 pm
by DieselBoy
On a more positive note, made good progress with the Tub.

Lots of hammer and dolly work, blocks of wood and leavers, a small amount of filler and heaps of high build primer and its starting to look less like a crumpled aluminium can. Slightly less at least :lol: :lol:

Hopefully this is the last coat of primer, and it just needs one last sand to be "good enough" for a 1955 L.R with a rough history :mrgreen: :mrgreen:

IMG_4241.JPG


IMG_4248.JPG


IMG_4246.JPG


Still a bit wavy, but its so stretched and bent that its as good as I'm going to get it with out professional help :lol: :lol: :lol:

Re: Rocky Rover 1955 Series 1

Posted: Sun Mar 22, 2015 9:30 pm
by DieselBoy
After the above ripply mess, just incase your now doubting how its all gonna look once its done, heres the first part finished and top coated 8) 8) 8)

IMG_4235.JPG


IMG_4237.JPG


IMG_4239.JPG


The Colour is "Ivory". It's spent the majority of its life a similar colour, so its only fitting.

Sanding through the paint on the tub, it left the factory as they all did, in WWII left over green. Then its been a bright orange colour, then to grey, and then to its current colour in 1983.

I can picture the finished result with black flares and black wheels. I wonder if we can get the new soft top in black :lol: :lol: :lol: :lol:

Still, theres plenty to do before that happens :lol: :lol:

IMG_4252.JPG

Re: Rocky Rover 1955 Series 1

Posted: Sun Mar 29, 2015 7:58 pm
by DieselBoy
Some cool pics on the next page :roll: :roll: :roll: