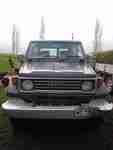
Rusty the SJ413
-
You Get That
- Hard Yaka
- Posts: 429
- Joined: Wed Aug 26, 2009 4:05 pm
- Location: Southland
Re: Rusty the SJ413
what wireing diagram did you use for the engine? I'm doing same swap at the moment cherrs
Addicted to suzukis....
Re: Rusty the SJ413
Today I swapped over the ring gear on the flywheel. Off with the old and on with the "new-to-me".
They're actually surprisingly easy to get off. A good fat prybar in there has no torubles.
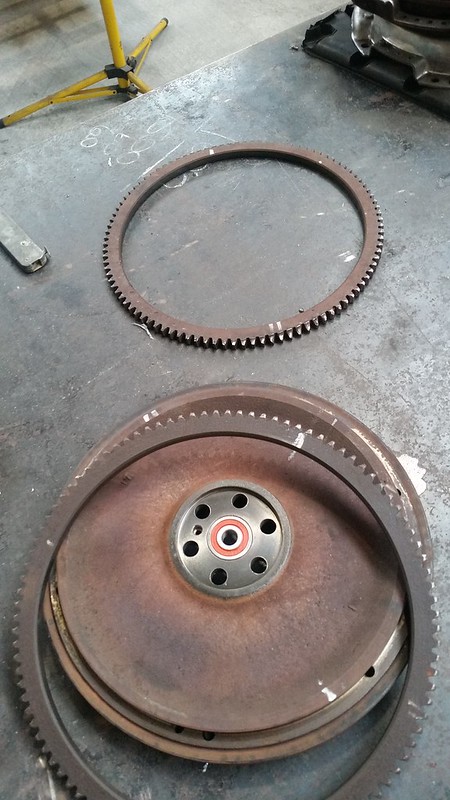
And they're even easier to put on. I got it hot but not too hot (for the scientists among us, hot-enough-for-a-blob-of-spit-to-roll-off-it degrees celcius) on the bench next to it, then simply dropped it on with a set of welding gloves. Easy. No hammering or pressing required. I also rotated it roughly 90 degrees. They seem to wear in two spots at 180 degrees apart, so I rotated it to make sure that I have nice new teeth where the wear occurs.
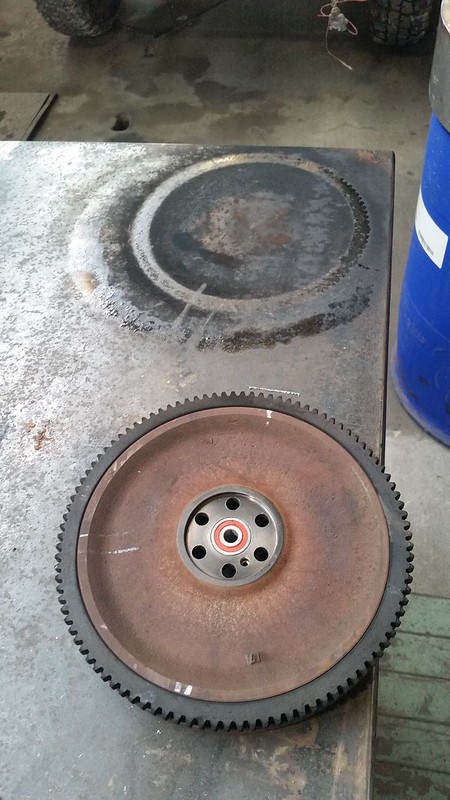
And then I fitted it up. I used a spare gearbox as a clutch alignment tool haha
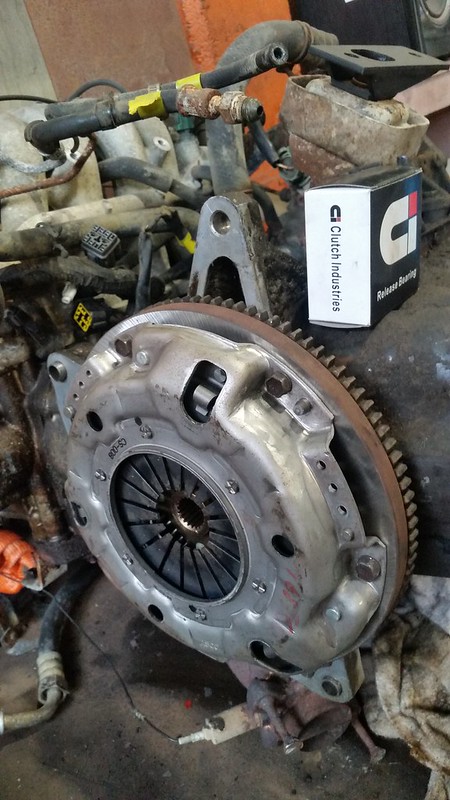
The release bearing needs to go on, and then that side of things is done. Then extractors on, LH side engine mount packers, and then motor in. Can't wait.
They're actually surprisingly easy to get off. A good fat prybar in there has no torubles.
And they're even easier to put on. I got it hot but not too hot (for the scientists among us, hot-enough-for-a-blob-of-spit-to-roll-off-it degrees celcius) on the bench next to it, then simply dropped it on with a set of welding gloves. Easy. No hammering or pressing required. I also rotated it roughly 90 degrees. They seem to wear in two spots at 180 degrees apart, so I rotated it to make sure that I have nice new teeth where the wear occurs.
And then I fitted it up. I used a spare gearbox as a clutch alignment tool haha
The release bearing needs to go on, and then that side of things is done. Then extractors on, LH side engine mount packers, and then motor in. Can't wait.
Re: Rusty the SJ413
You Get That wrote:what wireing diagram did you use for the engine? I'm doing same swap at the moment cherrs
I found this one the most useful:
Print off in A3 and laminate it. Trust me.
This here has a few handy bits and pieces in it too, though remember that a Samurai is different to an SJ413, so there are differences
http://www2.izook.com/wp-content/tech-library/USR%20-%20Sidekick%20Wiring%20Diagram%20and%20Instructions%20for%2092-95%2016v.pdf
Re: Rusty the SJ413
Cheers for the ring gear install info. Did you chase up what a new one was worth?
Be good to know as all my spares have shot teeth.
Also out of interest, why not just swap an entire spare flywheel onto it?
Be good to know as all my spares have shot teeth.
Also out of interest, why not just swap an entire spare flywheel onto it?
Re: Rusty the SJ413
Using a new flywheel was my preference. A new ring gear was too pricey ($115+ gst and freight) and I couldn't find a secondhand one that was feasible. So I ordered a grind on my existing one and was going to rotate the gear 90 degrees to spread the wear out. But then the day that I picked up the ground flywheel, a friend of mine turns up on my doorstep with a decent, free flywheel. So I swapped the rings instead 
Re: Rusty the SJ413
Another update. I'm making slow progress...
The motor is in!
And all is well. It went in pretty smoothly. My engine mount lined up perfectly, so that was a bonus.
The only hiccup is the Power steering pump wheel hits the radiator support. Normally, I would move the pump upwards to clear the mount, but I have an AC pump above it. I want to keep that AC pump as an onboard air pump. Future project right there.
I thought I had a better pic, but this is all I have.
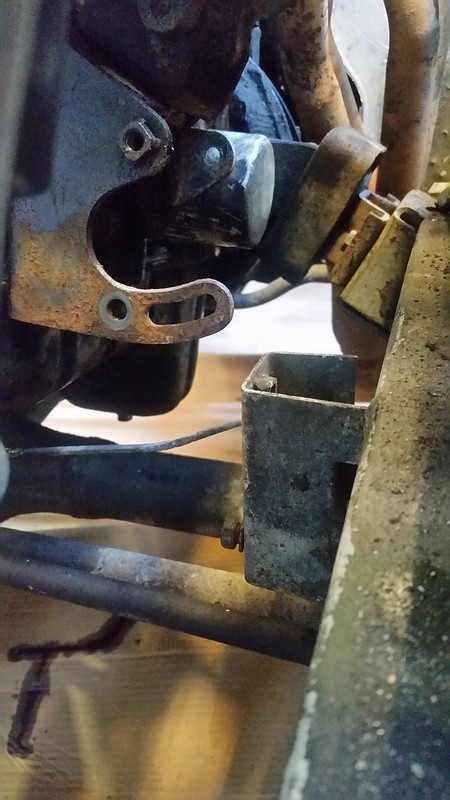
Either way, problem solved with a flick of the grinder haha. I'll make a new mount for the radiator later.
I'm in the middle of sorting fuel lines, accelerator cable, clutch cable, heater hoses, etc. at the moment, and then it's onto integrating my modified loom and wiring it all up.
I'm torn between deleting the charcoal canister from the system. If I do that, how will the fuel tank breathe?
The motor is in!
And all is well. It went in pretty smoothly. My engine mount lined up perfectly, so that was a bonus.
The only hiccup is the Power steering pump wheel hits the radiator support. Normally, I would move the pump upwards to clear the mount, but I have an AC pump above it. I want to keep that AC pump as an onboard air pump. Future project right there.
I thought I had a better pic, but this is all I have.
Either way, problem solved with a flick of the grinder haha. I'll make a new mount for the radiator later.
I'm in the middle of sorting fuel lines, accelerator cable, clutch cable, heater hoses, etc. at the moment, and then it's onto integrating my modified loom and wiring it all up.
I'm torn between deleting the charcoal canister from the system. If I do that, how will the fuel tank breathe?

Re: Rusty the SJ413
Sausager wrote:I'm torn between deleting the charcoal canister from the system. If I do that, how will the fuel tank breathe?
my old 413 didn't have a charcoal canister , the tank just vented to atmosphere through a small filter
LR110 ..... LJ50 project 
Chris.
Chris.
Re: Rusty the SJ413
UBZ wrote:Sausager wrote:I'm torn between deleting the charcoal canister from the system. If I do that, how will the fuel tank breathe?
my old 413 didn't have a charcoal canister , the tank just vented to atmosphere through a small filter
My SJ system didn't, but the Vitara did. I have it all there, it just seems a little unnecessary to put it in
Re: Rusty the SJ413
I’ve started integrating my cut down loom into the SJ.
Bleugh!
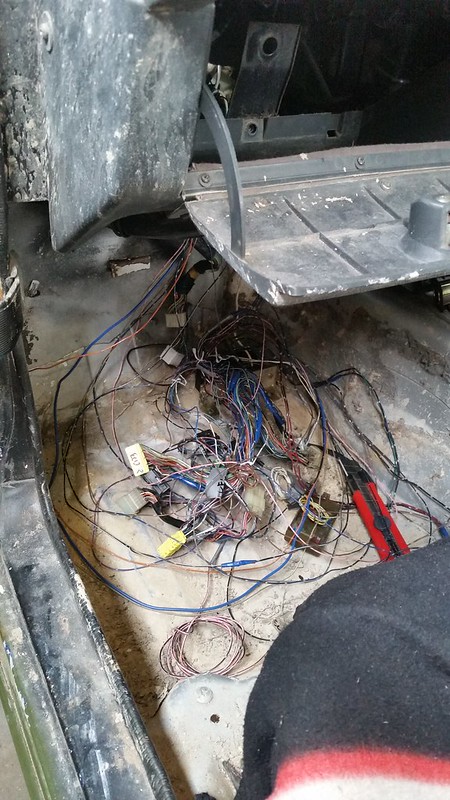
I am learning things as I go: First is that while I was cutting the loom down I should have better planned what was going where
Second is that I should have taped together stuff that I knew I wouldn’t have to touch again. I was scared to do so because I didn’t want to have to cut any sheathing off if I got something wrong. The problem with this is that the wires splayed out so much once I started putting it in the car.
Third is that I am super glad I labelled stuff haha.
Now I have to figure out all of the integration. Hopefully it’s not too hard…
Bleugh!
I am learning things as I go: First is that while I was cutting the loom down I should have better planned what was going where
Second is that I should have taped together stuff that I knew I wouldn’t have to touch again. I was scared to do so because I didn’t want to have to cut any sheathing off if I got something wrong. The problem with this is that the wires splayed out so much once I started putting it in the car.
Third is that I am super glad I labelled stuff haha.
Now I have to figure out all of the integration. Hopefully it’s not too hard…
Re: Rusty the SJ413
Looks awesome, very well done on the work.
Have you got an update?
Have you got an update?
Ln106. 2.8TD 35s, RUF, 4.5 diff ratios, 2003 HiLux leafs in rear...... plenty of flex
Life is better off-road
Life is better off-road
Re: Rusty the SJ413
Tumor wrote:Looks awesome, very well done on the work.
Have you got an update?
Cheers mate!
Yes, I do have an update. I just need a chance to get it typed out... I'll try for this avo
Re: Rusty the SJ413
Update time
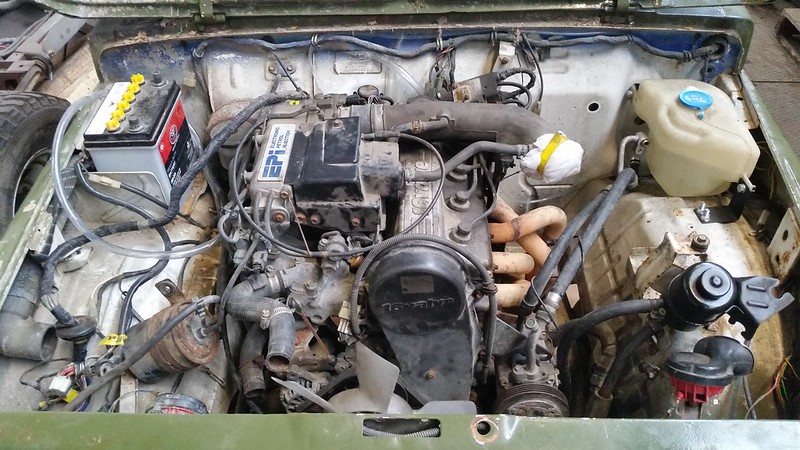
She runs and drives!
So I got through the wiring and integrated it all without too much drama thanks to wiring diagrams, a few tips and hints from friends of mine (and also Facebook. Yes, I stooped that low ). Some of the wiring is still hanging down in the passenger footwell too. I’m being lazy. I also made a bracket to hold the ECU up nice and high behind the glovebox.
I also learned that my OEM radiator mounts didn’t work anymore. The radiator sat far too close to the motor, so the fan was trying to interfere with the radiator. So I made some custom mounts to hold it further away from the fan. This consisted of a channel to hold the bottom of the radiator, and mounts that hang off the front top crossmember thing where the bonnet latch is.
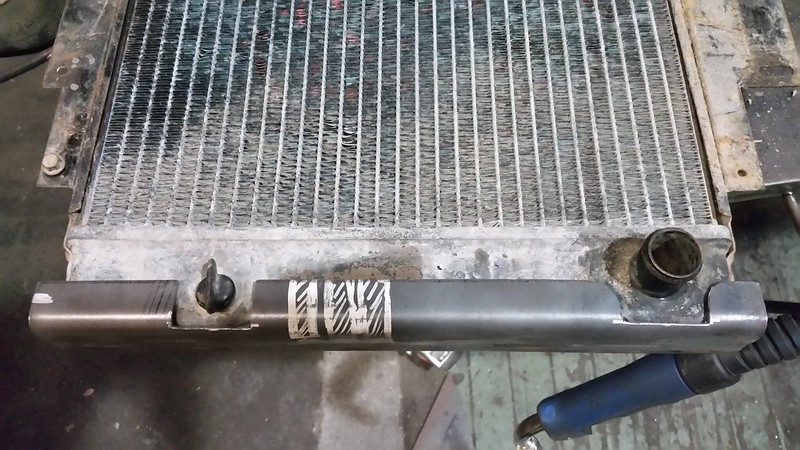
I lined the inside of this channel with hot water pipe insulation foam and it was a nice tight fit.
All painted and mounted. Pics aren’t the best sorry.

Then I made an exhaust out of a couple of old Vitara ones - two resonators straight off the extractors.
Like this. She fair roars in the high revs!

Then I made an intake. I used all sort of bits and came to a solution that I am happy with. Parts are:
Intake
Vitara rubber piece
Cut down Vitara aluminium intake piece
Vitara rubber pipe
MAF
Cut down SJ intake Elbow
SJ airbox
As you can see, there’s still a few little things that need sorting – AC compressor piping needs tidying up (I’m going to use this for onboard air later), PS reservoir needs a mount made, breather pipes need sorting, a bit of old wiring needs a sort out, battery needs mounting properly, PS hoses need a sort out, etc etc
When it came time to start it for the first time, she started first pop! I was over the moon. So I adjusted the clutch cable and went for a drive a very happy man.

She’s not perfect, but I am happy. The main problem is the idling and general running of the motor.
I took these following videos a week or so back.
This first video is of starting it stone cold. I am not touching anything else besides the key the whole time (ie, no throttle). You can see my battery light when the key is "on" and the bright red light you can see reflecting on the steering wheel is from my super bright, super custom CEL.
https://www.flickr.com/gp/125196140@N05/e2t561
This second video is of it idling a little later that same day, warm. You can see here that it doesn't run smooth - the motor shakes. It's not missing or anything like that, but it's just running rough. Revving hard (6-7k rpm) it runs smooth, but then back at low revs or idle, it's rough.
https://www.flickr.com/gp/125196140@N05/WoU69b
I drove it yesterday and it idled at 2k from cold, no bouncing. So I don't know why it's decided to not do it's rev bounce yesterday? Any ideas are welcome here!
As a side note, the clutch is amazing. It has so much bite it’s ridiculous. It’ll happily chirp the tyres on concrete if you let the clutch out too quickly – either from a standstill or when changing while driving haha. I’m happy.
She runs and drives!
So I got through the wiring and integrated it all without too much drama thanks to wiring diagrams, a few tips and hints from friends of mine (and also Facebook. Yes, I stooped that low
I also learned that my OEM radiator mounts didn’t work anymore. The radiator sat far too close to the motor, so the fan was trying to interfere with the radiator. So I made some custom mounts to hold it further away from the fan. This consisted of a channel to hold the bottom of the radiator, and mounts that hang off the front top crossmember thing where the bonnet latch is.
I lined the inside of this channel with hot water pipe insulation foam and it was a nice tight fit.
All painted and mounted. Pics aren’t the best sorry.
Then I made an exhaust out of a couple of old Vitara ones - two resonators straight off the extractors.
Like this. She fair roars in the high revs!
Then I made an intake. I used all sort of bits and came to a solution that I am happy with. Parts are:
Intake
Vitara rubber piece
Cut down Vitara aluminium intake piece
Vitara rubber pipe
MAF
Cut down SJ intake Elbow
SJ airbox
As you can see, there’s still a few little things that need sorting – AC compressor piping needs tidying up (I’m going to use this for onboard air later), PS reservoir needs a mount made, breather pipes need sorting, a bit of old wiring needs a sort out, battery needs mounting properly, PS hoses need a sort out, etc etc
When it came time to start it for the first time, she started first pop! I was over the moon. So I adjusted the clutch cable and went for a drive a very happy man.
She’s not perfect, but I am happy. The main problem is the idling and general running of the motor.
I took these following videos a week or so back.
This first video is of starting it stone cold. I am not touching anything else besides the key the whole time (ie, no throttle). You can see my battery light when the key is "on" and the bright red light you can see reflecting on the steering wheel is from my super bright, super custom CEL.
https://www.flickr.com/gp/125196140@N05/e2t561
This second video is of it idling a little later that same day, warm. You can see here that it doesn't run smooth - the motor shakes. It's not missing or anything like that, but it's just running rough. Revving hard (6-7k rpm) it runs smooth, but then back at low revs or idle, it's rough.
https://www.flickr.com/gp/125196140@N05/WoU69b
I drove it yesterday and it idled at 2k from cold, no bouncing. So I don't know why it's decided to not do it's rev bounce yesterday? Any ideas are welcome here!
As a side note, the clutch is amazing. It has so much bite it’s ridiculous. It’ll happily chirp the tyres on concrete if you let the clutch out too quickly – either from a standstill or when changing while driving haha. I’m happy.
-
You Get That
- Hard Yaka
- Posts: 429
- Joined: Wed Aug 26, 2009 4:05 pm
- Location: Southland
Re: Rusty the SJ413
It's a good feeling when ya get them going, you say about your clutch what kind is it?
just got mine going too (your diagram worked very well) and the clutch is slipping bad thought it could be the more power and need a heavy duty one.
just got mine going too (your diagram worked very well) and the clutch is slipping bad thought it could be the more power and need a heavy duty one.
Addicted to suzukis....
Re: Rusty the SJ413
You Get That wrote:It's a good feeling when ya get them going, you say about your clutch what kind is it?
just got mine going too (your diagram worked very well) and the clutch is slipping bad thought it could be the more power and need a heavy duty one.
Apparently HD clutches are more hassle than they're worth breaking clutch forks, snapping clutch cables, etc.
Quote from page 1:
MP Autoparts in Upper Hutt sorted me out for this and did an awesome job. I highly recommend them. I got a new clutch, flywheel grind, new spigot and release bearings and new pressure plate. They had 4 different brands of pressure plate in stock, so they tested all 4 of them for the best clamp pressure. I ended up with one that has 10% better clamp pressure than standard, so that should give me a good bit more bite.
Seriously awesome service from MP Autoparts. I can dig the guys card out (it's at work) if you're keen to go this route.
Re: Rusty the SJ413
Phew, this hasn't been updated in a while...
It wasn't running right, and I got that sorted. Turns out it was the throttle body after all that. Swapped it out for a good one and away I went.
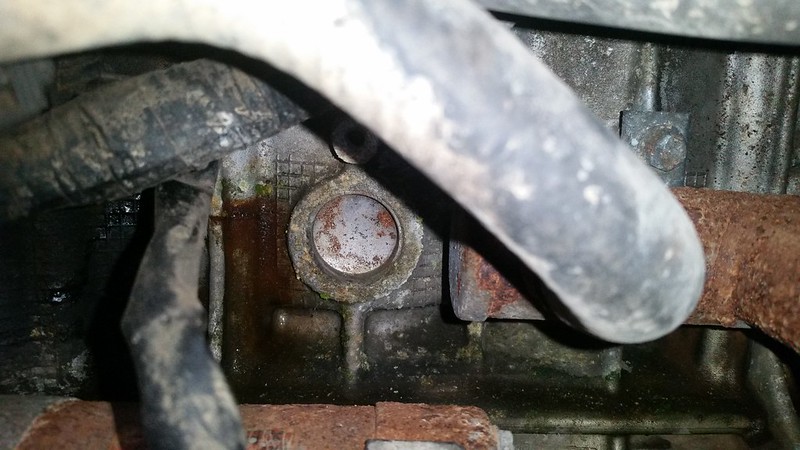
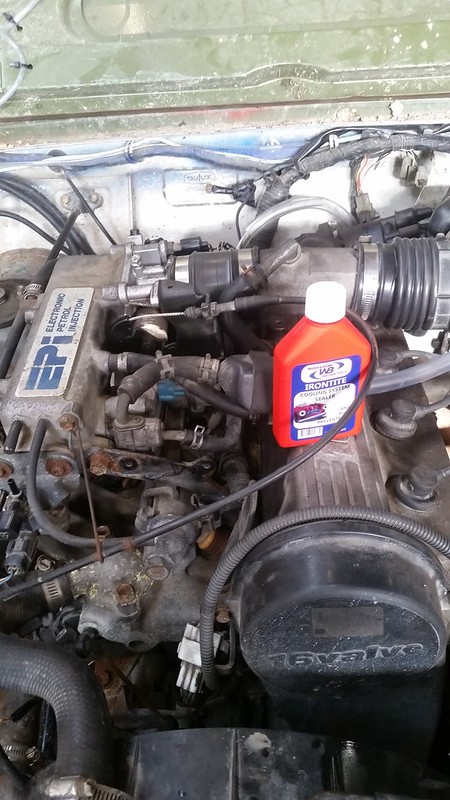
Then I found this crack, just to the left of the frost plug:
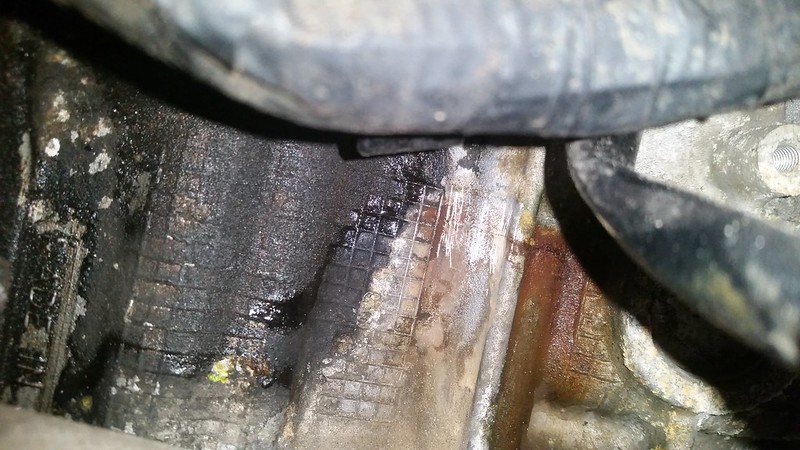
At this point, I lost a stack of motivation for the project. After all that hard work and trading/dealing, I end up with a cracked block. Rusty sat neglected for a long time, I toyed with the idea of selling it as is, and then I don't know what changed but I got into it again - starting with a decent fix for the block, not one of these temporary patches that people do.
Just kidding, I put a plaster on the crack haha. It seems to have stopped it for now.
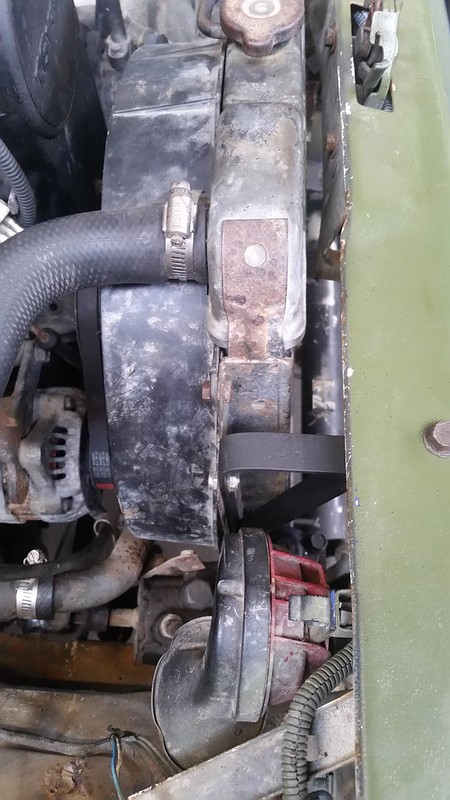
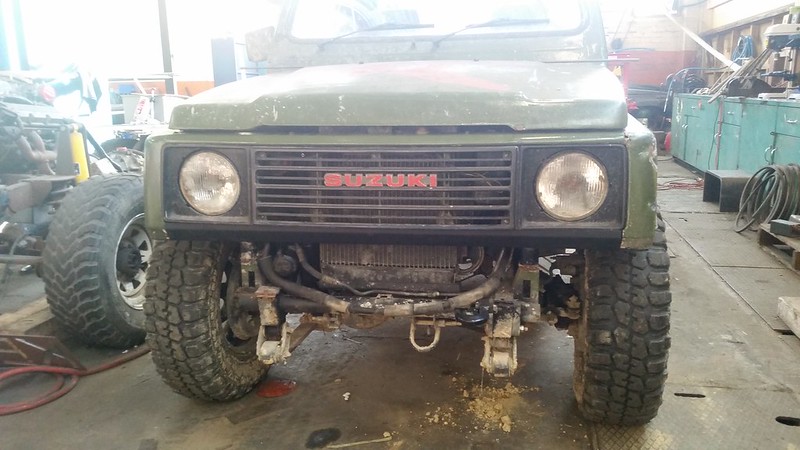
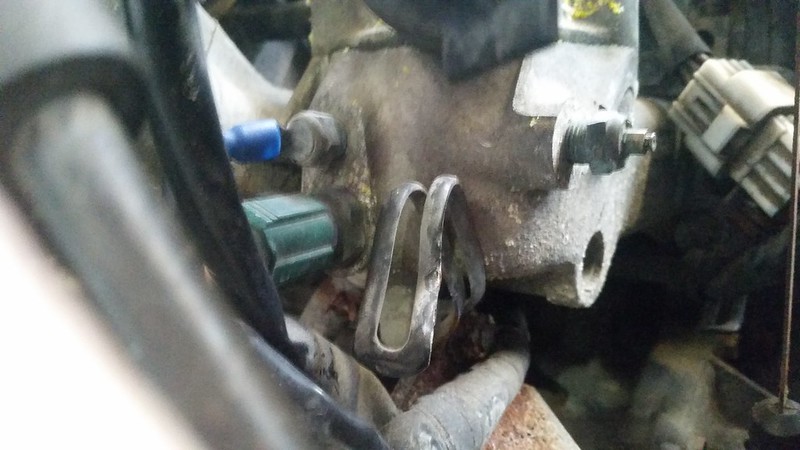
And the front end was bugging me, so I decided to change it. The corners outside of the lights were drooping and 'bouncing' mostly because someone at some stage removed the support under the grill. So I wanted to replace it and also move the power steering lines to the top of the front tube there instead of below it where they are prone to damage.
Before.
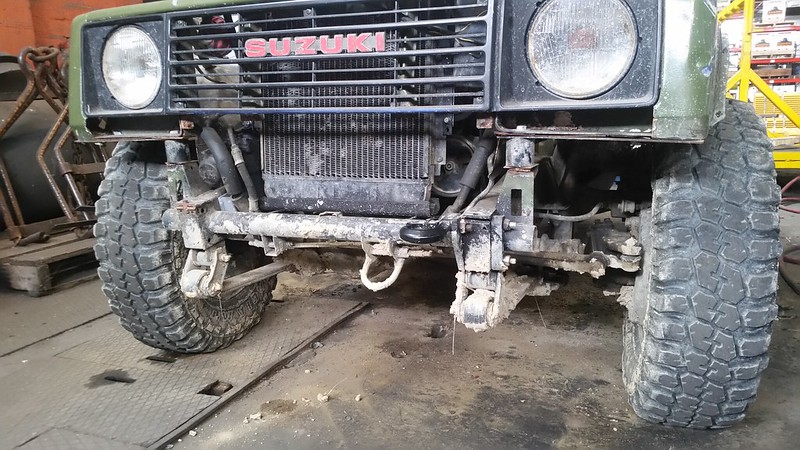
Stripped down.

This is what I stuck in there. A 3mm HT channel folded up at work.
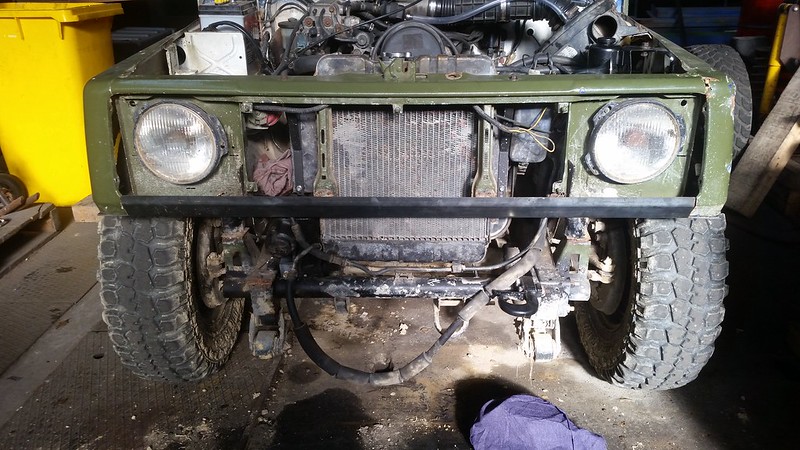
And the finished product, painted matte black. PS lines still to be mounted fully.
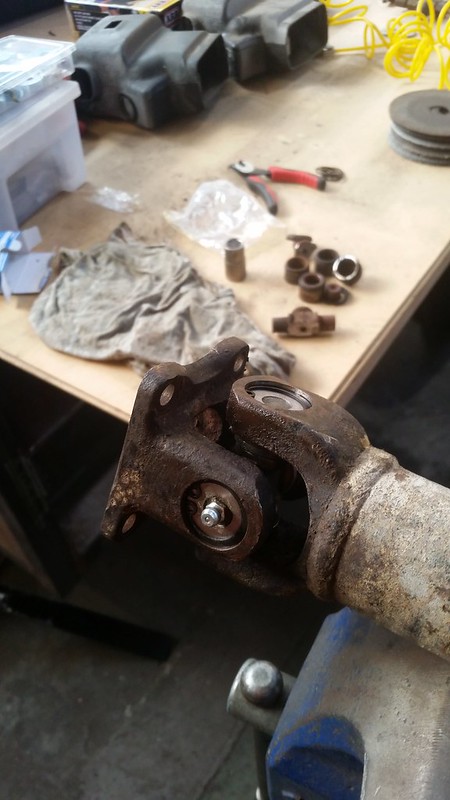
I replaced a UJ in the front shaft too. The one in there had no needle rollers in 2 cups, powdered needles in a third, and about 5 needles in the fourth haha
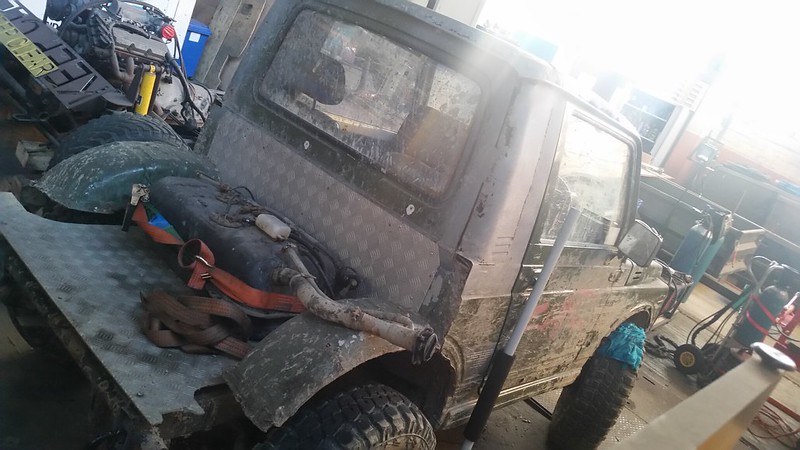
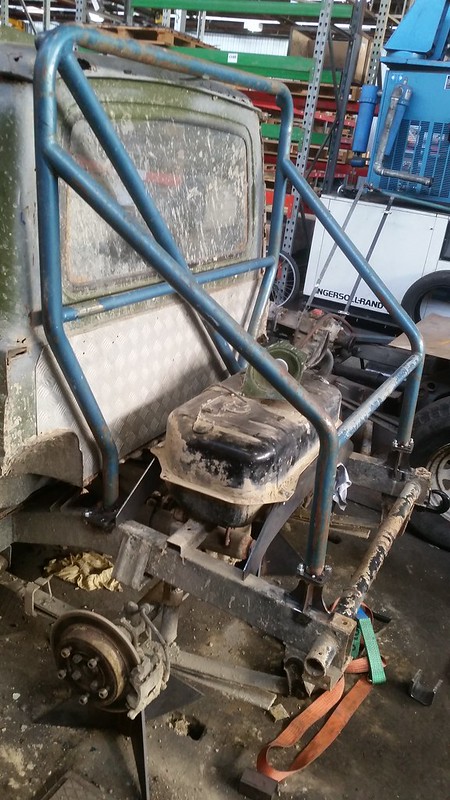
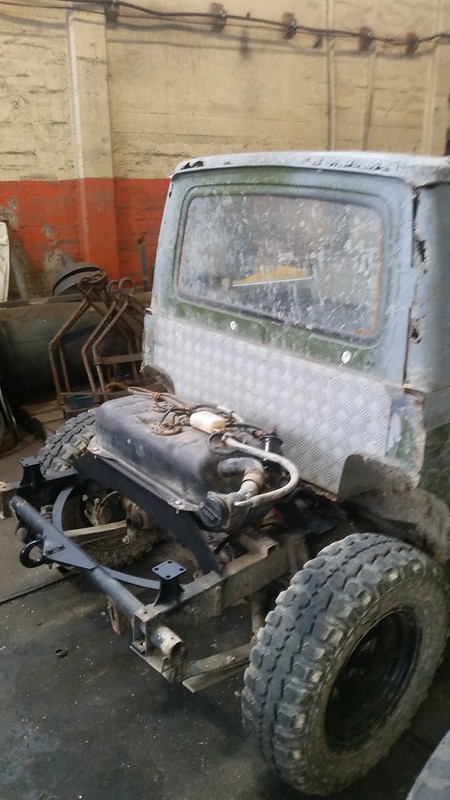
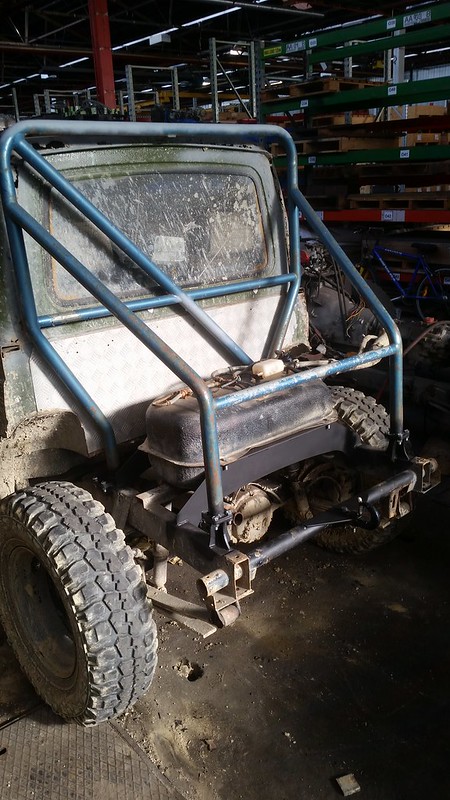
Now say goodbye to this ugly, impractical rear end! The next mission was a rear rollbar with hopefully some sort of tray, fuel tank mounted properly, and a spare wheel mount would be a bonus too.
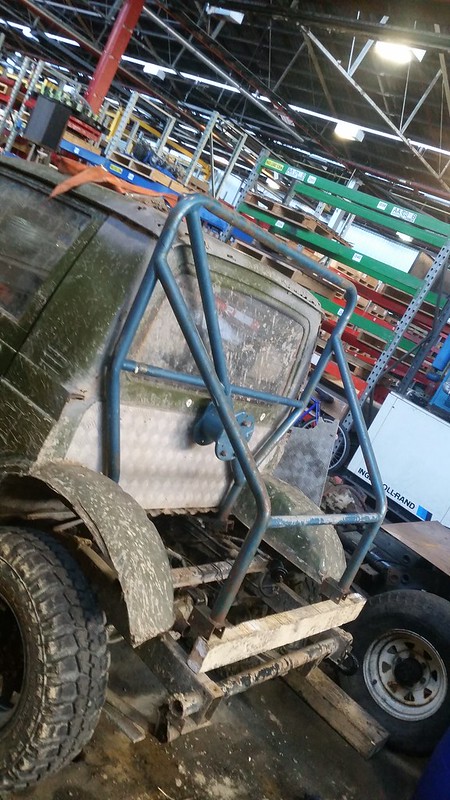
I scored a rollbar off Facebook for free. It was built for an SJ but I had to change it a bit to make it fit. It is a bit rusty and has paint peeling so is in dire need of a clean up, but certainly saves me making one!
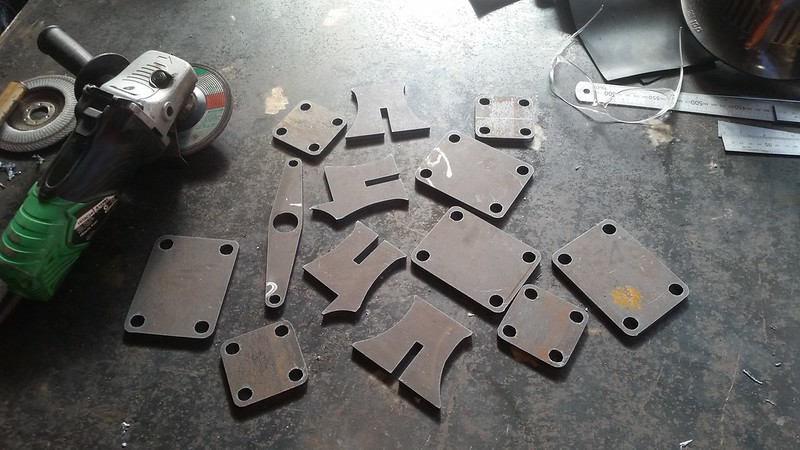
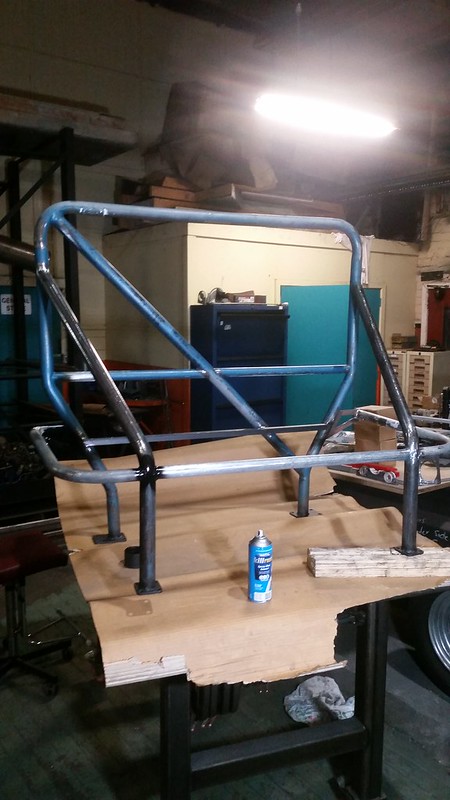
Then some steel landed at my feet, so I made some mounts out of it
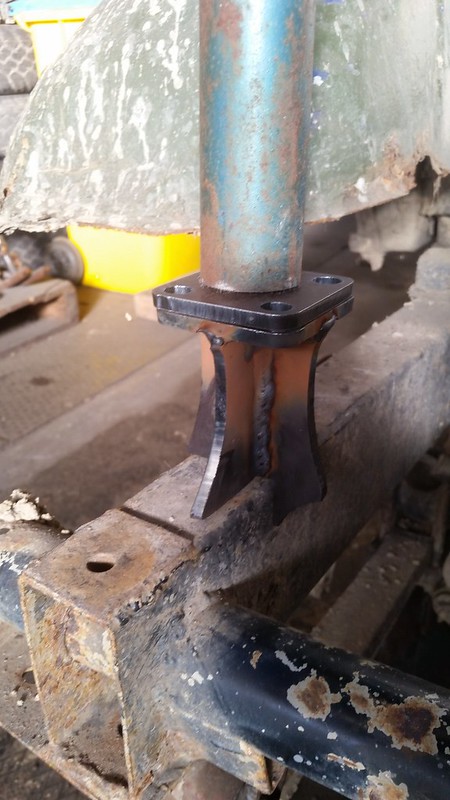
I also mocked up some fuel tank mounts at the same time
Then it was all welded up and painted. I think my welding is improving too.

While I was there I welded on a rear recovery hook mount too
And that brings me to where I am today. Still to do is make a tray over the fuel tank, mount a spare wheel carrier somewhere, tidy up and paint the rollbar, etc.
Slowly slowly...
It wasn't running right, and I got that sorted. Turns out it was the throttle body after all that. Swapped it out for a good one and away I went.
Then I found this crack, just to the left of the frost plug:
At this point, I lost a stack of motivation for the project. After all that hard work and trading/dealing, I end up with a cracked block. Rusty sat neglected for a long time, I toyed with the idea of selling it as is, and then I don't know what changed but I got into it again - starting with a decent fix for the block, not one of these temporary patches that people do.
Just kidding, I put a plaster on the crack haha. It seems to have stopped it for now.
And the front end was bugging me, so I decided to change it. The corners outside of the lights were drooping and 'bouncing' mostly because someone at some stage removed the support under the grill. So I wanted to replace it and also move the power steering lines to the top of the front tube there instead of below it where they are prone to damage.
Before.
Stripped down.
This is what I stuck in there. A 3mm HT channel folded up at work.
And the finished product, painted matte black. PS lines still to be mounted fully.
I replaced a UJ in the front shaft too. The one in there had no needle rollers in 2 cups, powdered needles in a third, and about 5 needles in the fourth haha
Now say goodbye to this ugly, impractical rear end! The next mission was a rear rollbar with hopefully some sort of tray, fuel tank mounted properly, and a spare wheel mount would be a bonus too.
I scored a rollbar off Facebook for free. It was built for an SJ but I had to change it a bit to make it fit. It is a bit rusty and has paint peeling so is in dire need of a clean up, but certainly saves me making one!
Then some steel landed at my feet, so I made some mounts out of it
I also mocked up some fuel tank mounts at the same time
Then it was all welded up and painted. I think my welding is improving too.
While I was there I welded on a rear recovery hook mount too
And that brings me to where I am today. Still to do is make a tray over the fuel tank, mount a spare wheel carrier somewhere, tidy up and paint the rollbar, etc.
Slowly slowly...
Re: Rusty the SJ413
Nice progress!
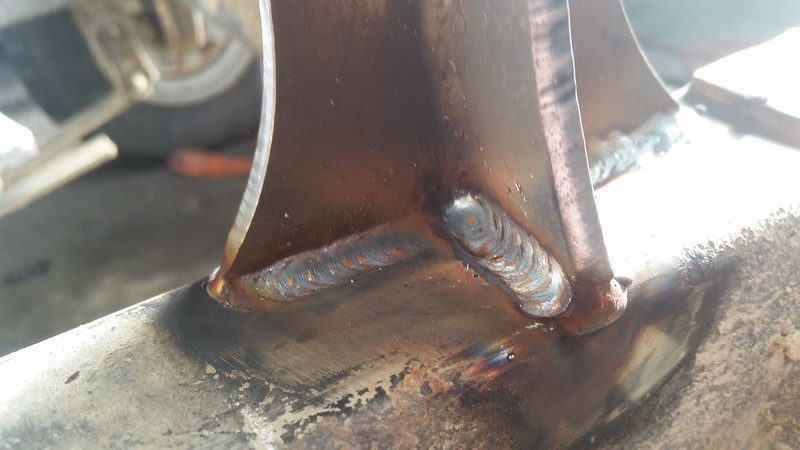
A suggestion about your rear recovery piont . I would recommend reinforcing the tube with another Heavey wall pipe inside , they bend very easily .
A suggestion about your rear recovery piont . I would recommend reinforcing the tube with another Heavey wall pipe inside , they bend very easily .
LR110 ..... LJ50 project
Chris.
Chris.
Re: Rusty the SJ413
The plan is to weld some decent gussets from the tube to the chassis rails to stop that from happening.
It sounds like you know from experience?!
It sounds like you know from experience?!
Re: Rusty the SJ413
I've got a bit more done. First, I added some gussets to strengthen the rear tube with the tow hook on it.
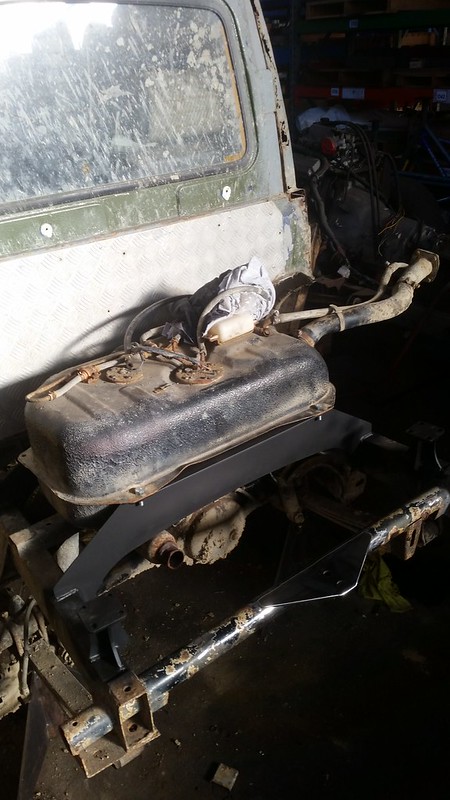
I've got the rear bar and tray done!


Then off for paint

And it looks so clean on a rusty, dirty Zuk haha. Hopefully my fuel filler won't get smashed there...

And the tray. 6mm Aluminium all round, nice and solid without being too heavy.

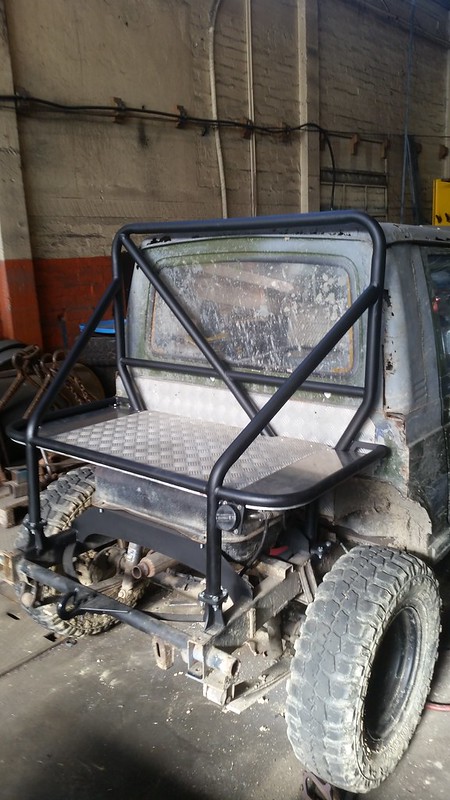
And some cap screw goodness. I love cap screws.
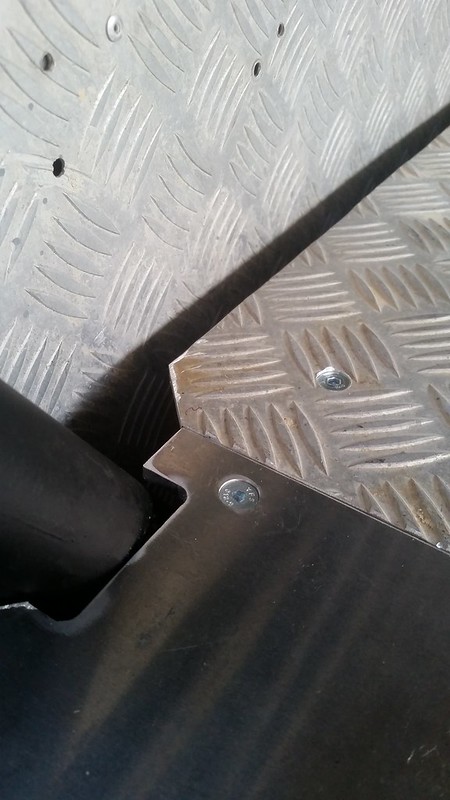
I've also retained the battery, secured my PS lines properly, retained the brake line on the diff properly, tidied wiring around the ecu, lubed the window winders so they work better, etc etc.
I'm getting dangerously close to running her in...
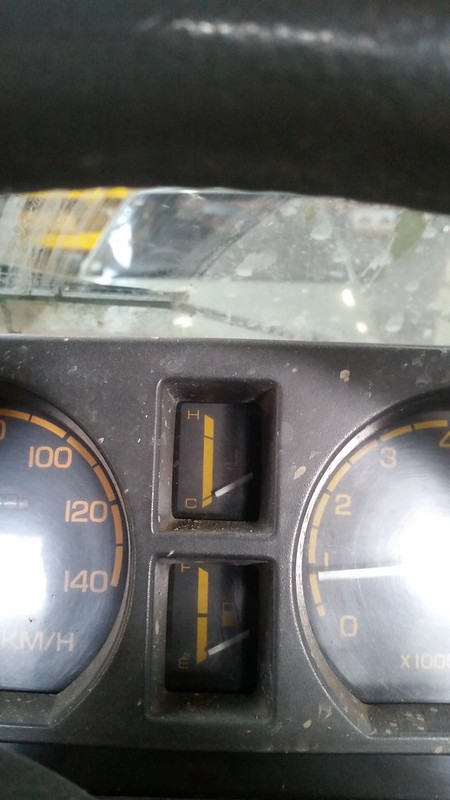
My biggest issue now is that the temp gauge isn't working. A dodgy connection on the sender is the issue I think. Not sure how to resolve that one. Maybe an aftermarket unit. Does anyone know the thread type on the temp sender?
I've got the rear bar and tray done!
Then off for paint
And it looks so clean on a rusty, dirty Zuk haha. Hopefully my fuel filler won't get smashed there...
And the tray. 6mm Aluminium all round, nice and solid without being too heavy.
And some cap screw goodness. I love cap screws.
I've also retained the battery, secured my PS lines properly, retained the brake line on the diff properly, tidied wiring around the ecu, lubed the window winders so they work better, etc etc.
I'm getting dangerously close to running her in...
My biggest issue now is that the temp gauge isn't working. A dodgy connection on the sender is the issue I think. Not sure how to resolve that one. Maybe an aftermarket unit. Does anyone know the thread type on the temp sender?
Re: Rusty the SJ413
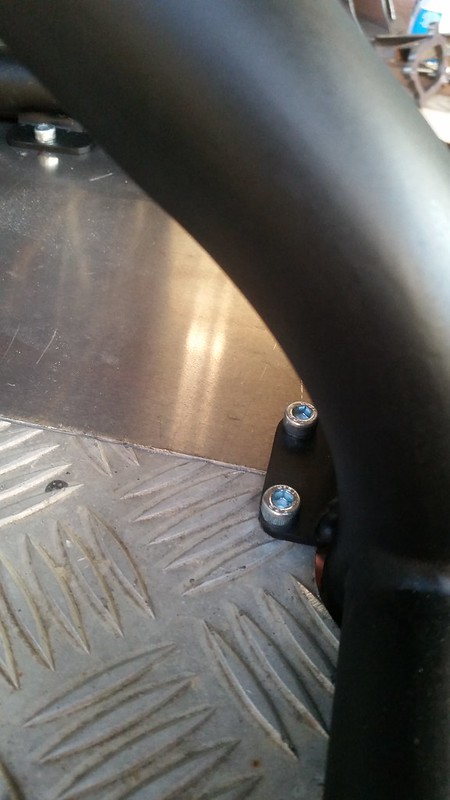
This is what I have done with my temp sender
The gauge sender is on the RH side of the pic. There was a really crappy connector thing stuck on the end of that little 'stick' that just hung there limply. Not a good connection. So I tried to use the AC temp sender (I think?) on the LH side on the off chance that the senders sent the same resistance. You can see my blue female terminal I have connected on there. There's a good connection there, but at running temp, the gauge reads this:
I've grounded the wire and the gauge leaps up, so I know the wiring is good.
I'll either get an aftermarket cheap water temp gauge or a new temp sender. Recommendations or other ideas?
Re: Rusty the SJ413
One is the temp sender the other should be a temp switch for the AC fan
One should short to ground at a certain temp the other should change impedance ( decrease ohms ) as the temperature rises.
From memory the vitae's uses a different impedance range to the SJ and most use the SJ sender to get full range on the guage .
One should short to ground at a certain temp the other should change impedance ( decrease ohms ) as the temperature rises.
From memory the vitae's uses a different impedance range to the SJ and most use the SJ sender to get full range on the guage .
LR110 ..... LJ50 project
Chris.
Chris.
Re: Rusty the SJ413
UBZ wrote:One is the temp sender the other should be a temp switch for the AC fan
One should short to ground at a certain temp the other should change impedance ( decrease ohms ) as the temperature rises.
From memory the vitae's uses a different impedance range to the SJ and most use the SJ sender to get full range on the guage .
Bugger, so that'll be why it doesn't read right haha. I figured it was worth a shot. I had read that the senders are the same between g13 and g16, but obviously not?
-
Crawlerer79
- Hard Yaka
- Posts: 305
- Joined: Sun Jun 12, 2016 3:38 pm
- Contact:
Re: Rusty the SJ413
How's Rusty coming along? I've been through and read this thread start to finish time and time again. It's an awesome build!
'The Big Truck' - 2001 TD5 Disco II
'Lando' - 1994 V8 Disco
'The Caramel Trophy Truck" - 1990 Disco Ex-Camel Trophy (?)
'Lando' - 1994 V8 Disco
'The Caramel Trophy Truck" - 1990 Disco Ex-Camel Trophy (?)
Who is online
Users browsing this forum: No registered users and 30 guests