hizuke project

Starting a project or modification? Then post it's progress here and show us some pic's.
User avatar
new2zukes
Hard Yaka
Posts: 761
Joined: Thu Sep 06, 2007 12:00 pm
Location: kerikeri northland

hizuke project

Post by new2zukes »

well this is my first ever major build for my truck il be putting hilux diff under my suzuki samurai, the plan will be to weld the rear diff and keep everything else suzuki and posibly run a rocklobster transfer case. so far it took me about 2 hours to figure out how to get the rear drum brake back together as they looked all black and horrible. so took it all apart and cleaned it. this build will not be the fastest build there is as like ive said its my first major build. have very little machanical knowledge but it will all get there in time ( i hope). the pics below are just of the rear diff in its different stages so far will start to mesure up on the truck tomorrow.
Image
diff on the saw horses
Image
dirty un cleaned brake drum
Image
all cleaned up but not too clean as it will just get dirty again.
Image
and the last one of it all back together with the tires on, they are just 31x10.5 perreli scorpion muds as i had them left over from another truck. might have to get some bigger ones at some stage when the money provails.
more of an update tomorrow.

martin
User avatar
Denby
Bush Crasher
Posts: 54
Joined: Sun Apr 27, 2008 2:03 pm
Location: West Auckland

Re: hizuke project

Post by Denby »

What is your plan, spring perch over axle to get extra height or just standard mountings?

And what are you looking at doing with the front?
I understand (I could be wrong) the Toyota mounts are about 30mm further apart than Zuk and some people just try and slap then together which results springs being wider at one end than the other.

Is there anybody in the Whangarei club that has done something like this before who you can talk to?
"Insert witty comment here"
User avatar
lee22
Bush Crasher
Posts: 77
Joined: Thu Dec 18, 2008 6:00 am
Location: surrey uk

Re: hizuke project

Post by lee22 »

this thead mite help alittle
http://board.marlincrawler.com/index.php?topic=37942.0
it abit on the long side build good build
lee
User avatar
SirGerald
Hard Yaka
Posts: 222
Joined: Tue Jan 22, 2008 2:16 pm
Location: Palmerston North
Contact:

Re: hizuke project

Post by SirGerald »

We are currently in the process of doing the same thing and sounds like we are at a similar stage in knowledge (limited but learning very fast)

We have taken the approach of making it as simple as possible and then modify things at a later stage once we have driven it and seen what doesn't work.

We are using the samurai springs mounted using the hilux mounts on the diffs. The front ones are very very close so didn't have to modify the mounts there. The rear we decided was a bit to far out so made up a bracket to push the springs in a bit. Will also need to have a bit more of a play with them to angle the front of the rear diff up so the drive shafts aren't on so much of an angle.

If you are using leaf springs you will need to visit jafa on here and purchase some hi-steer arms

http://www.snr4x4.co.nz/histeer-arms-p-112.html

Springs running over the diffs have given the truck a very big lift which is made to look even worse as the guards have been cut right back. Will see if we are to high once we get out and about and on some angles.

Plan to finish it all off today so will get some pics for you and feel free to ask any questions.

Some other good sites are

http://www.pirate4x4.com/forum/showthre ... did=116013

http://www.cardomain.com/ride/2179501/4
Team Lada Loves Sloppy Holes!!!!!!!!!!!!!!!
User avatar
lee22
Bush Crasher
Posts: 77
Joined: Thu Dec 18, 2008 6:00 am
Location: surrey uk

Re: hizuke project

Post by lee22 »

User avatar
new2zukes
Hard Yaka
Posts: 761
Joined: Thu Sep 06, 2007 12:00 pm
Location: kerikeri northland

Re: hizuke project

Post by new2zukes »

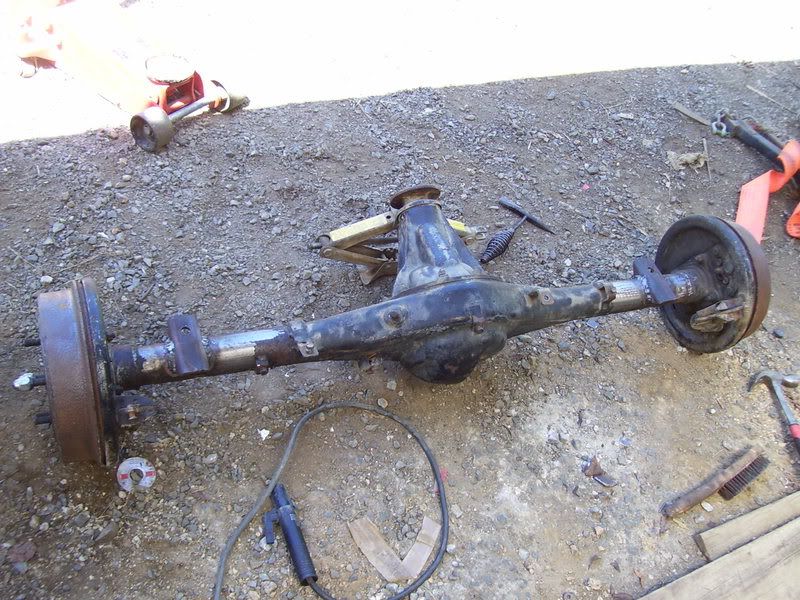
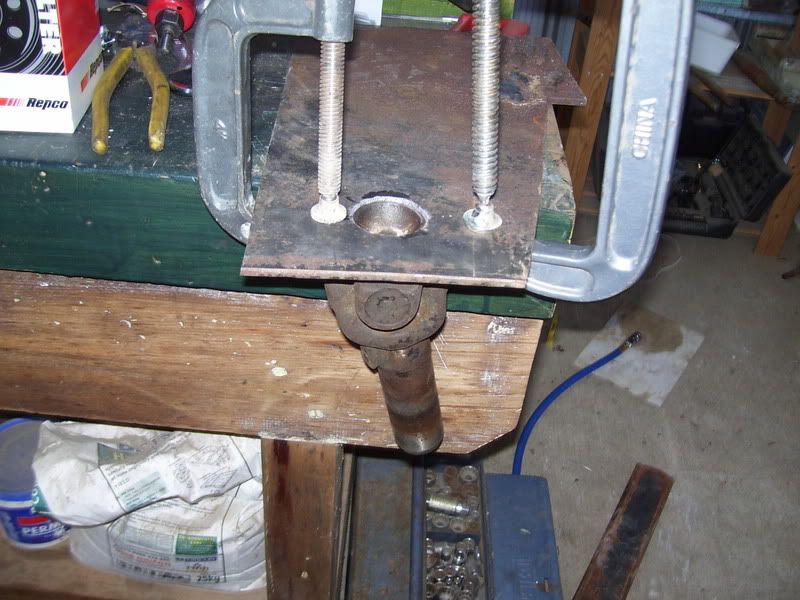
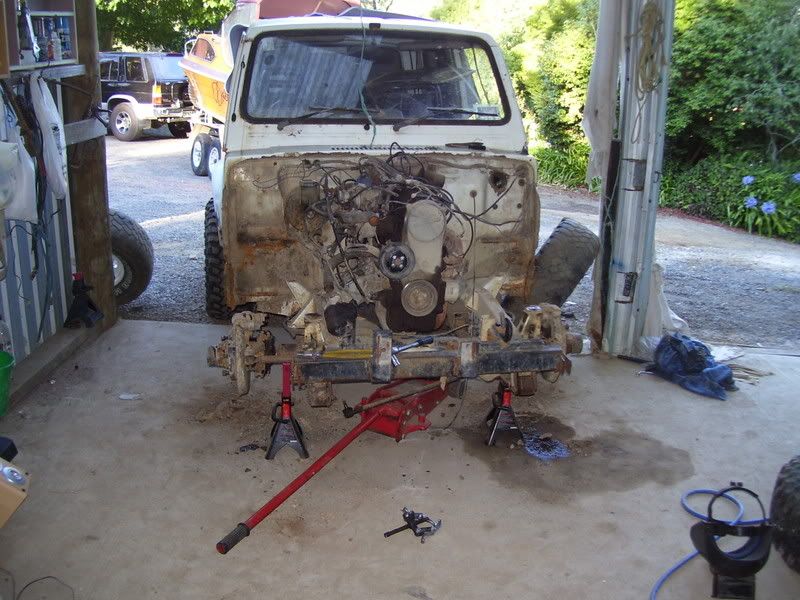
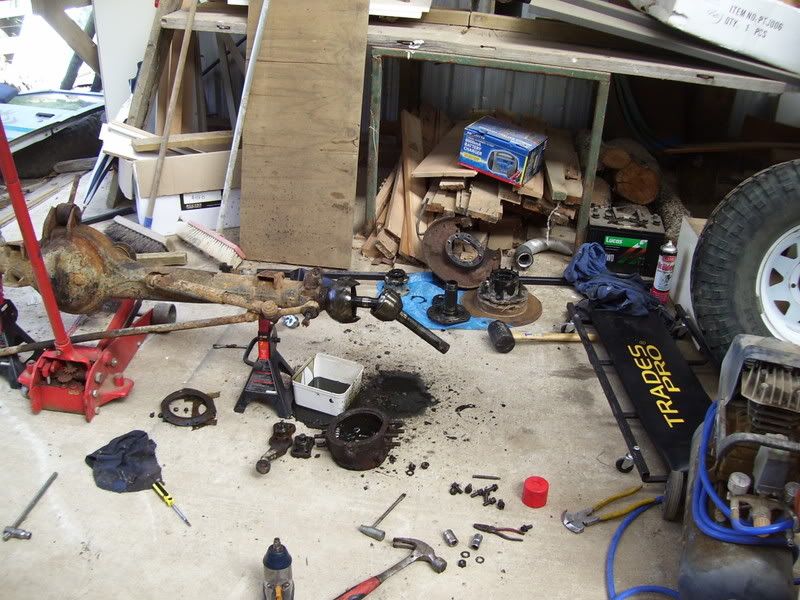
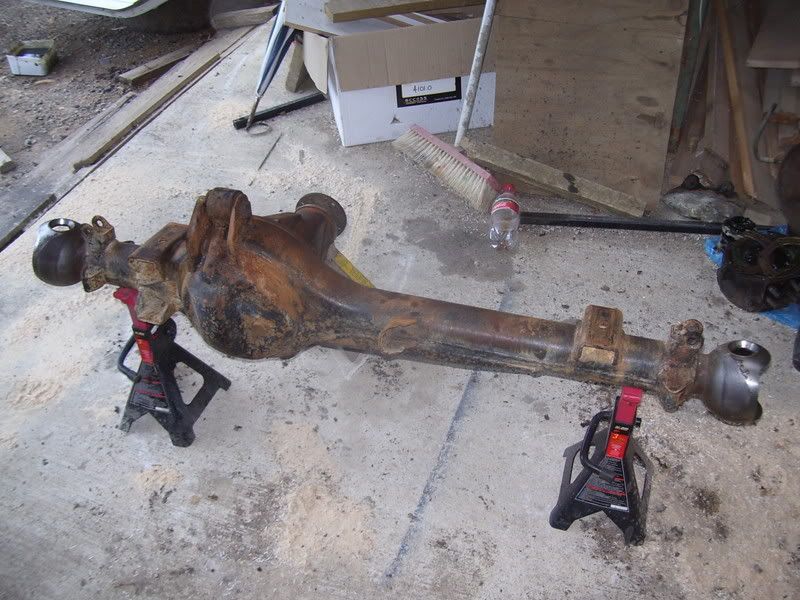
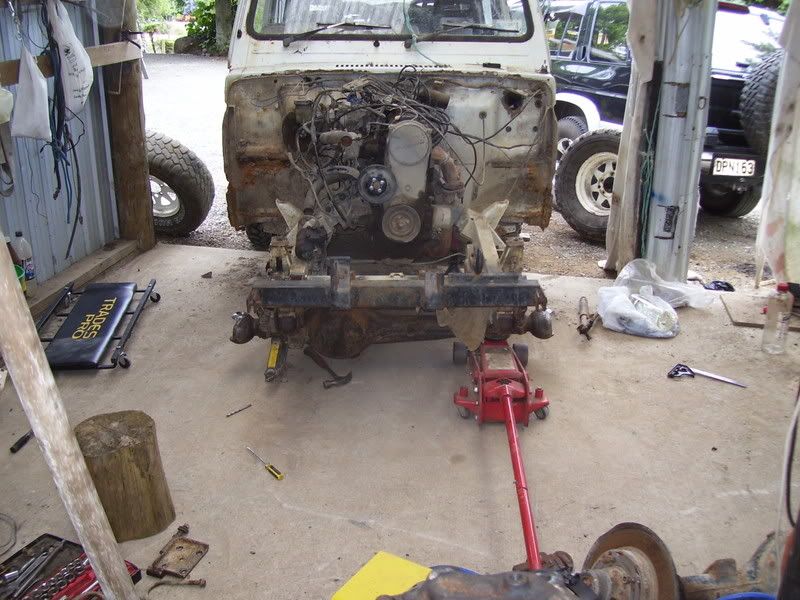
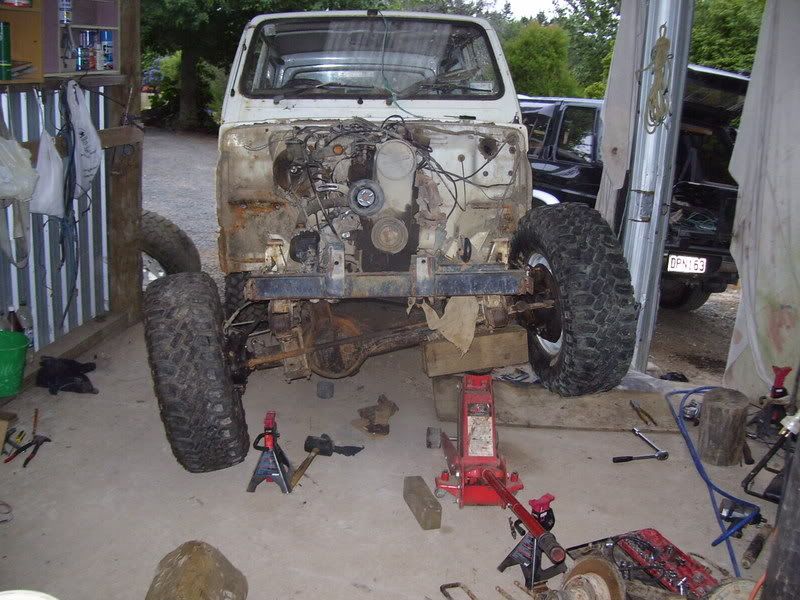
well thanks all for your info so far, have been reserching for along time and dont know why i couldnt find some of the sites that you just gave me. i have made a start today. got the suzuki diff out and the hilux one in but not bolted in as i have to make some perches. i will be making some perches out of 2 bits of 100x50 as shown in the pics below and i will be moveing the axle back about 25mm or so by drilling the center hole a bit back on the perch. will hopefully be able to use a drill press tomorrow with a holesaw as my poor battery just wont cut it without burning up. i have got a front hilux driveshaft that will go into the rear but i have a little problem with the end that goes into the transfer case, i can buy one of those addapters to space it out so the transfer case nut doesnt hit on the driveshaft, but this is a budget build and im trying not to spend too much money.
as for the steering i should be using a ifs hilux power steering box as i can get it for cheap as off a m8 then will put 2 hilux arms ( i dont know what they are called but they are directly over the steering nuckle and atach the tie rod with the drag link if thats what they are called)on one side then use the stock arm on the other side, thats the plan anyways. well here are all the pics:
Image
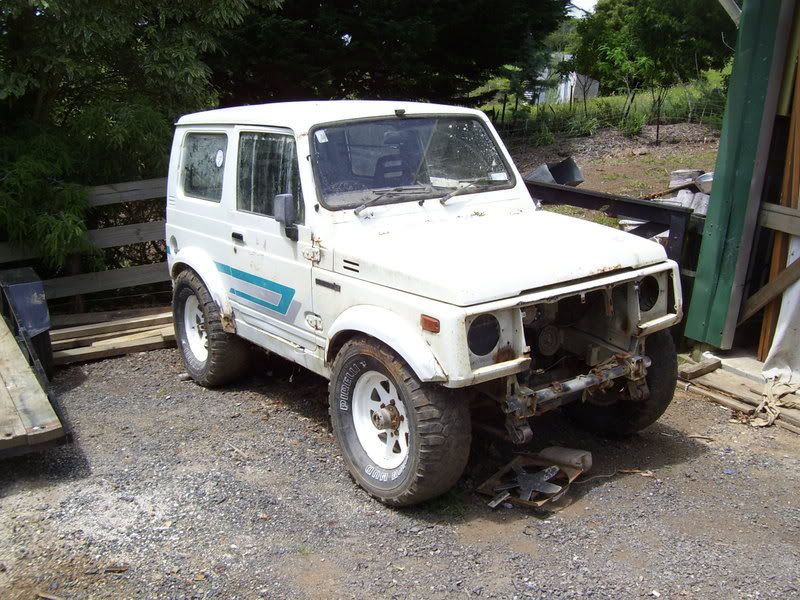
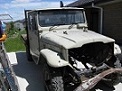
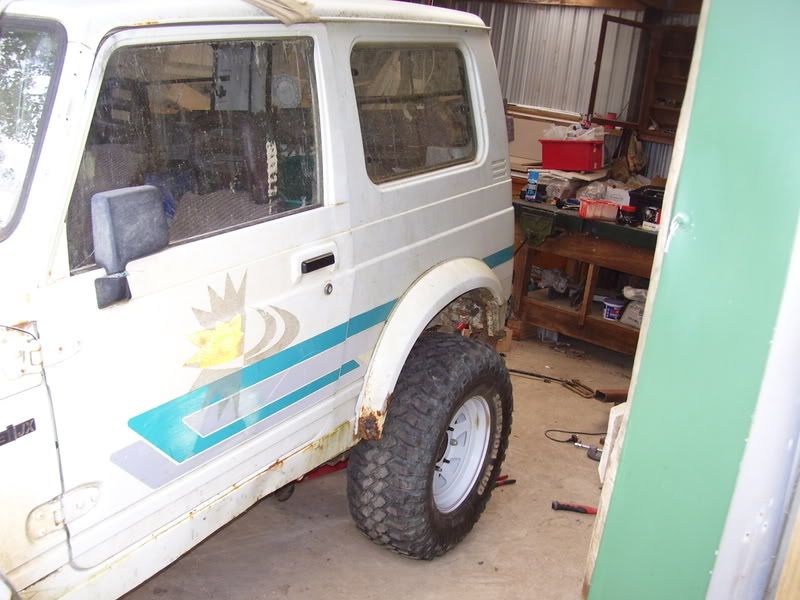
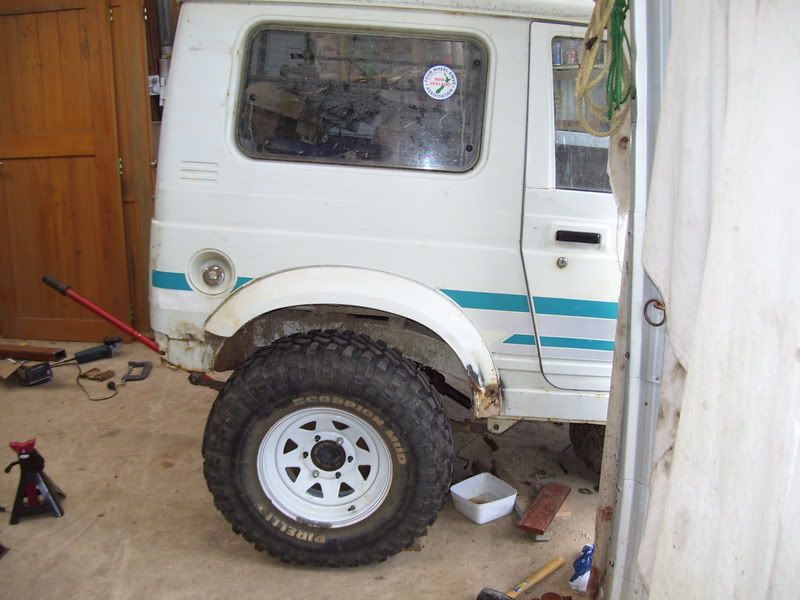
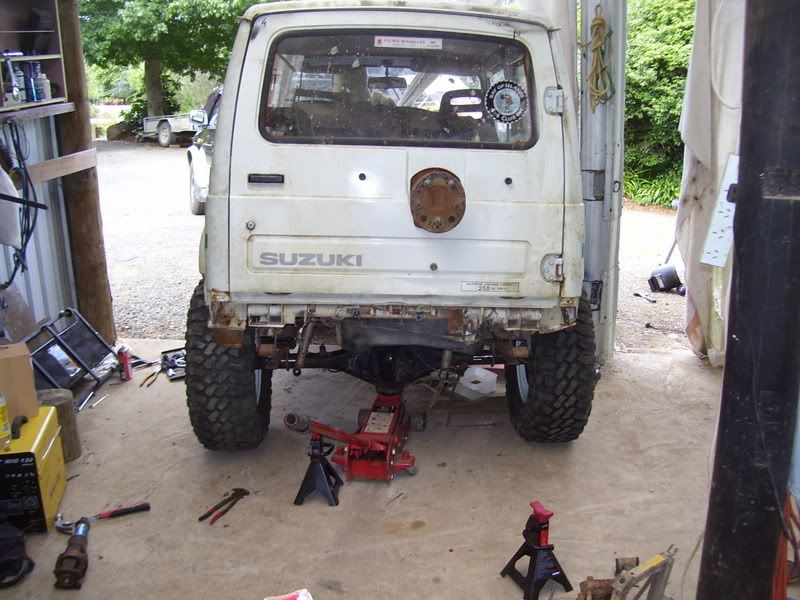
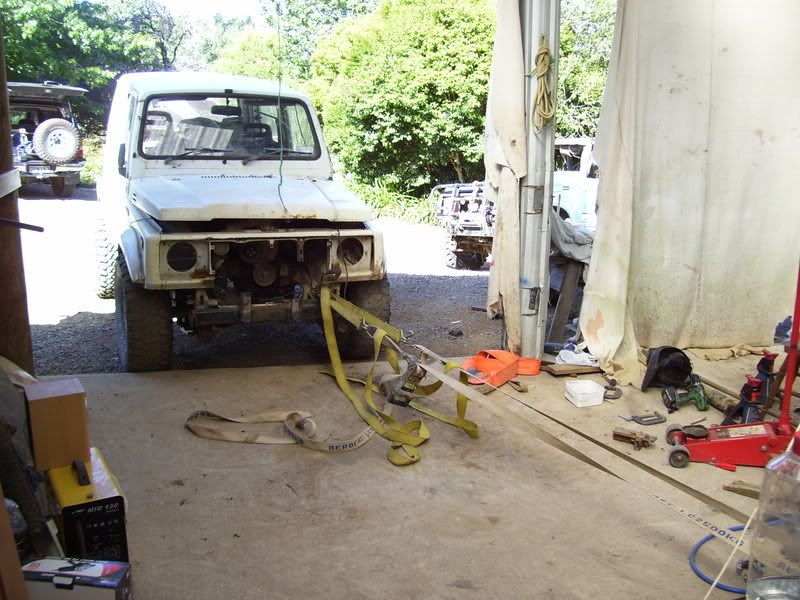
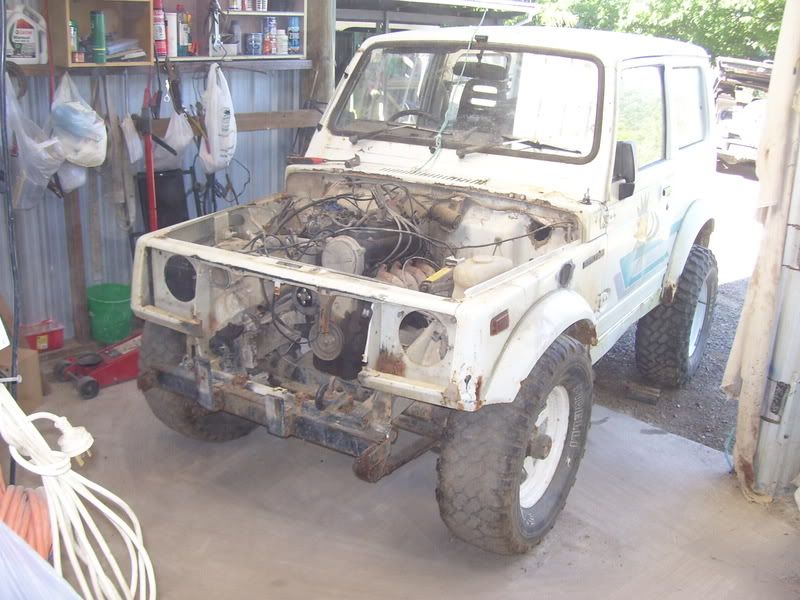
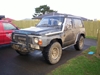
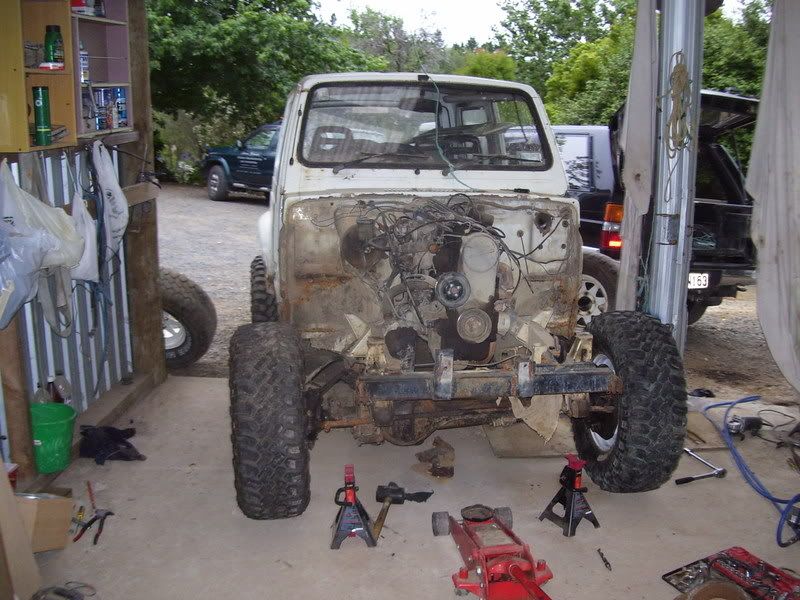
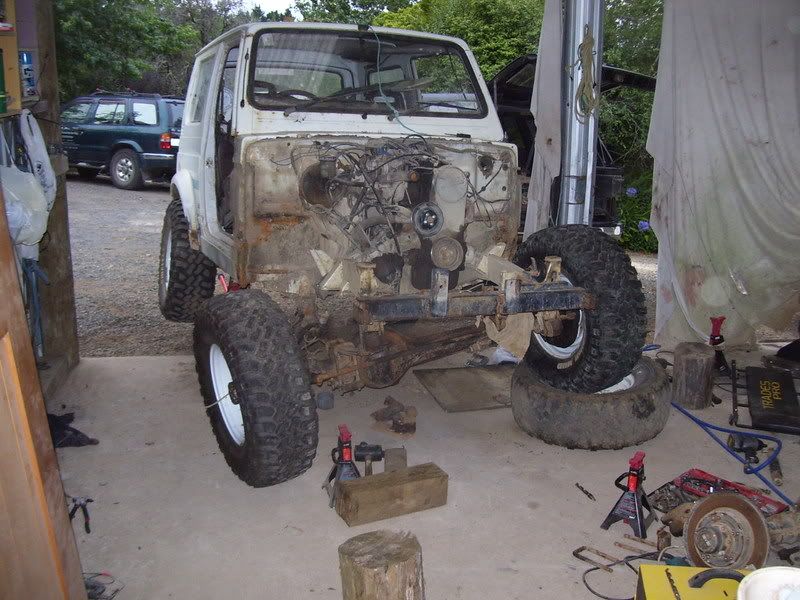
pic of the truck this is all being done on. its a 1989 suzuki samurai.
Image
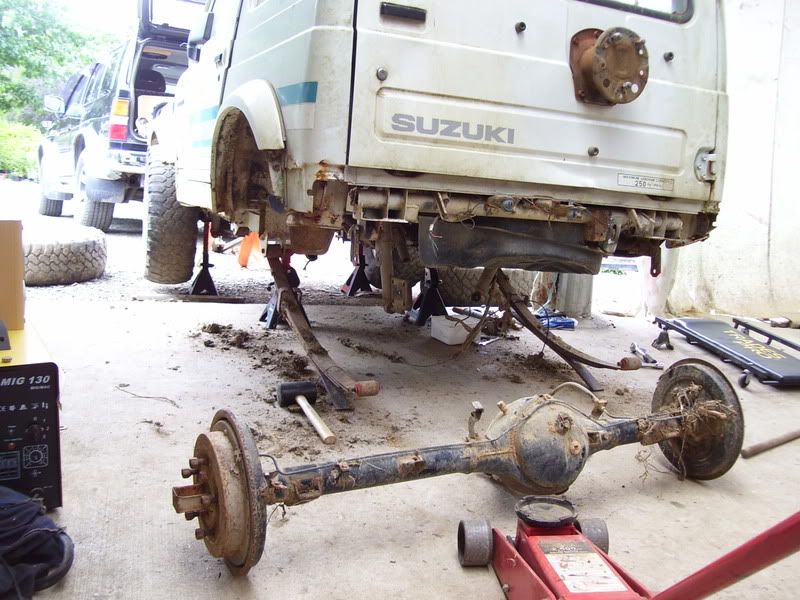
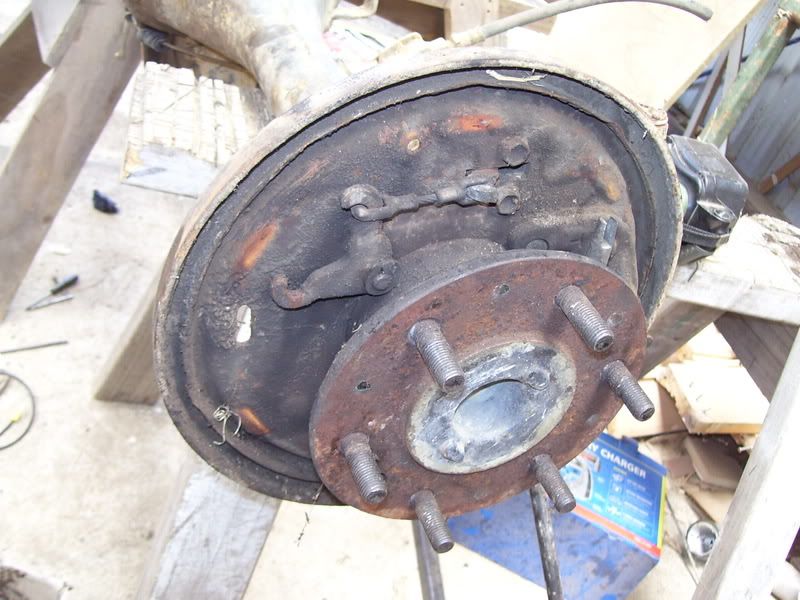
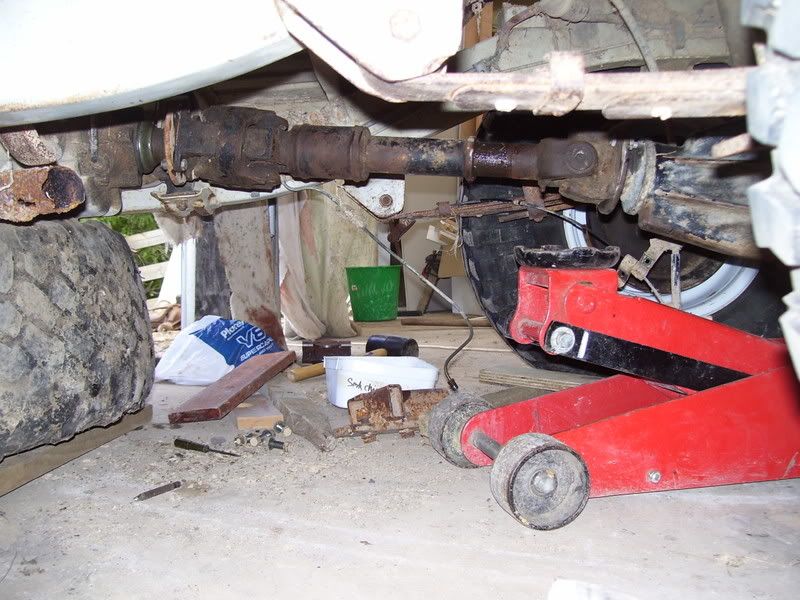
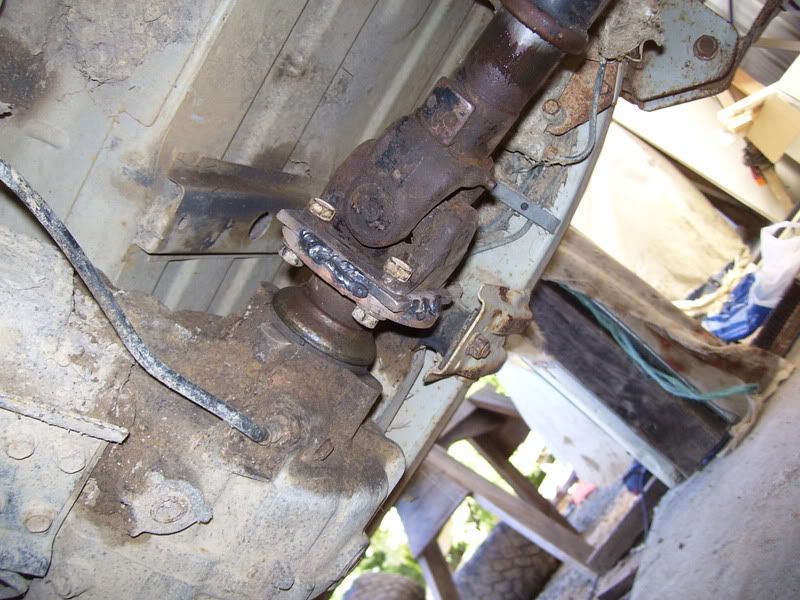
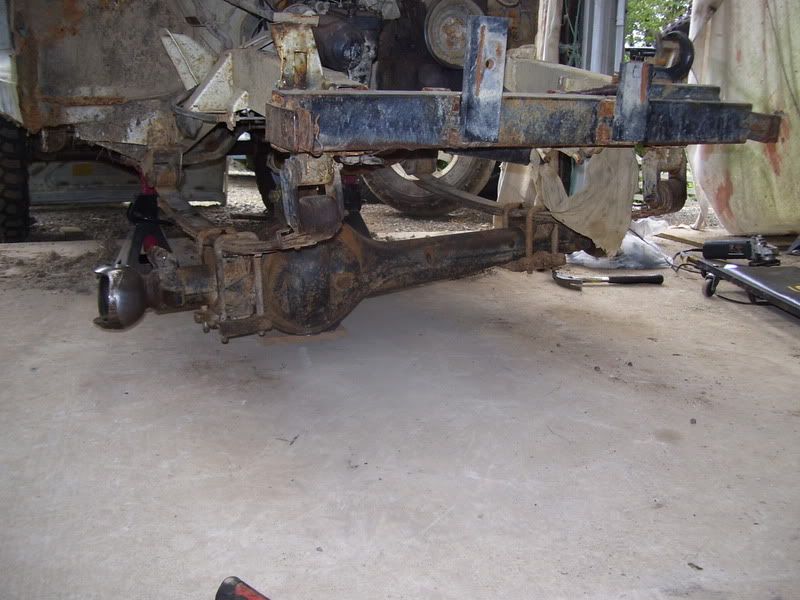
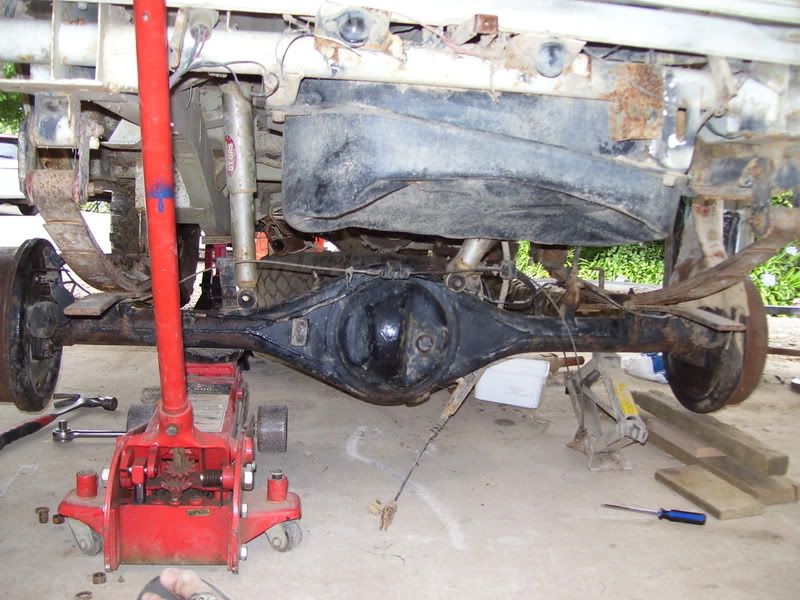
zuke axle out from under the truck.
Image
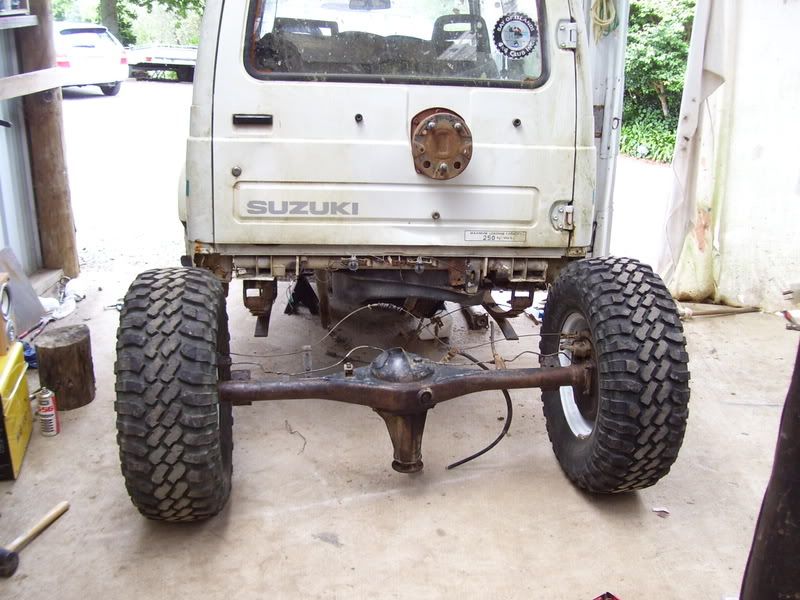
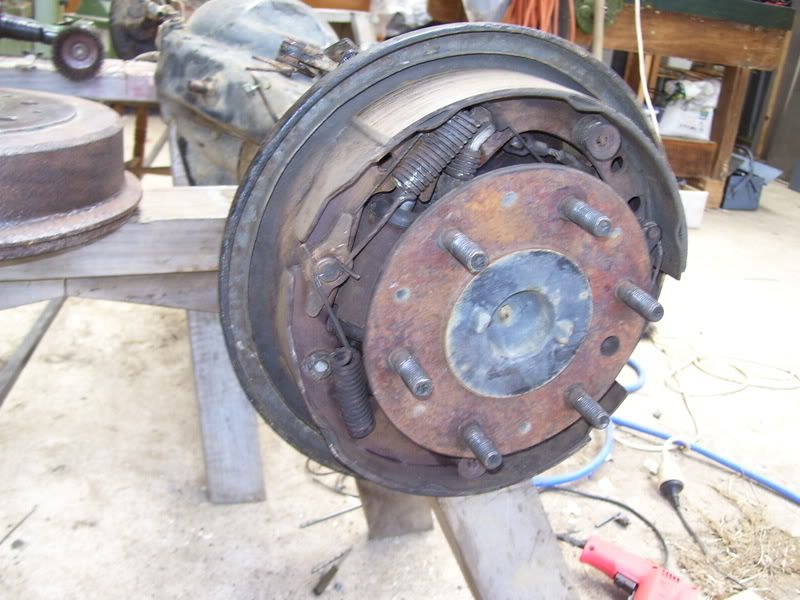
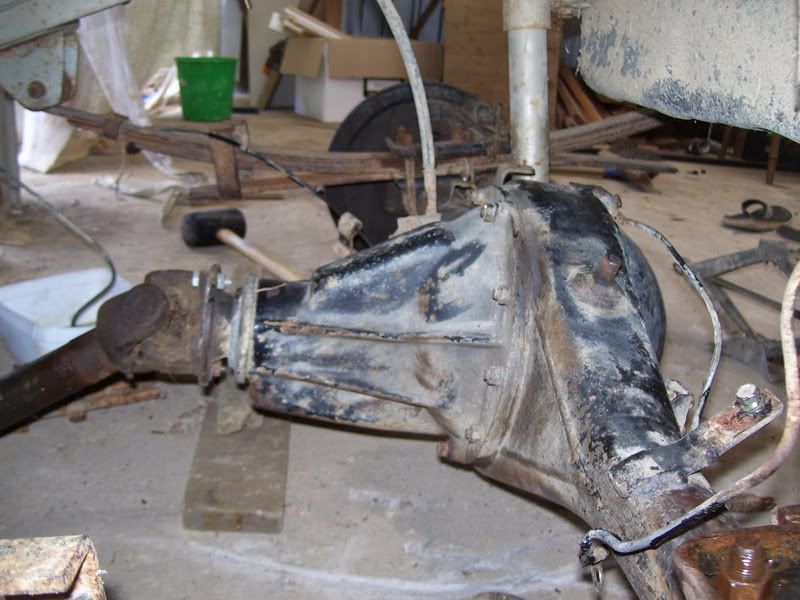
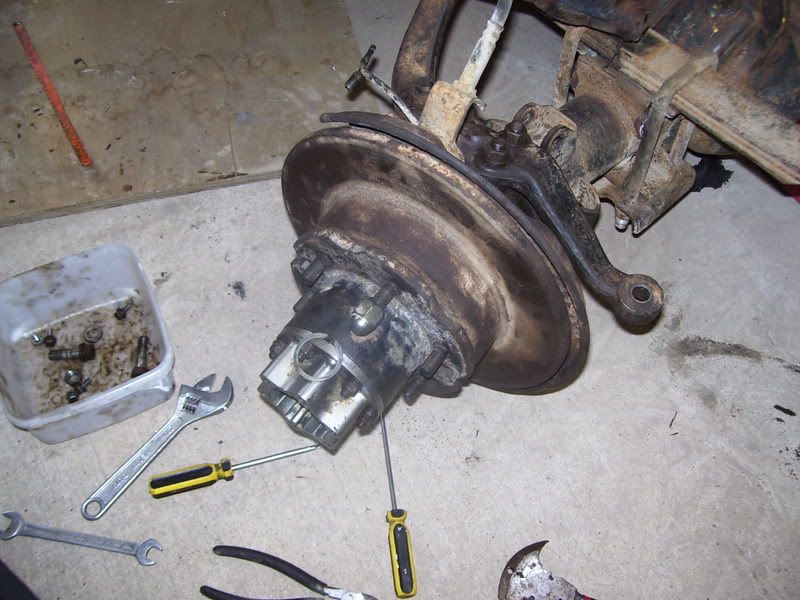
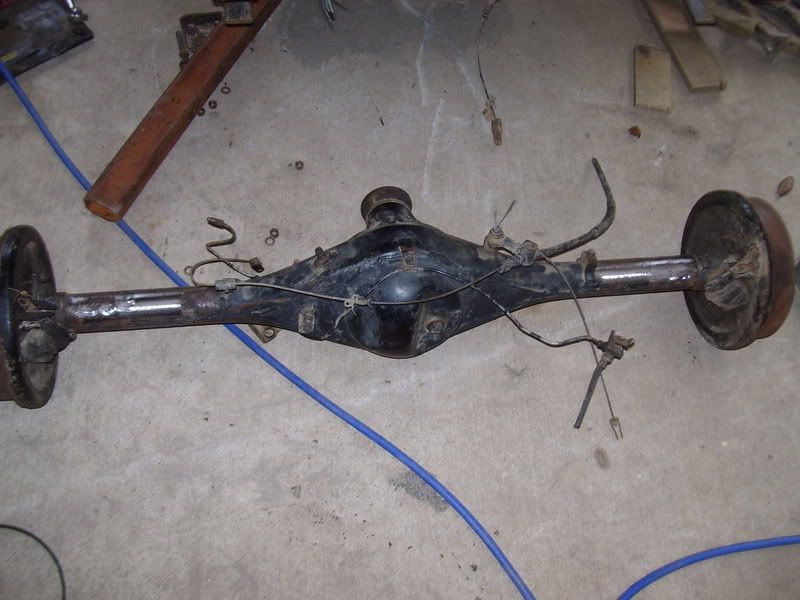
hilux one ready to go in.
Image
spun the centre pin round ready to put the springs ontop of the axle.
Image
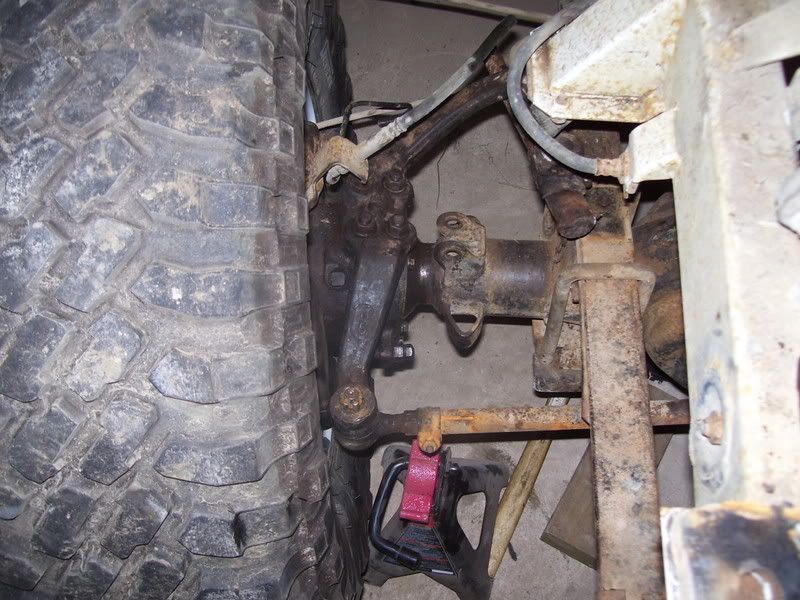
all lined up to see where they will sit
Image
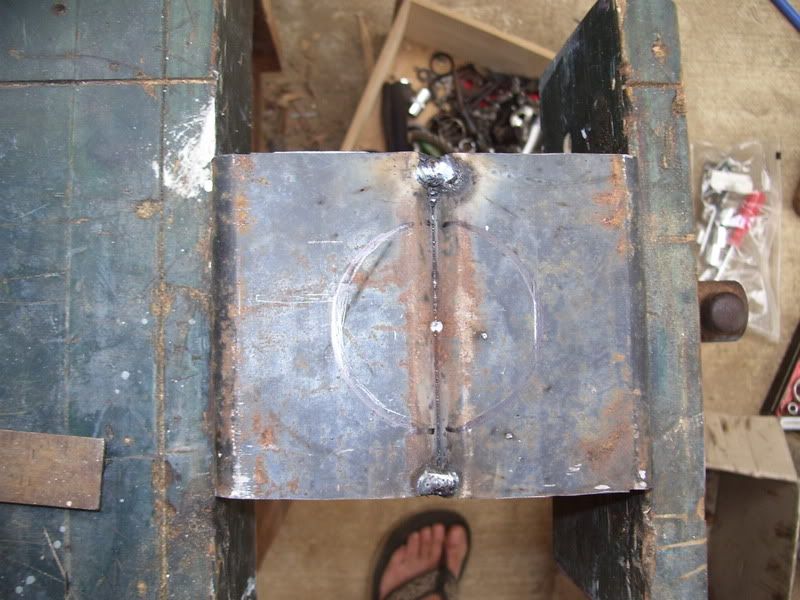
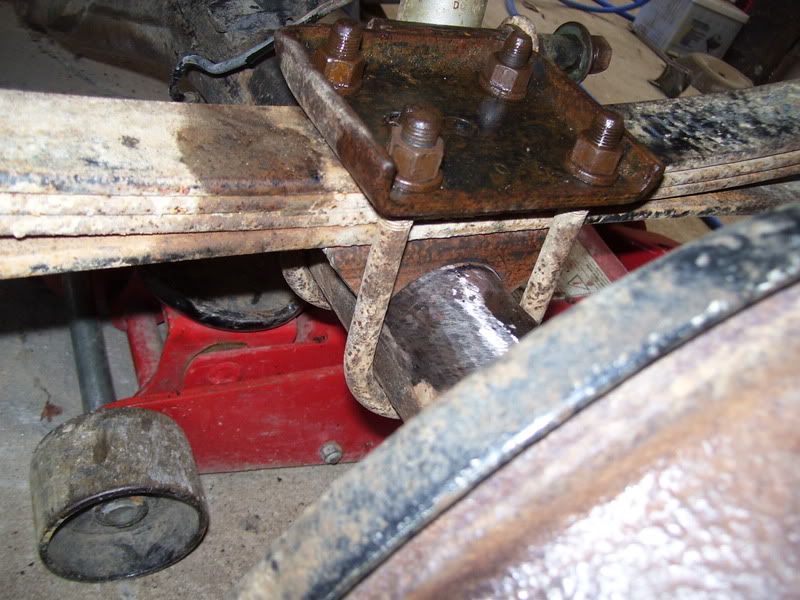
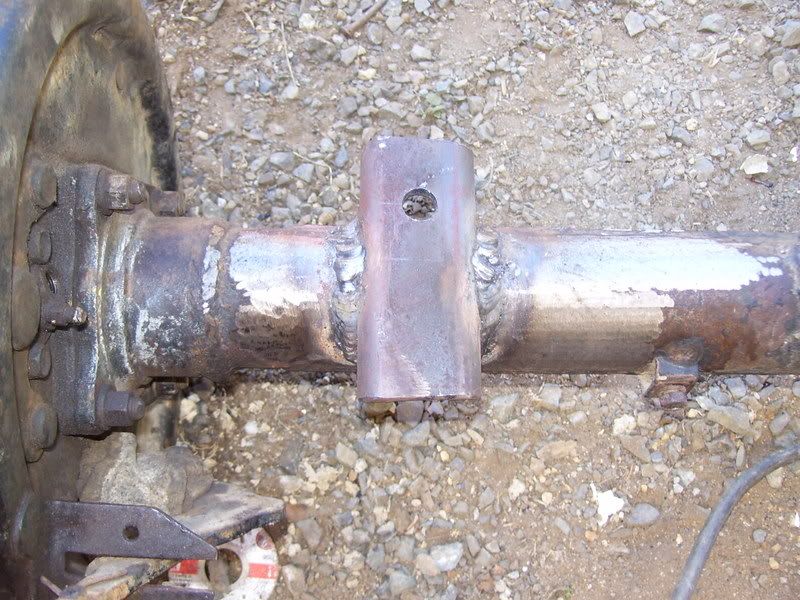
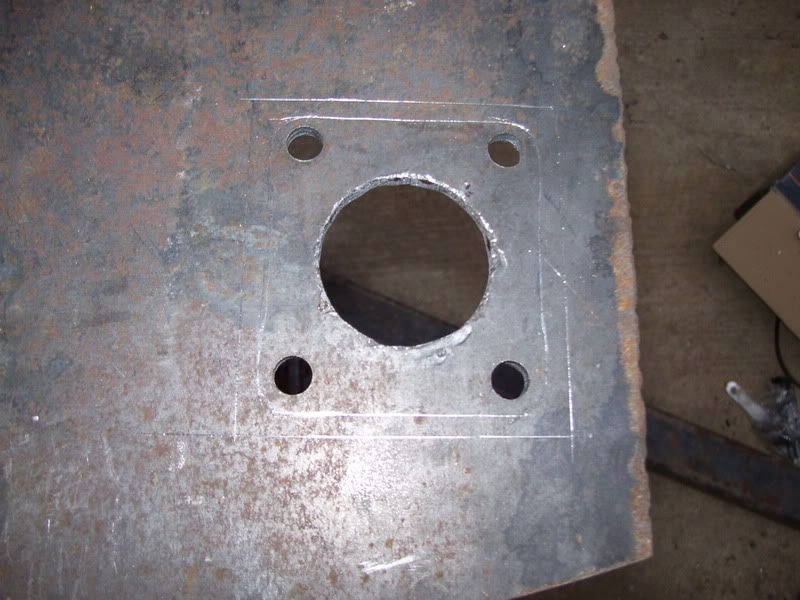
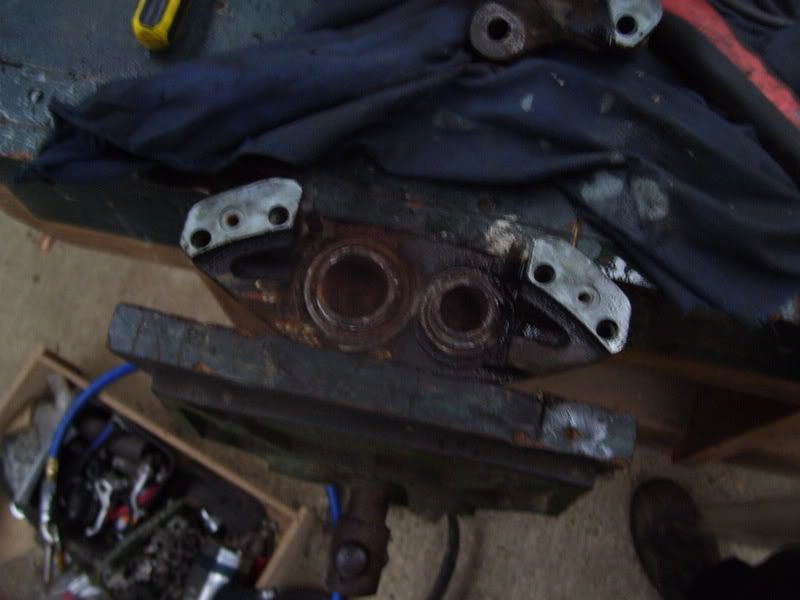
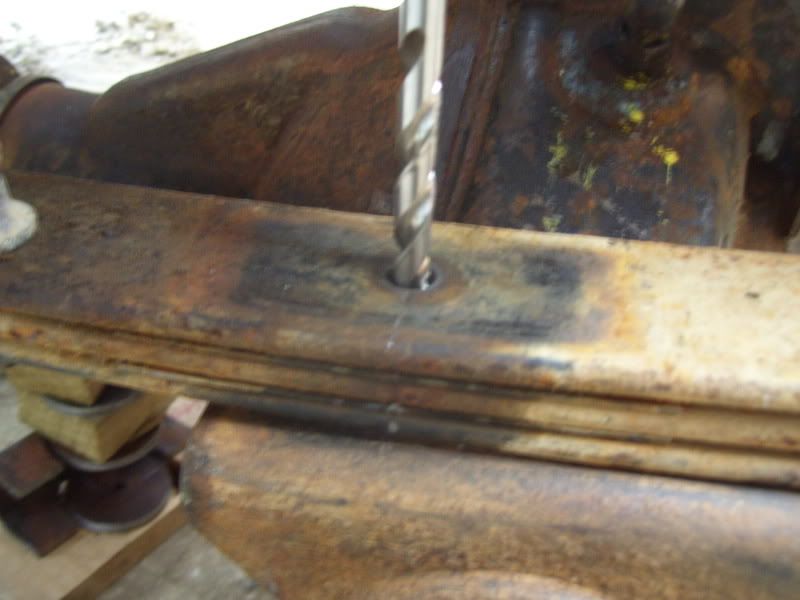
this is the plan for making the new mounts just tacked 2 bits of 100x50 together and will drill a hole in the middle to make 2 mounts.
Image
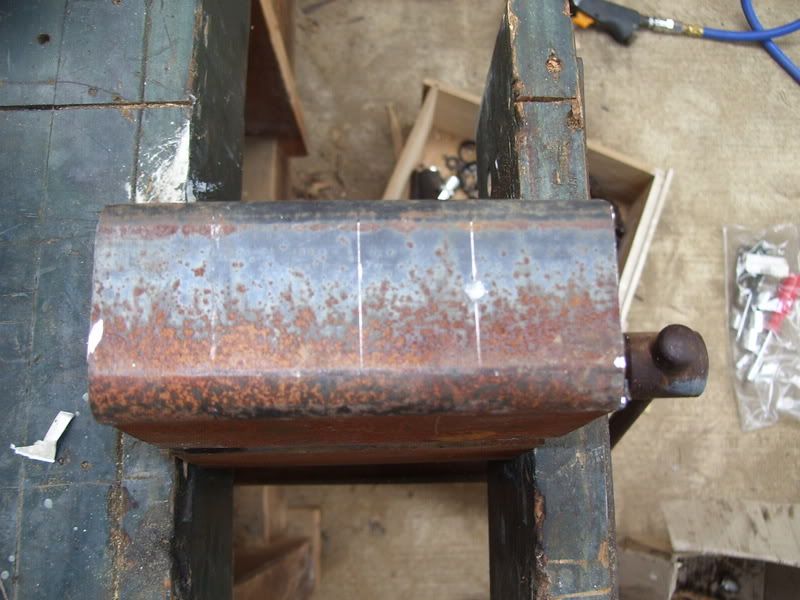
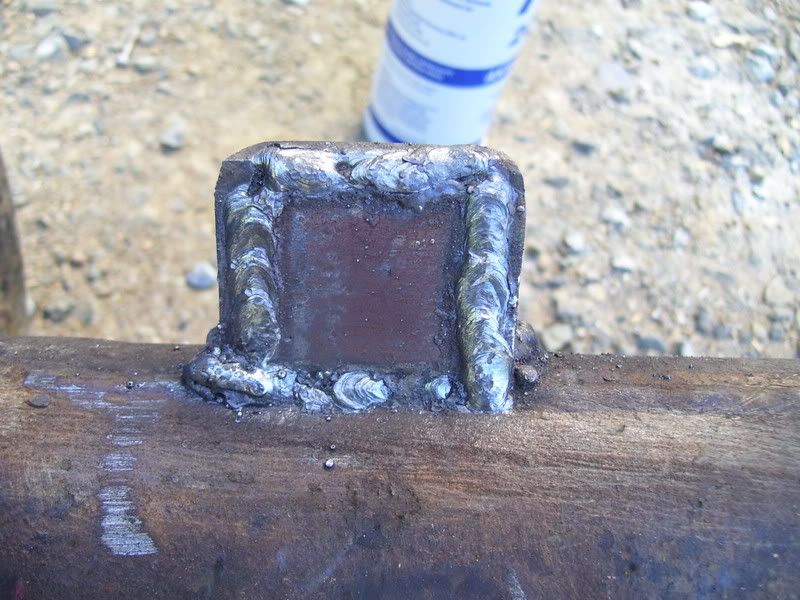
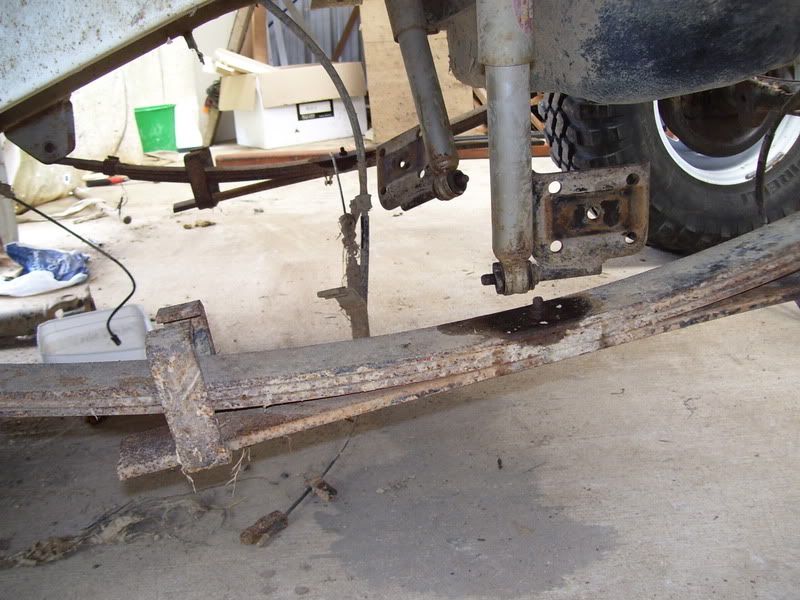
this will be the placement of the new center pin to move the axle a little back for better aproach angle
Image
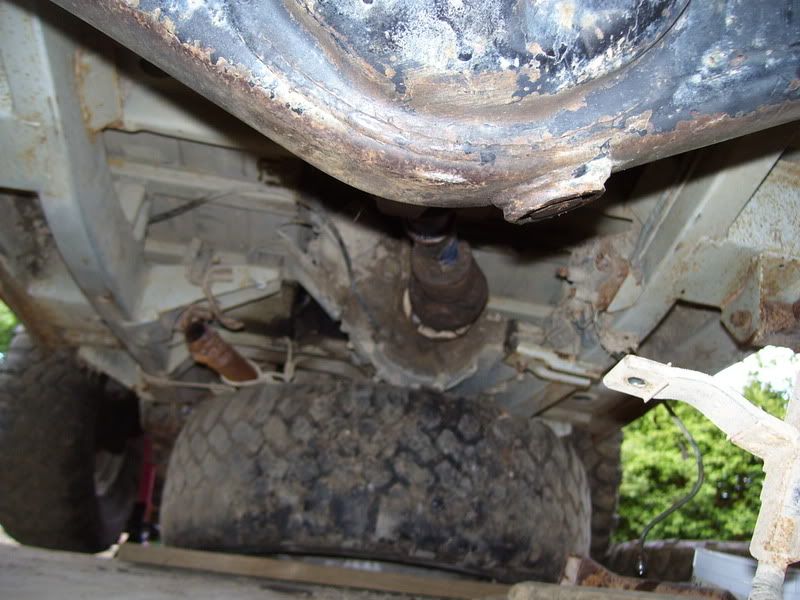
ground the old mounts of and cleaned it up ready to weld the new ones on.
Image
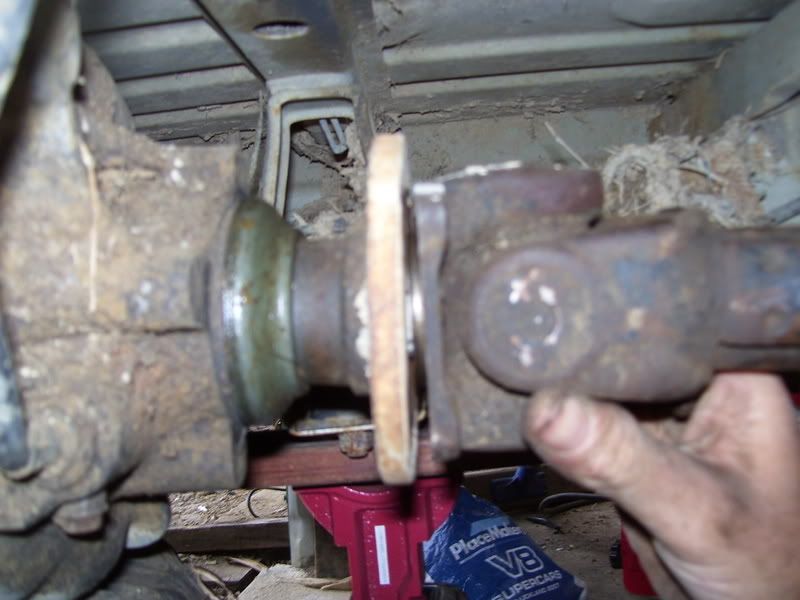
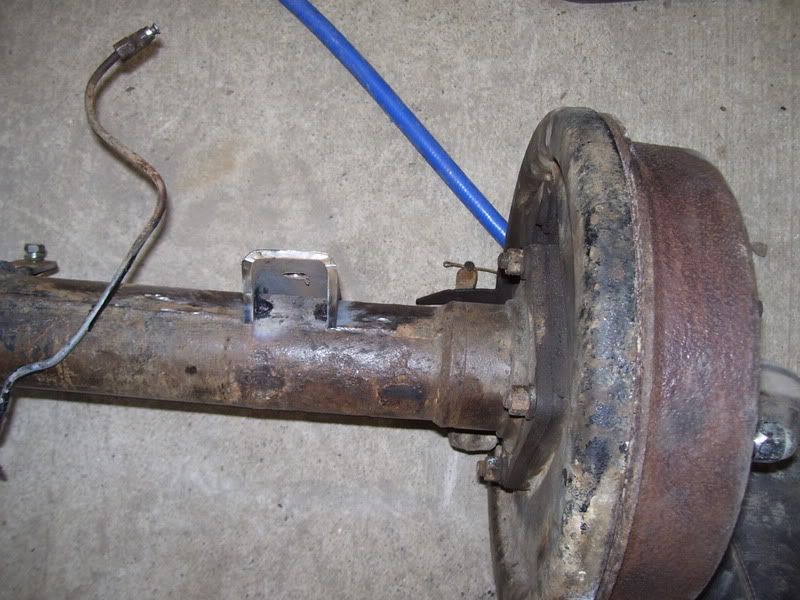
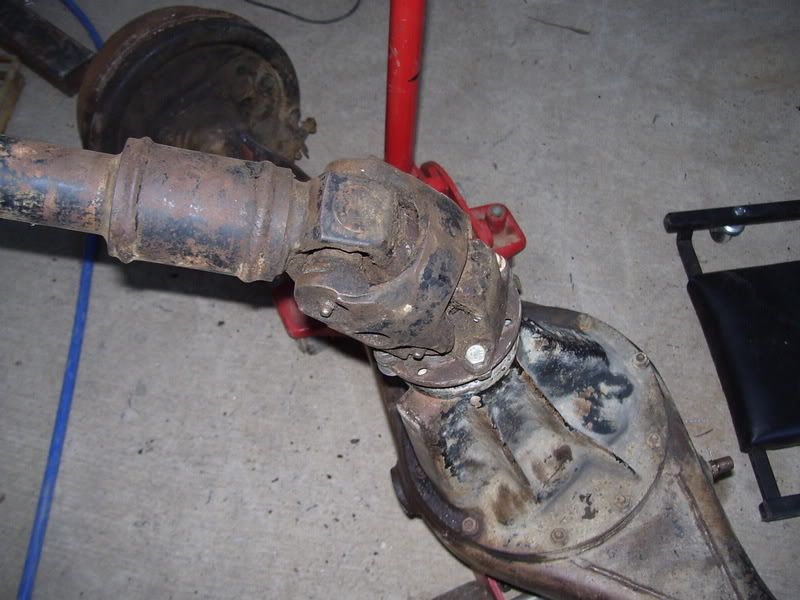
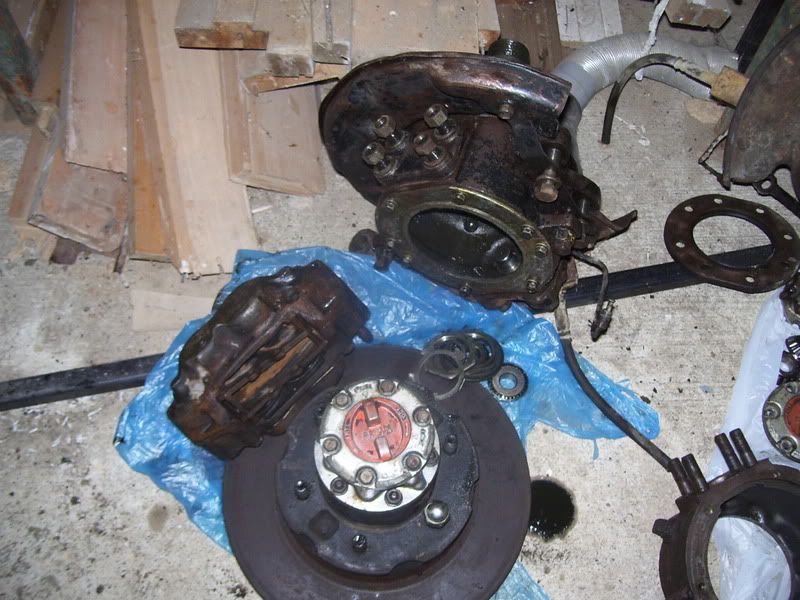
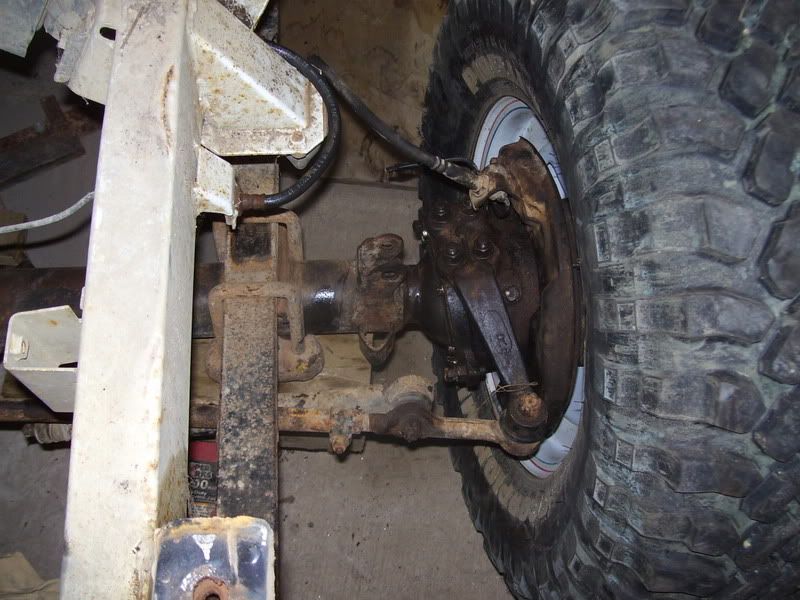
this is the problem with the transfer case end of the driveshaft it has this gap and that is as close it can get to being flat.
Image
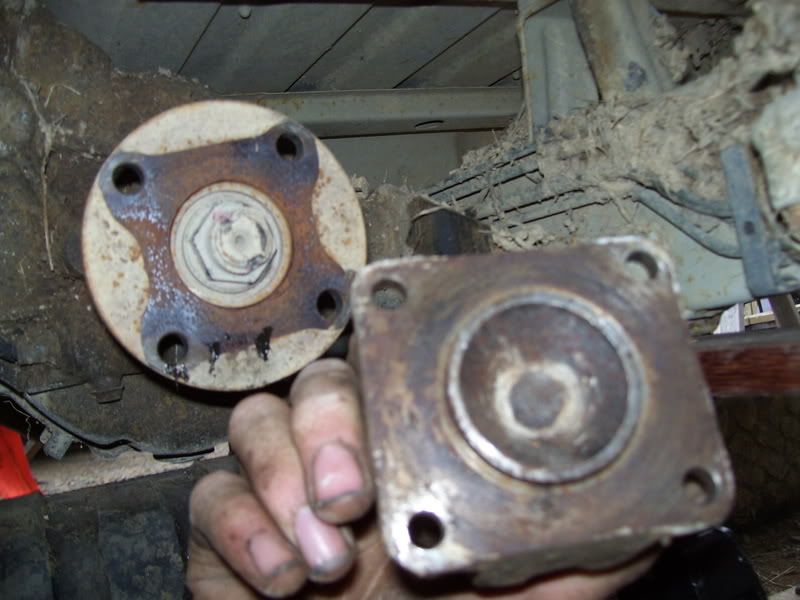
and just a pic of the 2 ends.
well thats all i got done today when i am getting the angle for the new pad do i just sit the truck on flat ground then just get the driveshaft straight then weld away?

cheers

martin
User avatar
Heath
Hard Yaka
Posts: 3297
Joined: Thu Dec 12, 2002 12:00 pm
Location: Rolleston, Chch

Re: hizuke project

Post by Heath »

How about using the old drive shaft end that bolted to the t case, cut the uj section off and get it turned down (faced flat) and use it as a spacer?
User avatar
new2zukes
Hard Yaka
Posts: 761
Joined: Thu Sep 06, 2007 12:00 pm
Location: kerikeri northland

Re: hizuke project

Post by new2zukes »

sounds like a plan to me il give it a go
User avatar
new2zukes
Hard Yaka
Posts: 761
Joined: Thu Sep 06, 2007 12:00 pm
Location: kerikeri northland

Re: hizuke project

Post by new2zukes »

If you are using leaf springs you will need to visit jafa on here and purchase some hi-steer arms

http://www.snr4x4.co.nz/histeer-arms-p-112.html


dont you think that price is a little expensive for a bit of steel i no its strong but dam thats alot of money and its not money i have. so will have to make something else up.
User avatar
UBZ
Hard Yaka
Posts: 1647
Joined: Sat Aug 19, 2006 12:00 pm
Location: Twizel

Re: hizuke project

Post by UBZ »

Wow you certainly jumped right into into it.
Will be watching avidly as I plan to do this to my LWB this year.
What size tire are you planing on running? you will need 35's to get better clearance than a Zuk on 31's

You going to truss up the axle while your there?

Most people who do this conversion use a Prado rear axle as the pumpkin is offset like that Zuk one.
From what i have read the angle of the rear drive shaft , when using a standard hilux diff will cause quite severe drive line vibrations at road speeds. Not that that should bother a trailer sailor. But some thing to think about.

Does the hilux drive shaft have a slip yoke. You will need one as the diff will move backwards under compression.
I have seen a adapter plate used to join the hilux drive shaft to the zuk transfer. 12-16mm Circle Plate 8 holes. Offset the Lux shaft 45deg to the Zuk flange and all bolts should go through. Or you can drill new holes in the Zuk flange.

Keep it up mate

C.
LR110 ..... LJ50 project :roll:
Chris.
User avatar
Heath
Hard Yaka
Posts: 3297
Joined: Thu Dec 12, 2002 12:00 pm
Location: Rolleston, Chch

Re: hizuke project

Post by Heath »

UBZ wrote:Wow you certainly jumped right into into it.
Will be watching avidly as I plan to do this to my LWB this year.
What size tire are you planing on running? you will need 35's to get better clearance than a Zuk on 31's

You going to truss up the axle while your there?

Most people who do this conversion use a Prado rear axle as the pumpkin is offset like that Zuk one.
From what i have read the angle of the rear drive shaft , when using a standard hilux diff will cause quite severe drive line vibrations at road speeds. Not that that should bother a trailer sailor. But some thing to think about.

Does the hilux drive shaft have a slip yoke. You will need one as the diff will move backwards under compression.
I have seen a adapter plate used to join the hilux drive shaft to the zuk transfer. 12-16mm Circle Plate 8 holes. Offset the Lux shaft 45deg to the Zuk flange and all bolts should go through. Or you can drill new holes in the Zuk flange.

Keep it up mate

C.


Lucky bugger where did you find a LWB in NZ? They are as rare as rare can be.
User avatar
UBZ
Hard Yaka
Posts: 1647
Joined: Sat Aug 19, 2006 12:00 pm
Location: Twizel

Re: hizuke project

Post by UBZ »

Heath wrote:Lucky bugger where did you find a LWB in NZ? They are as rare as rare can be.


Ive got IceKayaks one. All wrapped up and waiting to be monstered
Trying a few things on the SWB first.
LR110 ..... LJ50 project :roll:
Chris.
User avatar
new2zukes
Hard Yaka
Posts: 761
Joined: Thu Sep 06, 2007 12:00 pm
Location: kerikeri northland

Re: hizuke project

Post by new2zukes »

well got the rear diff in today, took a while but it got there. i went to my work to use the drill they have as its better than my poor battery drill and my broken chinese power drill, (managed to brake 2 grinders and a drill and they all broke in the gears the teeth just sheered off but thats a differnt story). pic below shows the perches bolted up but not welded so i can get the driveshaft angle.
Image
Image
next i just had to get some tires on to see how it looks is a little crooked as the front axle isnt dead level so it throws the back off a wee bit.
Image
Image
Image
next i tryed to get the drive shaft angle right but i only did it how i thought so i dont no if it is right, made the driveshaft so it is straight when it is sitting level on the ground.
Image
the next pic shows how off center the rear driveshaft is but i will just have to see if it will do after i get to drive it.
Image
the last pic shows that i tacked the perches on but as of yet i havent fully welded as if someone saw something that was wrong with the angle of the driveshaft then there might be some going back without starting all over again.
Image
well thats about all i did today, more will be done tomorrow, hopefully.

martin
User avatar
new2zukes
Hard Yaka
Posts: 761
Joined: Thu Sep 06, 2007 12:00 pm
Location: kerikeri northland

Re: hizuke project

Post by new2zukes »

UBZ wrote:Wow you certainly jumped right into into it.
Will be watching avidly as I plan to do this to my LWB this year.
What size tire are you planing on running? you will need 35's to get better clearance than a Zuk on 31's

You going to truss up the axle while your there?

Most people who do this conversion use a Prado rear axle as the pumpkin is offset like that Zuk one.
From what i have read the angle of the rear drive shaft , when using a standard hilux diff will cause quite severe drive line vibrations at road speeds. Not that that should bother a trailer sailor. But some thing to think about.

Does the hilux drive shaft have a slip yoke. You will need one as the diff will move backwards under compression.
I have seen a adapter plate used to join the hilux drive shaft to the zuk transfer. 12-16mm Circle Plate 8 holes. Offset the Lux shaft 45deg to the Zuk flange and all bolts should go through. Or you can drill new holes in the Zuk flange.

Keep it up mate

C.

ye i did jump in a little quick but i just thought that the axles had been sitting there for about 6 months so thought i should do something with them. i am going to start with 31s as the 1300 motor might strugle a little unless i put the rocklobster in it as i do alot of steep hill playing might have to offset my rims as the front rims hit on the tierod arms in the suspension dont want to go too big as i have just finished putting sides on my trailer and it wont fit if i reverse the centers. by truss up the axle you mean strengthen it? if so ye i might shove a bit of strength in there but i really want ground clearance more than strength as i dont do alot of rock crawling if any. might have to put a rear traction bar in somewhere but i have no clue on how to make one but im sure i can figure it out sometime. and yes the front hilux driveshaft that im using in the rear has a slip yoke and it is a long travel one that can be used for a shackle reversal. it has lots of universals if thats what they call them the things that make it turn round a corner when it spins so hopefully there will not be too much vibration, although all the info i have read people have said nothing about there being a problem.dont wuite know what you mean about the adapter plate thing but i no u can get a rockrat adapter or whatever they call it to offset the flange a little so it doesnt hit the transfer case nut but they are all running xj springs so they are a lil different. anyway thats all i can think of typing which is proberly too much but oh well.

thanks.

martin
User avatar
new2zukes
Hard Yaka
Posts: 761
Joined: Thu Sep 06, 2007 12:00 pm
Location: kerikeri northland

Re: hizuke project

Post by new2zukes »

well didnt get much done today but i got something done. first off i welded the rear spring perches on not the best welding in the world but i think it will do the job. here is a pic of it all welded up.
Image
Image
next i boxed in the ends of the perches.
Image

the next bit was to work out how to space out the rear to transfer case driveshaft, i decided to make a bit of steel 5 mm bigger all round than the driveshaft end then cut a hole in the middle to center the d-shaft then weld that piece to the transfer case flange so it doesnt or hopefully doesnt cause vibration. ive seen it done with a bit of alluminium but it wasnt welded to the transfer case flange which means it vibrated like hell as it wasnt centered to the transfer case just to the bit of alli. so in theory this way should work that im doing it as its fixed/welded.pics to show what i did so far.
Image
i didnt have a metal hole saw do i started it with a wooded one as i have heeps of them then drilled some small 2.5mm holes then hit it with the hammer then did some more bodging and then it was round, didnt even have a file so i used so sand paper and another drill. i know this is dodgy but it ment another 30 min trip to work.
Image
then i drilled the holes to 10mm as im using the same bolts that came off my sammy d-shaft the outline of the d-shaft flange is the inside on then where im going to cut it is the outside one so i have some meat to weld to.
Image
finaly i re drilled the rear diff flange holes as the holes in the d-shaft didnt match up as it is the front d-shaft going onto the rear diff flange. also i used 8mm bolts instead of 10 as if i used 10 there would be no steel on the diff flange to bolt onto.
tomorrow i think i will tackle the front diff as soon as i get the rear dif done.
Image
if anything looks like it wont work please say.

thanks

martin
User avatar
Heath
Hard Yaka
Posts: 3297
Joined: Thu Dec 12, 2002 12:00 pm
Location: Rolleston, Chch

Re: hizuke project

Post by Heath »

Looks good but the double cardan joint usually goes on the gearbox end and the pinion is pointed up towards the back of the gearbox. That way the greater angle is at the double joint. I could be wrong though as I havent done this myself.
User avatar
new2zukes
Hard Yaka
Posts: 761
Joined: Thu Sep 06, 2007 12:00 pm
Location: kerikeri northland

Re: hizuke project

Post by new2zukes »

oh ok but would it still work this way? i thought it would be the same angle on both ends so didnt think it would matter
User avatar
Heath
Hard Yaka
Posts: 3297
Joined: Thu Dec 12, 2002 12:00 pm
Location: Rolleston, Chch

Re: hizuke project

Post by Heath »

I guess with the offset rear diff it isnt possible to aim the pinion at the rear of the t-case. Dont know if there is a right or wrong way?
User avatar
new2zukes
Hard Yaka
Posts: 761
Joined: Thu Sep 06, 2007 12:00 pm
Location: kerikeri northland

Re: hizuke project

Post by new2zukes »

oh well if it causes a problem it will be back to the drawing board (thats if there was one hehe)
User avatar
new2zukes
Hard Yaka
Posts: 761
Joined: Thu Sep 06, 2007 12:00 pm
Location: kerikeri northland

Re: hizuke project

Post by new2zukes »

well didnt get much done atall today didnt even start on the front diff. got the rear driveshaft addapter plate sorted.
Image
then it was time to try turn the zuke round in the limited space i had so ended up using a rope on one end and a winch on the other to spin it round as the motor doesnt go atm. then got it back into the shed with some ratchet straps was a bit of a mission but it got there.
Image
then i didnt have much time left as i had to get the boat ready for tomorrows fish, so i took the battery out and took the bonet off was going to take the front wheel arches off but couldnt get the screws undone. will have to borrow the bosses impact driver.
Image
there prob wont be an update tomorrow as im goin fishing.

martin
User avatar
new2zukes
Hard Yaka
Posts: 761
Joined: Thu Sep 06, 2007 12:00 pm
Location: kerikeri northland

Re: hizuke project

Post by new2zukes »

oh well i forgot one thing i did, i made a few brackets up for the handbrake cable as the zuke one wont quite fit it a lil short, but i made it a bit too long so it wont pull the brake on.
Image
User avatar
new2zukes
Hard Yaka
Posts: 761
Joined: Thu Sep 06, 2007 12:00 pm
Location: kerikeri northland

Re: hizuke project

Post by new2zukes »

well went fishing so got home late this afternoon but managed to get the bolts undone on the front end. was a missions tryed using the air ratchet gun but just kept breaking screwdriver bits cus some silly bugger didnt design the bolt very well would have been alot easyer if they were normal bolts. got them undone with a hit with a hammer and a pair of pipe grips. found a fair bit of rust but what do u expect its a zuke.
Image
User avatar
adogg
Hard Yaka
Posts: 118
Joined: Fri May 25, 2007 12:00 pm
Location: Taupo

Re: hizuke project

Post by adogg »

id put the double cardan joint at the g/box end
http://www.4xshaft.com/driveline101.html
good build mate!!
yeah i own a few cruisers
hdj81
fj55
fj40
User avatar
new2zukes
Hard Yaka
Posts: 761
Joined: Thu Sep 06, 2007 12:00 pm
Location: kerikeri northland

Re: hizuke project

Post by new2zukes »

well got into the messy stuff today, pulled the steering apart took axles out and the grease in the steering nuckles were like oil it was liquidy. made a mess of the garage floor.
Image
spot the difference which is clean :) ran out of karo to finish off the other side.
Image
cleaned up most of the surface rust and mud on the housing should be alot lighter to drag around now and get it ready to bolt up.
Image
another week and a bit till i go back to work so should hopefully get it all done main problem will be trying to get the steering sorted
User avatar
new2zukes
Hard Yaka
Posts: 761
Joined: Thu Sep 06, 2007 12:00 pm
Location: kerikeri northland

Re: hizuke project

Post by new2zukes »

adogg wrote:id put the double cardan joint at the g/box end
http://www.4xshaft.com/driveline101.html
good build mate!!


thanks for the info m8 il put the double cardan at the t/case end when ive sorted the steering out, there was alot of info in that site got a bit technical for me but i got the picture.
User avatar
new2zukes
Hard Yaka
Posts: 761
Joined: Thu Sep 06, 2007 12:00 pm
Location: kerikeri northland

Re: hizuke project

Post by new2zukes »

well cleaned up the rest of the front end parts and put one together without grease so i remember how to get it back together when it gets there. pulled one of the calipers apart cleaned it all put it back together just fine then tryed to pull the other one apart and i just couldnt get the cup like things out. (no idea what they are called) can anyone help me out here? tryed pulling them out with some plyers will go down with a hit with a hammer lightly but wont come up have try twisting when i pull but its just too tight.
Image
Image
User avatar
coxsy
Hard Yaka
Posts: 5200
Joined: Tue Jun 20, 2006 12:00 pm
Location: mangere auckland

Re: hizuke project

Post by coxsy »

the cup things are pistons in cylinders just like a engine
89 safari, pto winch, 33x15 simexs. sliders,75mm lift . turbo intercoolered
User avatar
Heath
Hard Yaka
Posts: 3297
Joined: Thu Dec 12, 2002 12:00 pm
Location: Rolleston, Chch

Re: hizuke project

Post by Heath »

compressed air. Maybe a haynes manual might be a good investment. when you blow them out they may travel a long way so figure out some way of stopping them. if you leave them in the calliper mount then place a bit of wood infront of them and when they blow out they jam against the bit of wood (which is held in place by the mount)
User avatar
new2zukes
Hard Yaka
Posts: 761
Joined: Thu Sep 06, 2007 12:00 pm
Location: kerikeri northland

Re: hizuke project

Post by new2zukes »

hi health i do have a haynes manuel for the sammy but didnt think to look in there (silly me:p) but will try that tomorrow i did try compressed air today but didnt block the other holes off enough (there were too many leaks for it to pressurise enough) blew compressed air down one side and 4got about the other and s**t went everywhere all over the roof hehehe oh well teaches me to not jump in and pull the trigger too fast:)
User avatar
new2zukes
Hard Yaka
Posts: 761
Joined: Thu Sep 06, 2007 12:00 pm
Location: kerikeri northland

Re: hizuke project

Post by new2zukes »

well got the front diff in today at last:)
took the sammy diffs out.
Image
put the hilux one in to get the mesurements for the new center holes.
Image
just squared line across on both spring and pad and then made sure the diff was centered then put a 8mm drill bit in the center pin hole to mark where to drill the hole.
Image
then drilled the holes
Image
then bolted it up with the factory hilux u bolts.
Image
got the hubs etc on but couldnt get the last bit in its the circle clip in the photo does anyone know how to get this in there is no holes in it just a round clip with a gap. also the cv shaft has a little movement on it so that if u push it in you cant get the clip on, is this normal?
Image
then got the wheels on couldnt just bolt them up i had to space them out as the steering arms hit on the rims.
Image
then flexed it up a bit this is as high as the jack would go
Image
then twisted it up a bit
Image
also i was thinking would it be posible to move the left steering arm to the right and vice versa so the rims will clear the arms? i will be chopping the j arm off the drivers side. pic of the 2 arms the are bent slighly outwards and if i reversed them they would both be bent slightly inwards will be modifying the draglink or tierod, which ever one keeps both wheels pointing straight
Image
Image

cheers

martin
Post Reply

Return to “Projects / Mod's”