SJ413 Ute Build
-
Dr_PC
- Hard Yaka
- Posts: 797
- Joined: Thu Feb 13, 2003 12:00 pm
- Location: Moerewa Bay of Islands
- Contact:
Re: SJ413 Ute Build
Keep at it it will be ready for Christmas
-
PuddleJumper
- Hard Yaka
- Posts: 204
- Joined: Fri Mar 03, 2006 12:00 pm
Re: SJ413 Ute Build
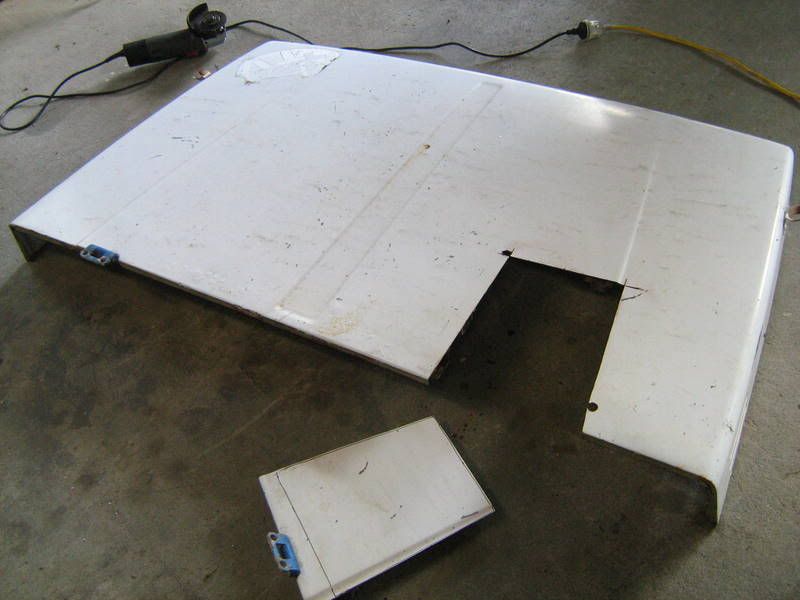
Finally finished my tray off!
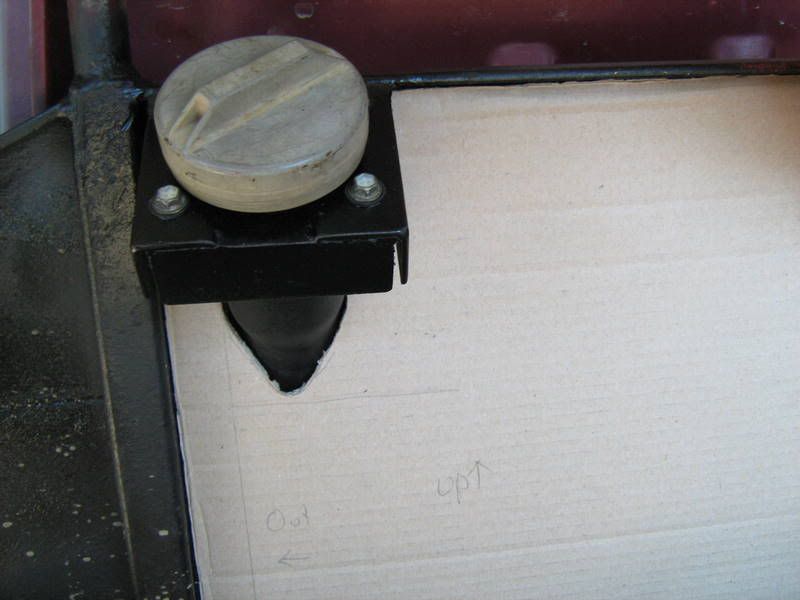
I needed a fuel filler and the only place i could was right behind the cab. After having no joy then trying to find fuel filler pipe i decided the next best thing was to use steel tube then use the original fuel filler pipe to join it all together.
Having a look at my scrap steel bin nothing really jumped out at my then i remembered i had two roll cages just sitting outside doing nothing .... So a quick measure and they are the perfect diameter and the piece i was going to use had the perfect curve to it too - After a few minutes with a angle grinder..
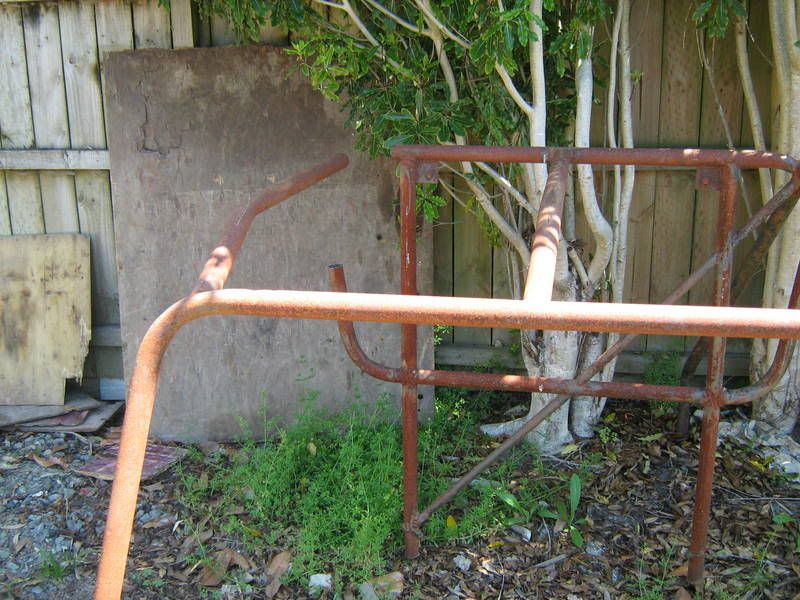
Gave it a clean up then a bit of paint. The pipe has a wall thick ness over over 3mm so it sould last a while. Also made a mounting point for the Escudo fuel filler to sit.
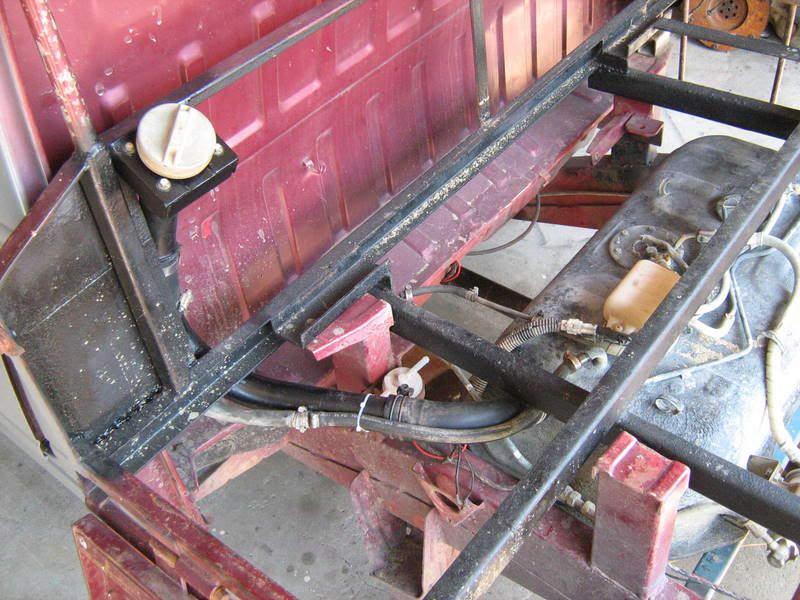
With it all in place i made a cardboard template to make fitting the new ply deck easier.
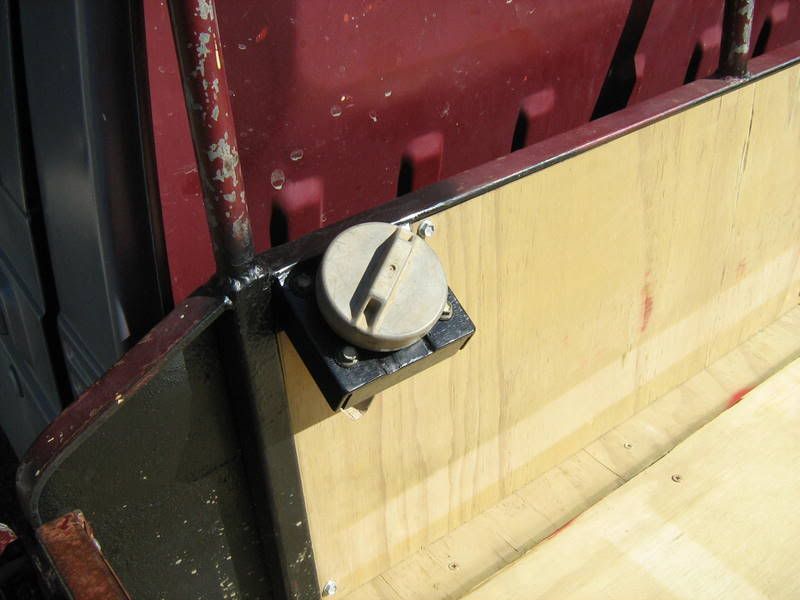
Then traced this onto the wood
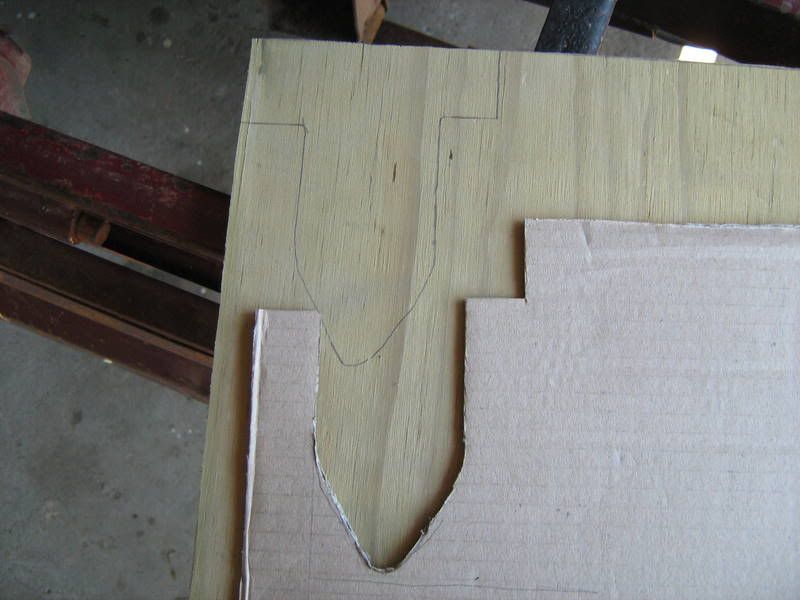
Came out OK in the end.
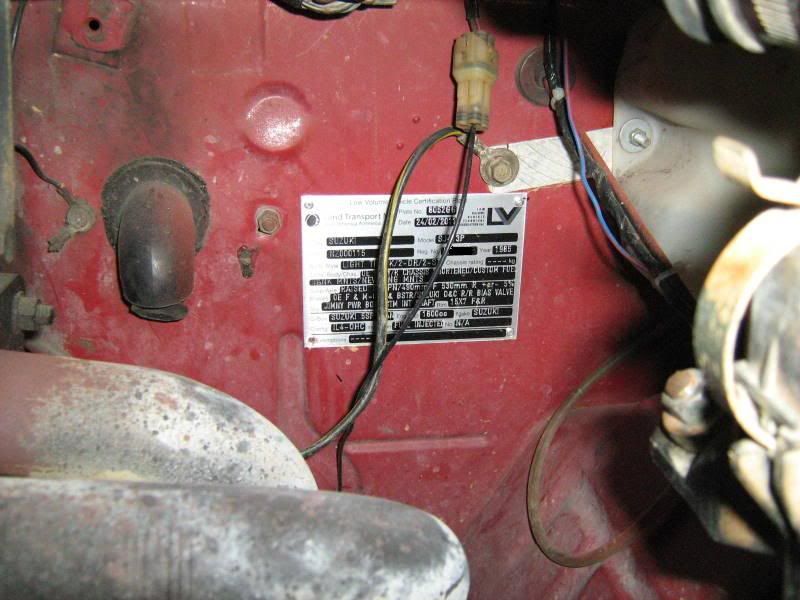
Now the deck has been shortened by around 650mm i needed to shorten the wiring loom aswell. I pinched some connector plugs from the Escudo doner truck and made a loom.

Now that thats done I need to sort the steering out...
I needed a fuel filler and the only place i could was right behind the cab. After having no joy then trying to find fuel filler pipe i decided the next best thing was to use steel tube then use the original fuel filler pipe to join it all together.
Having a look at my scrap steel bin nothing really jumped out at my then i remembered i had two roll cages just sitting outside doing nothing
Gave it a clean up then a bit of paint. The pipe has a wall thick ness over over 3mm so it sould last a while. Also made a mounting point for the Escudo fuel filler to sit.
With it all in place i made a cardboard template to make fitting the new ply deck easier.
Then traced this onto the wood
Came out OK in the end.
Now the deck has been shortened by around 650mm i needed to shorten the wiring loom aswell. I pinched some connector plugs from the Escudo doner truck and made a loom.
Now that thats done I need to sort the steering out...
-
Dr_PC
- Hard Yaka
- Posts: 797
- Joined: Thu Feb 13, 2003 12:00 pm
- Location: Moerewa Bay of Islands
- Contact:
Re: SJ413 Ute Build
Carboard and Cor-flute the best friend a 4 wheeler can have
-
PuddleJumper
- Hard Yaka
- Posts: 204
- Joined: Fri Mar 03, 2006 12:00 pm
Re: SJ413 Ute Build
Powersteering time!
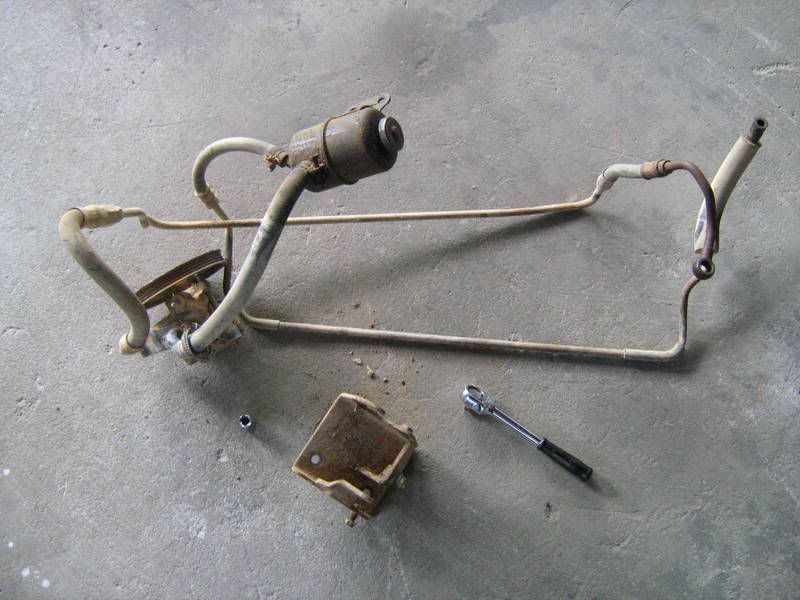
I've fitted P/S to my last Zuk using a Escudo box and a mitsi pump i think - I still have this complete setup in my parts deparment somewhere
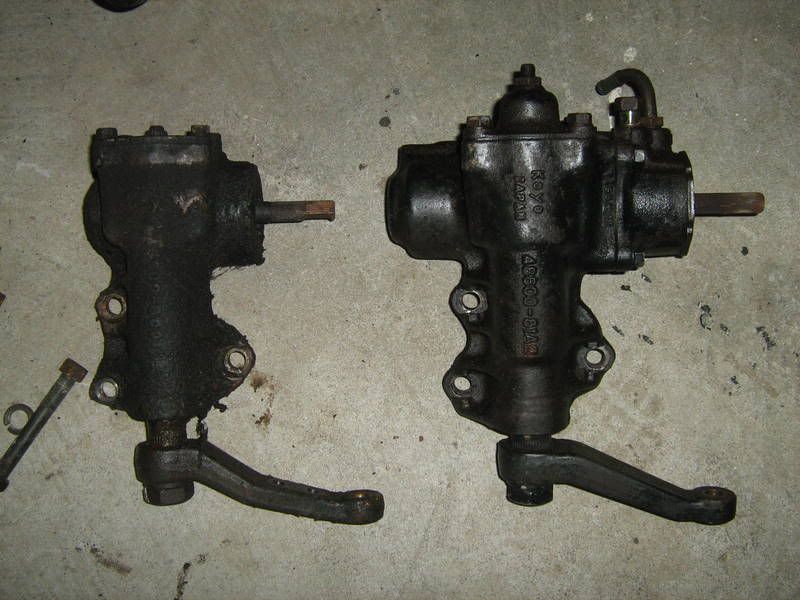
This time I thought of using something bolt on so I picked up a '99 Jimny Steering box a wee while back fairly cheaply.

I'm also reusing the pump and bracketry from the Escudo.
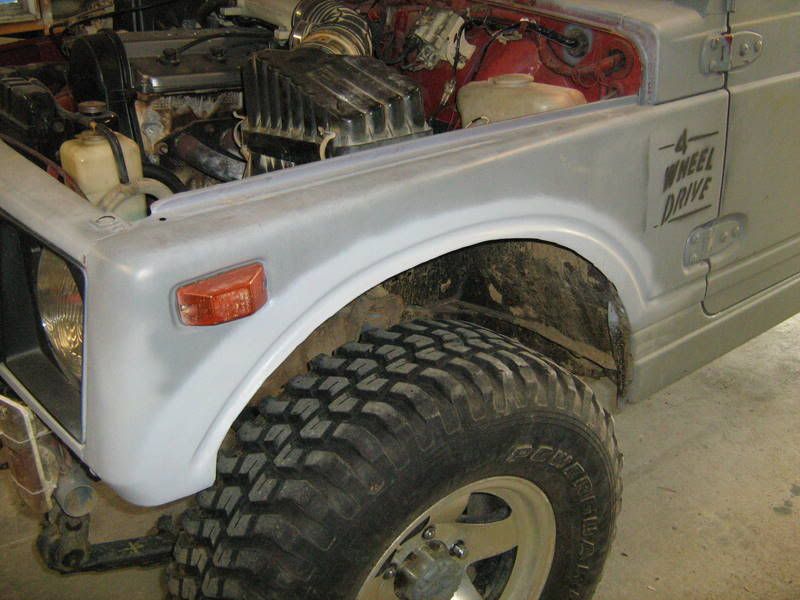
The Jimny box is bigger in dimensions to the 413 but bolts straight on and has a slightly shorter pitman arm which will come in handy soon..
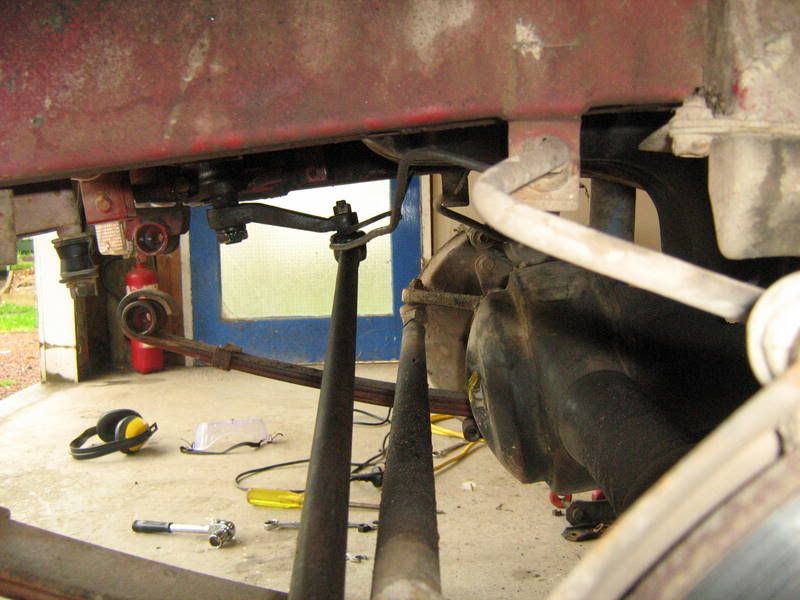
The one on the right is the Jimny Box
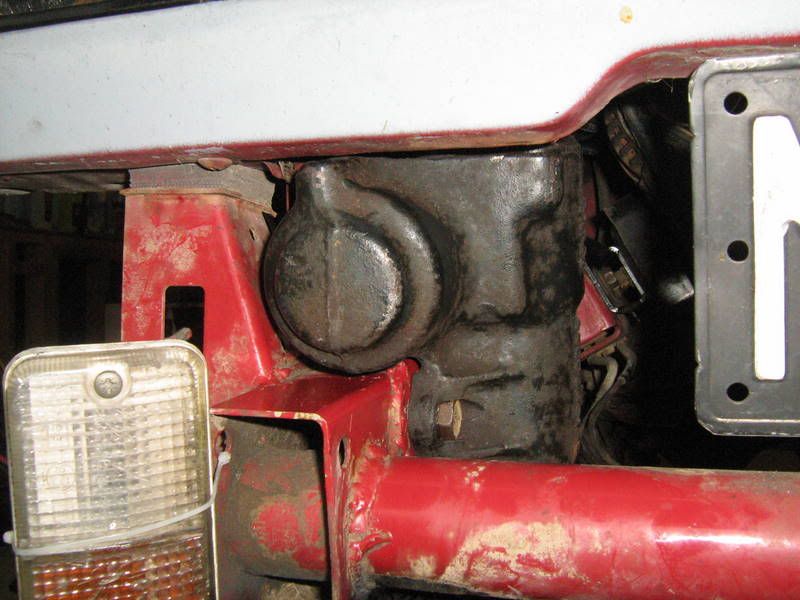
As you can see from the picture the Jimny box is a great fit! It only touches the inner gaurd (i just bolted the box in and the inner gaurd moved out about 5mm - nothing to worry about)
Other than that it clears everything
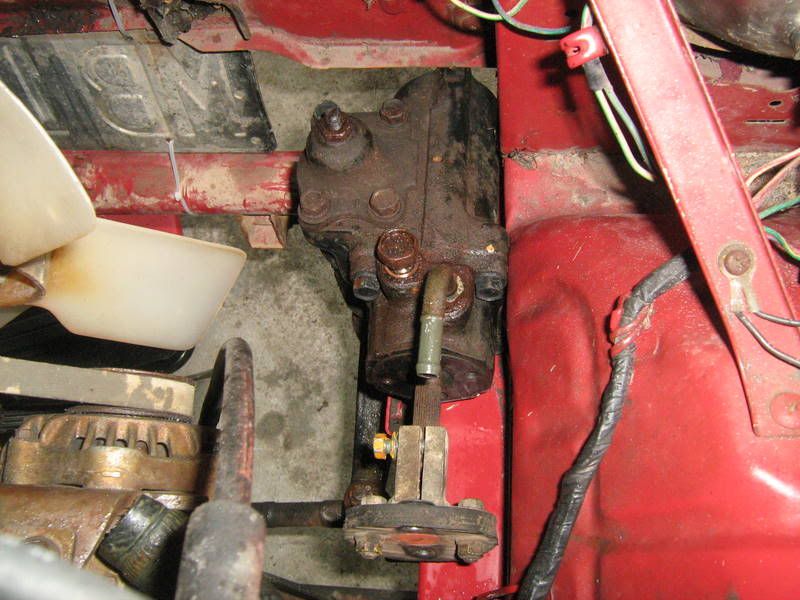
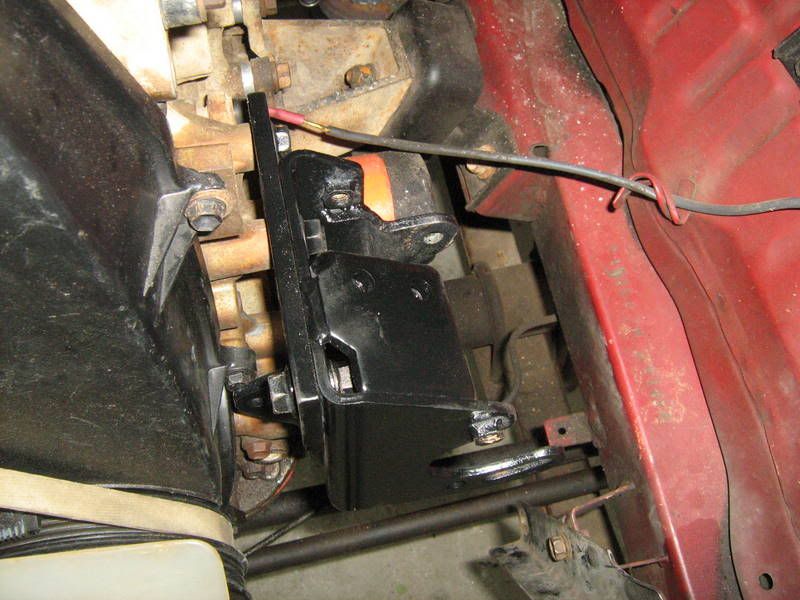
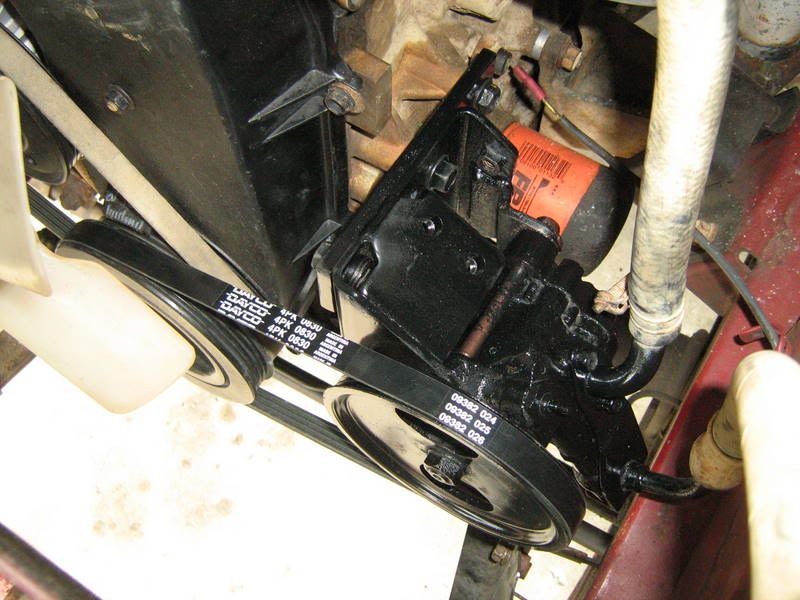
With that fitted i needed to mount the P/S pump.
The pump wont fit in its original place on the side of the Vit motor as it would hit the inner chassis rail so i moved the bracket up to the next set of mounting holes on the side of the block. I then found i need to put in a spacer at the top as the mounting holes are of a different height. Also the front of the factory P/S bracket has a tab at the front to stop it from flexing. So the easiest and simplest way i could come up with was a 8mm flat plate i had lying around which spaced it out perfecty and also gave lots of rigidity the the bracket
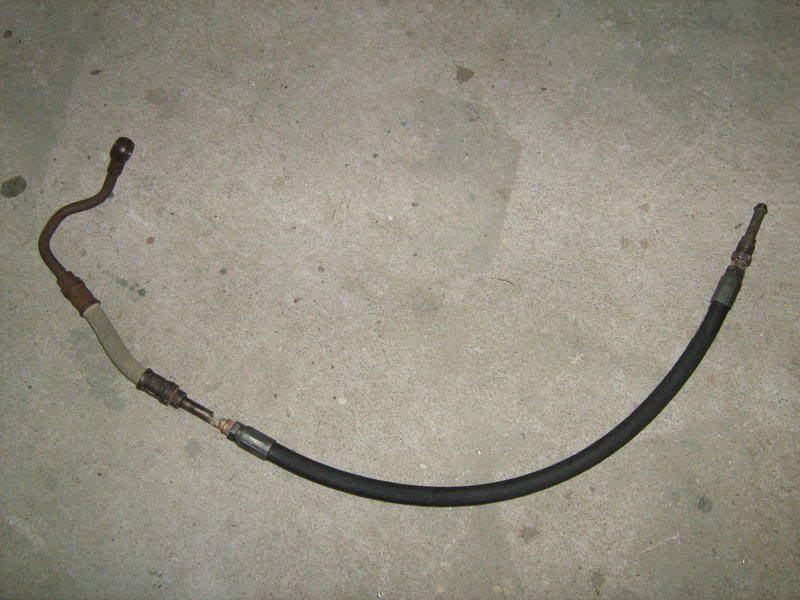
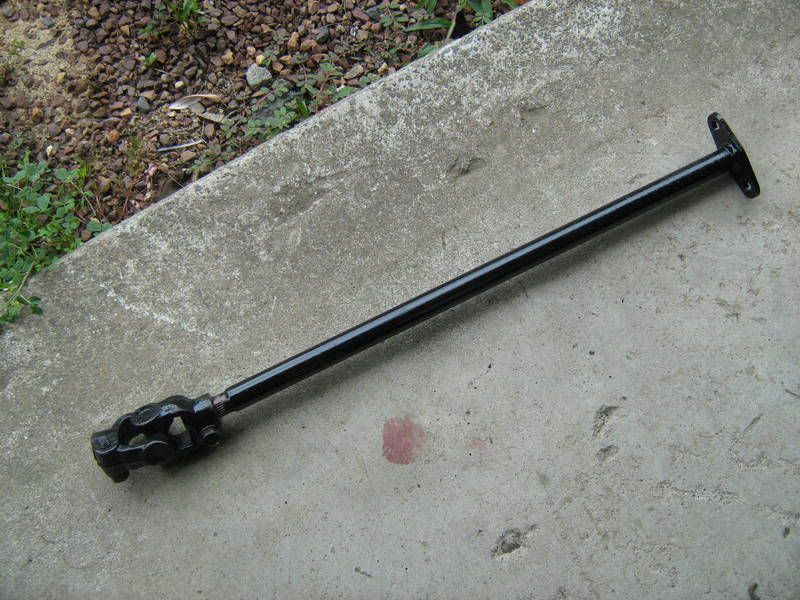
While all this was happening I'd had the Vitara High pressure hose modified at a hydraulics place and I'd also taken the steering shaft (from the firewall to the box) down to Bernie at JK Racing to have him respline it. This was needed as the box is longer.
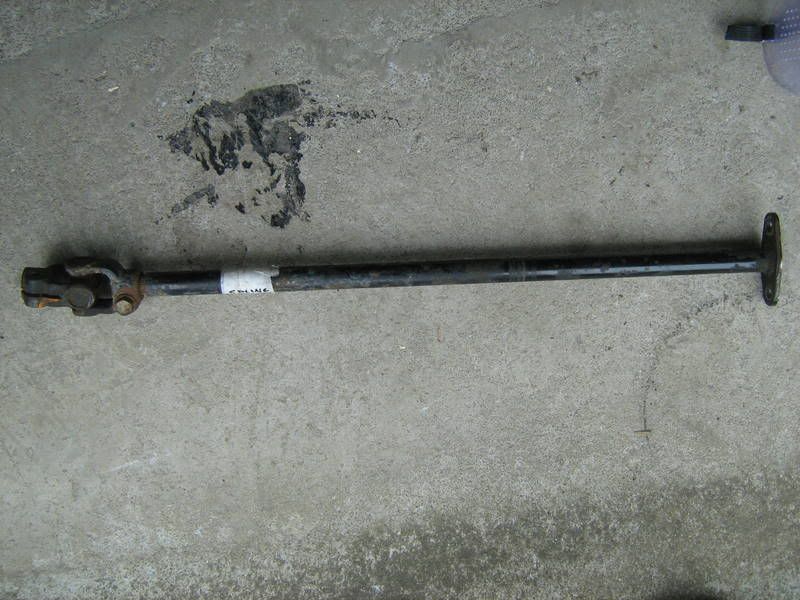
With this done i cut off the excess..
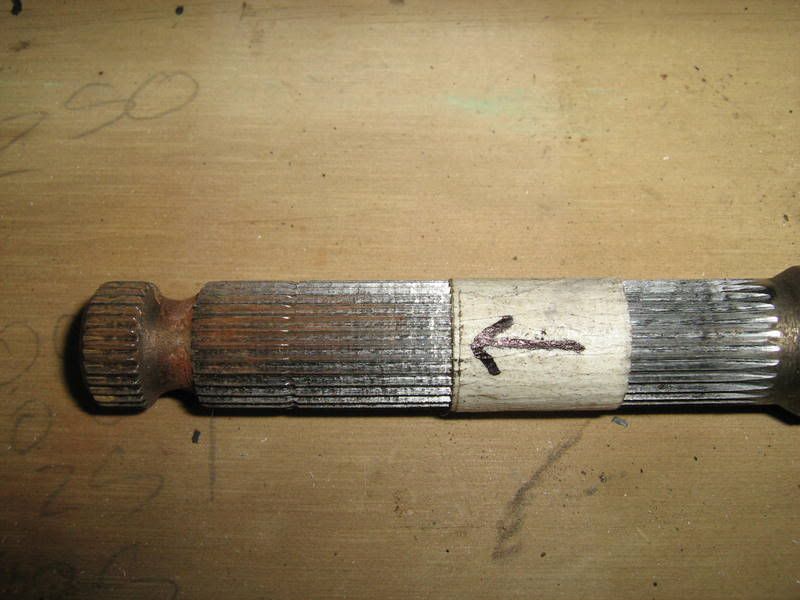
Then a bit of paint and its ready to go!
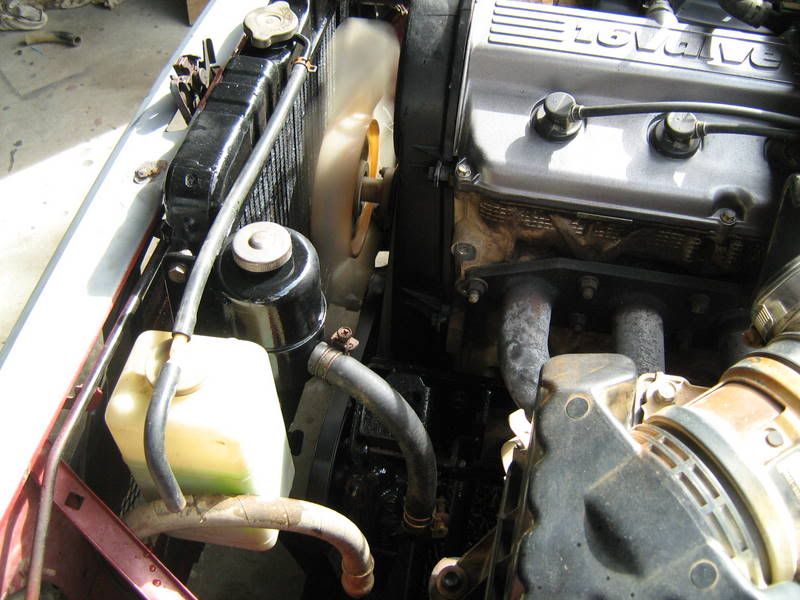
I mounted the resivour on the radiator, attached the P/S belt then added some oil. Once all the fittings were checked i started it up and bleed the system (just pouring the oil into the resovour oil the level dropped after turn the wheel lock to lock a few times)
The end result is a excellent feel through the wheel with it not being overly light which can be the case with using other boxs.
Well worth the effort of putting this in
I've fitted P/S to my last Zuk using a Escudo box and a mitsi pump i think - I still have this complete setup in my parts deparment somewhere
This time I thought of using something bolt on so I picked up a '99 Jimny Steering box a wee while back fairly cheaply.
I'm also reusing the pump and bracketry from the Escudo.
The Jimny box is bigger in dimensions to the 413 but bolts straight on and has a slightly shorter pitman arm which will come in handy soon..
The one on the right is the Jimny Box
As you can see from the picture the Jimny box is a great fit! It only touches the inner gaurd (i just bolted the box in and the inner gaurd moved out about 5mm - nothing to worry about)
Other than that it clears everything
With that fitted i needed to mount the P/S pump.
The pump wont fit in its original place on the side of the Vit motor as it would hit the inner chassis rail so i moved the bracket up to the next set of mounting holes on the side of the block. I then found i need to put in a spacer at the top as the mounting holes are of a different height. Also the front of the factory P/S bracket has a tab at the front to stop it from flexing. So the easiest and simplest way i could come up with was a 8mm flat plate i had lying around which spaced it out perfecty and also gave lots of rigidity the the bracket
While all this was happening I'd had the Vitara High pressure hose modified at a hydraulics place and I'd also taken the steering shaft (from the firewall to the box) down to Bernie at JK Racing to have him respline it. This was needed as the box is longer.
With this done i cut off the excess..
Then a bit of paint and its ready to go!
I mounted the resivour on the radiator, attached the P/S belt then added some oil. Once all the fittings were checked i started it up and bleed the system (just pouring the oil into the resovour oil the level dropped after turn the wheel lock to lock a few times)
The end result is a excellent feel through the wheel with it not being overly light which can be the case with using other boxs.
Well worth the effort of putting this in
-
PuddleJumper
- Hard Yaka
- Posts: 204
- Joined: Fri Mar 03, 2006 12:00 pm
Re: SJ413 Ute Build
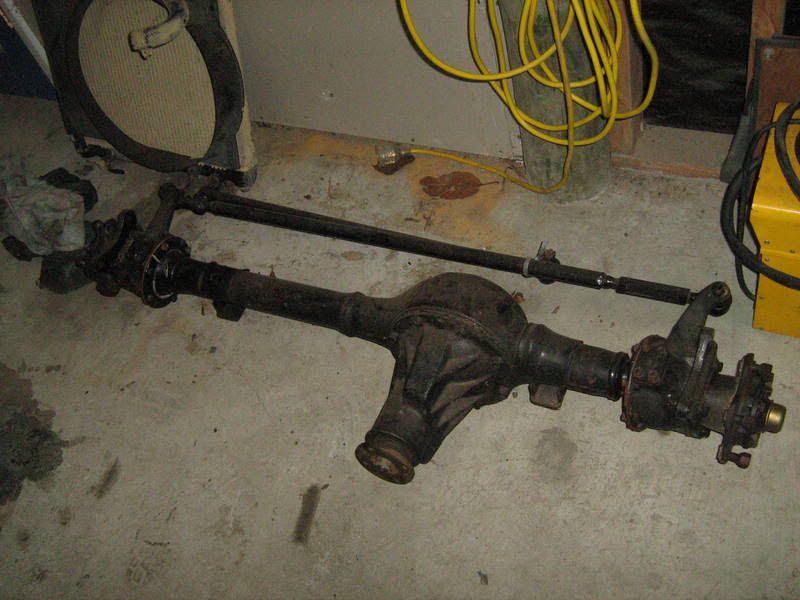
Santa bought me some goodies! 

40mm of lift over standard which should make a big difference as the original springs are almost inverted...
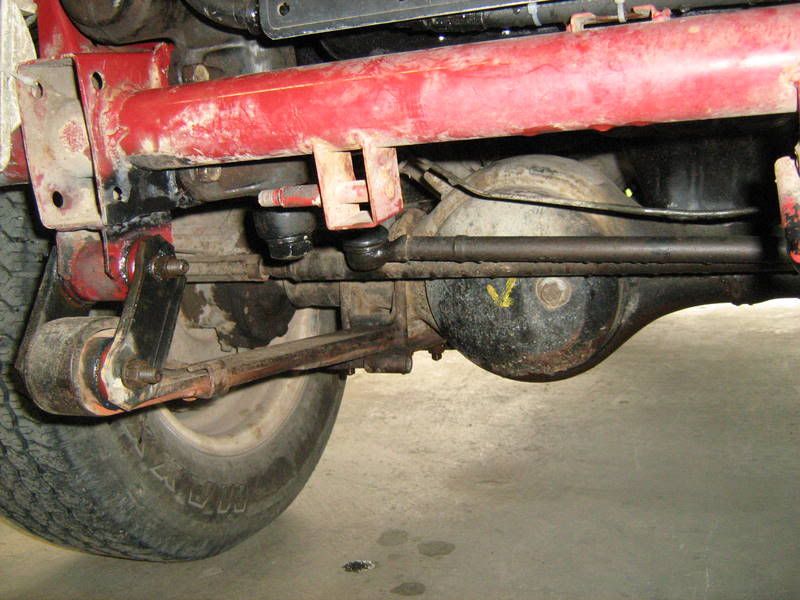
So out with the front diff for a start. I was in luck for a change - The previous owner must have swapped out the suspension bushes not long before i bought it so they didnt need replacing.

Now you may remember what i said about what a good thing the Jimny P/S box has a shorter pitman arm - This allows me to push the front diff forward which gives to good bonuses. The first being i wont have to trim much if any of the firewall and the second is a slightly better approch angle. I figured 16mm would be good as this still allows for clearence between the draglink balljoint and the tierod.
I fully rebuilt a complete front end about a year ago so i figured i'd use this as all the bearing and seals have been done and it was clean
So i redrilled the spring perch holes and filled in the original ones.

All the springs were put in now i need to get some new shocks as the original ones on there are to short now (the rears are almost topped out at rest )
)
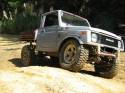
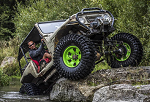
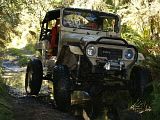
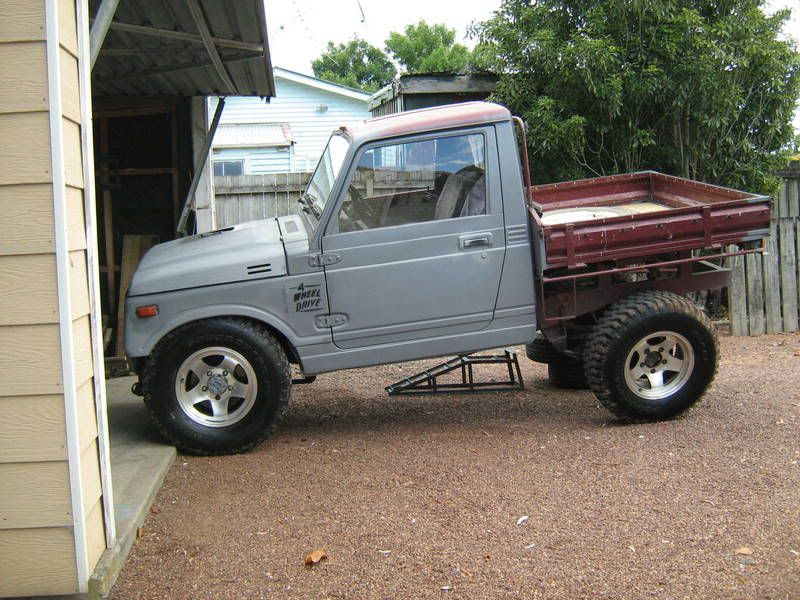
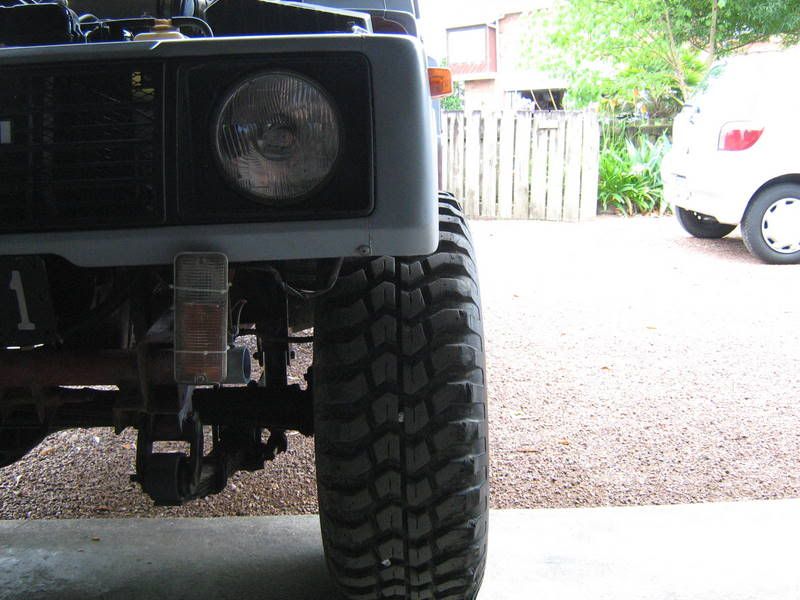
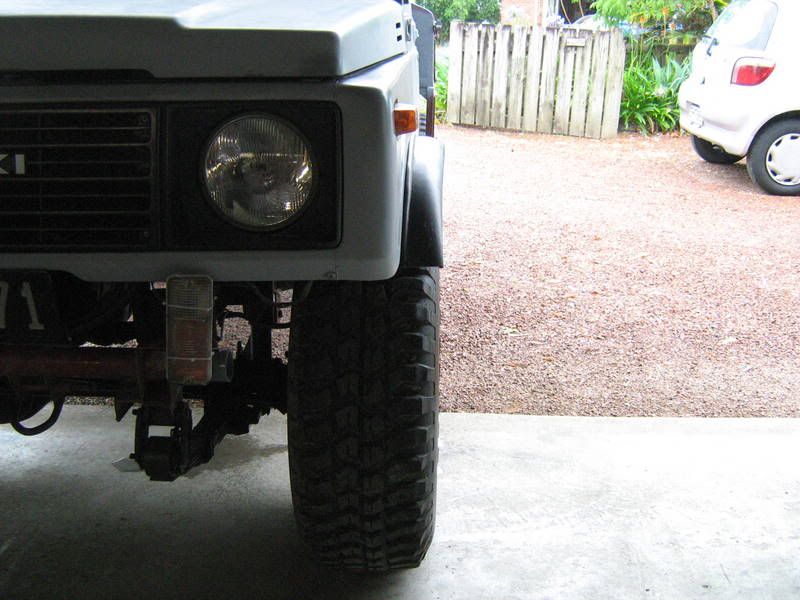
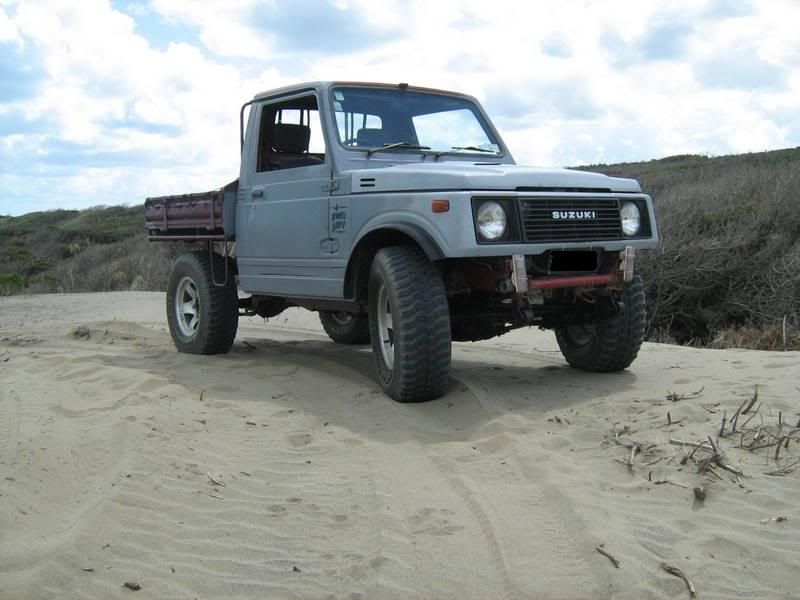
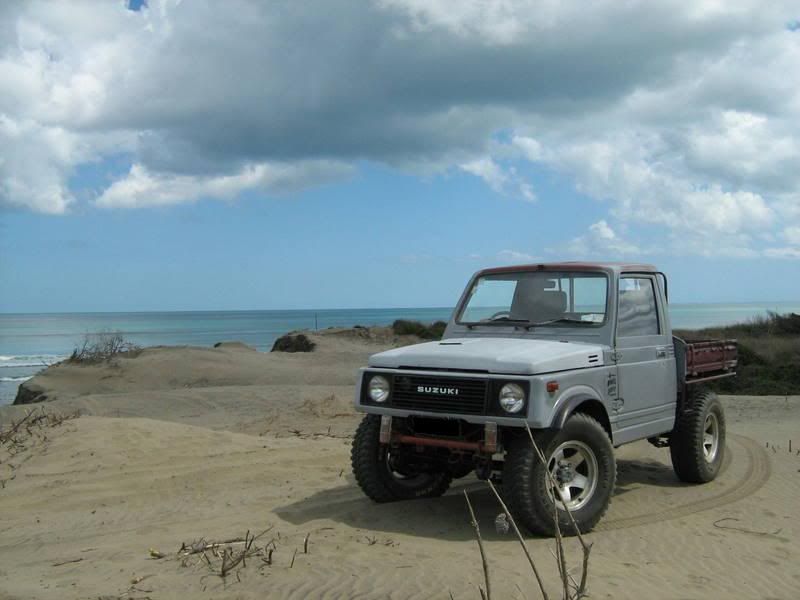
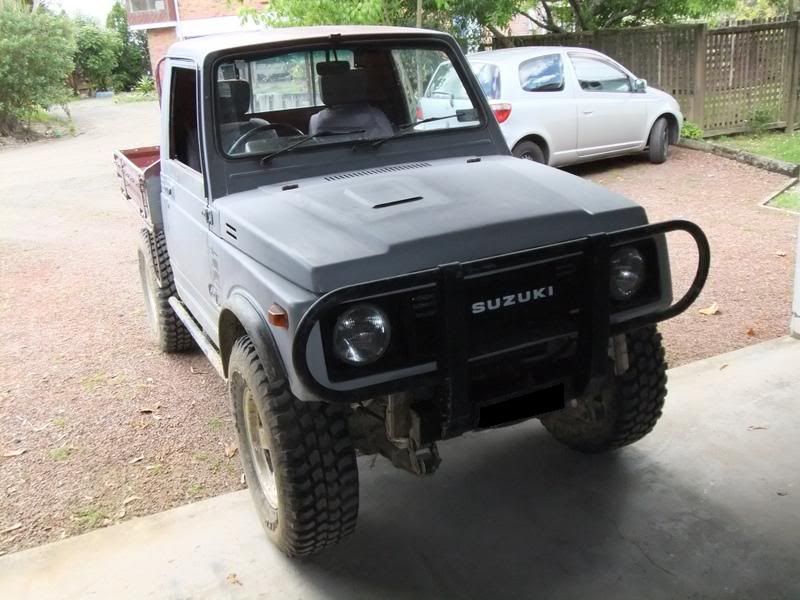
With all this new found room i could finally put my bigger wheels on.
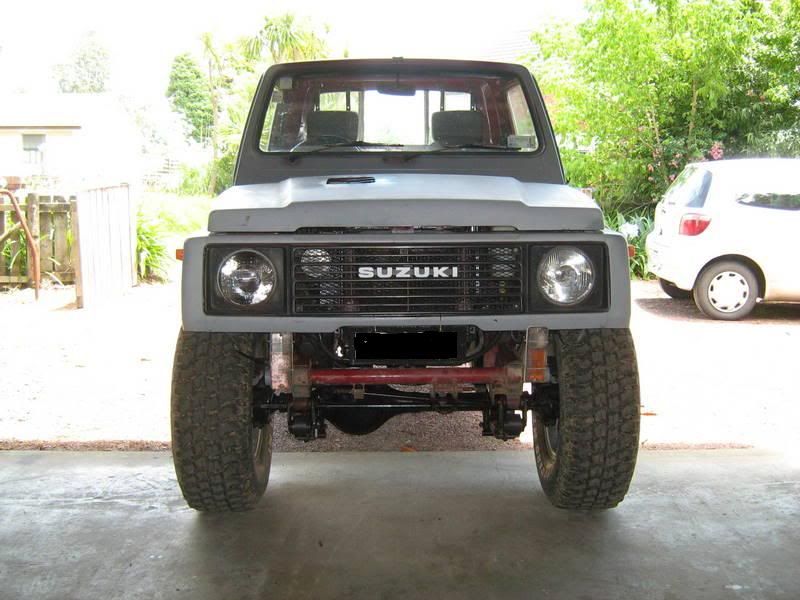
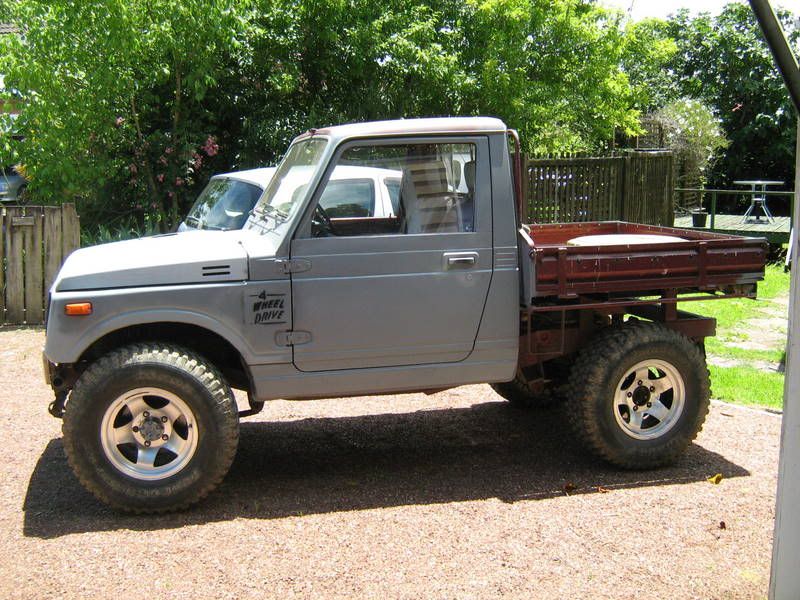
What a difference a set of wheels can make! Its almost looking like a proper one
40mm of lift over standard which should make a big difference as the original springs are almost inverted...
So out with the front diff for a start. I was in luck for a change - The previous owner must have swapped out the suspension bushes not long before i bought it so they didnt need replacing.
Now you may remember what i said about what a good thing the Jimny P/S box has a shorter pitman arm - This allows me to push the front diff forward which gives to good bonuses. The first being i wont have to trim much if any of the firewall and the second is a slightly better approch angle. I figured 16mm would be good as this still allows for clearence between the draglink balljoint and the tierod.
I fully rebuilt a complete front end about a year ago so i figured i'd use this as all the bearing and seals have been done and it was clean
So i redrilled the spring perch holes and filled in the original ones.
All the springs were put in now i need to get some new shocks as the original ones on there are to short now (the rears are almost topped out at rest
With all this new found room i could finally put my bigger wheels on.
What a difference a set of wheels can make! Its almost looking like a proper one

Re: SJ413 Ute Build
bloody hell its looking good. looking forward to seeing it on a run soon.
good job
good job
Lubrication Specialist
Lubrication Engineers
www.lubeng.com.au lincoln@lubengnz.co.nz
Lubrication Engineers
www.lubeng.com.au lincoln@lubengnz.co.nz
-
PuddleJumper
- Hard Yaka
- Posts: 204
- Joined: Fri Mar 03, 2006 12:00 pm
Re: SJ413 Ute Build
lincooln wrote:bloody hell its looking good. looking forward to seeing it on a run soon.
good job
Yeah its getting there.... Still got a external cage, Rear mounted winch and other bits to go yet then its needs a cert
-
niblik
- Sausage Shack
- Posts: 3307
- Joined: Wed May 03, 2006 12:00 pm
- Location: erm.. out in the shed for a mo...
Re: SJ413 Ute Build
thats a grouse lookin wee zook guy.. coolies.. aesthetically very balanced and looks like a wee toughie..
are ya goin to make a front bar at all? i'd perhaps suggest ya make plans to move those front indicators away from being ya first point of bash? which ya probably already have thought..
before ya go for cert, ya considered doin a shackle reversal on those front springs?
well done on it thus far..
are ya goin to make a front bar at all? i'd perhaps suggest ya make plans to move those front indicators away from being ya first point of bash? which ya probably already have thought..
before ya go for cert, ya considered doin a shackle reversal on those front springs?
well done on it thus far..
-
PuddleJumper
- Hard Yaka
- Posts: 204
- Joined: Fri Mar 03, 2006 12:00 pm
Re: SJ413 Ute Build
niblik wrote:thats a grouse lookin wee zook guy.. coolies..
are ya goin to make a front bar at all? i'd perhaps suggest ya make plans to move those front indicators away from being ya first point of bash? which ya probably already have thought..
before ya go for cert, ya considered doin a shackle reversal on those front springs?
well done on it thus far..
Thanks! Yes I will be building bull/Side bars and a exo cage. The indicators will more than likley be changed for some other units and relocated somewhere safe. I wanna try and protect the panel work as much as possible to keep it upto WOF standards
I'll be passing on a shackel reversal at this stage - Maybe later on down the track when i get itchy fingers (though coil overs maybe nice too)
-
PuddleJumper
- Hard Yaka
- Posts: 204
- Joined: Fri Mar 03, 2006 12:00 pm
Re: SJ413 Ute Build
badnuz wrote:looking oh so cool
Thanks Euan! - Thanks for the stubby holder and opener too
-
PuddleJumper
- Hard Yaka
- Posts: 204
- Joined: Fri Mar 03, 2006 12:00 pm
Re: SJ413 Ute Build
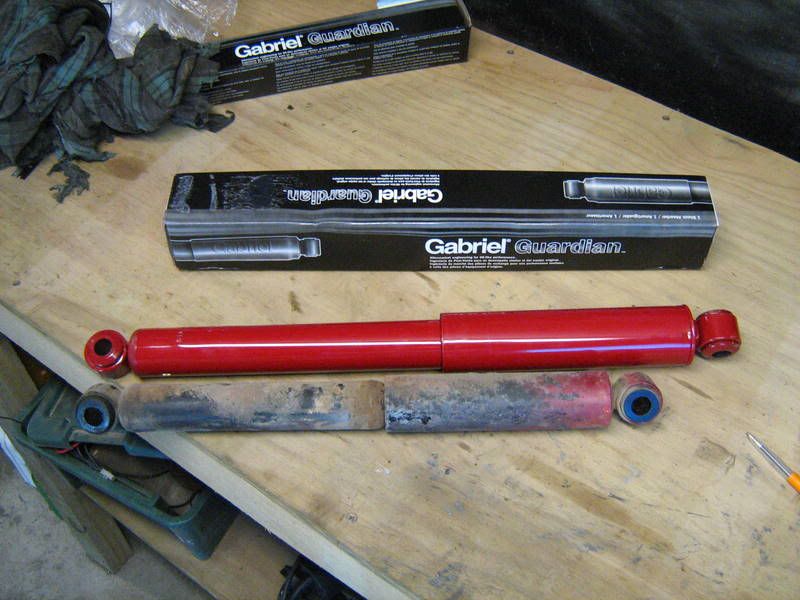
So now with the new springs in place for a little while and a couple of drives around to settle them in it was time to fit some new shocks. I've taken 2 leaves out of the rear spring pack as it was sitting a bit high in the rear and at the moment and theres not a lot of weight there to.
After lots of reading I ended up getting some Gabrial Hilux shocks for the rear which are 50mm longer in extension. Heres a comparo of the old & new.
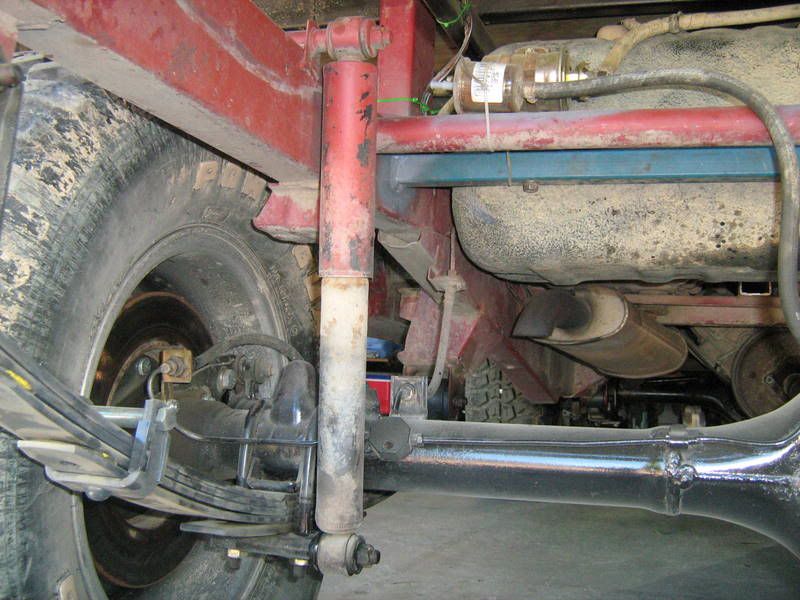
Heres the original on the vehicle..
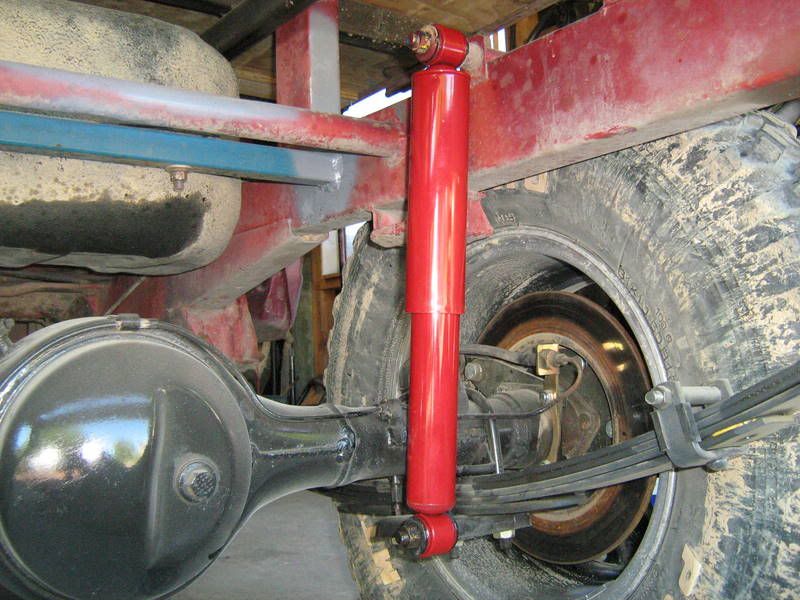
and the new
So with a longer shock this also means a longer compressed length - Approx 30mm so i made some 40mm extended bumpstops.
I still need to get some new shocks for the front - This time rear VS Commodore wagon shocks are meant to be ok.
Again I'll need to make bump stop extension for them to.
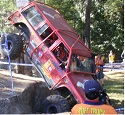
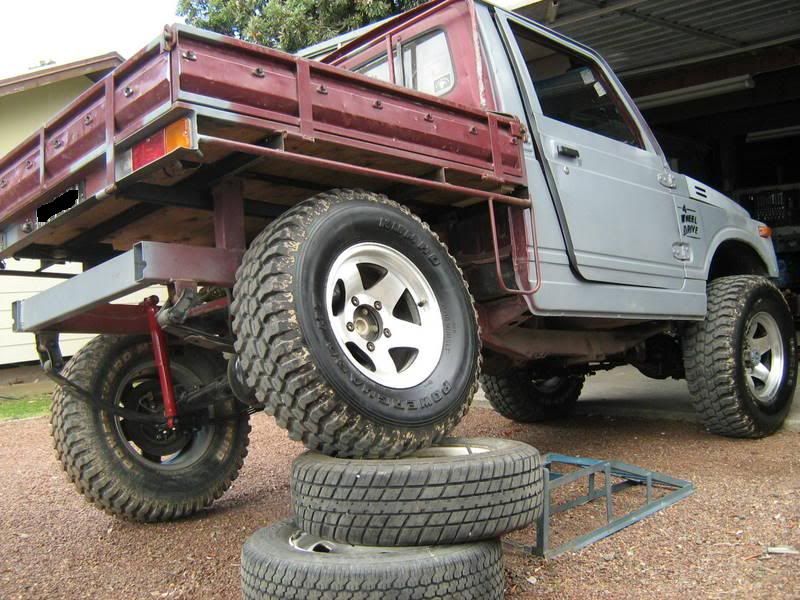
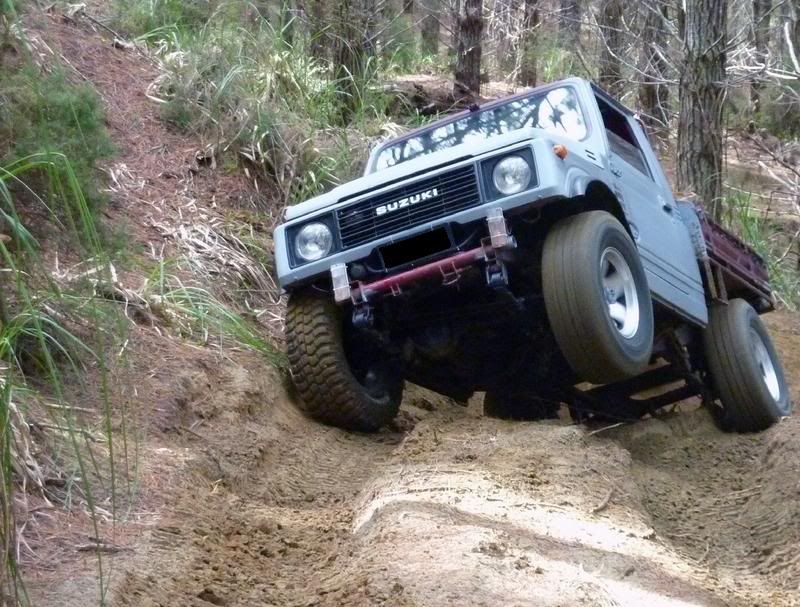
Heres a few flex pics (or lack of
 )
)
After lots of reading I ended up getting some Gabrial Hilux shocks for the rear which are 50mm longer in extension. Heres a comparo of the old & new.
Heres the original on the vehicle..
and the new
So with a longer shock this also means a longer compressed length - Approx 30mm so i made some 40mm extended bumpstops.
I still need to get some new shocks for the front - This time rear VS Commodore wagon shocks are meant to be ok.
Again I'll need to make bump stop extension for them to.
Heres a few flex pics (or lack of
-
niblik
- Sausage Shack
- Posts: 3307
- Joined: Wed May 03, 2006 12:00 pm
- Location: erm.. out in the shed for a mo...
Re: SJ413 Ute Build
great stuff.. looks like ya headin the right direction..
just one thing..
dont use commodore shocks fella.. i know they have the right lengths and good travel etc, but they wont stand up to the demands of 4wdin and the like. i know your vehicle is light etc, but the valving etc in the shock wont stand the punishment for long..
go for a more trusted brand that is made to do the offroadin stuff..
Re: SJ413 Ute Build
Wow it is starting to get there and you have done a great job looking good, hope to see you on a club run soon.
Ruben
Ruben
1997 Isuzu Mu, 3.1TD, 5sp Manual.
-
PuddleJumper
- Hard Yaka
- Posts: 204
- Joined: Fri Mar 03, 2006 12:00 pm
Re: SJ413 Ute Build
niblik wrote:great stuff.. looks like ya headin the right direction..
just one thing..
dont use commodore shocks fella.. i know they have the right lengths and good travel etc, but they wont stand up to the demands of 4wdin and the like. i know your vehicle is light etc, but the valving etc in the shock wont stand the punishment for long..
go for a more trusted brand that is made to do the offroadin stuff..
Thanks! All very true but I'll think they'll do for the time being.. I just want to get it certed and start driving it - I can swap them out later on down the track (so to speak
-
PuddleJumper
- Hard Yaka
- Posts: 204
- Joined: Fri Mar 03, 2006 12:00 pm
Re: SJ413 Ute Build
Drurban wrote:Wow it is starting to get there and you have done a great job looking good, hope to see you on a club run soon.
Ruben
Thanks Ruben. Yeah not to far away with it now...
-
PuddleJumper
- Hard Yaka
- Posts: 204
- Joined: Fri Mar 03, 2006 12:00 pm
Re: SJ413 Ute Build
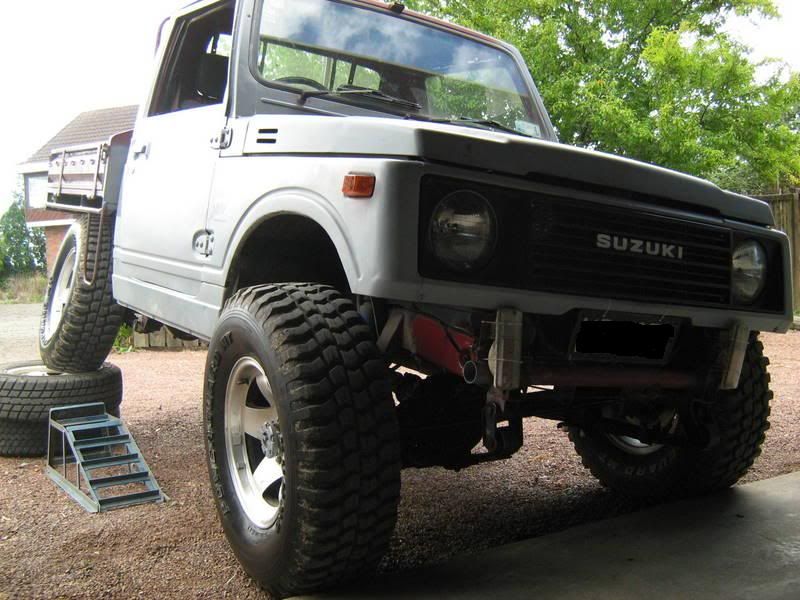
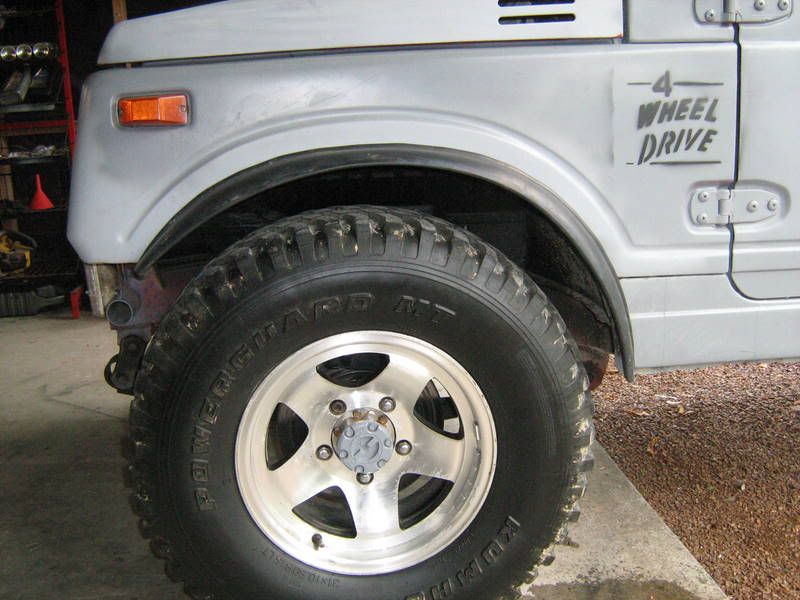
Did a bit more over the weekend. I'm running out of things to do so i needed to sort a couple of small jobs out before its gets certified then WOFed. First it'll need some flares on the front gaurds as the tyres stick out a bit to much.
So into my parts department again and i found some old flexy flares..
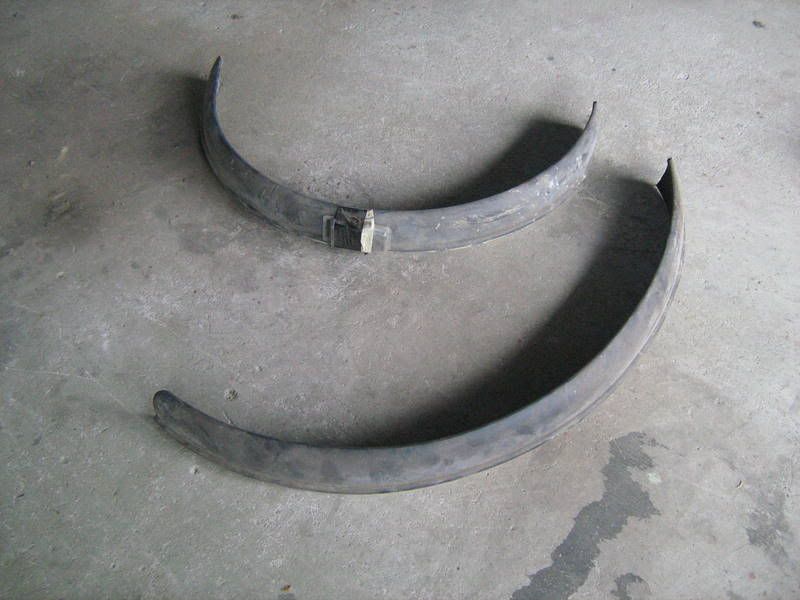
A bit of a clean up then i screwed them on. I needed to shorten them a little with a stanley knife.
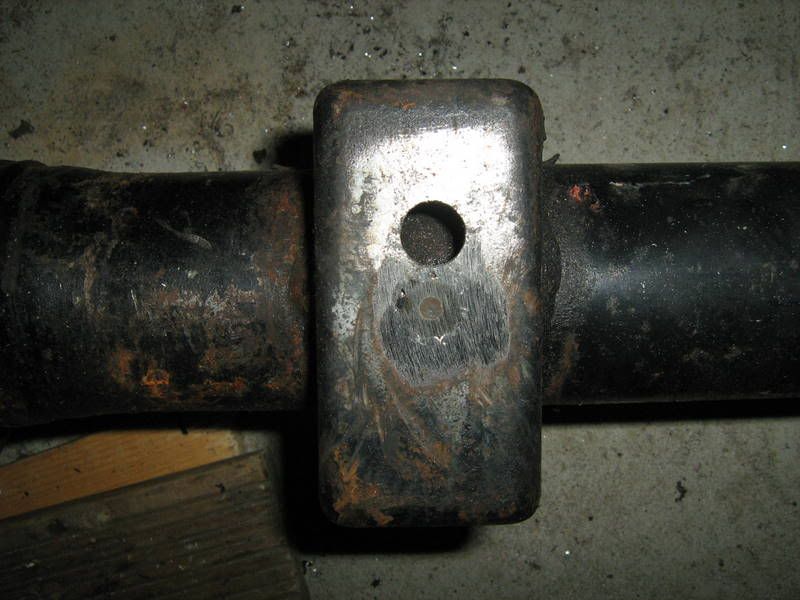
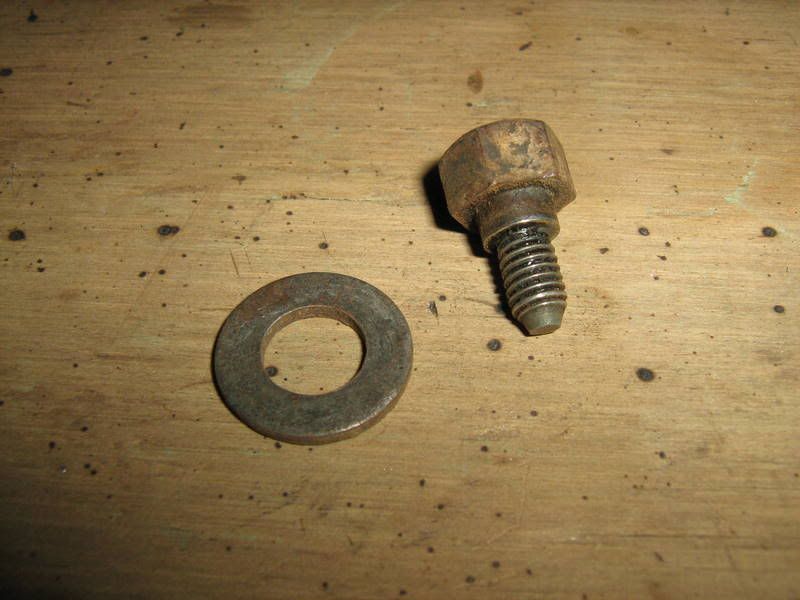
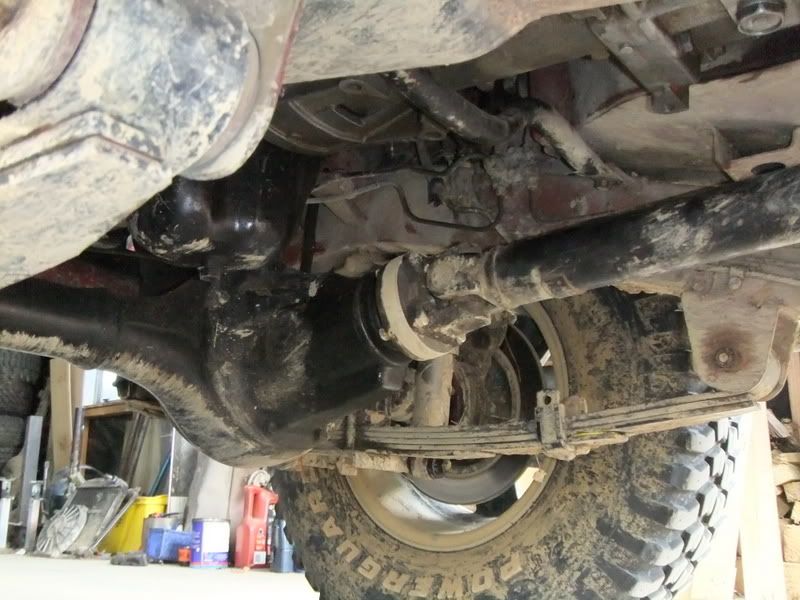
With that done i also needed to stop the inside tyre wall rubbing on the leaf spring at full lock. Was only just touching so with a bit of thinking and staring at the problem the easiest solution was this...
Remove one of the swivel hub retaining bolts and find a washer.
Weld washer to the back of the bolt
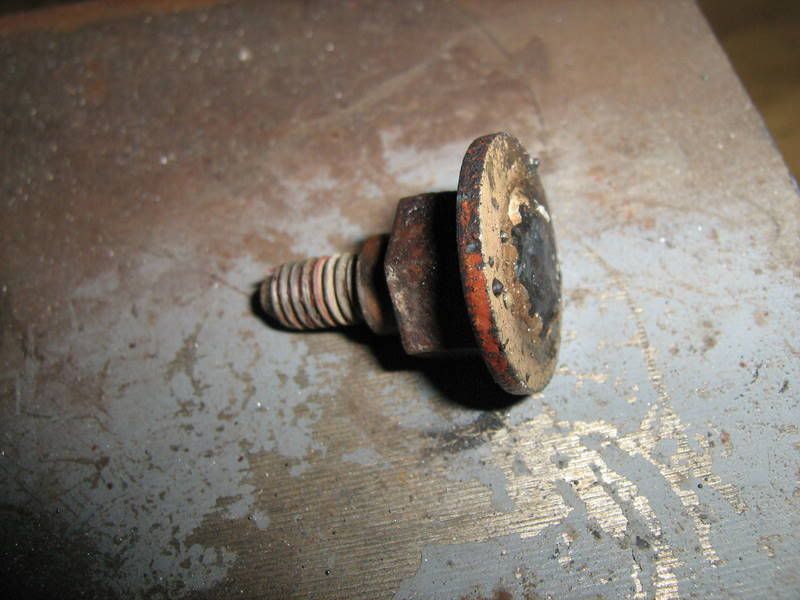
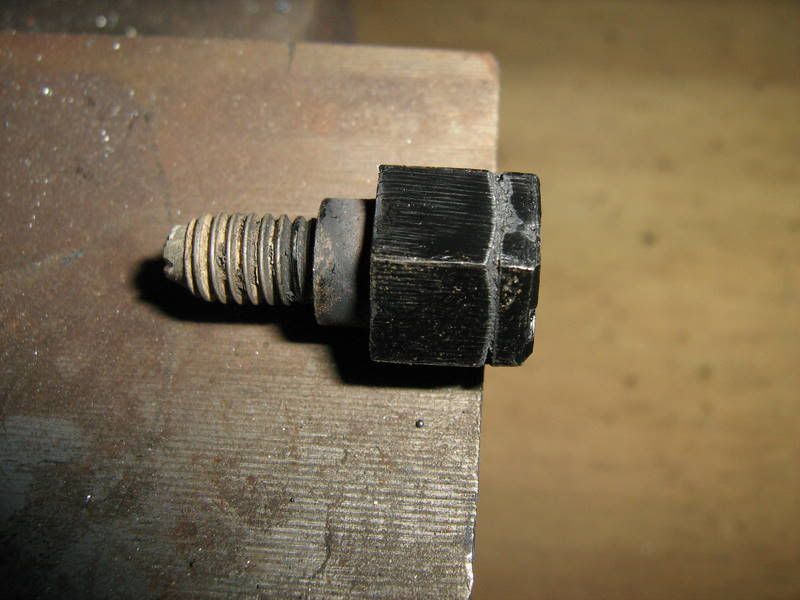
Grind off excess metal so i could still get a spanner on then paint.
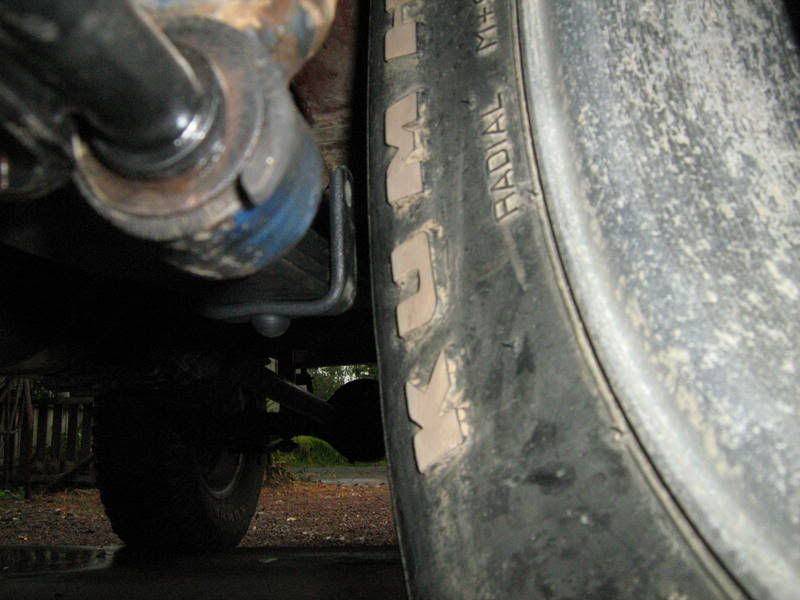
Reinstall bolt and turn to full lock

Now the tyre misses the spring by about 5mm.
I'd worked out how thick I needed the washer earlier (its only about 2mm thick but makes all the difference)
Did the same to the other side of couse and now no more tyre rubbing at full lock.
So into my parts department again and i found some old flexy flares..
A bit of a clean up then i screwed them on. I needed to shorten them a little with a stanley knife.
With that done i also needed to stop the inside tyre wall rubbing on the leaf spring at full lock. Was only just touching so with a bit of thinking and staring at the problem the easiest solution was this...
Remove one of the swivel hub retaining bolts and find a washer.
Weld washer to the back of the bolt
Grind off excess metal so i could still get a spanner on then paint.
Reinstall bolt and turn to full lock
Now the tyre misses the spring by about 5mm.
I'd worked out how thick I needed the washer earlier (its only about 2mm thick but makes all the difference)
Did the same to the other side of couse and now no more tyre rubbing at full lock.
-
Dr_PC
- Hard Yaka
- Posts: 797
- Joined: Thu Feb 13, 2003 12:00 pm
- Location: Moerewa Bay of Islands
- Contact:
Re: SJ413 Ute Build
PuddleJumper wrote:I'd worked out how thick I needed the washer earlier (its only about 2mm thick but makes all the difference)
Did the same to the other side of couse and now no more tyre rubbing at full lock.
Bring on the competitions I'm goining to peg some turns just for you
-
PuddleJumper
- Hard Yaka
- Posts: 204
- Joined: Fri Mar 03, 2006 12:00 pm
Re: SJ413 Ute Build
Dr_PC wrote:PuddleJumper wrote:I'd worked out how thick I needed the washer earlier (its only about 2mm thick but makes all the difference)
Did the same to the other side of couse and now no more tyre rubbing at full lock.
Bring on the competitions I'm goining to peg some turns just for you
Gee thanks Dan.. This thing didnt have the greatest lock to start with let alone making it even worse..... Hmmmm wonder what the legalities of rear fiddle brakes on a WOFed truck are
-
PuddleJumper
- Hard Yaka
- Posts: 204
- Joined: Fri Mar 03, 2006 12:00 pm
Re: SJ413 Ute Build
I haven't updated this for ages!!
Was gonna write up a whole bunch of stuff but i can't be arsed so heres a bunch of pics with a few captions instead
Needed some new inner door cards as the original were a bit tatty - the duct tape was coming off...
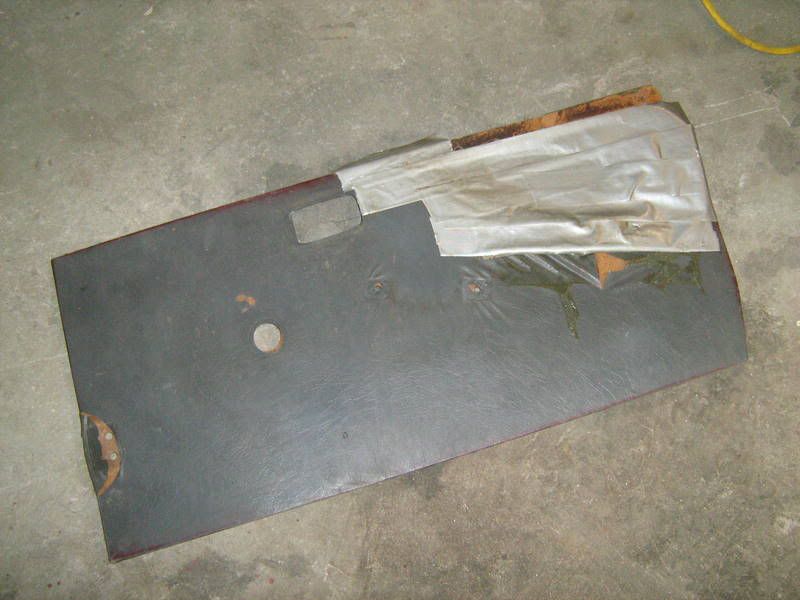
So i got some wood and some material and made some new ones which added a fair bit of rigidity too.
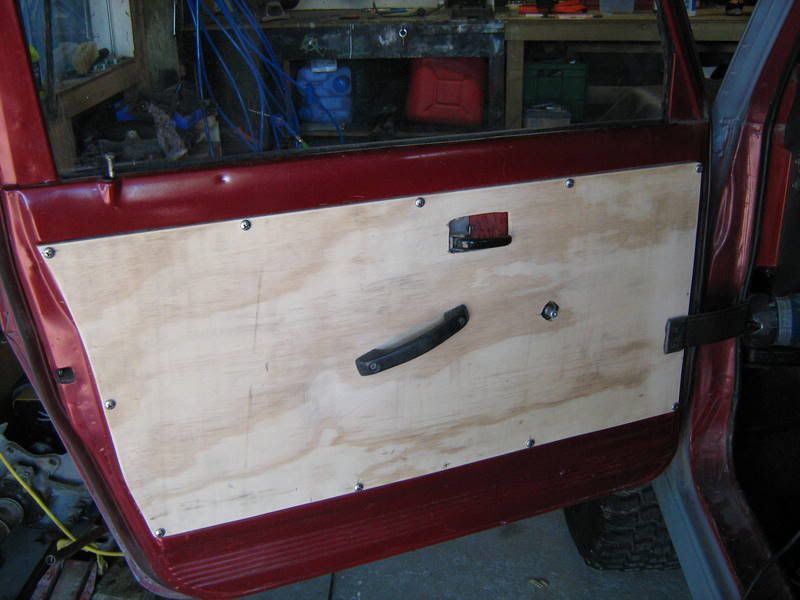
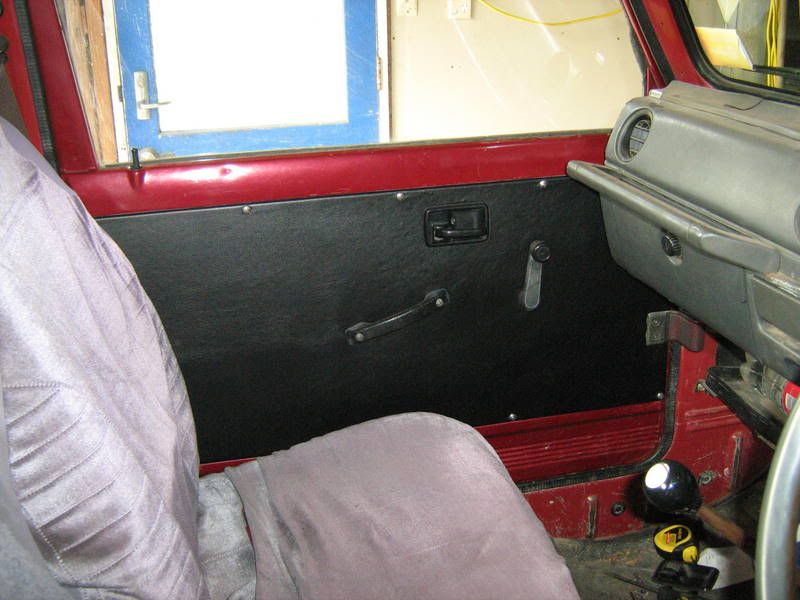
Never made any of these before so i reckon they came out ok.
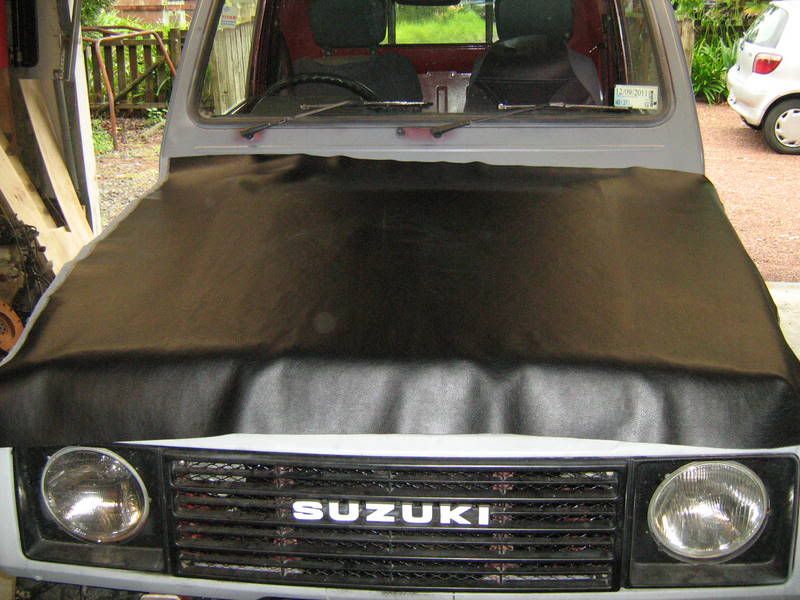
Next i needed to fit a bonnet scoop to fill the hole. I couldnt find what i wanted so i made my own. Had a old SJ410 bonnet doing nothing so i borrowed a bit out of it.
With some welding and a bit of bog work it finished up like this.

Was gonna write up a whole bunch of stuff but i can't be arsed so heres a bunch of pics with a few captions instead
Needed some new inner door cards as the original were a bit tatty - the duct tape was coming off...
So i got some wood and some material and made some new ones which added a fair bit of rigidity too.
Never made any of these before so i reckon they came out ok.
Next i needed to fit a bonnet scoop to fill the hole. I couldnt find what i wanted so i made my own. Had a old SJ410 bonnet doing nothing so i borrowed a bit out of it.
With some welding and a bit of bog work it finished up like this.
-
PuddleJumper
- Hard Yaka
- Posts: 204
- Joined: Fri Mar 03, 2006 12:00 pm
Re: SJ413 Ute Build
Next thing i had to get out the way was the low volume cert. I only needed to fit a driveshaft hoop, Wheel alignment and adjust the brake proportioning valve and it was done..
With a new WOF i went for its first test drive... Nothing to exciting
Second drive out to Woodhill for a easy run.


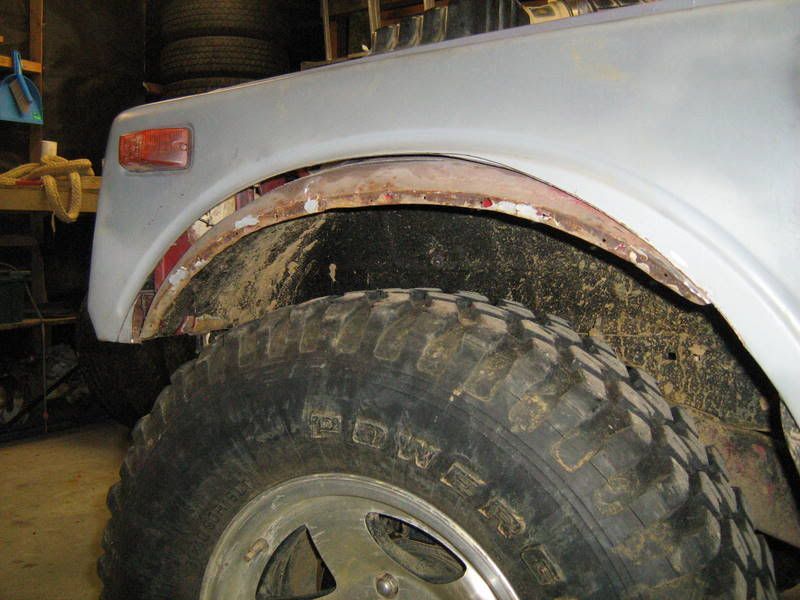
The front tyres were touching the gaurds.. Though not the firewall so armed with a vivid i marked a line then cut
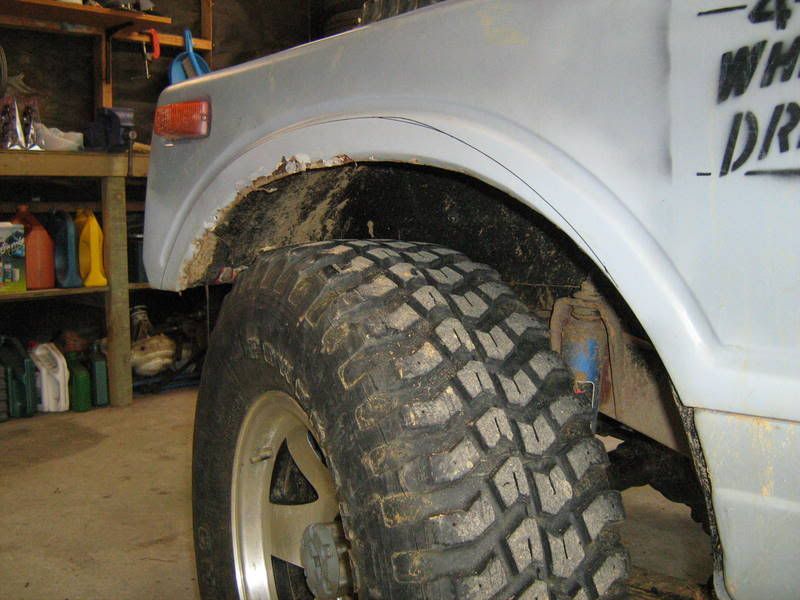
This got rid of some rust too which is standard issue around here.
Once the gaurd was cut to my liking i cut and folded the inner gaurd up and welded where it touched.
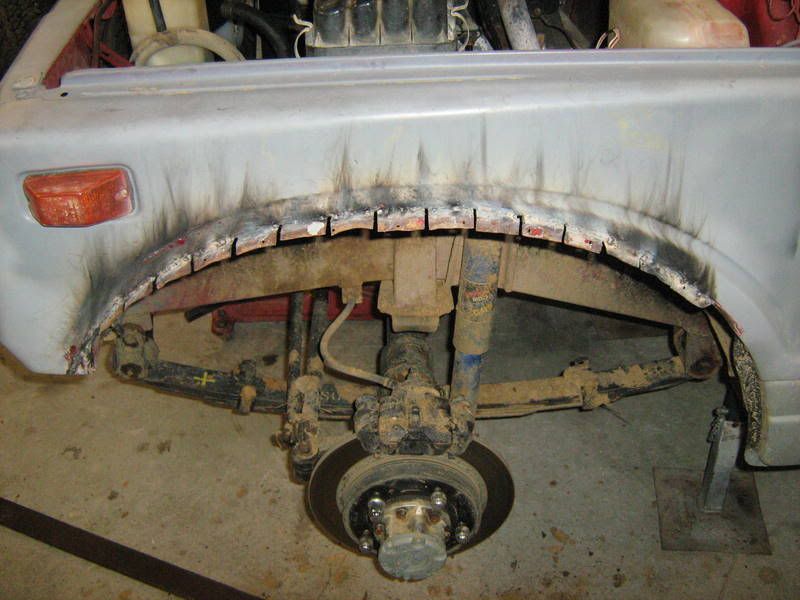
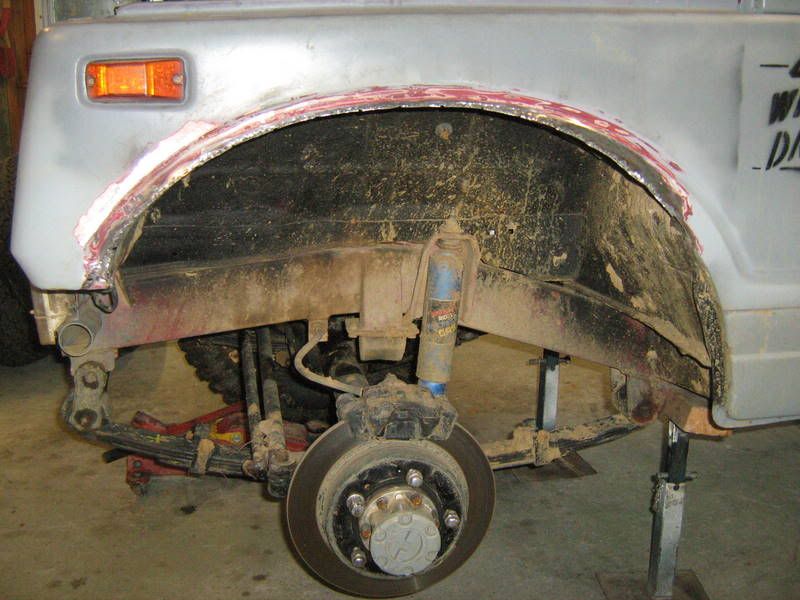
Once welded i trimed off the excess then a small amount of bog was added.
(note: the wheel is at full droop in this pic)
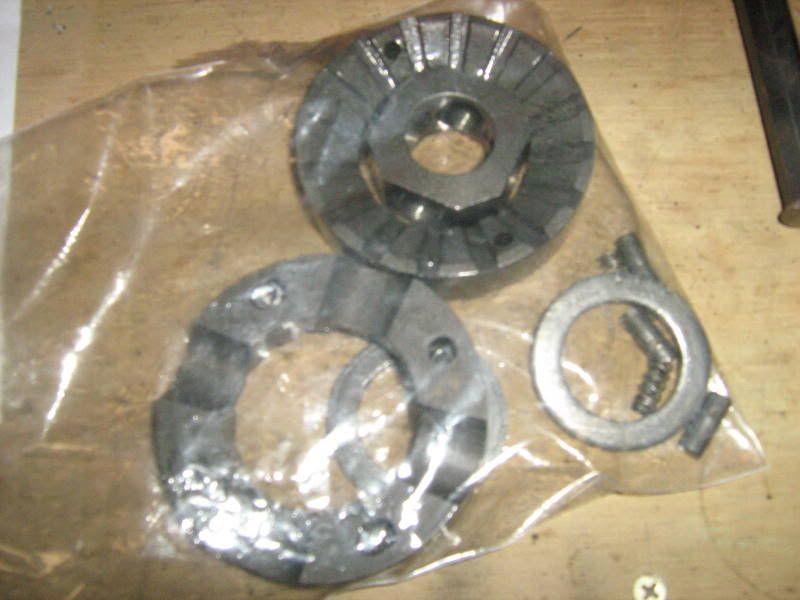
Picked up a second hand lockrite for some MUCH needed traction.

Here a couple more pics from the Woodhill trip (pre gaurd cut and without locker)

With a new WOF i went for its first test drive... Nothing to exciting
Second drive out to Woodhill for a easy run.
The front tyres were touching the gaurds.. Though not the firewall so armed with a vivid i marked a line then cut
This got rid of some rust too which is standard issue around here.
Once the gaurd was cut to my liking i cut and folded the inner gaurd up and welded where it touched.
Once welded i trimed off the excess then a small amount of bog was added.
(note: the wheel is at full droop in this pic)
Picked up a second hand lockrite for some MUCH needed traction.
Here a couple more pics from the Woodhill trip (pre gaurd cut and without locker)
-
PuddleJumper
- Hard Yaka
- Posts: 204
- Joined: Fri Mar 03, 2006 12:00 pm
Re: SJ413 Ute Build
Still to come is to sort out a exo cage along with front bar and sliders..
Rear mount a winch - then get it ready for painting..
Rear mount a winch - then get it ready for painting..
-
Dr_PC
- Hard Yaka
- Posts: 797
- Joined: Thu Feb 13, 2003 12:00 pm
- Location: Moerewa Bay of Islands
- Contact:
Re: SJ413 Ute Build
Bout time we had an update, Looks good need some front fiddles for woodhill by the looks of it
-
PuddleJumper
- Hard Yaka
- Posts: 204
- Joined: Fri Mar 03, 2006 12:00 pm
Re: SJ413 Ute Build
Another update.. My Camera broke so i hadn't bothered posting anything.
With the locker installed i now found with the extra traction i needed some lower gears.
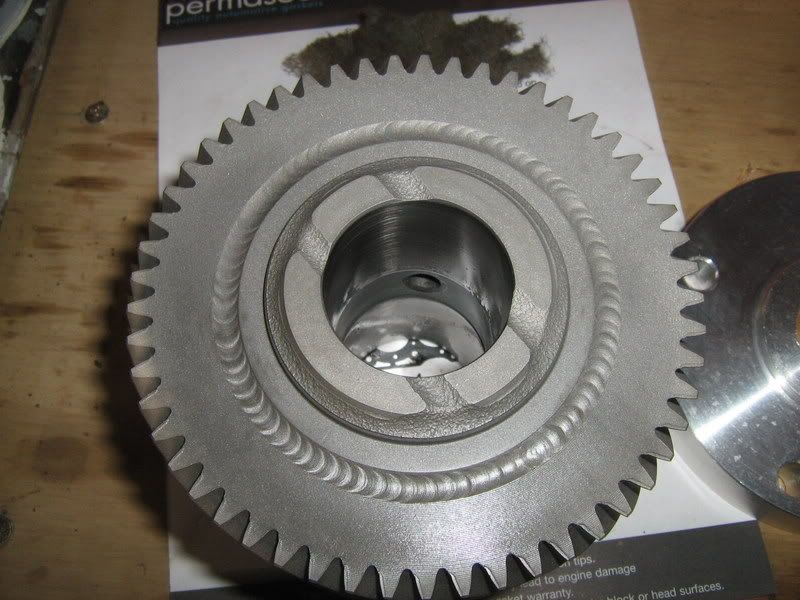
I had a spare SJ410 transfer case (with the shift light) which was given to me (amongst some other free stuff) so the obvious thing was to do the rocklobster thing
All in bits.
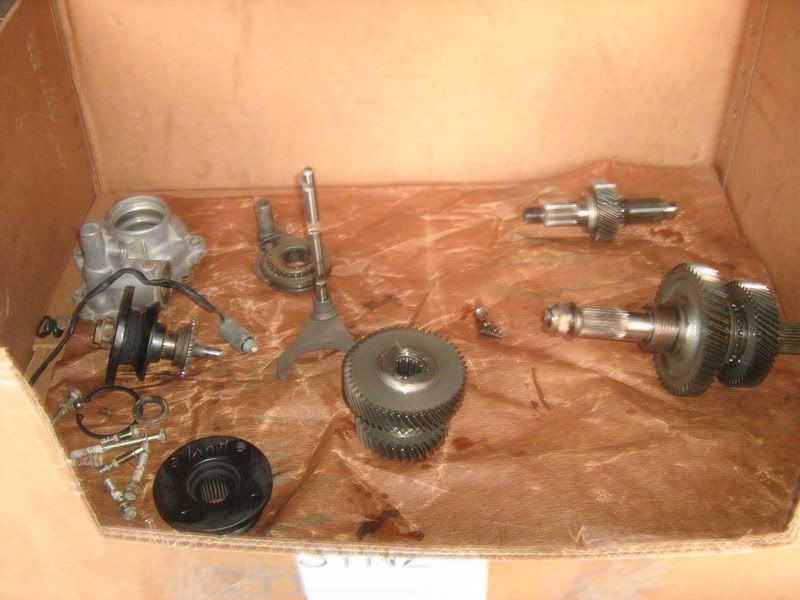
Only photo i got was of the finished welded gear - Very nice weld here, to good for it to be hidden away in a T/Case!!
I put new bearings and seals in there at the same time for good measure.
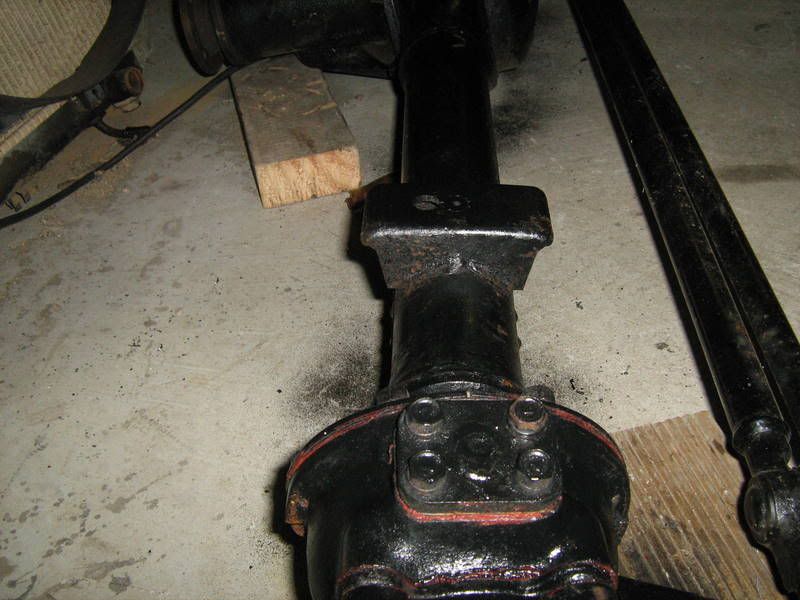
At the same time i got Bernie at JK Racing to do my gears i also got him to make make up a front drive shaft spacer. It was made 16mm thick to compensate the front axle going far that forward when the axle got moved.
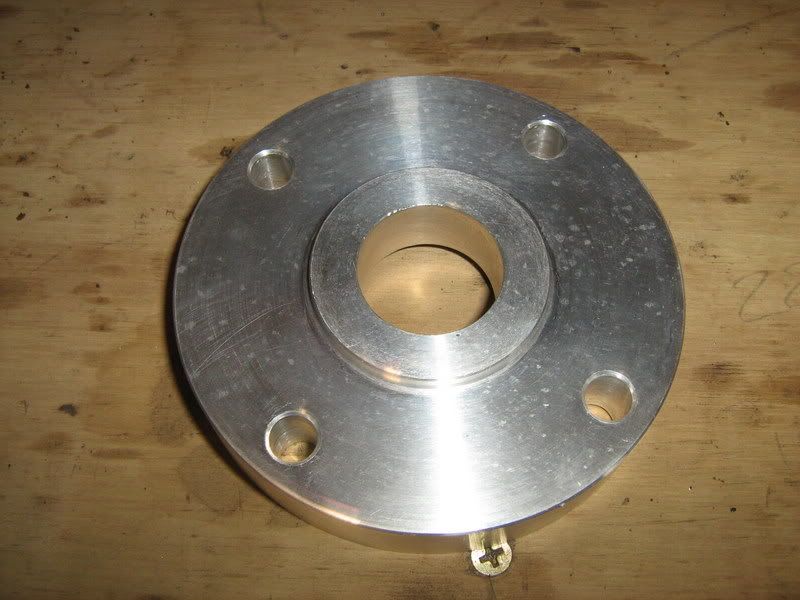
Here it is installed.
I bought some new stainless high tensile bolts and chucked them in at the same time.
A few other bits and bobs I've done to the Zuk include..
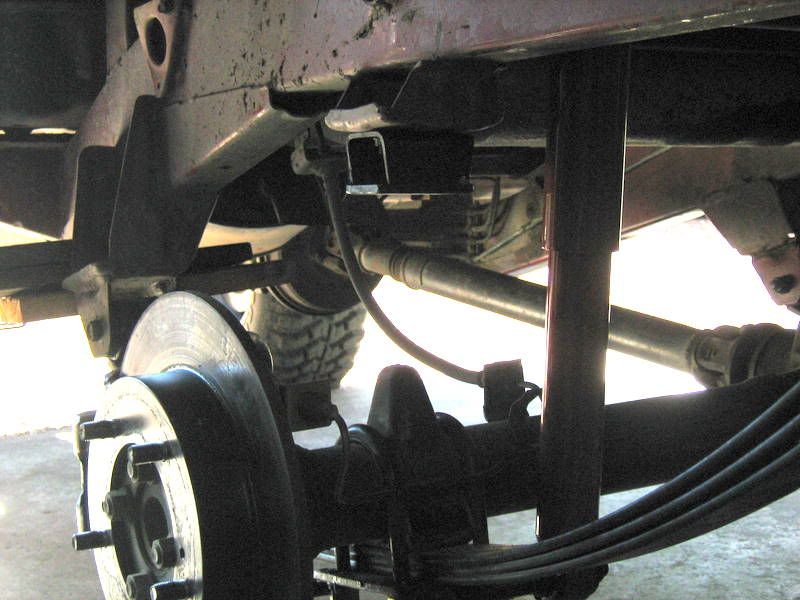
Fitting Commodore shocks in the front - AT the same time i put in sum bump stop extensions the compensate for the longer compressed length of the shock.

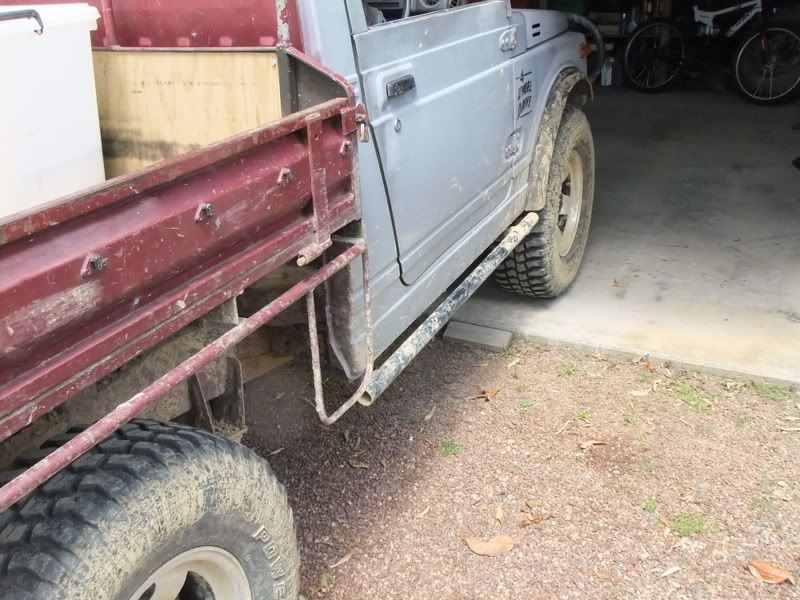
Needed sum side bars so made these up - They bolt to the chassis outriggers.. And no I'm not going to cap the ends!
With the locker installed i now found with the extra traction i needed some lower gears.
I had a spare SJ410 transfer case (with the shift light) which was given to me (amongst some other free stuff) so the obvious thing was to do the rocklobster thing
All in bits.
Only photo i got was of the finished welded gear - Very nice weld here, to good for it to be hidden away in a T/Case!!
I put new bearings and seals in there at the same time for good measure.
At the same time i got Bernie at JK Racing to do my gears i also got him to make make up a front drive shaft spacer. It was made 16mm thick to compensate the front axle going far that forward when the axle got moved.
Here it is installed.
I bought some new stainless high tensile bolts and chucked them in at the same time.
A few other bits and bobs I've done to the Zuk include..
Fitting Commodore shocks in the front - AT the same time i put in sum bump stop extensions the compensate for the longer compressed length of the shock.
Needed sum side bars so made these up - They bolt to the chassis outriggers.. And no I'm not going to cap the ends!
-
PuddleJumper
- Hard Yaka
- Posts: 204
- Joined: Fri Mar 03, 2006 12:00 pm
Re: SJ413 Ute Build
I then built a platform to tow off and also mounted an old Original Suzuki alloy bumper to. The platform is 6mm Angle with plates out the back which sandwich the chassis rails - The chassis rails have has crush tubes installed. The alloy bumper bolts on.
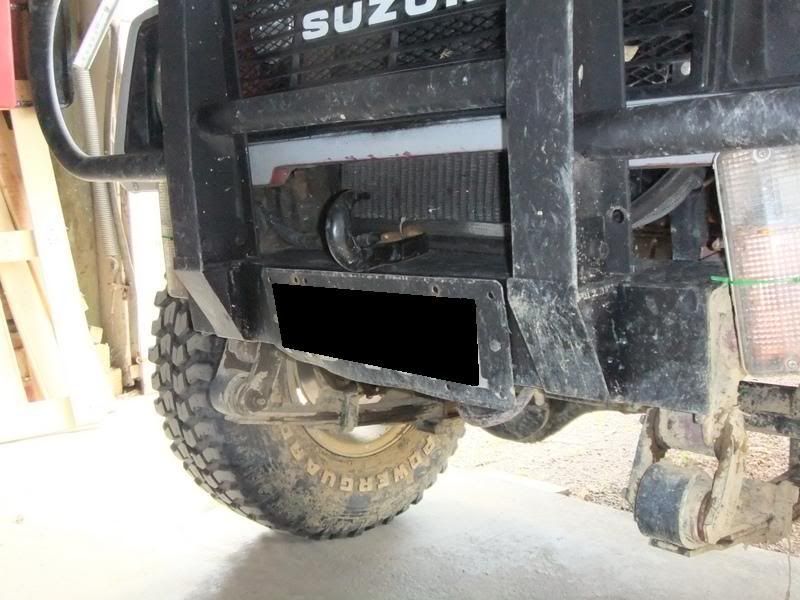
Still have to make bars from the bumper to the side bars but at the moment I'm working on half doors
Still have to make bars from the bumper to the side bars but at the moment I'm working on half doors
Re: SJ413 Ute Build
looking epic as still
Lubrication Specialist
Lubrication Engineers
www.lubeng.com.au lincoln@lubengnz.co.nz
Lubrication Engineers
www.lubeng.com.au lincoln@lubengnz.co.nz
-
suzookyman
- Hard Yaka
- Posts: 649
- Joined: Fri Mar 05, 2004 12:00 pm
- Location: Whangarei
Re: SJ413 Ute Build
What were your bump stop extensions?
"It's a Suzuki thing - you wouldn't understand !"
-
suzukisport
- Hard Yaka
- Posts: 439
- Joined: Fri Apr 16, 2010 8:08 pm
- Location: Whangarei
- Contact:
Re: SJ413 Ute Build
Great work When do you think you are going to paint it? A nice coat of paint would finish it off nicely.
Comp rig: Suzuki Vitara, L67 Supercharged V6 Commie and auto, Prado chassis and diffs. Gigglepin 8274 twin motor rear mounted winch, air free spools, 35" Silverstones, ect
Re: SJ413 Ute Build
suzookyman wrote:What were your bump stop extensions?
Look just above the brake hose, there is a piece of box section, 35x50 maybe?
-
PuddleJumper
- Hard Yaka
- Posts: 204
- Joined: Fri Mar 03, 2006 12:00 pm
Re: SJ413 Ute Build
lincooln wrote:looking epic as still
Thanks Lincoln.. Its getting there!