LJ80 Project

Starting a project or modification? Then post it's progress here and show us some pic's.
User avatar
PuddleJumper
Hard Yaka
Posts: 204
Joined: Fri Mar 03, 2006 12:00 pm

LJ80 Project

Post by PuddleJumper »

Been looking for a LJ as a new project. I wanted one with a live rego and not completly rotted out so it took ages to finally get one. This came from Havelock North with a custom trailer. If anyone knows any history on it I'd been keen to know.
Image
Image
Image
Image
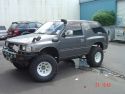
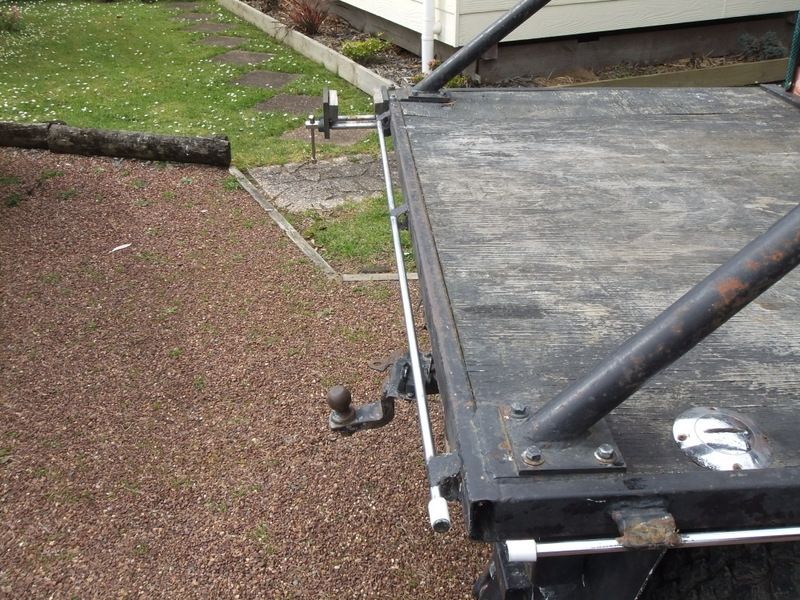
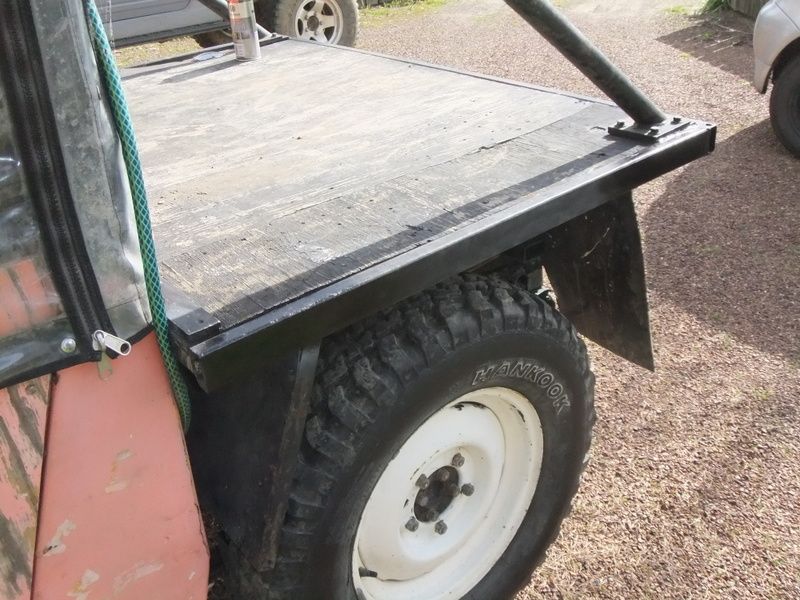
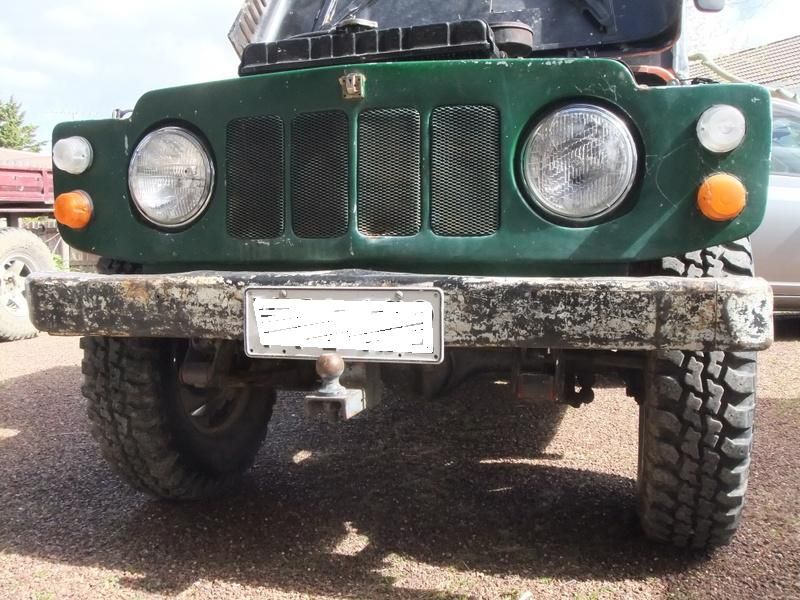
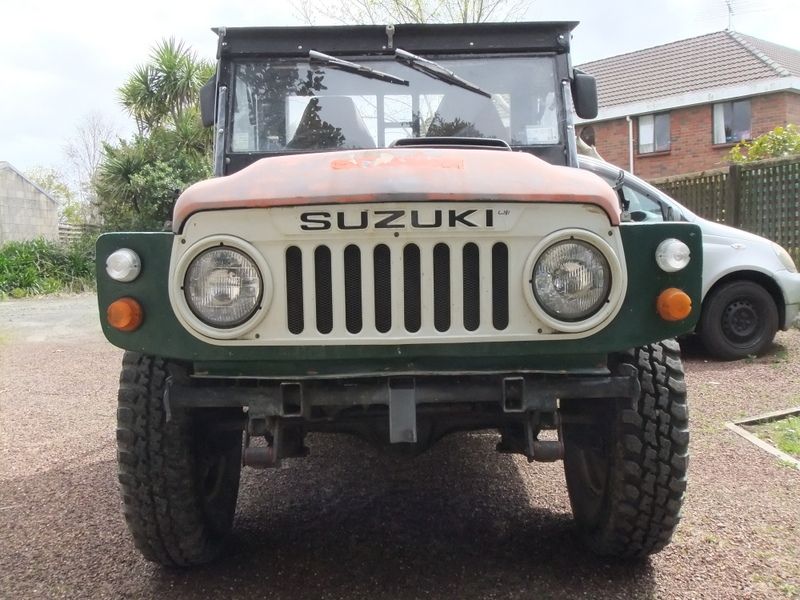
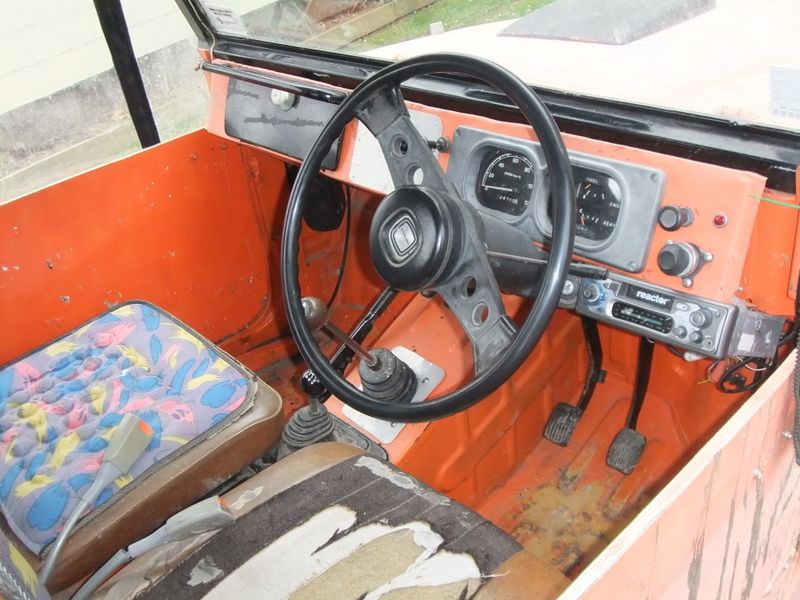
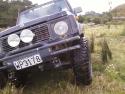
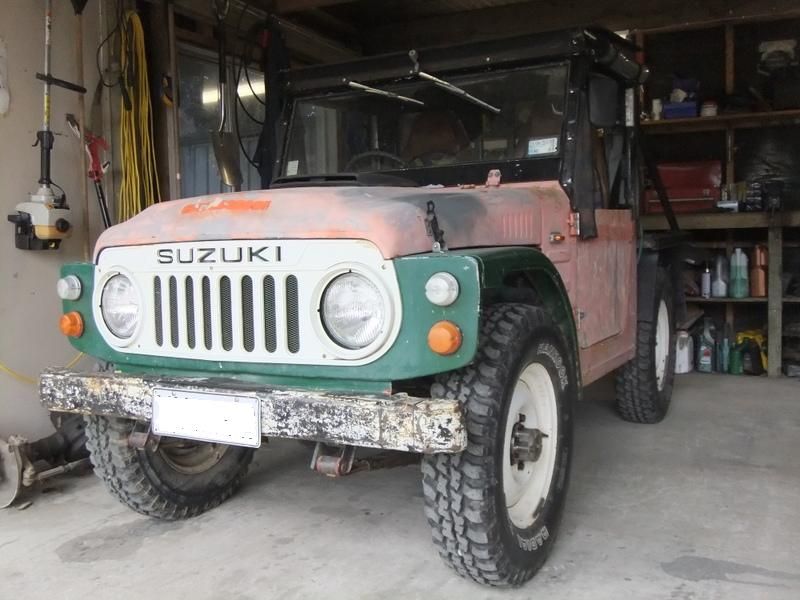
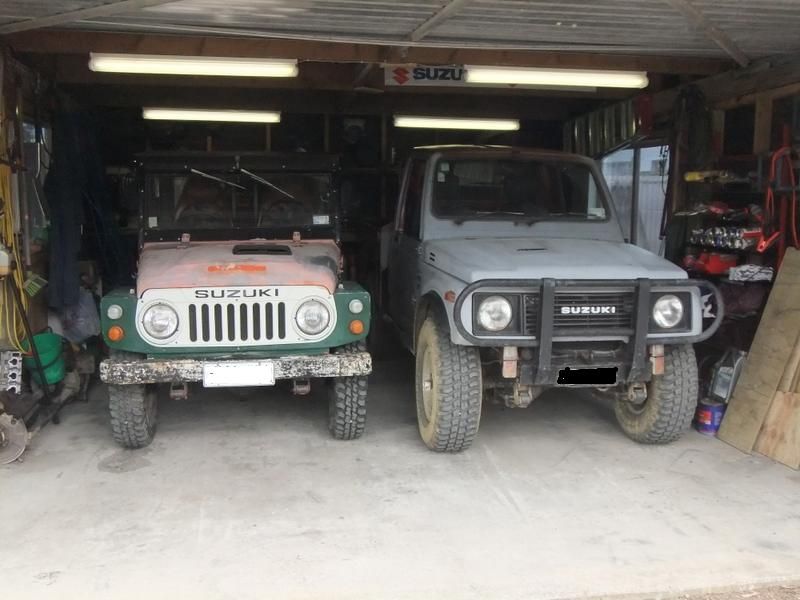
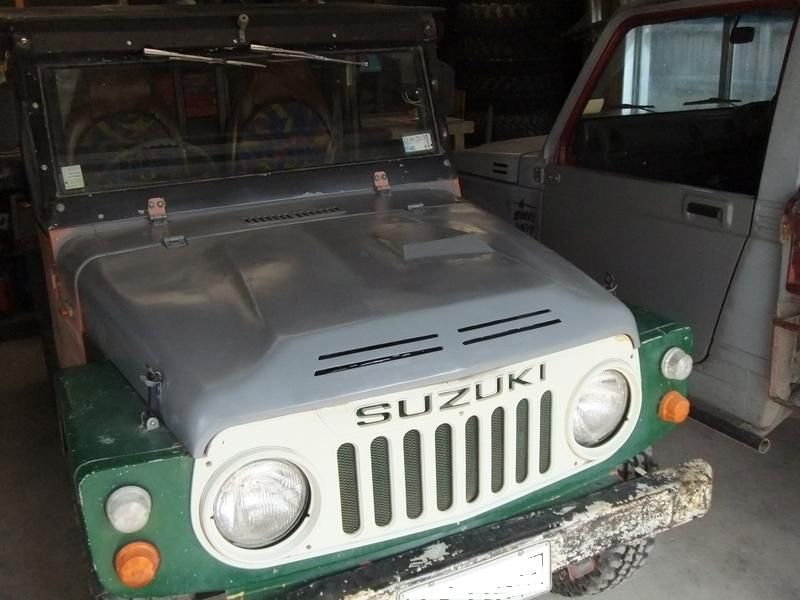
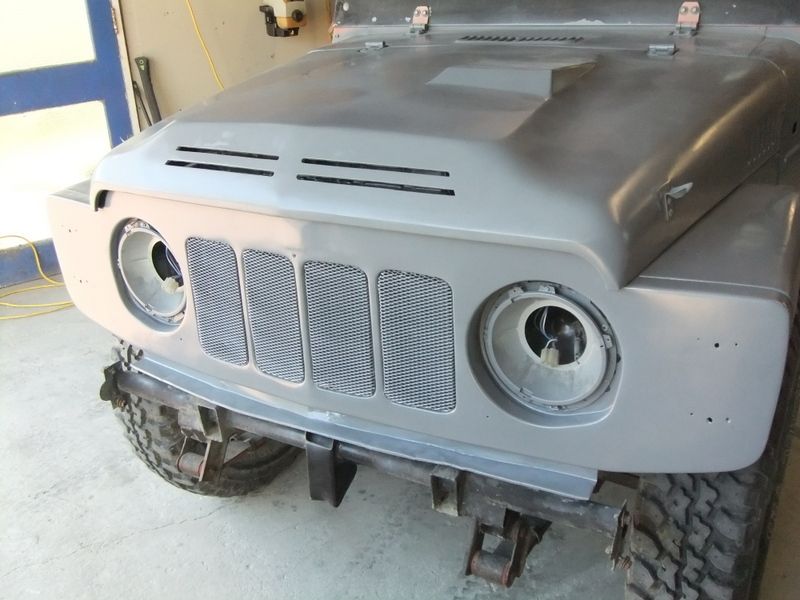
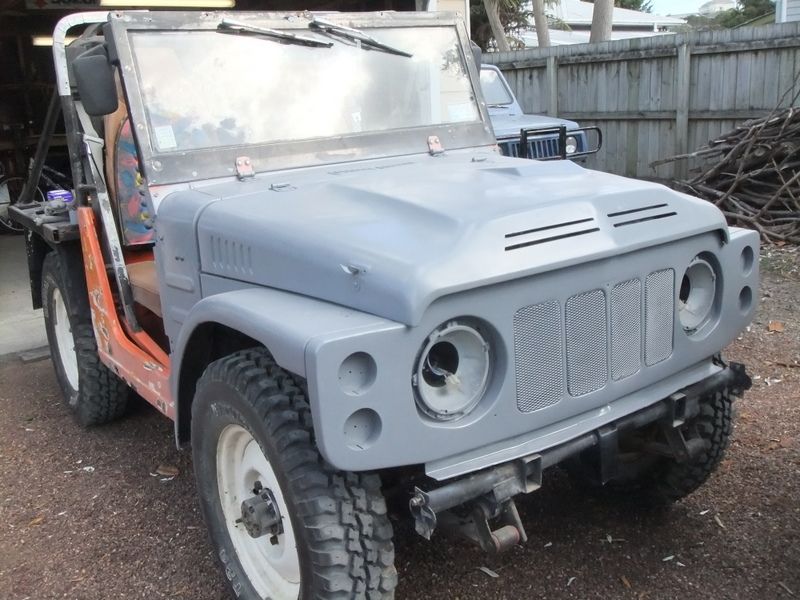
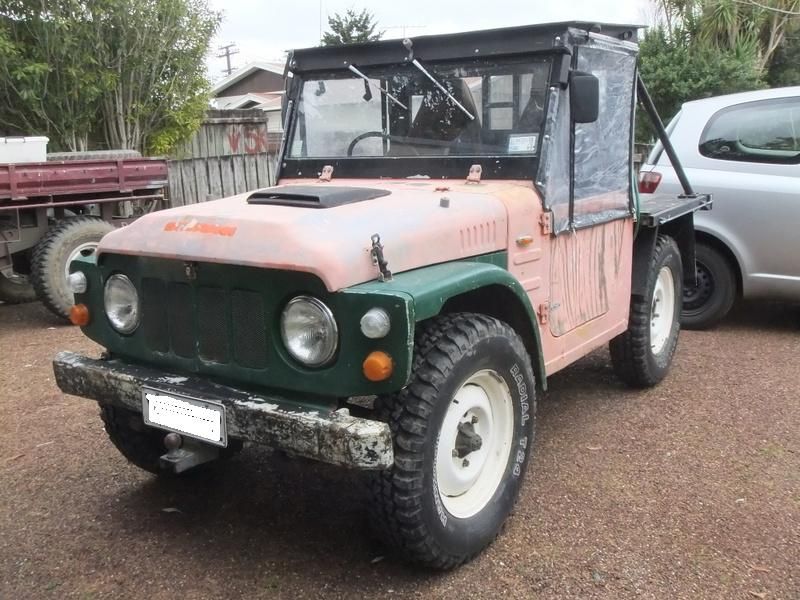
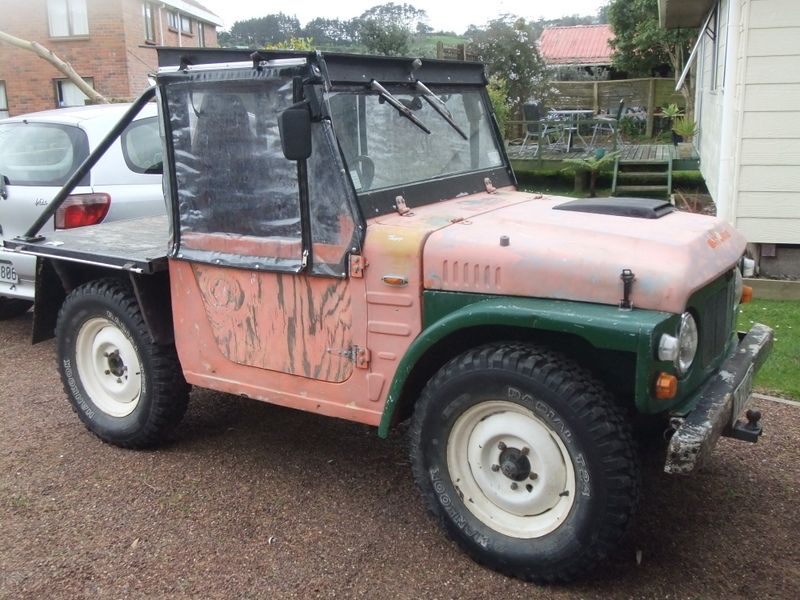
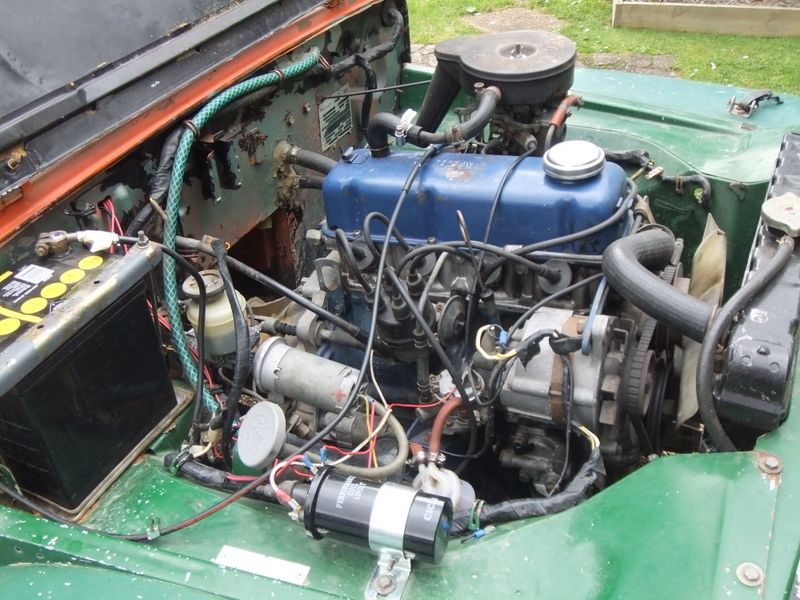
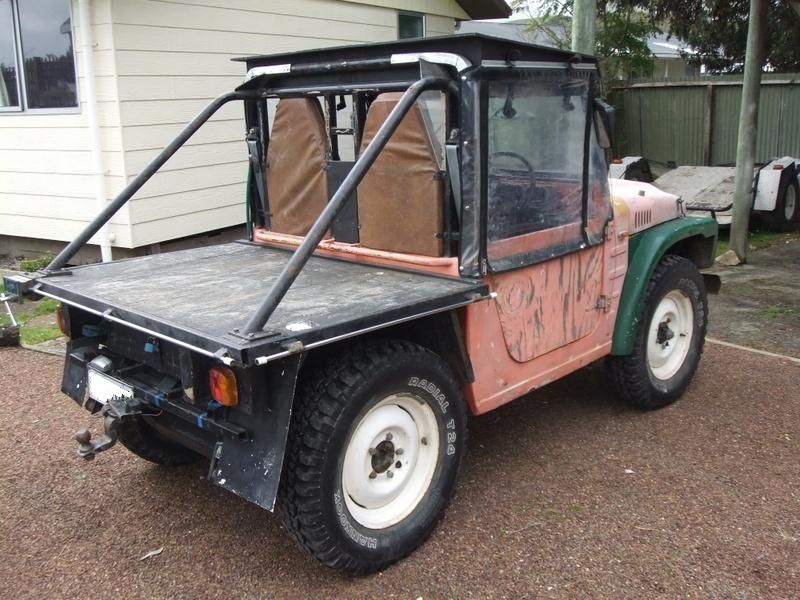
So its a 1980 LJ80 with a Datsun A15 motor and 4 speed. Some one has spent a lot of time on this - It has a integrated roll cage built in and Galvinised chassis hiding under the flaking paint, custom tray on the back with storage compartment underneath. Custom built windscreen frame and custom built removable roof with fold up soft-top! Oh and its fully certified :)
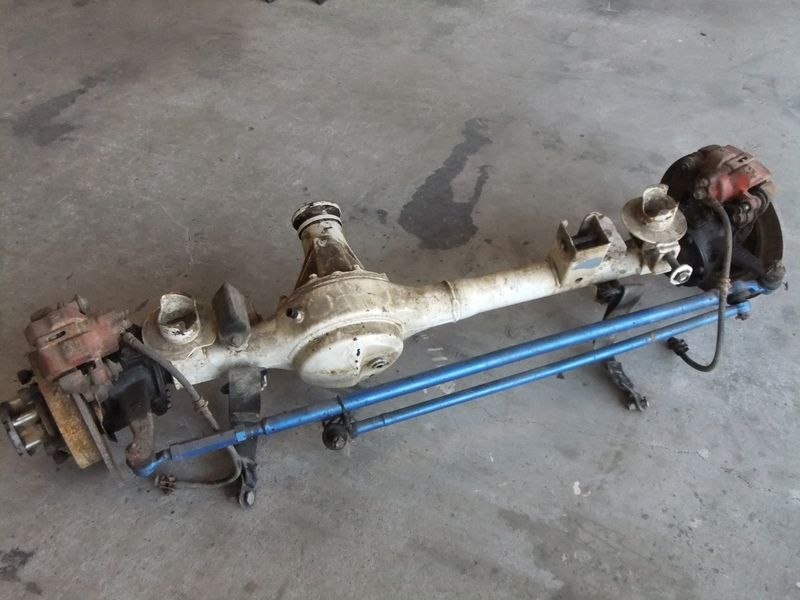
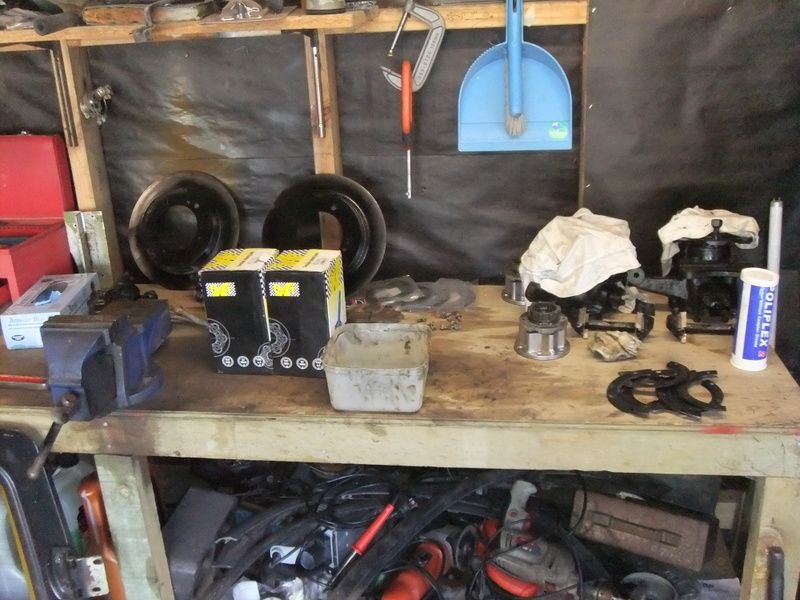
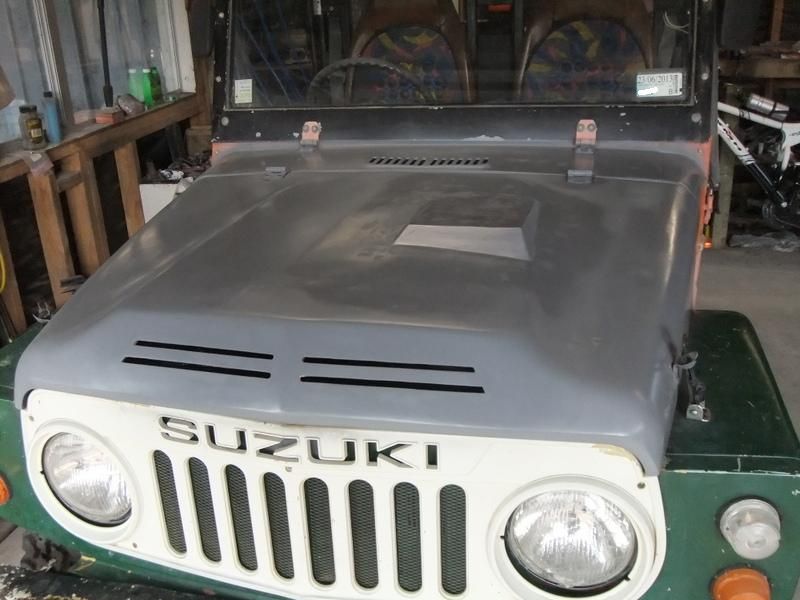
Plan is to give it a tidy up - Semi restore with a few upgrades along the way and get a WOF of course :D
User avatar
lincooln
Hard Yaka
Posts: 1251
Joined: Tue May 22, 2007 12:00 pm
Location: Kaiwaka and Dorkland

Re: LJ80 Project

Post by lincooln »

Cool as. Good to see you are keeping up with the Suzuki projects.

Look forward to seeing progress on this one,
Lubrication Specialist
Lubrication Engineers
www.lubeng.com.au lincoln@lubengnz.co.nz
User avatar
Drurban
Hard Yaka
Posts: 623
Joined: Wed Mar 25, 2009 4:19 pm
Location: Tokoroa/Auckland

Re: LJ80 Project

Post by Drurban »

Nice one Scott, will be watching this thread.
1997 Isuzu Mu, 3.1TD, 5sp Manual.
User avatar
UBZ
Hard Yaka
Posts: 1647
Joined: Sat Aug 19, 2006 12:00 pm
Location: Twizel

Re: LJ80 Project

Post by UBZ »

very cool little Zuk 8)
hurry up and get it WoF'd
then we can have a LJ convoy :mrgreen:

3 things I'd do to it .
- ditch the horrible indicator / park lights.
- upgrade the front drums to discs
- paint it some other color than lilpig rank pink.
LR110 ..... LJ50 project :roll:
Chris.
zukmeista
Hard Yaka
Posts: 2380
Joined: Tue Aug 21, 2007 12:00 pm

Re: LJ80 Project

Post by zukmeista »

UBZ wrote:- paint it some other color than lilpig rank pink.

X2, that colour scheme is puke-worthy! :shock: Will be cool to see another LJ put back on the road, by the looks of it this one will be a bit quicker than the rest. :mrgreen:
User avatar
PuddleJumper
Hard Yaka
Posts: 204
Joined: Fri Mar 03, 2006 12:00 pm

Re: LJ80 Project

Post by PuddleJumper »

lincooln wrote:Cool as. Good to see you are keeping up with the Suzuki projects.

Look forward to seeing progress on this one,


Yeah its a disease i have.. :lol:
User avatar
PuddleJumper
Hard Yaka
Posts: 204
Joined: Fri Mar 03, 2006 12:00 pm

Re: LJ80 Project

Post by PuddleJumper »

UBZ wrote:very cool little Zuk 8)
hurry up and get it WoF'd
then we can have a LJ convoy :mrgreen:

3 things I'd do to it .
- ditch the horrible indicator / park lights.
- upgrade the front drums to discs
- paint it some other color than lilpig rank pink.


LJ convoy - Now that would be cool.

Wanting to locate some original indicator and park lights but i think I'll need the whole assembly as they may not fit these aftermarket bases.

Also wanting some original door hinges too if anybody has some.

Will be painted a factory colour.. not sure yet but Ive always liked to the yellow they came out in.
User avatar
PuddleJumper
Hard Yaka
Posts: 204
Joined: Fri Mar 03, 2006 12:00 pm

Re: LJ80 Project

Post by PuddleJumper »

What is it with LJ's and towel rails?!! UBZ's had one on the back of his and mine had been blessed with 3!
Image

WHOOPS slipped with the angle grinder..
Image

Also removed the vice.

Another thing to come off was the towbar that was welded to the chassis on the front.
Image
Also had a weird little latch that used to hold the bonnet shut. This was removed to.
Image
Image
I picked up a mint grille on T/M so i chucked this on at the same time.
Image

Amazing the difference a grille can make 8)
zukmeista
Hard Yaka
Posts: 2380
Joined: Tue Aug 21, 2007 12:00 pm

Re: LJ80 Project

Post by zukmeista »

Are those rims/tyres going to stay on it?
User avatar
UBZ
Hard Yaka
Posts: 1647
Joined: Sat Aug 19, 2006 12:00 pm
Location: Twizel

Re: LJ80 Project

Post by UBZ »

haha towel rails :lol:
recovery points for an LJ . :lol:

the lens are still available , but the factory bases are hard to find

however having a closer look at your front clip , it doesn't look original or its been repaired . there should be recesses for the indicator / park lights to sit in . the mounting holes for the grill are missing , and the radiator mesh is not original .

I'd just look for some round factory style done lights to get the cool Suzuki look . side indicators are no factory either .

the bonnet rubbers are the standard way of holding The bonnet down , but they also have a Manual cab operated lock inside the front of the bonnet . I don't use mine as people always try and yank the bonnet open after popping off the rubbers

The hinge parts that are mounted to the cab look factory for Softtop style doors just mounted backwards.

I would stash the front bumper for safe keeping as its the first thing that gets smashed off road.

have a look on this page , bout half way down is the factory color charts , as well as heaps of brochures etc to drool over 8)
http://www.offroadrunner.nl/

oh and make sure you pop over to LJ10.com and say hello to all the nutters

more interior and underneath pictures please.

I'm also interested in what rear diff it has . if its a later model LJ80-II or III it should have the bigger axle housing with a 65mm axle tube , 410 sized bearings and the good big axles .
LR110 ..... LJ50 project :roll:
Chris.
User avatar
lilpigzuk
Tiger Balm
Posts: 2316
Joined: Mon Dec 09, 2002 12:00 pm
Location: Counties

Re: LJ80 Project

Post by lilpigzuk »

UBZ wrote:- paint it some other color than lilpig rank pink.


:cry:

:lol: Cool project Scott 8)
User avatar
PuddleJumper
Hard Yaka
Posts: 204
Joined: Fri Mar 03, 2006 12:00 pm

Re: LJ80 Project

Post by PuddleJumper »

UBZ wrote:more interior and underneath pictures please.

I'm also interested in what rear diff it has . if its a later model LJ80-II or III it should have the bigger axle housing with a 65mm axle tube , 410 sized bearings and the good big axles .


Had a look see over the weekend at the diff tube. Measures 60mm Diameter.

Heres a pic of the interior - It came with this bangin hitech tape player! I couldn't work out how the speakers had been mounted (these were up under the dash) They seemed to move around when i pulled on them but i couldn't see any bolts - So i gave a big yank..... Turns out they were held on by lots of bluetack :lol:
Image
Heres another with the radio removed, Dash binnacle tidied up and a 413 steering wheel attached - Think I'll put the original wheel back on.
Image
User avatar
jervisad
Hard Yaka
Posts: 139
Joined: Mon May 02, 2011 5:45 pm
Location: makara wellington

Re: LJ80 Project

Post by jervisad »

this is gonna be another cool little lj keep it up mate good luck :)
User avatar
PuddleJumper
Hard Yaka
Posts: 204
Joined: Fri Mar 03, 2006 12:00 pm

Re: LJ80 Project

Post by PuddleJumper »

jervisad wrote:this is gonna be another cool little lj keep it up mate good luck :)


Thanks. They are cool little trucks :D
User avatar
PuddleJumper
Hard Yaka
Posts: 204
Joined: Fri Mar 03, 2006 12:00 pm

Re: LJ80 Project

Post by PuddleJumper »

First proper mod - Disk brake front end.

Had a spare SJ410 front end lying in the parts dept... Stole some parts from it.
Image

Had bought a bunch of new parts including Bearings, CV's, seals, Brake caliper rebuild kits etc.
Image

Stripped down with the axle out. Everything came apart easily with nice grease and fresh oil in it by the looks.
Image

Here is the LJ80 axle with the new SJ410 CV attached
Image

Had already rebuilt some bits ready to go.
Image

Rebuilt Caliper
Image

All back together
Image

Better brakes and less maintenence :D
Image
User avatar
PuddleJumper
Hard Yaka
Posts: 204
Joined: Fri Mar 03, 2006 12:00 pm

Re: LJ80 Project

Post by PuddleJumper »

Roommates :lol:
Image

Did'nt like the Mitsi Cordia bonnet scoop and also the bonnet was missing the factory vents. - Many hours later... The vents could do with being enlarged a bit more, will address this in the future.
Image

Someone had put these horrible blinker lights on with a alloy plate to cover the factor hole.
Image
Image

Found some LED blinkers which are closer to than the original shape than the old ones
Image

Forgot to take a pic but i welded a small plate to the inside of the factory hole then filled and sanded.
User avatar
PuddleJumper
Hard Yaka
Posts: 204
Joined: Fri Mar 03, 2006 12:00 pm

Re: LJ80 Project

Post by PuddleJumper »

Back in the day when LJ's got there factory lights broken it was much cheaper/easier to go down to the local Repco and buy some trailer lights as they were a similar size apart from there height. I had no joy with finding some original ones so i bought some new trailer ones. So they didnt stick out so far i did a bit of body work.

Here they are before...
Image

Stripped front end and tidied stuff up.
Image

Starting point.
Image

Had some panel steel so made some discs and some stripes - Welded together to make cups
Image

Cut a hole
Image

Sat cup in and angled it a bit to square the angle up
Image

Spot welded - then ground of the excess steel.
Image

A small amount of filling then sanded.
Image

One done three to go!
Image

Hey PRESTO! - Left a small slot on the bottom for the water to drain.
Image

Looks much better now with the lights in :D
User avatar
Dr_PC
Hard Yaka
Posts: 797
Joined: Thu Feb 13, 2003 12:00 pm
Location: Moerewa Bay of Islands
Contact:

Re: LJ80 Project

Post by Dr_PC »

Shit Scottie, You're such a sad individual, You really really gotta get help with this illness of yours.
Keep the posts coming always like to see what you're got planned next
User avatar
Dirtydog
Hard Yaka
Posts: 1788
Joined: Wed Jun 24, 2009 6:47 pm
Location: Gore, Southland

Re: LJ80 Project

Post by Dirtydog »

I love seing these little trucks being done up. theyre soo awesome.

great work on the panelwork an lights etc, looks quite good, and are a little bit more tucked away so wont get damaged as much i bet.
User avatar
PuddleJumper
Hard Yaka
Posts: 204
Joined: Fri Mar 03, 2006 12:00 pm

Re: LJ80 Project

Post by PuddleJumper »

Time for a update. I've done loads of work to this but forget to update here.

First up I wanted to change the windscreen back to a original unit as the one on here looked horrible.

Dieselboy came to the rescue here he had a couple at his place kicking around so I zipped down and grabbed them. While i was there i also got some factory seats which were in ok condition.

Below are some pics

x2 windscreens back home.
Image

Got rust..
Image

The other screen was broken
Image
Image

Dieselboy suggested making one good screen out of the two as the top half was good on one and the bottom good on the other so thats what i did.

Cut
Image

Bent
Image
Image

Only way to get in to straighten it out
Image
Image

Bang with hammer on straight bit of steel..
Image

Weld back together
Image

Better
Image

Attach to bottom half
Image

Used 3mm thick angle up inside with plug welds to for some strenght.
Image

This is where i forgot to get pics... So jump forward a weekend or two and this is the final result.
Image
Image
Image

A LOT of work went into that to make sure the glass still fitted and was straight.
User avatar
UBZ
Hard Yaka
Posts: 1647
Joined: Sat Aug 19, 2006 12:00 pm
Location: Twizel

Re: LJ80 Project

Post by UBZ »

Awesome Work!
Labour of love .

Are you aware there are differences between the LJ50 and LJ80 windscreens?
the way the support brackets mount to the cab and the soft rail attachment are different .
from what I can see in the pics looks like you have 2 lj80 ones to work with , but worth checking .

what's happening with the rear tub?
LR110 ..... LJ50 project :roll:
Chris.
User avatar
PuddleJumper
Hard Yaka
Posts: 204
Joined: Fri Mar 03, 2006 12:00 pm

Re: LJ80 Project

Post by PuddleJumper »

UBZ wrote:Awesome Work!
Labour of love .

Are you aware there are differences between the LJ50 and LJ80 windscreens?
the way the support brackets mount to the cab and the soft rail attachment are different .
from what I can see in the pics looks like you have 2 lj80 ones to work with , but worth checking .

what's happening with the rear tub?


Yes was aware of the brackets and mounting points were different - Got those off DB as well :D

Rear tub coming up...
User avatar
PuddleJumper
Hard Yaka
Posts: 204
Joined: Fri Mar 03, 2006 12:00 pm

Re: LJ80 Project

Post by PuddleJumper »

So whilst at DB's collecting the above items i saw the original tub he had been working on for 'Project Wombat'

http://www.offroadexpress.co.nz/Forums/ ... 23&t=26140

I love the shape of the original LJ's so a week or so later I went back down and dragged it home :D

Although it had had some major work done to it already it was still in need of quite abit more. I got a few other bits i needed while i was there - Pics to explain.

Day i got it home.
Image

Munted rear corner
Image
Image

Drivers floor where rust had been cut out
Image

Passenger side
Image

Previous owner (not DB) must have used a angle grinder to cut into this :shock:
Image

Inner wheel arch - Both side where like this
Image

Image

The other bits i needed - Rear lights and the relativly straight tailgate.
Image
Image
8)
User avatar
Drurban
Hard Yaka
Posts: 623
Joined: Wed Mar 25, 2009 4:19 pm
Location: Tokoroa/Auckland

Re: LJ80 Project

Post by Drurban »

Nice work there Scott, you are going to get quite a collection of Suzuki's.
1997 Isuzu Mu, 3.1TD, 5sp Manual.
User avatar
DieselBoy
Hard Yaka
Posts: 4568
Joined: Sun Nov 14, 2004 12:00 pm

Re: LJ80 Project

Post by DieselBoy »

Scott, your a whole new level of mad!!!!!

Awesome work, so cool to see stuff that was handed on to me from Lilpigzuk and Rotazuk finally finding its way to a guy that's restoring them. I would say all of us are equally as stoked of you!!!!

Now, where are they tub pics, you tease :mrgreen: :mrgreen:
lax2wlg wrote:Is that like saying 'she's hot, for a crackwhore??
User avatar
PuddleJumper
Hard Yaka
Posts: 204
Joined: Fri Mar 03, 2006 12:00 pm

Re: LJ80 Project

Post by PuddleJumper »

With the new body at home I rigged up chain block to get the old tub off.
Image

Once high enough i just pulled the chassis out
Image

Naked LJ
Image

Moved the chain block inside so i could test fit the body
Image

Lookin so much better already :D
Image
Image
Image
Cute ass! :lol:

Ok so this is where i got lazy with the camera....

Needed some brackets for the seats to sit on so made these up.
Image

This is the passenger side seat mount.
Image

The drivers side one had been removed
Image

So i made one up close to the original (out of a piece of SJ410 bonnet no less)
Image

Stuck it on
Image

Now just forward abit and heres the passenger floor repaired the the new seat mount.
Image
Image
Image

Then i did the other side and the tray.
Image
Image

Dash had had some aftermaket gauges fitting which left big holes in the so a plate was welded in (along with welding some small cracks)
Image

All was going along fine then this thing turned up 8)
Image
Image
Image
Image

All stock standard apart from the F10A in it - Even better 8)
Image

So the motor and box will be removed from this and also the dashboard buttons and controls - You can never have too many spares :D

Picked up these good doors.. I used some cutting compound on them to bring em back to life.
Image
Image

So now we're prity much upto date - This is how it stands ATM. I made my own door striker brackets.
Image
Image
Image

Since these pics were taken the tailgate and rear lower (skirt?) have be fixed and primed. Next big job once body work is done is to do the engine/Gbox swap.
User avatar
UBZ
Hard Yaka
Posts: 1647
Joined: Sat Aug 19, 2006 12:00 pm
Location: Twizel

Re: LJ80 Project

Post by UBZ »

it just keeps getting better and better 8)

Can I please have the factory Radio out of the Blue one :wink:
been looking for one for ages
LR110 ..... LJ50 project :roll:
Chris.
User avatar
lilpigzuk
Tiger Balm
Posts: 2316
Joined: Mon Dec 09, 2002 12:00 pm
Location: Counties

Re: LJ80 Project

Post by lilpigzuk »

Awesome Scott!
User avatar
Dr_PC
Hard Yaka
Posts: 797
Joined: Thu Feb 13, 2003 12:00 pm
Location: Moerewa Bay of Islands
Contact:

Re: LJ80 Project

Post by Dr_PC »

There is quite a gap between posts, but after this update I think we'll let you off, as you appear to have been hard at it, good on you dude
User avatar
PuddleJumper
Hard Yaka
Posts: 204
Joined: Fri Mar 03, 2006 12:00 pm

Re: LJ80 Project

Post by PuddleJumper »

Update time again... Am I sick of doing body work!!!

Bought some paint - An original factory colour called Grecian Ochra (I think that spelt right?)
So spent this weekend painting - Came out ok.. Pics

Did the front clip seperatly along with the bonnet, windscreen frame and hinges.
Image

Interior
Image

Could'nt resist adding the checker plate on the sills.
Image
Image

1000cc of power
Image

I'll let it sit for till next weekend then I'll start putting it all back together.

Getting closer now :D
Post Reply

Return to “Projects / Mod's”