Land Rover sickness
First up, it was axle stands and wheels off to see what condition brakes and wheel bearings were in and allow better access underneath.

The chassis was covered in a light rust in places, so called the sand blaster into service.
Dave dealing to the rust on the chassis in the engine bay with the sand blaster

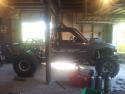
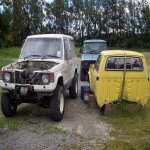
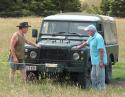
What we started with:

Chassis all sand blasted and blinged up:


Engine bay and chassis rails all cleaned up and painted:


I shouldn't be let loose with a spray gun!!!!! There was paint left over, and being it was 2k acrathane, you either use it or throw it out, soooooooo.......
Front bumper and bull bar got hit:

and so did the wheels

My next big mission was to address the damage caused by the removal of the sign writing on the rear guards. Craziest sign writing i have ever come across, like it was super glued on??
As respraying the rear guards wasn't in the budget, I had to get creative. I devised a realy careful procedure, to carefully sand the remaining glue off one side, and fill and re-finish the other side which was heavily damaged, without touching any of the paintwork outside of the line of the sign writing, and then paint a black stripe down it. What a mission that was, respraying the guard would have been way easier!!
The drivers side, which was the good side, ready for love

The passengers side part way through, filling the craters


The end result is a black stripe down each guard. Doesn't look to bad considering its a cover up job, and when it comes time to respray the guard properly, nothing has been lost...
It also needed some slightly more substantial rust repairs in two spots on the rear cross member, so hit them with the sand blaster, welder, rust killer, paint, and then cavity wax. End result should see the chassis last for quite a while longer!!!


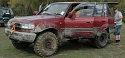
Its getting there!!!!