1990 TUF LUX

Starting a project or modification? Then post it's progress here and show us some pic's.
User avatar
Steve_t647
Hard Yaka
Posts: 998
Joined: Wed May 17, 2006 12:00 pm
Location: Christchurch City, In front of the computer

Post by Steve_t647 »

It is worth the issue of finding more steel, there is a lot of leverage on those bars and a lot of weight can rest on them.

Image

Image

Oh and before someone says I was meaning the car weight on the rail NOT the driver. :roll: but is some cases this is an issue too :lol:
Legal disclaimer: Any information I may have provided is worth exactly what you paid me for it.
User avatar
rokhound
Hard Yaka
Posts: 2558
Joined: Sat Apr 22, 2006 12:00 pm
Location: Christchurch

Post by rokhound »

If they are only going to be sliders and steps (and jack points) I still reckon the c clamp barcket is the best option, They will allow the chasiss to flex (which they all do), and they are more than strong enough to jack the truck up on. In fact my can be lifted up with a forklift on the steps.

Having said that, I am about to weld outriiger brackets onto my wreck to fit the exo cage too. So the sliders will get bolted to these.
Ugly is a state of mind..... and the state of my truck!
User avatar
wjw
Hard Yaka
Posts: 3420
Joined: Thu Jan 15, 2004 12:00 pm
Location: Christchurch
Contact:

Post by wjw »

muddyhilux wrote:wjw were u planin on weldin plates onto the end of ur tubbing or were u just gona weld them on as per ur pic?


I'll put plates on the end and weld the plates to the chassis rails. Probably make a C shaped plate so it wraps around.
-----------------------
Who knew Prados could fly?
User avatar
muddyhilux
Hard Yaka
Posts: 1307
Joined: Wed Oct 04, 2006 12:00 pm
Location: auckland

Post by muddyhilux »

:lol: no worries steve,i knew what ya meant,and cheers for the pics,and cheers for the exta input wjw,yeh i kno its worth doing,think i was just in 1 of those friday before long weekends mood,but yeh,cheers guys,ill track down some c bracketing next week and throw that togetha with the bars,heres what they look like today after workin on them

Image

just gota add the third connection bar tonight once ive worked out the angle etc,then yeh add some c brackets and weld mhm to the truck,and ofcourse and coat of pa10 and then zinc black to keep them inline with the hole ruff tuff truck image :lol:
User avatar
Mattman
Hard Yaka
Posts: 1643
Joined: Sun Mar 05, 2006 12:00 pm
Location: Kapiti

Post by Mattman »

I havent' got any pics of mine yet but I used Rok's idea of the C/U bracket and then ran outriggers to 75x50 RHS that sits about 5mm under the sill lip.

I used a U bracket that slips up from underneath and have a 10mm bolt at the top to pinch it together.

I have a 2in body lift so it was easy to fit everything under the body and not hang down below the chassis.

I made three outriggers and brackets for the first bar but two is plenty. I dropped back to two after testing.

Even with only tacks in place on the assembly it's no problems to use the highlift on them.

Matt.
User avatar
muddyhilux
Hard Yaka
Posts: 1307
Joined: Wed Oct 04, 2006 12:00 pm
Location: auckland

Post by muddyhilux »

well update from yesturday,things finally went well,eng and box,driveshafts are all in aswell as the new gearbox xmember which looks dam good,new eng mounts have been welded and after the cert man says he likes them ill pull them and paint them,side steps have had third attachment bar added and are pa10'd,just need to find u brackets and theyll be welded on,35s are now on the front and its actually lookin quite complete,ill get some photos up after mon and by then it should be runnin and ill get a chance to play in the back yard,have finished wiring the spotlights all profesional like and dash is completly back together,oh gota love get things done ae :D
User avatar
muddyhilux
Hard Yaka
Posts: 1307
Joined: Wed Oct 04, 2006 12:00 pm
Location: auckland

Post by muddyhilux »

well after a few litres of oil ,a wee bit of timing and a smidgin of gas

:D :D :D IT RUNS :D :D :D

after 9months of it siting while i save cash,and then a month of long long days its finally up and running,just got tidy up a few more things and get the final touches done and itll be off to the cert man,oh what a great day,ill keep uz all posted on how things go together and ill continue to throw up as many detailed pics for all
User avatar
Steve_t647
Hard Yaka
Posts: 998
Joined: Wed May 17, 2006 12:00 pm
Location: Christchurch City, In front of the computer

Post by Steve_t647 »

Congrats, I bet you are happy. Have you taken it for a spin offroad? The first thing we want to see is some articulation shots ;)

oh and a shot of you going through a McDonalds Drive through :D

Funny thing they have made them wider in the US and even have truck drive through for big rig's. No-one seem's to use the restaraunt section unless it is for a birthday!

Anyway good work that may encourage me to start mine but it is getting a little too warm to be in the shed :oops: :P
Legal disclaimer: Any information I may have provided is worth exactly what you paid me for it.
User avatar
muddyhilux
Hard Yaka
Posts: 1307
Joined: Wed Oct 04, 2006 12:00 pm
Location: auckland

Post by muddyhilux »

oh mate,unbelieveably happy.and yeh took it for a spin round the back yard and then down the street but didnt push the brand new rebuild to hard,give it 10000 kms runin or so before i thrash it ae,and yeh will do,gota trim all ma gards first and get ma ball joint spacers in and torsions set,at the mo the fronts down low so looks like some wack hot rod body driven down the strret,and mac donalds drive thru,ha yeh right,ill get a pick of me driven ove the lil walls into the drivethru they have tho :lol: :lol:
User avatar
muddyhilux
Hard Yaka
Posts: 1307
Joined: Wed Oct 04, 2006 12:00 pm
Location: auckland

Post by muddyhilux »

well bit more of an update,spots are all fully wired up and working well,front grills back in and looking tidy,ball joint spacers are in and suspension is set so lloks alot more even now,and my windows all work again,(had a wee accedint and cut out the control box which i mistook for the old alarm brains :oops: )but yeh all good now :D ,heres a couple pics

Image

mates ute is lowered on 16s but yeh,and as for flew,these are before i removed the rear sway bar,which made a real difference

Image
Image

after seeing how its turned out i probly could have got away with just a 3" body lift but i suppose ive now got room to run some 36" simexs if i eva get them
Last edited by muddyhilux on Wed Mar 11, 2009 6:09 pm, edited 2 times in total.
User avatar
UBZ
Hard Yaka
Posts: 1648
Joined: Sat Aug 19, 2006 12:00 pm
Location: Twizel

Post by UBZ »

Very Nice Work

Cant wait to see how she preforms off road :twisted: :twisted:

You have given me motivation to complete what I have started on my Surf :roll: :roll:
LR110 ..... LJ50 project :roll:
Chris.
User avatar
muddyhilux
Hard Yaka
Posts: 1307
Joined: Wed Oct 04, 2006 12:00 pm
Location: auckland

Post by muddyhilux »

lol no worries mate,yeh i cant wait to see how she goes either ae,and dont worry mate,ull get there,good things take time ae :)
Last edited by muddyhilux on Sat Nov 03, 2007 4:53 pm, edited 1 time in total.
1990 surf 350 chevy jacked up and currently under construction again
User avatar
86-surf
Hard Yaka
Posts: 893
Joined: Fri Nov 02, 2007 12:00 pm
Location: Rotorua

Post by 86-surf »

shizer!! that thing is a beast! cant wate to finish mine!
User avatar
muddyhilux
Hard Yaka
Posts: 1307
Joined: Wed Oct 04, 2006 12:00 pm
Location: auckland

Post by muddyhilux »

well its been a while so heres an update,ive made up my new adjustable panhard rod and thats all in and lookin good

Image

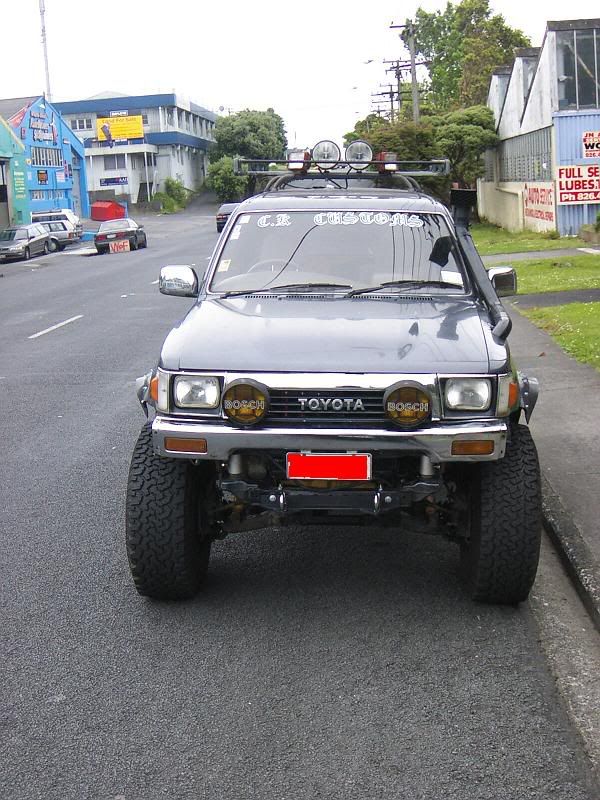
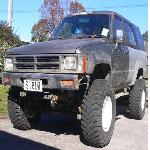
after the ball joint spacers were in i set my torsions and got a wheel alignment,at which it ended up lookin like this

Image

altho this is all good we discovered that the original cams of the adjustment dont have enuf movement to correct the camber of the lhs wheel,so ive now made a new plate which is currently being welded to the top of the a arm which will effectivly move the ball joint out 6mm from original which should hopefully correct this error,

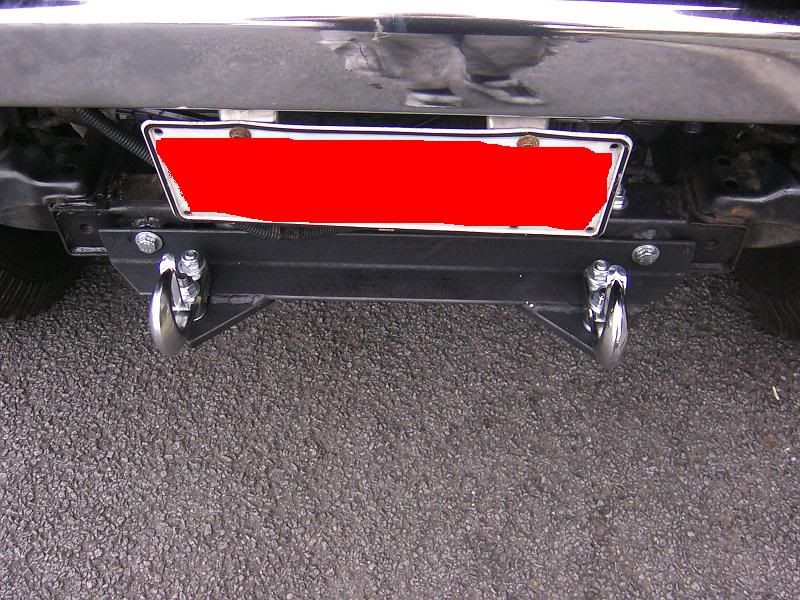
also my tow hooks have arrived thanks to warrnen at 4wd bits and high lift is on the way,

side bars are on,4/6 mounts complete and the last two are gona be done tomorrow,they ended up looking like this once mounted

Image

steering shaft has now been declared as not enuf spline contact so ive made up a new spacer to correct this

also the xaust from cat back i declared dead as it was rusted and full of holes so thats been removed,ive then cut 2 100mm sections out of the pipe pre the cat,1 either side of the flex bit,added a 2"freeflow muffler behind the cat followed by a 2" strait pipe to 2"mandrel bend at 90deg and then a final 2" strait pipe out the side of the truck exiting through the hole in the lower control arm bracketing,sounds good,wee bit loud but lets the engine rev out alot beter and gives it quite a bit more power to i think,atleast it drives like it has more power,will put some pics up asap

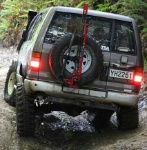
in the fuel tank situation i have cut out the xmember at the back of the chasis which used to hold the spare tyre up,im now in the process of making a replacement which will be welded to the very back of the chasis and am curently in the process of sourcing a fuel tank which will slot right up in side the newly created hole and will sit only 50-60mm below the chasis line,tank of choice for me is from a 2000 model suzuki grand vitra,ive sourced one but they want 295 so am currently questioning weather to not get the fuel pump with it and custom fit one of my 3 hilux pumps to it or wether i hunt high nd low through pickaparts to try find one for probly not more than $80

and to wrap up in conclusion,cert man checked all work done and all planned work on fri and has confirmed hes happy and told me to "finish the bloodly thing so you can have some fun",so ive got all this week off work and is planned to be on the road fully leagl by the wend of the week

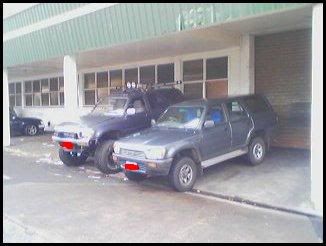
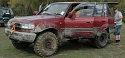
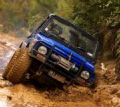
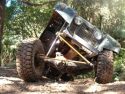
also couple pics beside my brother n laws nissan d21 and my mates surf from work

Image
Image
Image
Last edited by muddyhilux on Wed Mar 11, 2009 6:11 pm, edited 2 times in total.
User avatar
Mattman
Hard Yaka
Posts: 1643
Joined: Sun Mar 05, 2006 12:00 pm
Location: Kapiti

Post by Mattman »

Looking good.
User avatar
Sawdoc
Hard Yaka
Posts: 145
Joined: Fri Dec 29, 2006 12:00 pm
Location: Christchurch
Contact:

Post by Sawdoc »

thats some cool engineering 8)
91 HZJ73 Cruiser, 4.2 non turbo,33 x 12.5 kl71's,UHF radio, snorkle, diff breathers, Factory winch, Awesome club truck.
User avatar
UBZ
Hard Yaka
Posts: 1648
Joined: Sat Aug 19, 2006 12:00 pm
Location: Twizel

Post by UBZ »

Looking Good :twisted: :twisted:

Can you post up some pics of the ball joint spacers and how you installed them.
I have 1" spacers to go in but when I looked at fitting them I dont see how it is possible without cutting the upper A-Arm to fit the bolts.

Also which points on the steering shaft were deemed to have to much spline exposed?
I have slipped most of mine a little to accommodate my body lift and may require a spacer for Cert. :(
LR110 ..... LJ50 project :roll:
Chris.
User avatar
muddyhilux
Hard Yaka
Posts: 1307
Joined: Wed Oct 04, 2006 12:00 pm
Location: auckland

Post by muddyhilux »

cheers mattman and sawdoc,and ubz,u would be almost correct,mine are also 1"but instead of cuting the a arm(which if u did and is pos then ud just put 2" and b done with it) i headed itwith a gas torch and bent the lip back,therefore not technically majorly changing anything and will go strait threw cert,also it wasnt so much that the cert man failed me on the steering but i myself did,i just wasnt happy and knew i could make iot better,where it was is at the top end of the sgaft just inside the fire wall,like uv probly done u would have left the bottom tight and all the spline at the top has been removed,i was only left with about 10mm of contact and just wasnt happy so yeh

what size body lift did u do?,becoz of now making a longer spacer i now have my original 30mm spacer left if ur interested which only takes like 5 mins to put in :D
User avatar
UBZ
Hard Yaka
Posts: 1648
Joined: Sat Aug 19, 2006 12:00 pm
Location: Twizel

Post by UBZ »

Ive got a 2" body lift in.
I have slipped my steering in the same way you had , mainly on the inside of the firewall.
I would defiantly been keen to try out the 30mm spacer you have left over as my steering is at full stretch.

Im going to go pick myself up some upper A-Arms from a wrecker so I can experiment with the ball joint spacers.
LR110 ..... LJ50 project :roll:
Chris.
User avatar
muddyhilux
Hard Yaka
Posts: 1307
Joined: Wed Oct 04, 2006 12:00 pm
Location: auckland

Post by muddyhilux »

all good ubz,30mm should suit a 2"lift perfectly ae,and as for going to a wrecker,dam that could be expensive,where are u in auks,ive got 4 arms out the back yard not bein used,you can have a look at those if ya want
User avatar
UBZ
Hard Yaka
Posts: 1648
Joined: Sat Aug 19, 2006 12:00 pm
Location: Twizel

Post by UBZ »

That would be fantastic :D :D :D

Im in Blockhouse Bay , but quite happy to drive across the city.

Chris
LR110 ..... LJ50 project :roll:
Chris.
User avatar
muddyhilux
Hard Yaka
Posts: 1307
Joined: Wed Oct 04, 2006 12:00 pm
Location: auckland

Post by muddyhilux »

lol,i work in newlynn,and im off work for the week fixin my truck so if ya want my truck and a spare a arm will be here tomorow if u wana cme down n check them both out 0273242055

chandler
User avatar
muddyhilux
Hard Yaka
Posts: 1307
Joined: Wed Oct 04, 2006 12:00 pm
Location: auckland

Post by muddyhilux »

well bit more of an update,week off work didnt get it all done but im only a day off now,all goin well cert man can fit me in tomorrow

fuel tank is in,found one at pick apart for $50,had to get bung solderd up for 45 and fill pipe move for 100 so all up $195 and i used my sender unit from a my old tank so fuel gauge is all still primo

Image

Image

snorkel is on and lookin not to bad

Image

front end of chasis as had 6 crush tubes put in for decent bar/winch housing mounting,i stuffed one up so that was frustrating

side steps are welded on and looking good,ended up going back to only 2 mounts each side rather than the original 3,just didnt need them

mudflaps are all on and flares aswell,endid up putin my original 50mm flares on and then bolting a 100mm wide stip of rubber onto the bottom,40 under,60 expopsed so with all the zinc capscrews n washers id say it quite suits the vechile,can see these on above pic

mhm what else,took out my old 25mm steel bonnet spacers and replaced them with sum niffty 20mm aluminum ones,look alot tidyer and still good clearance to let all that warm air out

also got my sign writing done and my stickers arived,cheers mike,so theyl be goin on once its certed and had a wash

Image
Image
Image

got the front plates made up for attching the snatch hooks,bloddy solid and doesnt look like itl disadvantage me much in the way of approach angles

Image
Image
Last edited by muddyhilux on Wed Mar 11, 2009 6:04 pm, edited 4 times in total.
User avatar
muddyhilux
Hard Yaka
Posts: 1307
Joined: Wed Oct 04, 2006 12:00 pm
Location: auckland

Post by muddyhilux »

pics above for all you pic whores,will get some more up asap including ball joint spacers chris
User avatar
86-surf
Hard Yaka
Posts: 893
Joined: Fri Nov 02, 2007 12:00 pm
Location: Rotorua

Post by 86-surf »

The mud gaurds and flares look a bit doggey, But other then that its looking mint man, good work,
User avatar
turoa
Pyro Junior
Posts: 3112
Joined: Sun Oct 30, 2005 12:00 pm

Post by turoa »

what the hells up with the mudflaps?
User avatar
monaro427
Hard Yaka
Posts: 492
Joined: Sat Jun 18, 2005 12:00 pm
Location: where i want

Post by monaro427 »

what sort of gas tank did you use
User avatar
muddyhilux
Hard Yaka
Posts: 1307
Joined: Wed Oct 04, 2006 12:00 pm
Location: auckland

Post by muddyhilux »

and by bit doggy u mean what 86 surf,n yeh i kno turoa,but my cert guy says they need to be there so untill i get cert and 1st warrent theyll be there then theyll come off,and as for tank it was out of a suzuki of some sort,found it at pickapart so had nothing to identify,altho i kno dick all about zuks so yeh,sori i coldnt be more helpful
User avatar
muddyhilux
Hard Yaka
Posts: 1307
Joined: Wed Oct 04, 2006 12:00 pm
Location: auckland

Re: 1990 TUF LUX

Post by muddyhilux »

ok well its been a while,things went bad late last year,so its been on hold,but now im back up and moving,have recently decided that the rear end needed coil spacers as it saged below level with spare wheel,jack and gear in back end so thanks to ubz who was able to supply me with an old spring pad i made up some UHMWPE 50mm coil spacers which are now in the truck,along with parts mentioned above it now sits 15mm above level so am very pleased with the result 8) .did find however that both front lower ball joints were buggered :( so theyve both been replaced this week after work,olny things to finish now for cert are finishing xaust and side steps so will get some more pics up asap and then i think itll be time to get out and have some fun :D ,along with meeting up with a few members off the site and finally putting some faces to some names
1990 surf 350 chevy jacked up and currently under construction again
User avatar
muddyhilux
Hard Yaka
Posts: 1307
Joined: Wed Oct 04, 2006 12:00 pm
Location: auckland

Re: 1990 TUF LUX

Post by muddyhilux »

well guys,pretty much final update for now

afer a wee bit of driving,about 50m's down the road i relised after putting in my coil spacers that id actually maxed out my shocks,due to lack of funding i opeted to make a pair of shock spacers which have done the trick perfectly and now with all gear in the boot she sits 40mm above centre,just right i think,xaust wise ive now moved it so instead of sticking out the side it now curves up over the chasis and runs to the back corner and sticks out on an angle and is cut to suit the body line,thus making it look very tidy,well hidden and the extra length in pipe,although straight has now slightly further reduced the noise to a level which i am very happy with,so....


ITS NOW GOT A CERT


two weeks ago i got it to my certifyer who was more than happy with all the work done and i got the big tick,however im still waitin on the plate,but im just happy its finally done

so all in all ive endid up with a truck moded with
3.5" body lift
35" all terrains on 10" rims
ball joint spacers
front diff drop spacers
custom front mount for hooks
side steps
2"coil spacers
2" shock spacers
adjustable panhard rod
custom positioned fuel tank
snorkel
rebuilt eng
lifted gearbox and eng
lifted gearbox crossmember

quite a desent amount id say,makes me happy atleast,and im already currently working on a new rear bar with spare wheel holder and have been offered a 327 chevy which im very very interested in but mite have to pass for now,any way thats all for now,once wofd ill get it out for a spine and get a few phots plus photos for all the mods and if anyones keen to have a look just let me kno,im more than happy to show otheres how ive done it
1990 surf 350 chevy jacked up and currently under construction again
Post Reply

Return to “Projects / Mod's”