vomitron....

Starting a project or modification? Then post it's progress here and show us some pic's.
User avatar
MNC
Hard Yaka
Posts: 2100
Joined: Sun Apr 02, 2006 12:00 pm
Location: Close to (wishing I was closer to) the Puhoi Pub!

Re: P.O.S build..

Post by MNC »

niblik wrote:some new bonnet latches cos the last ones had perished..
Image


Hey dude, nice progress there. Mind me asking where you got the rubbers?


niblik wrote:got a bit of fanny action this morn too..
Image


Thats always a good win after having a baby :wink: Far and few between.
Image
User avatar
niblik
Sausage Shack
Posts: 3305
Joined: Wed May 03, 2006 12:00 pm
Location: erm.. out in the shed for a mo...

Re: P.O.S build..

Post by niblik »

MNC wrote: Mind me asking where you got the rubbers?


from supercheap.. ask for 'bonnet hooks'.. about $15 for a pair of em.. :wink:
ImageImage
User avatar
badnuz
Hard Yaka
Posts: 2367
Joined: Sat Aug 11, 2007 12:00 pm
Location: Melbourne
Contact:

Re: P.O.S build..

Post by badnuz »

yet the 40 waits :(
i used to Cruise, now i PATROL
User avatar
wopass
Hard Yaka
Posts: 5324
Joined: Tue Feb 22, 2005 12:00 pm
Location: Godzone

Re: P.O.S build..

Post by wopass »

niblik wrote:
MNC wrote: Mind me asking where you got the rubbers?


from supercheap.. ask for 'bonnet hooks'.. about $15 for a pair of em.. :wink:


but dont use the supacheap ones if your planning any road work, they arent up to it, good for low speed etc but not highway.

the zink coated ones from BJ auto spares down there are primo tho and much stronger for 20ea i think they were?
If you already know everything, DON'T ask bloody questions!!
User avatar
MNC
Hard Yaka
Posts: 2100
Joined: Sun Apr 02, 2006 12:00 pm
Location: Close to (wishing I was closer to) the Puhoi Pub!

Re: P.O.S build..

Post by MNC »

wopass wrote:
niblik wrote:
MNC wrote: Mind me asking where you got the rubbers?


from supercheap.. ask for 'bonnet hooks'.. about $15 for a pair of em.. :wink:


but dont use the supacheap ones if your planning any road work, they arent up to it, good for low speed etc but not highway.

the zink coated ones from BJ auto spares down there are primo tho and much stronger for 20ea i think they were?


Only for the Bush truck dude. Wont see any road use at all.

Nib's post was primo timing as the ones on my brown truck had perished & snapped. Was waiting at Supercheap at 8:30am this morning to get a pair :D

Will be working on the brown truck this weekend (got a leave pass for fathers day) :mrgreen: - Can't wait :!:
Image
User avatar
wopass
Hard Yaka
Posts: 5324
Joined: Tue Feb 22, 2005 12:00 pm
Location: Godzone

Re: P.O.S build..

Post by wopass »

i found with the rubber ones the metal hook that the rubber sat in slowly bent up and then the bonnet would start rattling and banging but that was road work as well so a fair bit of windage stress on the hooks. just thought i would share :mrgreen:
If you already know everything, DON'T ask bloody questions!!
User avatar
niblik
Sausage Shack
Posts: 3305
Joined: Wed May 03, 2006 12:00 pm
Location: erm.. out in the shed for a mo...

Re: P.O.S build..

Post by niblik »

a pic of clearance front guard now has......
Image

rear tow hook sorted...
Image

shroud on and fans mounted..
Image

brakes still a cawk bag. feckin farkin fawkin....
ImageImage
User avatar
MNC
Hard Yaka
Posts: 2100
Joined: Sun Apr 02, 2006 12:00 pm
Location: Close to (wishing I was closer to) the Puhoi Pub!

Re: P.O.S build..

Post by MNC »

niblik wrote:...brakes still a cawk bag. feckin farkin fawkin....


Got my new bonnet hooks on last weekend - thanks for the lead dude 8) Exactly what I was looking for.

Looks like I might be allowed to work on the truck this Saturday to. Guess what the next job on my list is:

'brakes, feckin farkin fawkin, brakes' :wink:
Image
User avatar
niblik
Sausage Shack
Posts: 3305
Joined: Wed May 03, 2006 12:00 pm
Location: erm.. out in the shed for a mo...

Re: P.O.S build..

Post by niblik »

MNC wrote:guess what the next job on my list is:

'brakes, feckin farkin fawkin, brakes' :wink:


not on my list anymore.. :!: all bled.. thanks T-rex for hookin up a yoshi.. me ruv you rong time..
ImageImage
User avatar
niblik
Sausage Shack
Posts: 3305
Joined: Wed May 03, 2006 12:00 pm
Location: erm.. out in the shed for a mo...

Re: P.O.S build..

Post by niblik »

last steering link done..
Image
ImageImage
User avatar
kbjj
Sausage Shack
Posts: 712
Joined: Sat Apr 10, 2010 3:51 pm
Location: Rangiora

Re: P.O.S build..

Post by kbjj »

Hope that leaf spring dosn't flatten too much and foul the steering arms, or does photo make that look closer than it is... or will that viagra thing stop that happening :D

Hey, that mean it driveable. Good work. Next bit started yet? You know you've got time :twisted:
If you break it... build it stronger.
User avatar
rokhound
Hard Yaka
Posts: 2558
Joined: Sat Apr 22, 2006 12:00 pm
Location: Christchurch

Re: P.O.S build..

Post by rokhound »

kbjj wrote:Hope that leaf spring dosn't flatten too much and foul the steering arms,


If it still rides like it used too, there isn't much chance of the spring deflecting at all, either up or down :mrgreen: :mrgreen: :mrgreen:

Good work nibz, you have done goodly :wink: :P
Ugly is a state of mind..... and the state of my truck!
User avatar
niblik
Sausage Shack
Posts: 3305
Joined: Wed May 03, 2006 12:00 pm
Location: erm.. out in the shed for a mo...

Re: P.O.S build..

Post by niblik »

rokhound wrote:
kbjj wrote:Hope that leaf spring doesn't flatten too much and foul the steering arms,


If it still rides like it used too, there isn't much chance of the spring deflecting at all, either up or down :mrgreen:


it shouldnt foul. it also does look closer than it is..

as rok said, it wont even get the chance to foul as its limited in its travel.. a lot.. a heap.. actually, i think the diffs are welded to the chassis.. :oops:
ImageImage
User avatar
niblik
Sausage Shack
Posts: 3305
Joined: Wed May 03, 2006 12:00 pm
Location: erm.. out in the shed for a mo...

Re: P.O.S build..

Post by niblik »

first got a different recovery hook for the front of vomitron. i hate the side mounted styles. pet hate. so got these. side bolted but upright for hookin on ropes/strops... also slight offset to clear front of chassis rail.. maybe you need something like this kbjj?
Image

Image

then drilled some holes, 12mm right the way through but took one side out to 22mm to accept the 4mm thick tube for crush sleeving.. ones at 18mm other dremel'd out to be gooderest..
Image

and the other side / inside of the rail...
Image

in this next photo ya can see where i tacked it in on this side and took it back to be flush for smooth fitting of plating.
Image

plated both sides of the chassis with 5mm like this.. (mid operation)
Image

and then it all fits together like this..
Image

looks close to the front bib but it clears nicely from the bib and chassis..
ImageImage
User avatar
petefj40
Ms Daisy
Posts: 4218
Joined: Mon May 01, 2006 12:00 pm
Location: The Mainland

Re: P.O.S build..

Post by petefj40 »

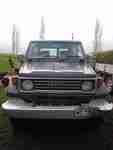
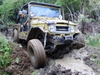
niblik wrote:a pic of clearance front guard now has......
Image


Tow hooks looking capable. :mrgreen:
How's that clearance with some new rubber though nibs? :shock:

:D
User avatar
petefj40
Ms Daisy
Posts: 4218
Joined: Mon May 01, 2006 12:00 pm
Location: The Mainland

Re: P.O.S build..

Post by petefj40 »

STILL, the little 40 waits.
(nice one Euan)
:lol:

So you got 4 weeks to get the landy up to speed nibs.
You'll be unstoppable on the 17/10 i recon mate.
User avatar
kbjj
Sausage Shack
Posts: 712
Joined: Sat Apr 10, 2010 3:51 pm
Location: Rangiora

Re: P.O.S build..

Post by kbjj »

[quote="niblik"]first got a different recovery hook for the front of vomitron. i hate the side mounted styles. pet hate. so got these. side bolted but upright for hookin on ropes/strops... also slight offset to clear front of chassis rail.. maybe you need something like this kbjj?
quote]


I like but don't think they will suit my situation, buggar it
If you break it... build it stronger.
User avatar
niblik
Sausage Shack
Posts: 3305
Joined: Wed May 03, 2006 12:00 pm
Location: erm.. out in the shed for a mo...

Re: P.O.S build..

Post by niblik »

the 40 can wait. i dont mind. i know i can finish it when i want.

the pic of front guards clearance is with the new (to me) silverstones on it.. also the tyre is slightly higher (couple of inches) than stock ride height.
ImageImage
User avatar
MNC
Hard Yaka
Posts: 2100
Joined: Sun Apr 02, 2006 12:00 pm
Location: Close to (wishing I was closer to) the Puhoi Pub!

Re: P.O.S build..

Post by MNC »

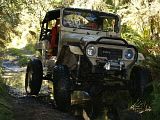
niblik wrote:first got a different recovery hook for the front of vomitron. i hate the side mounted styles. pet hate. so got these. side bolted but upright for hookin on ropes/strops...

Image

Image...


I agree Nibs, dont like the idea of snatch strap having chance of slipping off a side mounted hook. Cant lead to any good. Are your new hooks rated? and did you get them from somewhere special?

Nice work too. Looks like you've been given a few leave passes of late - to spend time working on the truck. 8)

Great progress.
Image
User avatar
niblik
Sausage Shack
Posts: 3305
Joined: Wed May 03, 2006 12:00 pm
Location: erm.. out in the shed for a mo...

Re: P.O.S build..

Post by niblik »

rover steerin sucks arse.. sooooo.......

cut the worm drive off the bottom of the steerin column and trimmed up a manual cruisers steerin spline, pressed into some pipe and plug welded..
Image

then made a captive bracket and mount to locate the bottom of the column and keep everything 'true' durin turning etc.. bolts go through the bottom of the column, through an alloy spacer, into the threaded bracket.
Image

mounted.. note the grub screws to locate and secure the inner bearing onto steerin shaft..
Image

made up a twin pulley.. hope it lasts.. had to configure this twin pulley system as 1 belt around the lot wouldnt get enough purchase/contact area on the pulleys.. (alt, crank, water pump, power steer pump)
Image

made a power steerin pump bracket and mounted em..
Image

Image

as everything in the engine bay is wicked snug styles, fitted the reservoir for the pump onto the shroud. its not heavy and is about the only spot spare above the pump..
Image

as the steering box sits, its forward most bolts sit in line with the front most crossmember, so there was no way of gettin around it. cleared out some room, and welded some nuts on inside of plating securing box. rear bolts go through chassis and are crush sleeved..
Image

Image

then welded plate onto chassis goodly..
Image

finally, the box sittin purty..
Image

thought i may bolt through plate at front of box right through chassis.. just to be safe..
ImageImage
User avatar
petefj40
Ms Daisy
Posts: 4218
Joined: Mon May 01, 2006 12:00 pm
Location: The Mainland

Re: P.O.S build..

Post by petefj40 »

Looking pretty trick there nibs.
User avatar
rokhound
Hard Yaka
Posts: 2558
Joined: Sat Apr 22, 2006 12:00 pm
Location: Christchurch

Re: P.O.S build..

Post by rokhound »

See, told ya you would have time to PS the POS.
I do have one wee observation though, those fans will do fark all until you cut some holes in the rad shroud :mrgreen: :mrgreen:

Looking good Nibz
Ugly is a state of mind..... and the state of my truck!
User avatar
niblik
Sausage Shack
Posts: 3305
Joined: Wed May 03, 2006 12:00 pm
Location: erm.. out in the shed for a mo...

Re: P.O.S build..

Post by niblik »

rokhound wrote:I do have one wee observation though, those fans will do fark all until you cut some holes in the rad shroud :mrgreen: :mrgreen:


not too observant are ya? see the join in the gib goin down through the right hand fan? follow it.. :roll:

and youre checkin out earthquake damage? :?

*fingers* :mrgreen:
ImageImage
User avatar
rokhound
Hard Yaka
Posts: 2558
Joined: Sat Apr 22, 2006 12:00 pm
Location: Christchurch

Re: P.O.S build..

Post by rokhound »

So it's 1/2 done :roll:
That would be typical of you eh? :mrgreen: :mrgreen:
Ugly is a state of mind..... and the state of my truck!
User avatar
niblik
Sausage Shack
Posts: 3305
Joined: Wed May 03, 2006 12:00 pm
Location: erm.. out in the shed for a mo...

Re: P.O.S build..

Post by niblik »

using the standard 302 air cleaner housing, the intake for it was on the wrong side so i made a blank for that part...
Image

and fizzed on a new inlet to align the intake pipe better..
Image

onto this mount on the upper footwell of the firewall..
[img] it has some stainless mesh on there to prevent leaves and large particulates being sucked in, then the filter does the rest..
Image

so it all fits together best..
Image

dunno if i mentioned earlier, but put a radiator overflow on to keep as much fluid in her as poss..
Image

after mounting the last power steering pump, that i was led to believe was out of a 60 series cruiser *cough* horseshit *cough*, i had trouble finding a high pressure fitting to fit the outlet side of the pipe.. so i took that stoopid number out and got a new pump off rokhound.. cheers fella.. made a new bracket..
Image

and here she is mounted.. ya might be able to see the sliding adjuster i put on the back so as to provide a tensioner on this belt..
Image

and seein as the power steering was all but done, put a mig lokka in the back courtesy to much help from kbjj aka jeremy, oober good bastard and helped me out immensely, and put the auto lokka up front..
Image

also made the shaft from steering column to steering box, but forgot pics.. eh.

must say a big thanks to classiccruiserspares aka jason too.. much help in sourcing parts and bouncin around ideas..
ImageImage
User avatar
niblik
Sausage Shack
Posts: 3305
Joined: Wed May 03, 2006 12:00 pm
Location: erm.. out in the shed for a mo...

its farkin finished!!

Post by niblik »

yesty = put oil in the diffs, driveshafts back on, put alt belt and power steer belts on, put low pressure return line on power steerin, made some brackets for securing power steer lines, high pressure line made, just need to install, roof painted and back on, cage painted, tie rod fabbed and put on, anti freeze/boil in system, radiator fans and shroud back on and wired up, battery in, passengers seatbelt in and bolted down.

so, need to install high pressure power steer line, put air filter in, fill and bleed pump and lines, test.

today put high pressure line in and tested.. it goes!!!!!! FARK YEAH!!!!

after a quick short in the fan power lines to locate and fix, thanks jezza!, it goes mint!! rollin down through the local hood, crankin that gangsta shiat!!

will get some vid of it tomoz.. bit too dark now for vids..

woot.. its finished.. :twisted: :twisted:
ImageImage
User avatar
chrome
Hard Yaka
Posts: 946
Joined: Wed Jul 20, 2005 12:00 pm
Location: the swamp

Re: P.O.S build..

Post by chrome »

looks mean :D
DIRTY OLD HILUX
022 519 7700
User avatar
You Get That
Hard Yaka
Posts: 429
Joined: Wed Aug 26, 2009 4:05 pm
Location: Southland

Re: P.O.S build..

Post by You Get That »

You cant beat welded diffs :mrgreen:
Addicted to suzukis....
User avatar
lilpigzuk
Tiger Balm
Posts: 2316
Joined: Mon Dec 09, 2002 12:00 pm
Location: Counties

Re: P.O.S build..

Post by lilpigzuk »

Please attach :mrgreen:

Image
User avatar
ClassicCruiserSpares
Sausage Shack
Posts: 1259
Joined: Sat Jan 16, 2010 9:16 pm
Location: Christchurch,

Re: its farkin finished!!

Post by ClassicCruiserSpares »

niblik wrote:
woot.. its finished.. :twisted: :twisted:


Lucky for some, but good too hear its all done and working, good effort :D :D
Toyota Landcruiser FJ40, front and rear lockers, 35" simex.
Toyota FJ45 build in progress.
Tires are like boobs, they always look big until you have played with them for a while, then you just want a bigger set.
Post Reply

Return to “Projects / Mod's”