bj40 build...

Starting a project or modification? Then post it's progress here and show us some pic's.
Post Reply
User avatar
niblik
Sausage Shack
Posts: 3305
Joined: Wed May 03, 2006 12:00 pm
Location: erm.. out in the shed for a mo...

Post by niblik »

many thanks to h2olova and goose.. they joined me on a late night excursion to h2o's work and prceeded to pull the diffs apart. strip them right down to get them prepared for a full refit of wiper kit,seals,bearings,everything! :D

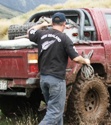
when fiddling around with the 60, pre pullin diffs out, h2o found the rear diff had a sticker sayin lsd.. sweet! unexpected surprise... joy..

pic below shows the good condition lsd on right and open diff 'pre-locker :twisted: ' left.. they'll be swapped so the lsd is up front and locker in rear..
Image

when doin the front diff, thought that the rotors could probably get away with a resurfacing... then had a rethink and doin it right was the call so 'be gone' front rotors.. to remove was something new to us all, so the two 'locater' bolts were removed from inside the hub, replaced wheel nuts on studs as to take the force of hammering out the studs.. then with a bit of 'encouragement', the rotors came free...
Image

then all the bearing seats were removed with a cold chisel punch and all that remains is to use the parts wash at work to tidy up pieces for an inspection and prep for refit with new sparkly nice parts.. might have to sand blast the pieces that will be exposed to nature, to prep surface for a coat of paint (oh, and NO, its not dayglo pink :!: ) :lol: ... then wash em..
Image

all the half axles and birfields looked in good condition too, bonus! :D just gotta get perches to enable the suspension mock ups.. :roll:

busy busy.. wash, wash and then blasting, then comes some welding, painting and reassembly.. more to come soon.. bit miffed that i have been slow on the progress lately.. next week is going to be better.. :twisted:
User avatar
niblik
Sausage Shack
Posts: 3305
Joined: Wed May 03, 2006 12:00 pm
Location: erm.. out in the shed for a mo...

Post by niblik »

talkin to a couple of lads in the chatrooms and had an epiffany....

number plate for my 40 when complete...

Image

it'll please a few people... :roll: :lol: :lol:
Last edited by niblik on Fri Jul 21, 2006 12:27 am, edited 1 time in total.
User avatar
rokhound
Hard Yaka
Posts: 2558
Joined: Sat Apr 22, 2006 12:00 pm
Location: Christchurch

Post by rokhound »

Steve Eat yer heart out Baby :lol: :lol: :lol:
Ugly is a state of mind..... and the state of my truck!
User avatar
niblik
Sausage Shack
Posts: 3305
Joined: Wed May 03, 2006 12:00 pm
Location: erm.. out in the shed for a mo...

Post by niblik »

well well well... spending money is easy to do... spending it on the right things in the right place at the right time is the trick... :roll:

oh trivial dramas...

first of all, i finally recieved the replacement fixed pin mounts... great! only problem is i had ordered them to take 60# greaseable pins and when i put my new pins in the mounts, not good... :evil: after talkin to the parties involved, i was informed that i would need to use 75# rear pins:?: after askin 'WTF?' i found out the rear pins on the 75 have a larger drop seaty bit thang.. now i'm getting a set of those sent to me.. :x dont need dumb ass delays from crap like that, always the way though huh!
these are the perches......
Image

i have taken the rear leaves apart, removed any rust scale and given them a quick scuff and a coat of paint.. next is to fit some anti friction gumbo then reassemble the packs with new locator pins too... (old pins were knackered) top leaf is finished and pre fitting, bottom leaves are yet to do.... ya can see my new obselete pins.. :cry:
Image

during some free nights i managed to do some sandblasting on the disc covers and hubs and also the steering knuckles too.. get all the crappy chipped muck off them..
Image

then got some of my 'picasso' skills out and got creative.. ah look, the masterpiece... :wink: :lol:
Image

then theres the 60 series diffs which h2o was able to utilise one of his many contacts to do some 'plasma action'! cheers again h2o!! :D so off came the perches and i ground down the left over waste and cleaned them up ready to place new perches on for the soa... oh yeah.. i'm goin soa again :oops: ... i'd just end up wanting it later, so why not pre-empt the inevitable?!
this pic is the perches removed and the diff cleaned and ready for a bit of axle angle fabbing turn thing stuff... you get what i mean.. :wink:
Image

with the 4 greasable pins i bought, to fit a 60,are surplus to requirement and no good as i'm gettin 75 rears all round.. luckily h2olova had a need for some bling bling on his truck.. i think he likes the idea of having bling on his shiny.. :lol: :lol:
Image

so as i said at the beginning, went shopping and got a pair of new rotors, wheel bearings, disc pads, steering knuckle wiper kit (includes king pin bearings,seals,lock tabs,etc...) good fun buyin new bits! :P thanks to westie for putting me onto that contact.. bloody legend! :D

thats enough rambles... back soon with more.. love buildin.. :!: :twisted:
User avatar
JTop
Hard Yaka
Posts: 236
Joined: Mon Jan 09, 2006 12:00 pm

Post by JTop »

vintage cars used to wrap their leaves in leather to keep road grime out, I wonder if that would work for you
I have also seen a G clamp with a grease nipple in 1 end and a wedge to separate the leaves and force grease between them to keep them flexing.
Then again I have seen coils fitted to take all those hassles away :D :D
J Top
User avatar
H2OLOVA
Hard Yaka
Posts: 1153
Joined: Tue Jun 06, 2006 12:00 pm
Location: Christchurch

Post by H2OLOVA »

As mentioned earlier Nibby has a LSD from the 60. Before we go reassembling the diffs, would it be worth checking the torque/clutch setting on the LSD? i have read here in previous posts about tightening up the clutch pack to increase the "grip" of the LSD. Neither of us have any experience with LSDs so any info would be great.
***Got the balls, just ain't got the bucks***
User avatar
niblik
Sausage Shack
Posts: 3305
Joined: Wed May 03, 2006 12:00 pm
Location: erm.. out in the shed for a mo...

Post by niblik »

well, goin has slowed.. finances have a way of doin that.. :-@

what i have done is reassemble the newly painted spring packs with new locater bolts and a slight greasing between leaves... also have pulled a few covers and bits off the 3b and done the 'red goo' thang.. :wink: prevent a few dodgy leaks and dribbles i hope.. sandblasted rear hubs for a painting and drawn up plans for the rear caliper mount for disc conversion.. just need to get cut... diff perches getting folded up at the moment too..

well.. thats all for now..
User avatar
MNC
Hard Yaka
Posts: 2100
Joined: Sun Apr 02, 2006 12:00 pm
Location: Close to (wishing I was closer to) the Puhoi Pub!

Post by MNC »

H2OLOVA wrote:As mentioned earlier Nibby has a LSD from the 60. Before we go reassembling the diffs, would it be worth checking the torque/clutch setting on the LSD? i have read here in previous posts about tightening up the clutch pack to increase the "grip" of the LSD. Neither of us have any experience with LSDs so any info would be great.


Hey guys, there is a really good article in the May 2006 issue of "Australian 4WD Monthly" mag.

They recommended taking out the diff head and taking it into a good diff specialist. They pack the LSD With Steel Shim papar (5thou & 10thou) between the LSD casing and clutches which increases the preload. They did a bit of trial and error but packed in the shims until they got a preload of between 90 - 110 lbs.

Aparently it dramatically increased the locking effect and cost approx $200.
User avatar
niblik
Sausage Shack
Posts: 3305
Joined: Wed May 03, 2006 12:00 pm
Location: erm.. out in the shed for a mo...

oooohhhh, now thats classy....

Post by niblik »

few more bits done on the 40's tub.. drivers footwell had slight cancer of the rust variety.. :? got that cut out and new bit fabbed up and welded in

Image

then found a litlle more 'thinning' of the panel down beside the drivers seat rise so got that cut and fabbed up too...

Image

the best bit is the big arse rear wells.. :twisted: these suckers should give the bitch sized monster tyres that it'll have, room to artic up real good... :wink:

Image

not too long till the tub is done... glee for me.. :thumright:
User avatar
niblik
Sausage Shack
Posts: 3305
Joined: Wed May 03, 2006 12:00 pm
Location: erm.. out in the shed for a mo...

Post by niblik »

alright! photos up and hummin :cheers: and much to catch up on..

ok, got the perches back all folded from 6mm plate.. radius of 83mm in them for mountin on diff, had to put a squarish notch in one so it could sit up on the front diffs pumpkin.. quick mock up for camera..

Image

h2o's done a power of weldin on the 40 as of late.. here ya see the gusset for the rear bar and spring mount in 'pre weld' form..

Image

then chassis turned over so you can now see the new rear chassis bar and the welded in gussets on each corner.. salvaged these gussets off chassis while taking off old rusty bar.. nb: in the background you can see gooses feet, and theres no sign of jandals! talofa my friend.. :wink: :lol:

Image

got the mounts for the swingin shackles onto some 10mm plate then put that onto the chassis.. brace type bit made with a bit of 5mm plate..

Image
Image

and the fixed pin mounts were put onto the front and back.. backs were put onto 10mm plate also and then put onto chassis..

Image

the c-bar chassis at the front wasnt quite 'tuff enuff' lookin so cut a piece of 5mm plate to close off the c section of chassis to stiffen it up and give better support.. then a bit of rectangular bar put between the mounts at the front to give some 'anti flexing' support for the chassis rails.. cant be too sure aye.. :wink:

Image

the rear mounts were put in and spring pack mocked up with the rear diff and perches put in to see how it all sort of comes together.. rear mounts straight onto gusset inline with chassis rail,(ya can see a small bit of 5mm plate welded into chassis to strengthen it from the 'crush value' by the rear of the leaves.. 1 leaf removed from 60 series pack and up to the front fixed pin mount thats been gusseted up..

Image

well, theres a heap that i've missed so it might not all be in perfect order.. will be updating again soon when get pics of other bits done, so stay tuned 4wd freaks... :!: still loving the build :!: :twisted:
ImageImage
User avatar
niblik
Sausage Shack
Posts: 3305
Joined: Wed May 03, 2006 12:00 pm
Location: erm.. out in the shed for a mo...

Post by niblik »

just showin some of h2o's handywork.. fabricated this engine mount up.. damn purty.. :D have to give h2o some big thanks for so many late nights and long hours.. thanks guy.. :cheers: :thumleft:

Image

and a fews pics of the front and rear diffs in s.o.a form with the engine, gearbox and transfer in and mounted..

Image
ImageImage
User avatar
niblik
Sausage Shack
Posts: 3305
Joined: Wed May 03, 2006 12:00 pm
Location: erm.. out in the shed for a mo...

Post by niblik »

made some goodly progress on the front diff..

first things first, the token islander got rid of the sway bar connects..

Image

so they're gone, cheers bruce..

Image

trimmed them up flush with the housing.. the next step was to cut the outer housing of the diff and turn the bugger to compensate for angling the diff up at the transfer.. this is the part that i have been sorta dreading..

Image

so the next pic is the housing outer all cut and ya can see the black line across for the reference point.. the first cut was a bit of a trick.. i didnt know the wall thickness of the diff housing and thus how far to cut down into it.. about 5mm in the end was the preferred depth, and to make life easy for yaself, cut on the inside edge of the weld at the end of the housing.. trust me..

another tip for the turn is to leave the old kingpin bearing seats in the swivel housing.. this will protect the lower seat part of the housing and the thicker sidewalls of the housing can take the load of the turn..

then placed a solid 3 foot bar through the kingping holes and put a bit of weight on the bar.. ( the weights name was goose :wink: :lol: )

Image

ready to turn? cross ya fingers, here goes...... :?
success! victory is mine!!!!! :D

Image

sweet!! unfortunately ran out of time, but next up is the squaring up of the swivel housings then weld 'em back up.. :!: :twisted:
ImageImage
User avatar
H2OLOVA
Hard Yaka
Posts: 1153
Joined: Tue Jun 06, 2006 12:00 pm
Location: Christchurch

Post by H2OLOVA »

how come theres no pictures of the right hand swivel Nibby? :roll: :wink: :lol:
***Got the balls, just ain't got the bucks***
User avatar
rokhound
Hard Yaka
Posts: 2558
Joined: Sat Apr 22, 2006 12:00 pm
Location: Christchurch

Post by rokhound »

Go on h20, what did our friendly native person do ????? :D
Ugly is a state of mind..... and the state of my truck!
User avatar
niblik
Sausage Shack
Posts: 3305
Joined: Wed May 03, 2006 12:00 pm
Location: erm.. out in the shed for a mo...

Post by niblik »

bah! i'll beat ya both to it...

i cut through the weld but couldnt turn.. the weld must have gotten great penetration.. :(

so............. had to do the cut on the inside of the weld, hence:
cut on the inside edge of the weld at the end of the housing.. trust me..


:insert sigh icon:
ImageImage
User avatar
niblik
Sausage Shack
Posts: 3305
Joined: Wed May 03, 2006 12:00 pm
Location: erm.. out in the shed for a mo...

Post by niblik »

just got bored at work and had a bit of a play with the microsoft paint thingy and designed a rollcage for 'dayglo'.. :D its pretty much a calaboration of a few aspects of lots of different cages, combined to be the one.. not too sure about the second bar behind the drivers position.. :? good for the mounting of the bikini top thang though, it'll keep the roof tight and back to give my head cover from the sun.. also the mid bars will angle up slightly to the bend, then straight or downwards slightly to the crossbar.. this is to eliminate water pooling on the ragtop.. :wink: the mid bars also angle towards the middle to give clearance for the 'headroom' factor,both gettin in it and when launching/bouncin around.. :D

Image

the pictures rough enough, you should get an approximate idea.. still a long way off though, got plenty to do before the cage is needed but thought i'd put this out there and see what people might think..

well, t.t.f.n... :mrgreen:
ImageImage
User avatar
mroffroader
Hard Yaka
Posts: 2330
Joined: Sat Mar 25, 2006 12:00 pm
Location: Lower Hutt WELLINGTON :D
Contact:

Post by mroffroader »

looks good to me :lol: 8)
80 series tow bus towing a redneck ass vitara :D
User avatar
rokhound
Hard Yaka
Posts: 2558
Joined: Sat Apr 22, 2006 12:00 pm
Location: Christchurch

Post by rokhound »

Looks choice Nibby. :D

Didn't the paint programe you were using have Dayglo PINK? :twisted:


Image :twisted: :twisted: Cool another chance to use this pic!!!
Ugly is a state of mind..... and the state of my truck!
User avatar
JTop
Hard Yaka
Posts: 236
Joined: Mon Jan 09, 2006 12:00 pm

Post by JTop »

His Nibs
there are no triangles in your cage, try and fit a diagonal in there somewhere.
The bends arround the dash look good but are probably impractical, the trick I have seen in 40s is to neatly cut out that triangle of dash in each corner and weld it back in concave, this lets the bar right up by the dash.
You have to lose the windscreen turnbuckles but it gives you better footroom for climbing in
J Top
User avatar
H2OLOVA
Hard Yaka
Posts: 1153
Joined: Tue Jun 06, 2006 12:00 pm
Location: Christchurch

Post by H2OLOVA »

Thats looking pretty flash Nibby 8) You'd better start saving for a bender!!!! And while reading your comments, how come you talk about keeping the rag top nice and tight and keeping the sun off your head, but don't mention once about how strong the cage will be and how well it will save your head when (and i mean when not if :wink: ) you tip it over. :?
***Got the balls, just ain't got the bucks***
User avatar
niblik
Sausage Shack
Posts: 3305
Joined: Wed May 03, 2006 12:00 pm
Location: erm.. out in the shed for a mo...

Post by niblik »

been doin a few hours with h2o on 'dayglo'..

began by puttin together the rear hubs together, being a full floating rear i didnt worry about placing disc and caliper bits on yet, no axles either.... besides, havent got them fabbed up yet.. :roll:

got some plates folded up from 10mm plate... beasty.. measured up holes for the u-bolts to go through and then had to do the off centre location pins holes too.. ( off centre just to push the diff that little bit more away from centre of vehicle.. better wheel base and approach angles.. will measure and post it up too, i'm curious to know the length.. ) then drilled em up.. :)

fronts hubs were all good.. h2o made a tool to seat bearings easier, an old bearing race/seat had a bit of bar welded across.. matches up fine to the new item and tap tap taparoo, in it went.. (no, no presses available..) got a pair of new vented front rotors for the fronts and got a fish scale from the warehouse to measure front kingpin preload thingy stuf whatsit.. all shimmed up and golden.. :wink: also to get around the whole diff housing being turned up to get a decent angle for the front driveshaft, had to rethink the square u-bolts around the drivers side of the pumpkin as this side is square but everywhere else is round.. didnt want to feck around with bending u-bolts or cuttin crap, so jimmied up this mount.. same as a standard 60's but inverted, well, pretty much..
Image

so once both ends were together....
Image

put them under the truck to see how it all came together..
front drivers side housing, pretty much lookin like how it will when complete...
Image

rear u-bolt plates.. much simpler process..
Image

i know theres a lot of thread on the u-bolts but there is still a lot of work to do with the leaves.. will probably need to add a leaf and there was no washers on, so a little more thread will be needed.. better too much than not enough huh? :D

then h2o put a pair of his 35's on just to see where the thing will sit and it looks quite neat.. will get a few pics of approach and departure angles..
Image

all goin well so far.. *fingers crossed* :thumright:
ImageImage
User avatar
rokhound
Hard Yaka
Posts: 2558
Joined: Sat Apr 22, 2006 12:00 pm
Location: Christchurch

Post by rokhound »

Lookin real sharp Nibby 8)

Keep brining it on.
Ugly is a state of mind..... and the state of my truck!
User avatar
MNC
Hard Yaka
Posts: 2100
Joined: Sun Apr 02, 2006 12:00 pm
Location: Close to (wishing I was closer to) the Puhoi Pub!

Post by MNC »

Yip, that is going to be one very tough truck.

Do I look Green? really green? NVS
User avatar
MNC
Hard Yaka
Posts: 2100
Joined: Sun Apr 02, 2006 12:00 pm
Location: Close to (wishing I was closer to) the Puhoi Pub!

Post by MNC »

niblik wrote:just got bored at work and had a bit of a play with the microsoft paint thingy and designed a rollcage for 'dayglo'..


Dont forget to put the steering wheel back on the right hand side :lol:
User avatar
hosehustler
Hard Yaka
Posts: 2051
Joined: Thu Jan 06, 2005 12:00 pm
Location: Brooklnands

Post by hosehustler »

coming along nice jas, you gonna be ready for show weekend :lol:
I hate signatures
User avatar
De-Ranged
Hard Yaka
Posts: 1883
Joined: Tue Apr 06, 2004 12:00 pm
Location: Hawkes Bay

Post by De-Ranged »

Love it when they start to come together like this.... looking good

Cheers Reece
User avatar
niblik
Sausage Shack
Posts: 3305
Joined: Wed May 03, 2006 12:00 pm
Location: erm.. out in the shed for a mo...

Post by niblik »

rokhound wrote:Keep bringing it on.


dont worry fella, i intend to!! ]:-)

MNC wrote:Dont forget to put the steering wheel back on the right hand side :lol:


:scratch: :tongue: cheers man, i'll keep that in mind.. :lol:

hosehustler wrote:coming along nice jas, you gonna be ready for show weekend :lol:


ummmm... ya smart arse.. :P

and for the little update on the approach angles, forgot to get photos of the other night, so here they go.. front approach angle...
Image

and the rear departure angle.. (havnt got the greasable longer rear shackles on at the moment..)
Image

not bad huh? i'm mightily pleased :twisted:

:happyjump: well.... onwards and upwards.. :D
ImageImage
User avatar
MNC
Hard Yaka
Posts: 2100
Joined: Sun Apr 02, 2006 12:00 pm
Location: Close to (wishing I was closer to) the Puhoi Pub!

Post by MNC »

Looking mint - could put some 40" tyres on and I reckon you have a 90 degree approach/departure 8)
User avatar
De-Ranged
Hard Yaka
Posts: 1883
Joined: Tue Apr 06, 2004 12:00 pm
Location: Hawkes Bay

Post by De-Ranged »

:P Mines betta 8).... 30mm of truck infront of my wheels and the back 8) its gona be a four bar linkage so I don't need anything behind the rear axle :roll: apart from the mud gards to keep it legal :lol:

Oh and your cage idea, you need a diagonal brace from floor to the top bar behind the seats... I'd also sugest instead of the 2 decoration bars in the top to do a diagonal cross as that will triangulate the top and give it more strength

Cheers Reece
User avatar
H2OLOVA
Hard Yaka
Posts: 1153
Joined: Tue Jun 06, 2006 12:00 pm
Location: Christchurch

Post by H2OLOVA »

niblik wrote:and the rear departure angle.. (havnt got the greasable longer rear shackles on at the moment..)


Thats cause i stole them and put them on my truck :lol: But i did put my old ones back on Nibbys truck :wink:
Its very handy having a whole truck full of spares sitting in my workshop.
***Got the balls, just ain't got the bucks***
Post Reply

Return to “Projects / Mod's”