Page 1 of 1
Installing PTO winch(pics up)
Posted: Tue Jul 07, 2009 9:19 pm
by Shane
I have a few :Q for the PTO boys
Have rebuilt winch,at the stage of fitting to vehicle(had elect before)and trying to get as far back as possible so I don't end up with a park bench on front of my vehicle.going to keep same bull bar as before,well use std mounting type system for winch with a cut/tuck here and there to help keep cost down.
I don't have a body lift so cant lift winch up feck all(approx 20mm)
I have pushed winch back as far as I can and may try and tilt the front up little as some say this helps approach angle.need to check drive shaft angle while doing this I guess
middle of fairlead is approx 800mm off ground,not sure if thats good or not
# Any tips for pushing winch back
# Drive shaft has spline/slip joint on front section(mine is seized at this stage)is it ok to cut this shorter to make up for moving winch back?
PTO pics up tomorro.
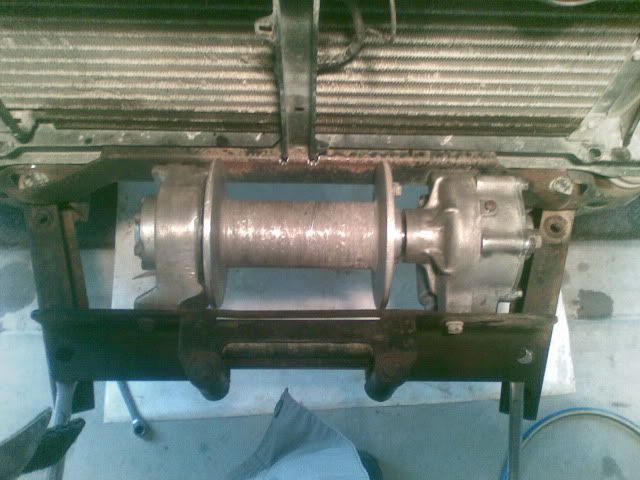
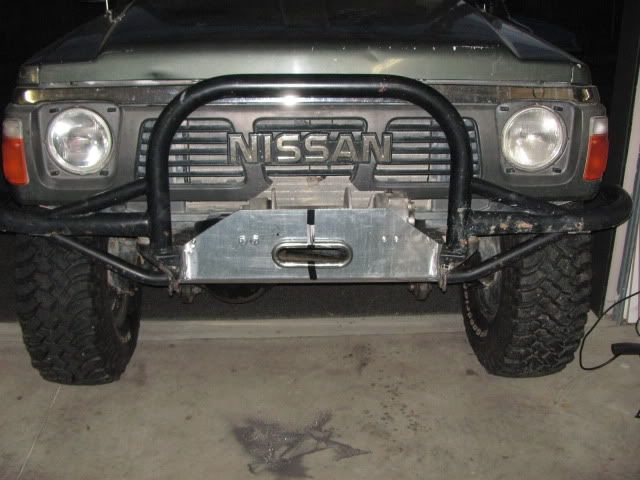
This is what I have so far,rear most winch bracket is now sitting on top of chassis rail.I was going to reverse(make new one) the L shape plate the fair lead is on so it points under the winch instead of foward,by doing this I can cut just over 4" inchs off the front guides.

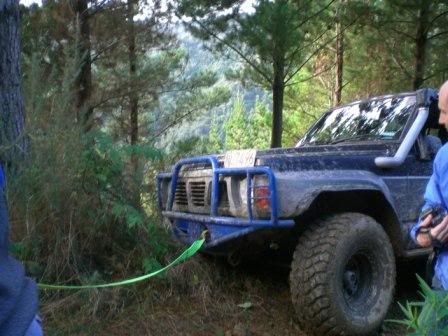
Elect winch set up vvv

Shane
Re: Installing PTO winch
Posted: Tue Jul 07, 2009 9:36 pm
by coxsy
do you have a spring lift on the beast
Re: Installing PTO winch
Posted: Tue Jul 07, 2009 9:56 pm
by Shane
coxsy wrote:do you have a spring lift on the beast
5" front 4" rear EFS springs.
sits pretty level so probley 4" lift with all the shit hanging off the front.
Re: Installing PTO winch
Posted: Tue Jul 07, 2009 10:04 pm
by coxsy
have a 3'', lift my idea is if it hits some thing it hits approach angle is for winch challange trucks
my fairlead centre is 750 off the ground
Re: Installing PTO winch
Posted: Wed Jul 08, 2009 8:59 am
by GQTROL
Cut the bottom section of the radiator support panel out and replace with a section of angle in behind it. Then can push the winch back so the drum just clears the section of angle.
As you've already noted, you can lift it 20mm before the knuckle of the input hits the underside of the rad support.
Keep driveshaft angle as flat as possible.
Re: Installing PTO winch
Posted: Wed Jul 08, 2009 9:11 am
by Shane
GQTROL wrote:Cut the bottom section of the radiator support panel out and replace with a section of angle in behind it. Then can push the winch back so the drum just clears the section of angle.
As you've already noted, you can lift it 20mm before the knuckle of the input hits the underside of the rad support.
Keep driveshaft angle as flat as possible.
Well check that tonight.
Cheers
does the slip joint on front section of driveshaft slide completely out?so spline can be shortened?
Re: Installing PTO winch(pics up)
Posted: Wed Jul 08, 2009 10:08 am
by Terry
Re: Installing PTO winch(pics up)
Posted: Wed Jul 08, 2009 12:49 pm
by Shane
Terry wrote:I'd second that question - just replaced my clutch and had a prick of a job getting driveshafts back in because couldn't separate that slip joint (just in front of the bearing that hangs off the engine mount bracket) - it has a circlip, so presumably should come out? Couldn't budge mine. My winch moved back about 4", up about 3" (40mm body lift).
How did you end up shortning drive shaft?
Looks good,very good approch
Re: Installing PTO winch(pics up)
Posted: Wed Jul 08, 2009 7:35 pm
by Terry
How did you end up shortning drive shaft?
Looks good,very good approch
Hi, must admit I farmed that out - first install was a cut and shunt done by Carl at Wgtn 4WD specialists ltd. Nice job and did the big move for me, rearranged the mounts and the front chassis arms (cut the original brakets down and mounted the front via a slip-in to the chassis rails). I revisited it 2 years later, converted to plastic rope and removed all the front mounts, integrated with new bullbar. Also removed the "forward facing" angle iron, replaced with the smooth front 1/4 pipe section - didn't improve the approach angle so much as change a bulldozer blade into a roller-tip. Much easier to bump over stuff now, and doesn't (always) pick up 100kg of spare dirt. Pretty sure the cut was between the front universal and the collar with the shear pin, but can't remember (it was a long time ago). This is a quick cell-phone pic:
if that helps. cheers,
Terry
Re: Installing PTO winch(pics up)
Posted: Thu Jul 09, 2009 8:14 pm
by Shane
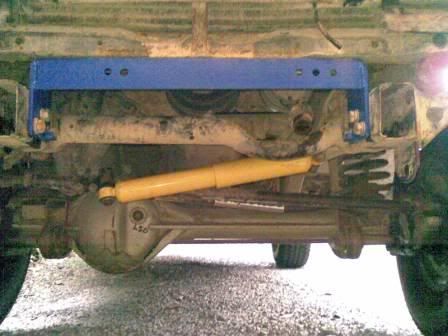
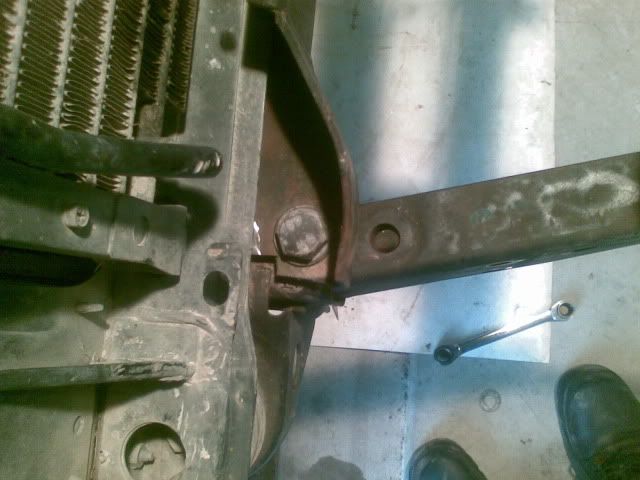
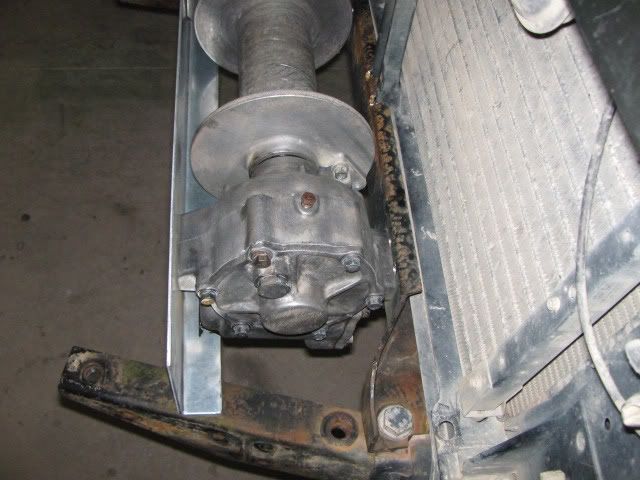
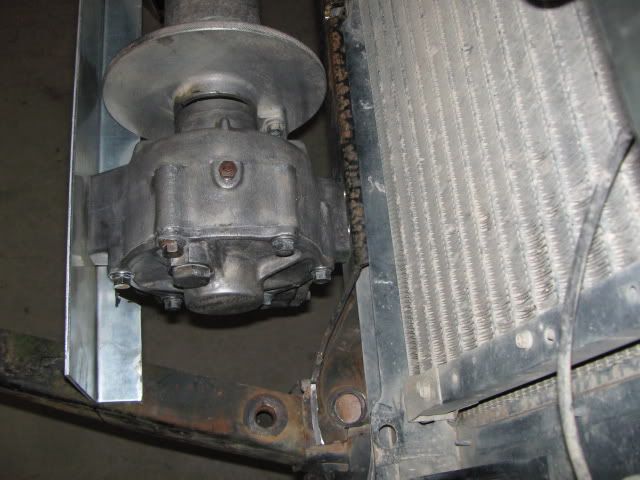
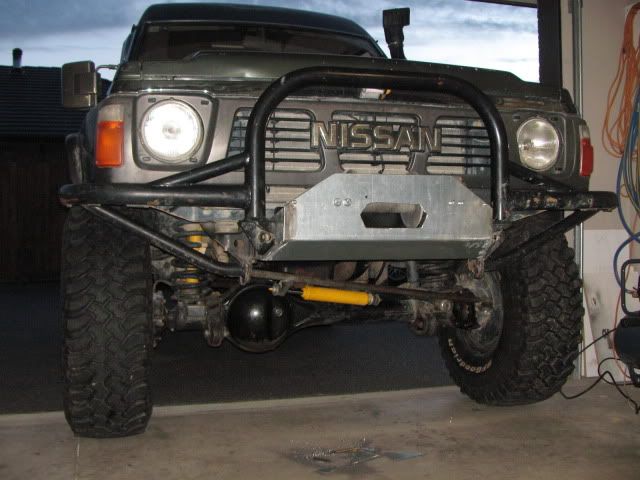
O.k I have had a plate made up for front,which you can see in 2nd pic.
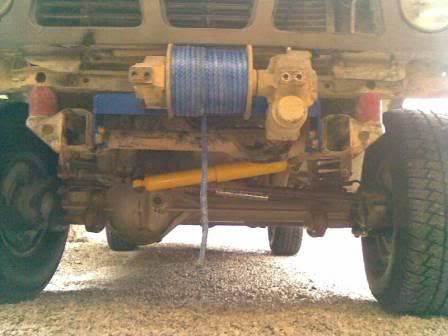
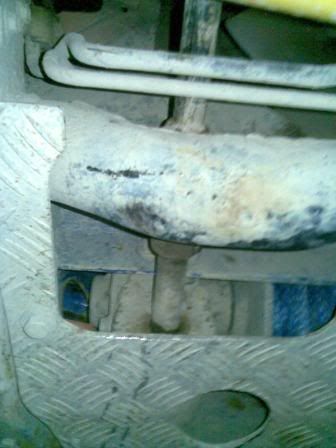
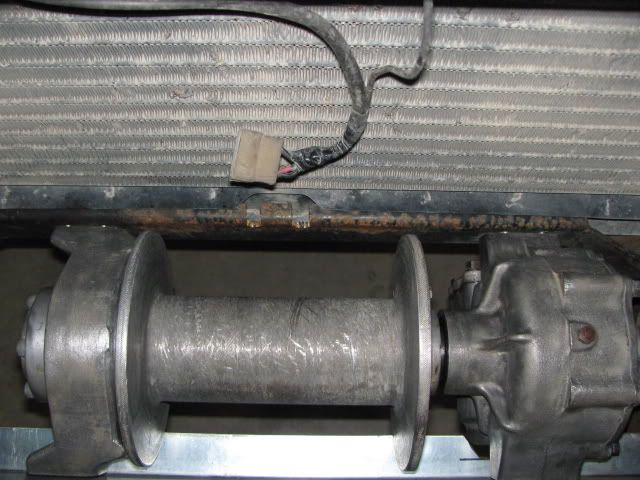
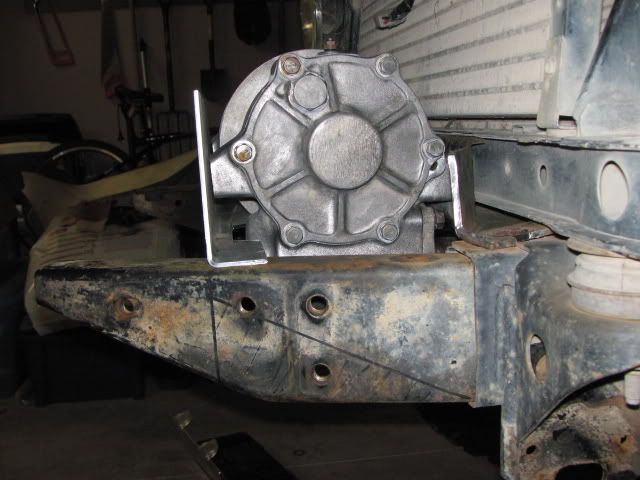
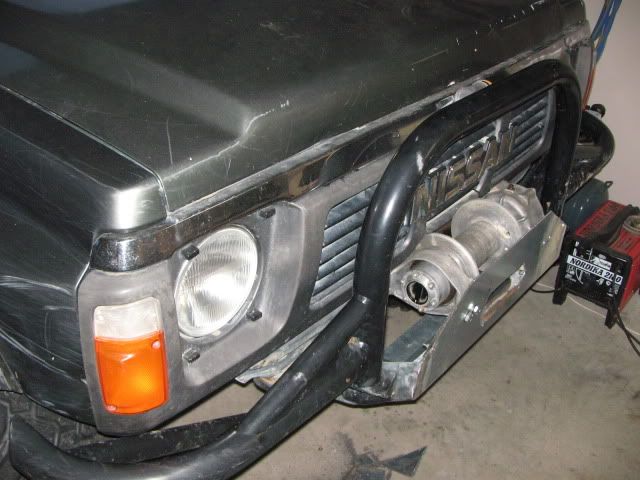
have removed the 2 spacers I had under rear most plate(under rad)and been able slip it under the first lip on the radiator surport panel which gives another 20mm back with out having to cut anything(pics 3,4,5)
Just need to redrill hole and strenghten plate a little,cut front/under side of rail guides,make up panel for front/fair lead then just need to sort drive shaft lenght out.
Shane
with std fairlead set up
with new plate sitting in place
with plate under rad surport panel
trim marks
Re: Installing PTO winch(pics up)
Posted: Sat Jul 11, 2009 11:38 pm
by MaccaOz
Re: Installing PTO winch(pics up)
Posted: Sun Jul 12, 2009 4:50 pm
by Terry
How do you go with the rope bunching up to one side if you aren't able to pull straight with that much rope on the drum?

Not good - I usually don't pull all the way up to the bumper, I usually have about 10M slack left, just wind it around the bullbar and tidy it up when i get home (Good Tip - plan for some ears to wind the rope around when you do the bullbar!)
When I do have to pull all the way uyp to the bumper, I need soemone to kick the rope across occasionally. I'm thinking of taking 15M off and making an extension instead.
Re: Installing PTO winch(pics up)
Posted: Sun Jul 12, 2009 9:12 pm
by Shane
Terry wrote:How do you go with the rope bunching up to one side if you aren't able to pull straight with that much rope on the drum?
Not good - I usually don't pull all the way up to the bumper, I usually have about 10M slack left, just wind it around the bullbar and tidy it up when i get home (Good Tip - plan for some ears to wind the rope around when you do the bullbar!)
When I do have to pull all the way uyp to the bumper, I need soemone to kick the rope across occasionally. I'm thinking of taking 15M off and making an extension instead.
How much plasma rope you got on there?what size is it ? (10mm)
I was going to get 30m and just use extension's if needed.
Shane
Re: Installing PTO winch(pics up)
Posted: Sun Jul 12, 2009 9:42 pm
by Terry
How much plasma rope you got on there?what size is it ? (10mm)
That's got 35M of 10mm Amstel Blue on it - next time i'd go for 30M as well, maybe even drop it to 25M with 20M extension if needed. Or better still, extend the reel...
Re: Installing PTO winch(pics up)
Posted: Mon Jul 13, 2009 8:44 am
by Shane
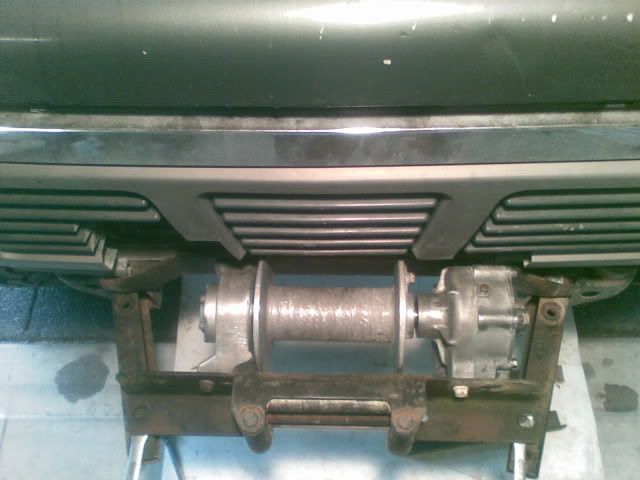
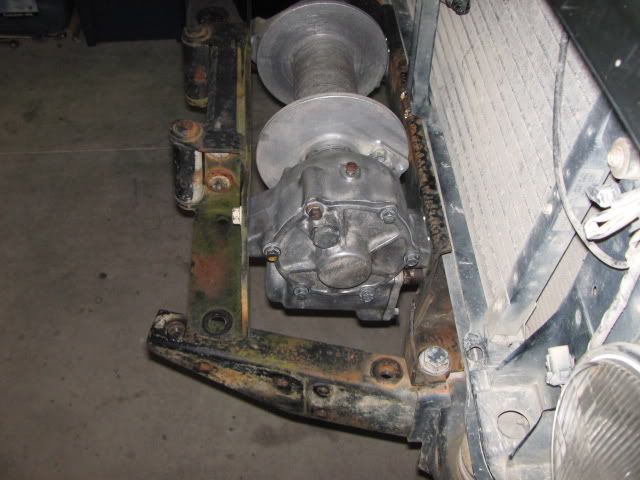
I've got a Thomas PTO winch on mine, not a genuine Nissan one, but here's some pics of how it's set up:
what vehicle does the thomas whinch come off?has that one had the drum widened or is that std?
Whats the speed like compaired to say the std nissan pto?
I saw some pics on outters when looking for some pto info,pretty sure its your one.
Cheers shane
Re: Installing PTO winch(pics up)
Posted: Mon Jul 13, 2009 10:26 am
by MaccaOz
Shane wrote:what vehicle does the thomas whinch come off?
AFAIK, it's just an aftermarket winch. They have different PTO adapters to suit different gearboxes/transfer cases.
Shane wrote:has that one had the drum widened or is that std?
I don't think so. It doesn't look like it has. Having said that, a mate's got one and it's drum is narrower than mine. Whether it's an earlier model or not, I don't know. Trying to get any information out of Thomas Winch Company is like trying to get blood out of a stone..

Shane wrote:Whats the speed like compaired to say the std nissan pto?
Dunno - I haven't seen a nissan PTO in action yet.. Hopefully one day. I know that free spooling the PTO is a fair bit slower than a Warn highmount, but when it loads up it is about the same speed, if not a little faster.
Re: Installing PTO winch(pics up)
Posted: Sat Aug 22, 2009 8:28 pm
by Shane
Bit of a up date,been working away slowly at getting things sorted.did more work on PTO today.
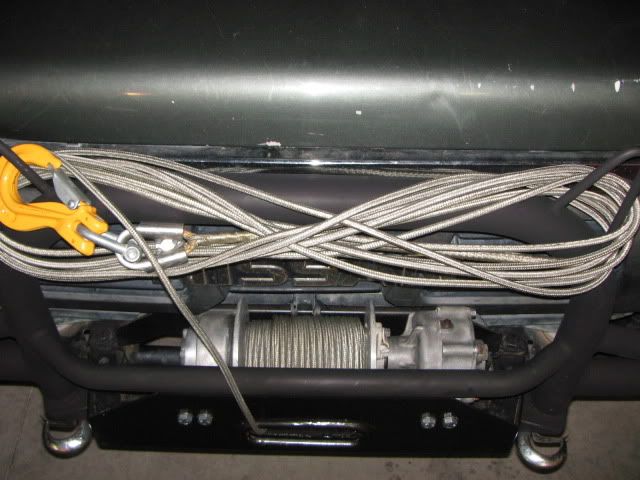
mainly just cutting,drilling,grinding and got a few things welded.not too much to do now and pto should be finished,got to get fairlead welded in strip,paint and refit.going to fit small bar in the middle of bull bar just above winch to hold spot lights also and some horns for winch rope.
brought some Dynx 75 overbraid winch rope(30m)hoping that well only fill drum 60-70% may shorten if need be.
Few weeks ago I unseized front spline,shortened,changed drive shaft surport mount too suit and bolted in place after trial fitting about 3 million times.have got 3" dump pipe to slip between drive shaft and chassis with out touching.still to finish rest of exhast
Cheers Shane

Re: Installing PTO winch(pics up)
Posted: Tue Sep 01, 2009 8:57 pm
by Shane
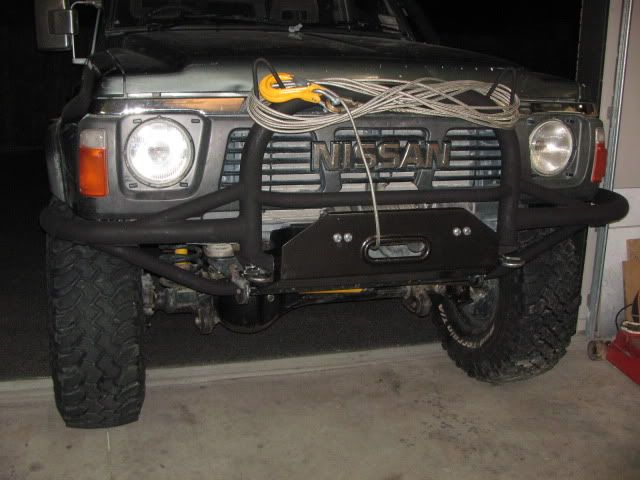
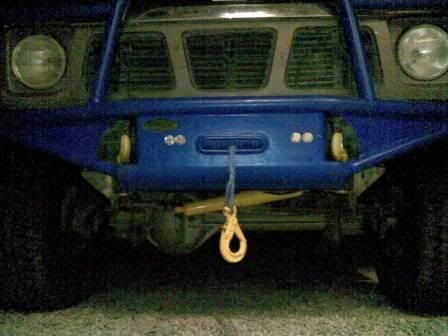
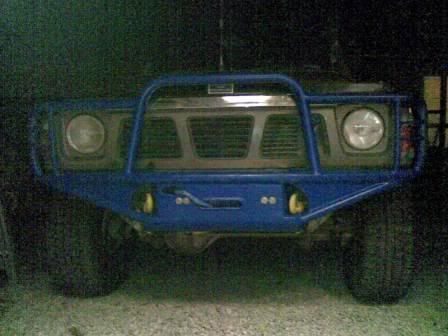
At last winch/bull bar set up pretty much 95% finished.
Added a cross bar just above winch so I have some were to bolt my spot lights,and the devil horns to on main hoop to wrap rope round.
Shane