Page 1 of 2

ZJ Build.....

Posted: Wed May 18, 2011 4:21 pm
by xj
Yeah i know, i can hear the wolf whistles now from the "i told you so's" but hell, theres some blokes on here with some ZJ's now so what Ive done may be able to help them.... fukya'll in advance (you know who you are)

This is transported for another build thread hosted elsewhere....


right-e-o......

I thought i may as well itemise what i do with thing somewhere, so i can look back one day and go "WTF was i thinking!!!"

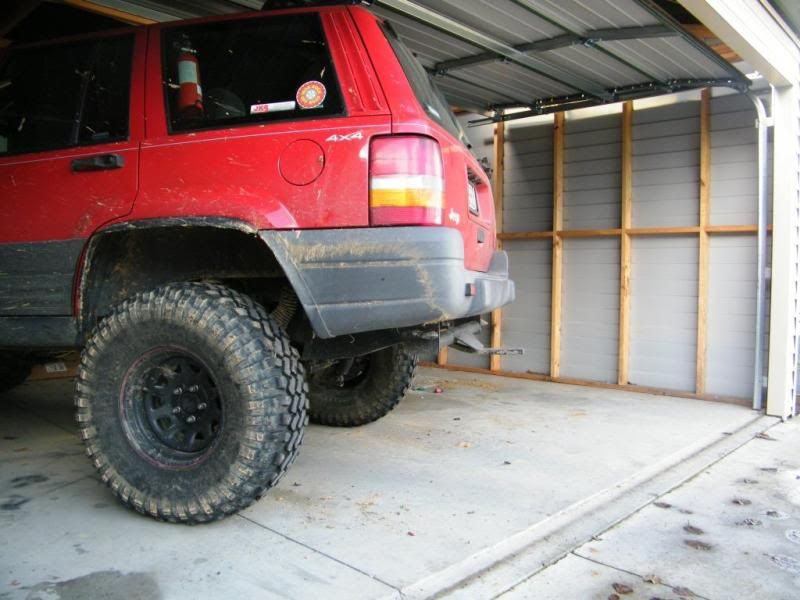
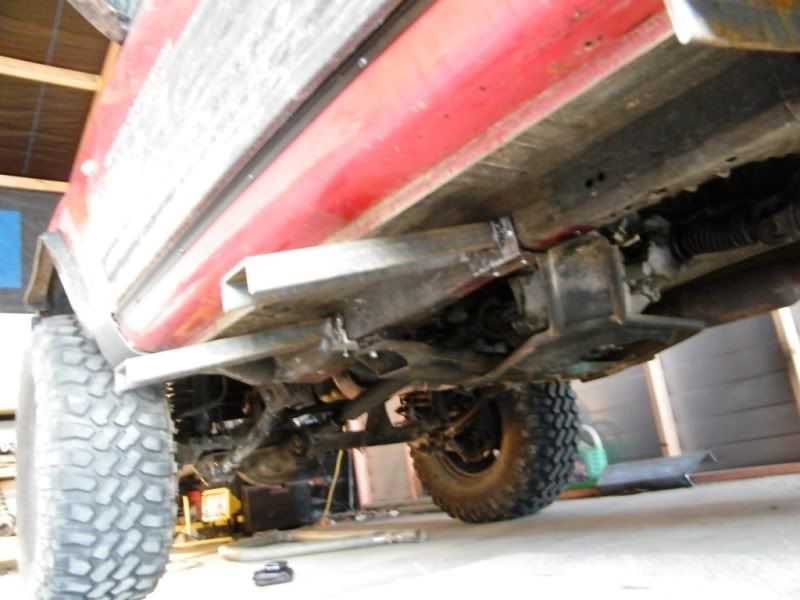
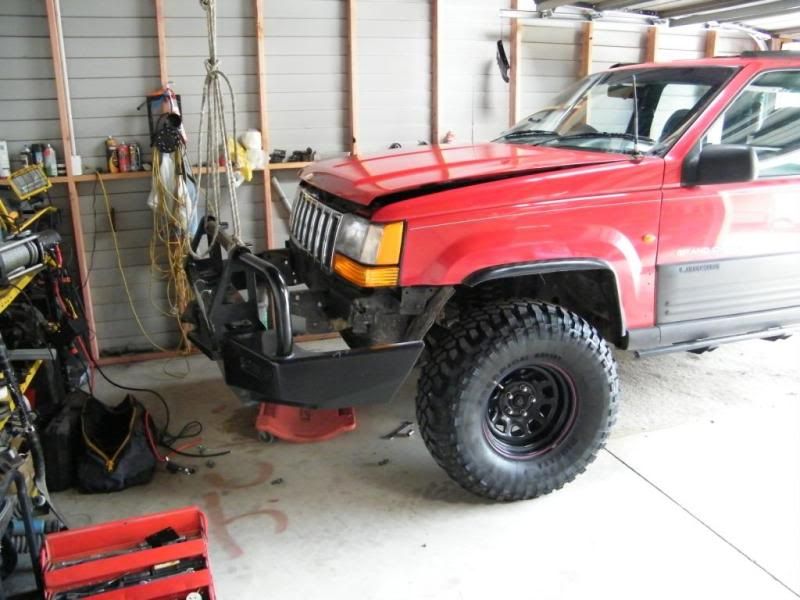
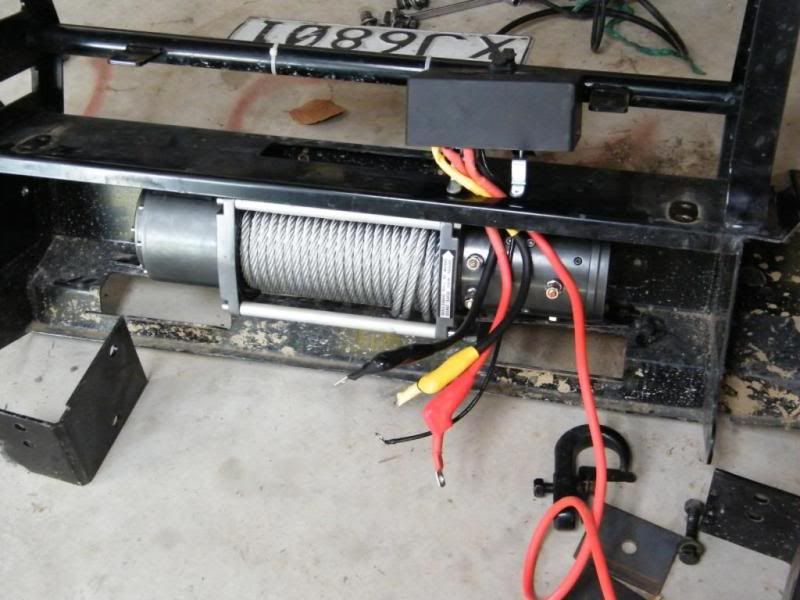
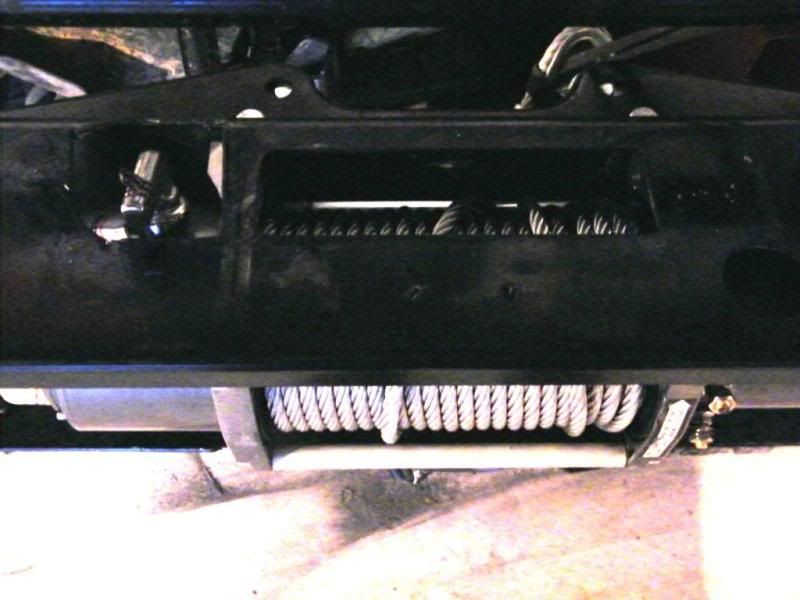
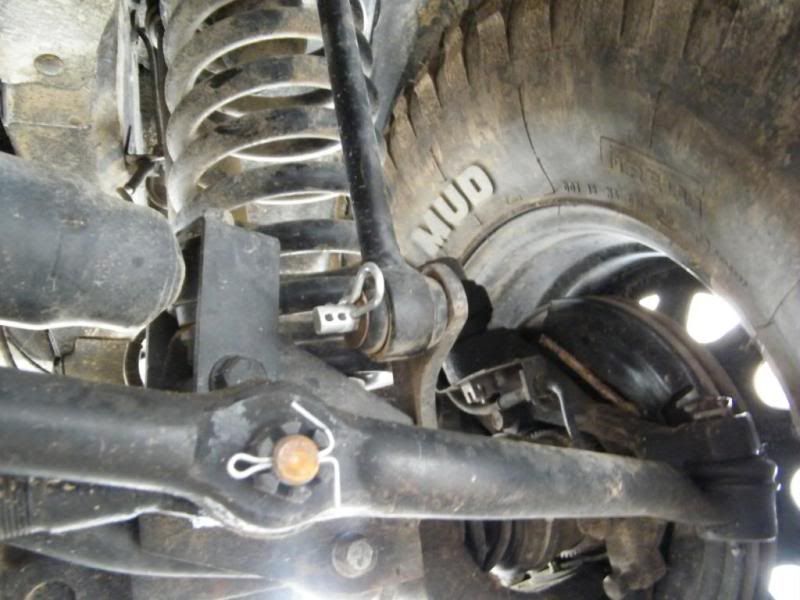
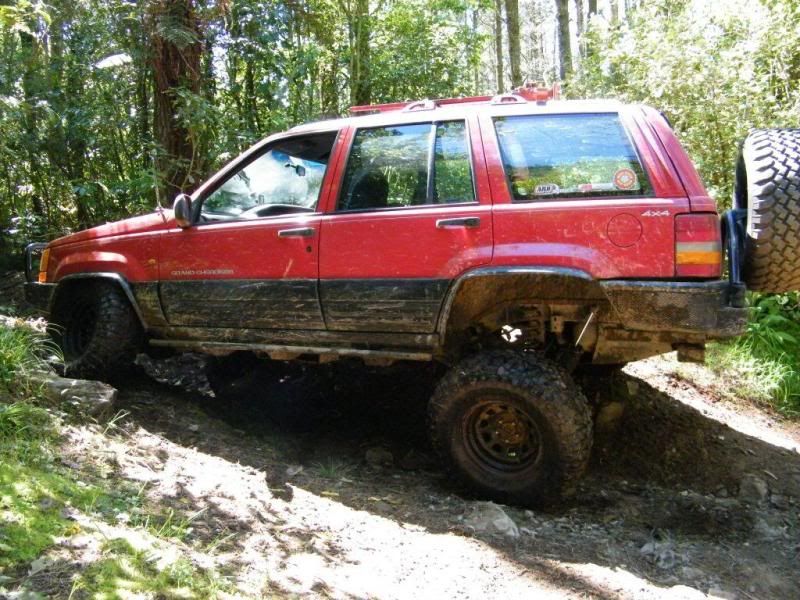
So, purchased 10 July. 4.5 butchered lift, adjustable everythings, 33 Scorpions, 15x8 rims and ARB fron winch bar, lockright in front (debating wether to leave that in there)

So far.........

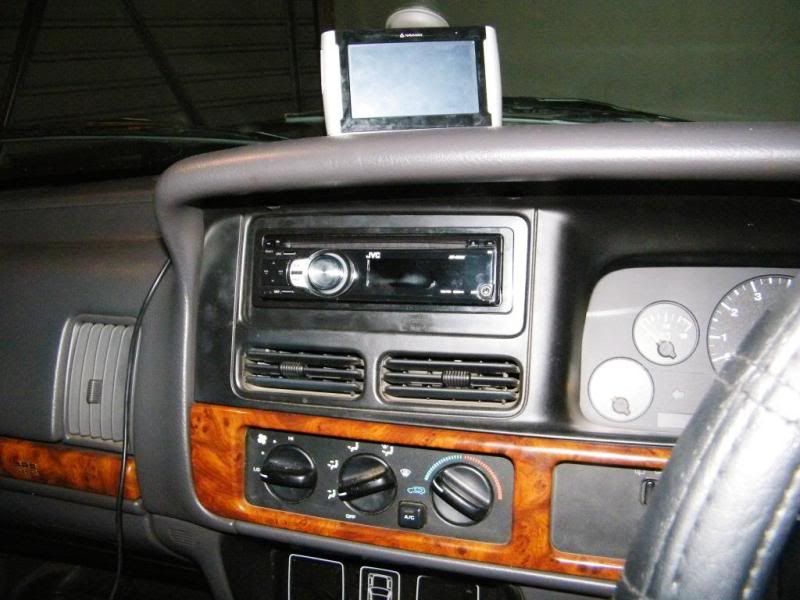
ditched the factory stereo, and replaced it with a jbhi-fi el cheapo, but one with the aux insert so the bride can get funky with the new ipod.
Image

Replaced battery and terminals

Ordered new 3.5 inch front springs to replace the current set up of stock springs with ACOS..... enroute now from Ironrock offroad.

Popped the 249 fulltime 4x4 transfer case out this arvo, nice and easy....measured both input shafts.... 22mm a piece (some are 19mm, some are 1.5 inch)... swapped the speedo sensors over, (one had 3 flat prongs, the other had 3 round prongs) and bolted it all back in. Took 3 hours from go to woah.
The bezel wont need to be changed at the selector, (though i might anyway, 'cause Im like that) as the range is indicated on the centre dash panel, blank for 2wd, then 4-full time, 4-part time (i think it was that order??), neutral is blank, and then up comes "lo".
The gears from 2wd through select sweet, without having to adjust the linkage, but coming out of lo up to 2wd is a little different. After a little trial and error, i figured i need to back up a few feet before the 4wd pops out and 2wd is off again. I wondered if it were the front locker binding, but cant see how. It might just need a little tickle on the linkage.
And oh what a difference driving it in 2wd is.... a pleasure even.
Image

Image

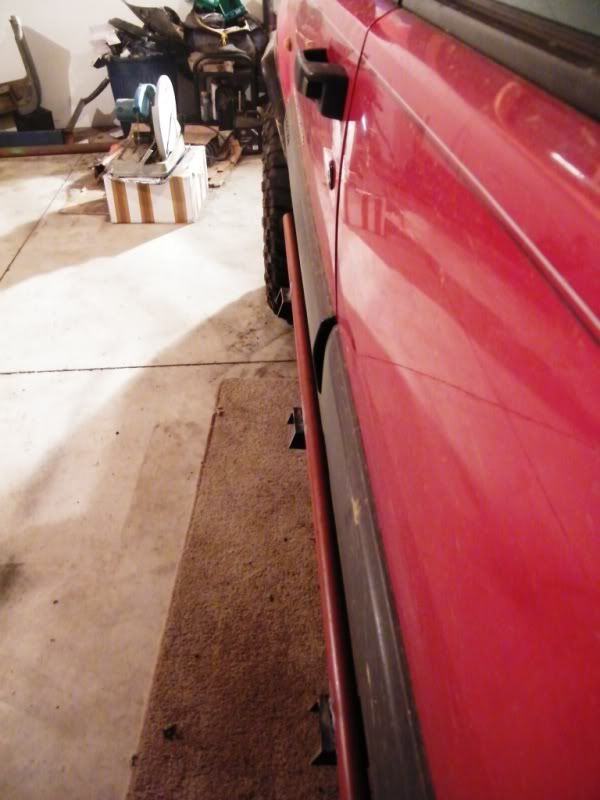
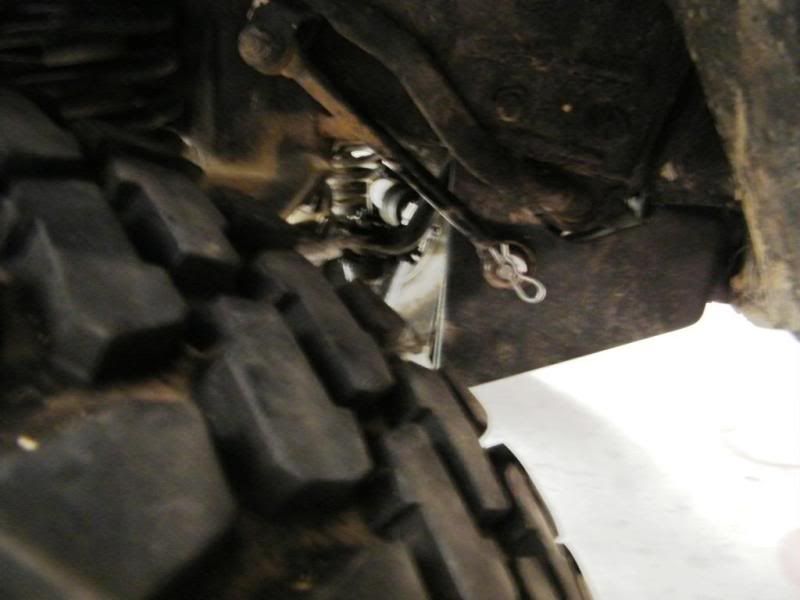
Old shock boots come in handy sometimes
Image

I'm picking it never saw many kms before being wrecked
Image

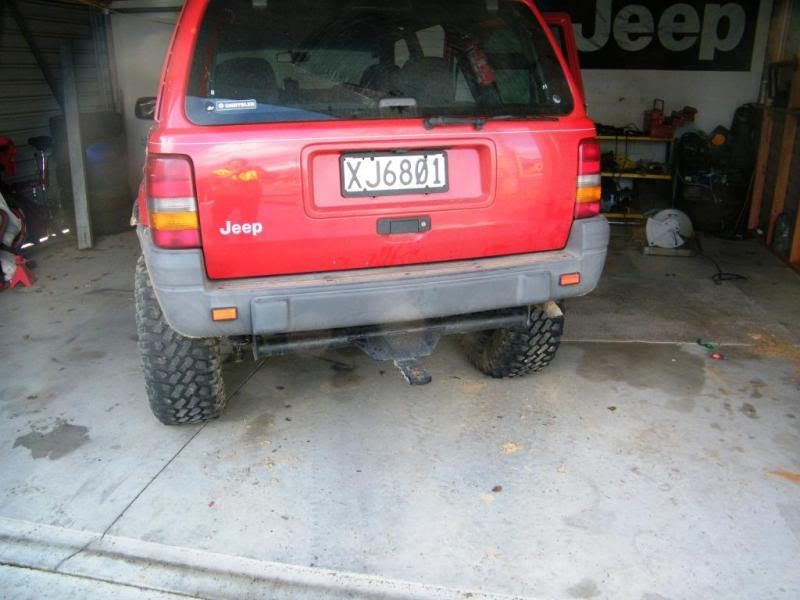
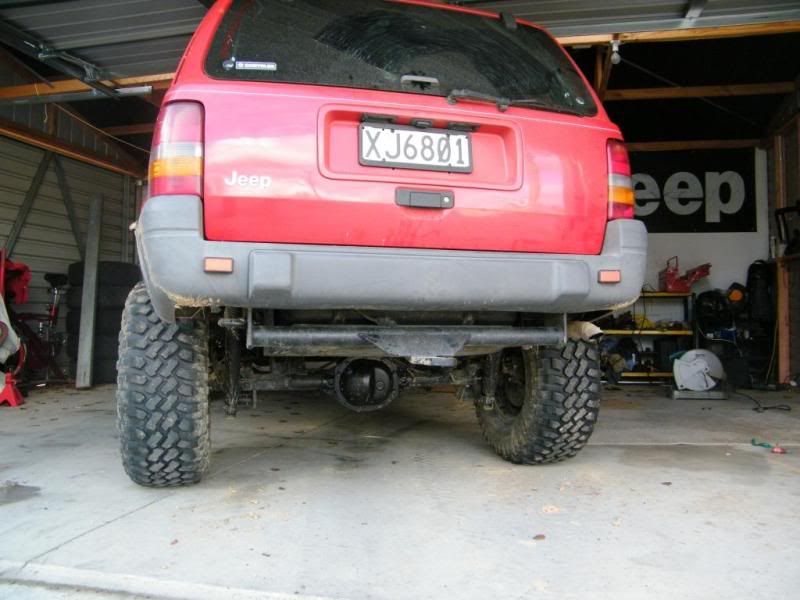
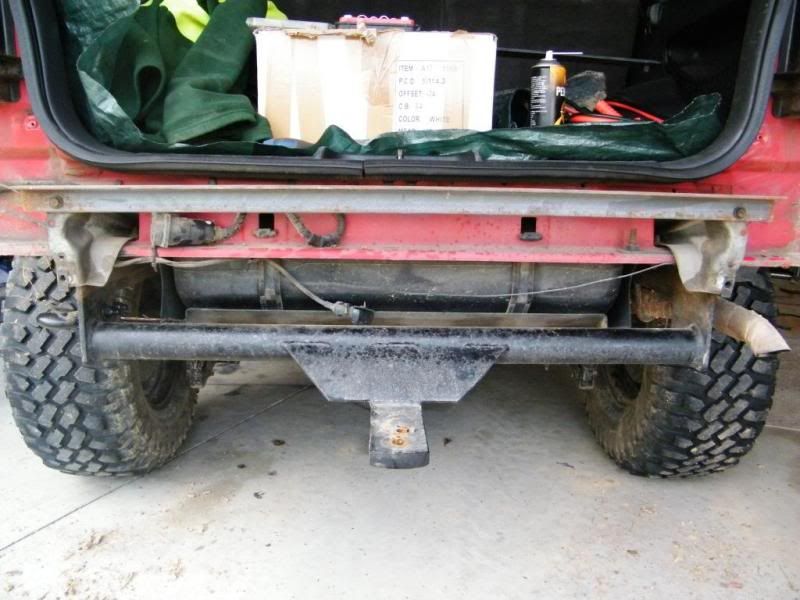
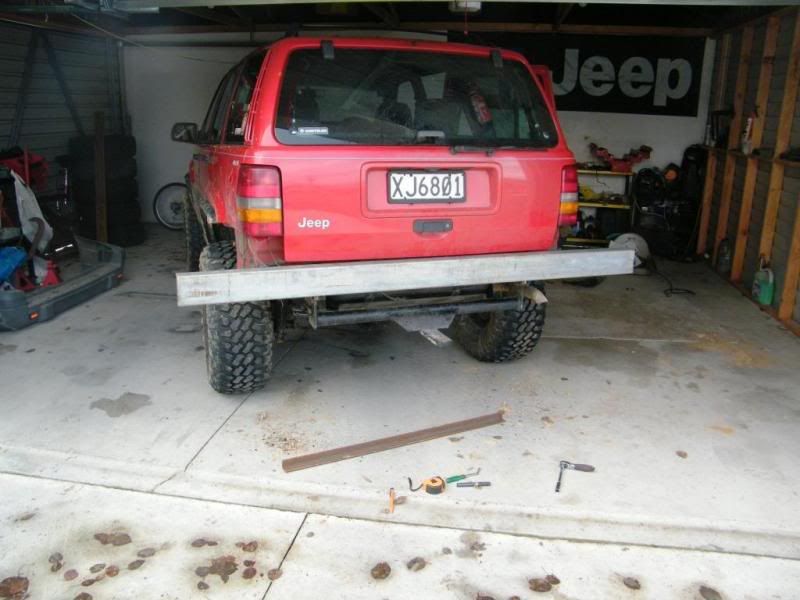
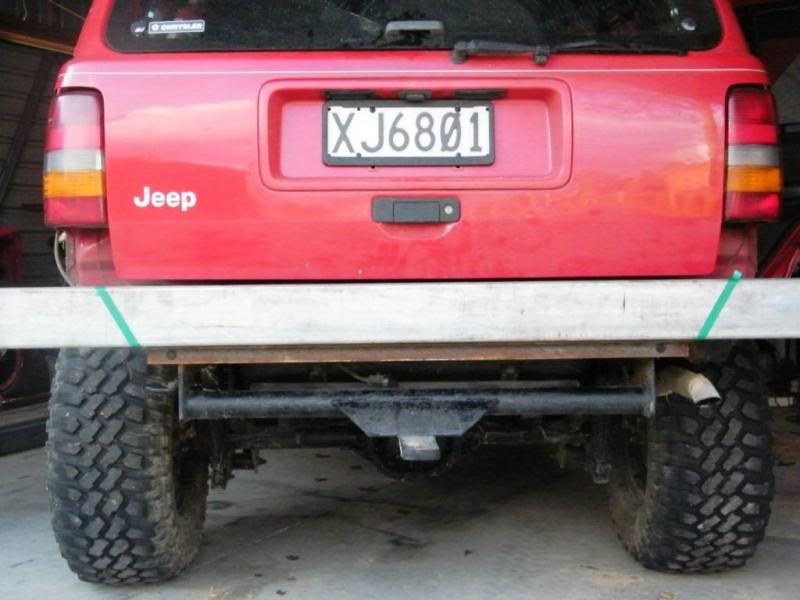
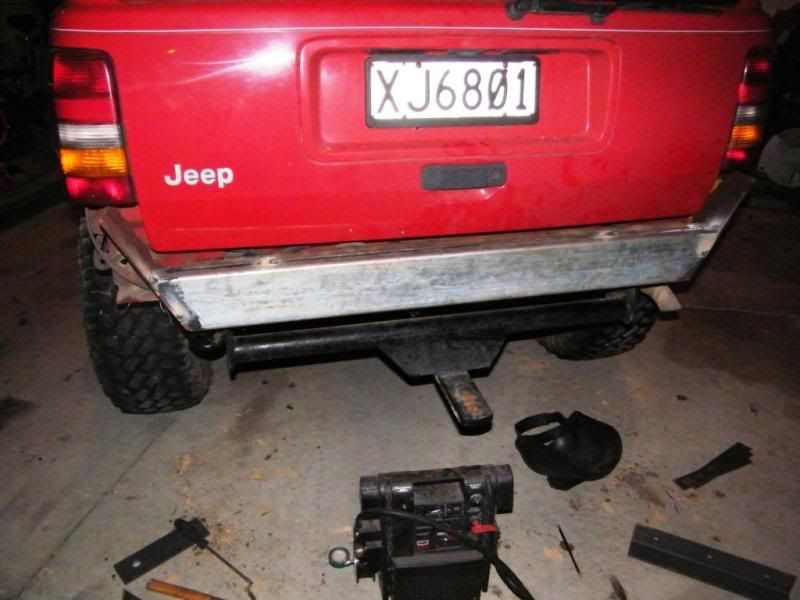
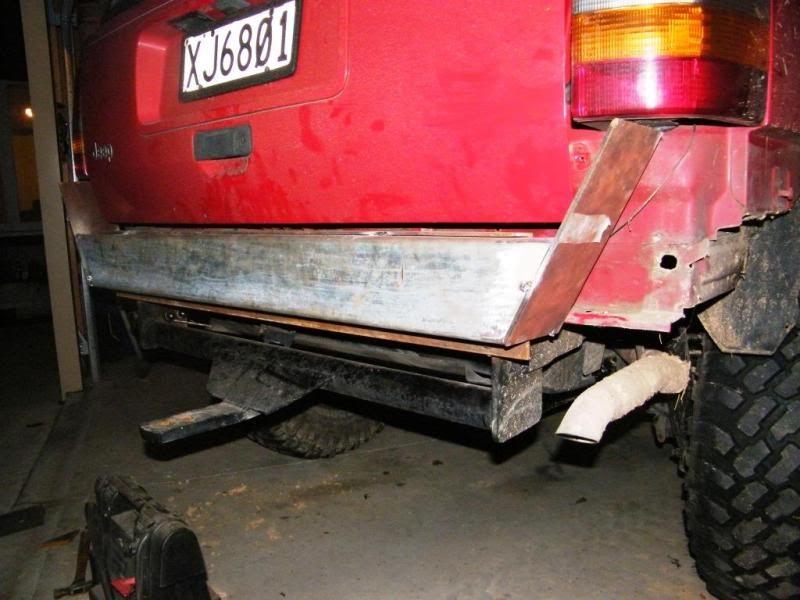
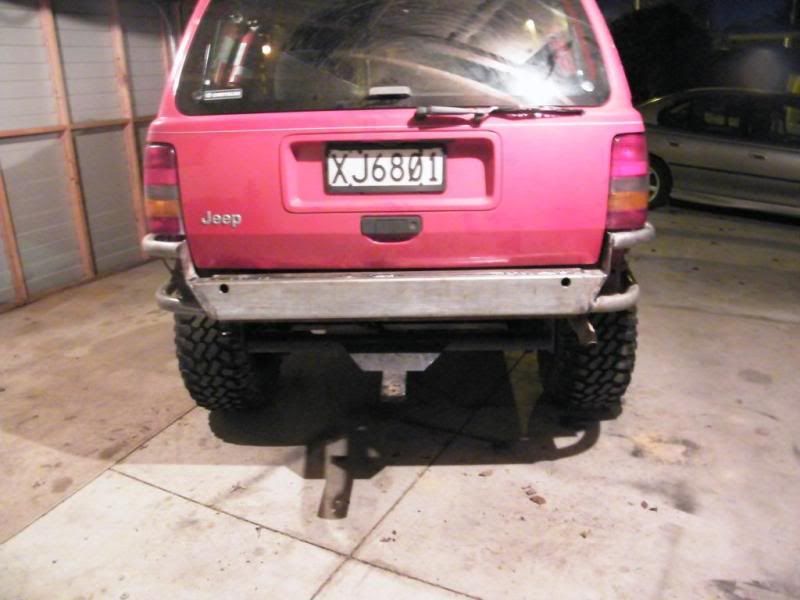
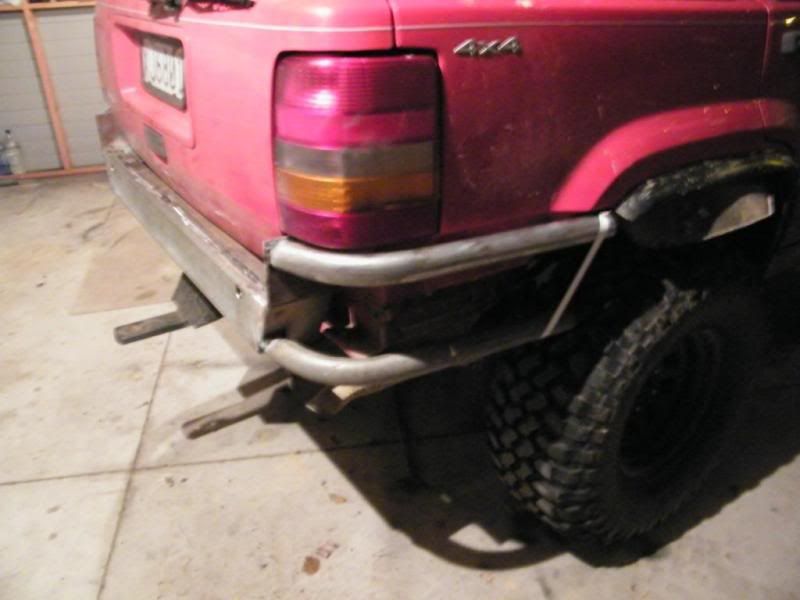
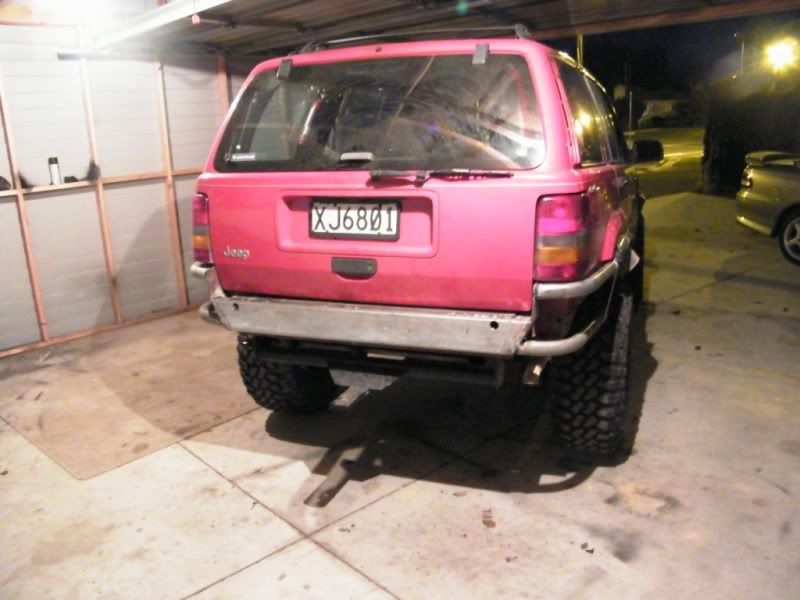
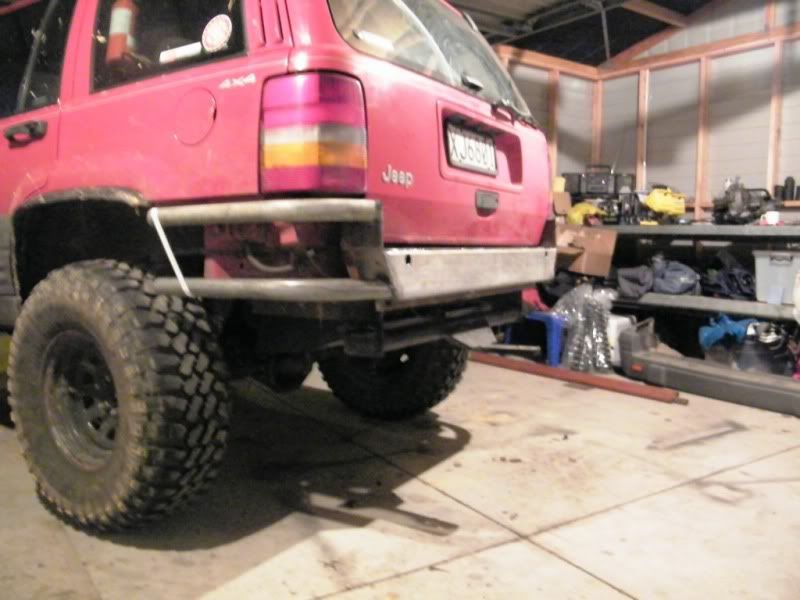
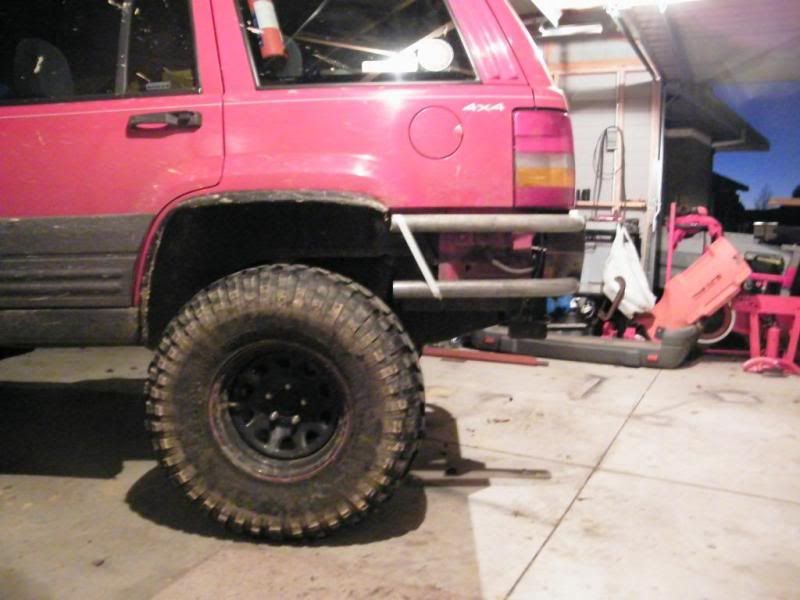
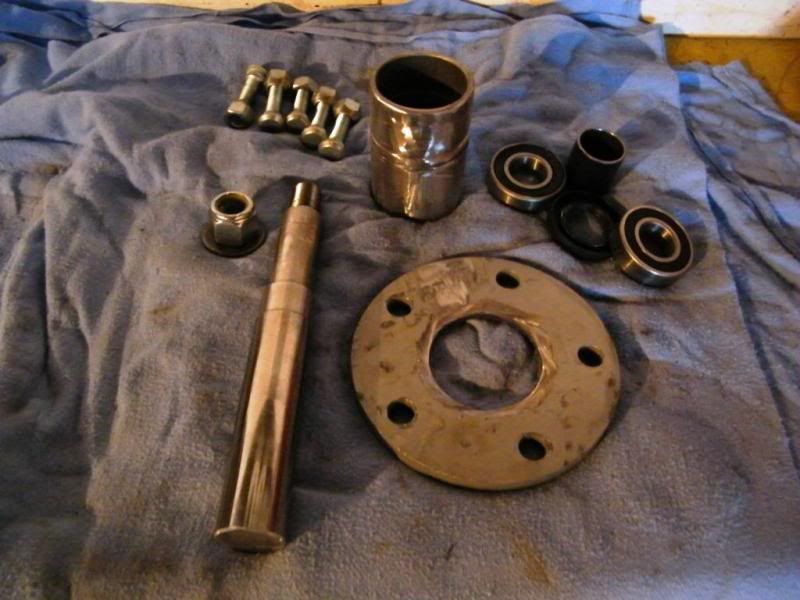
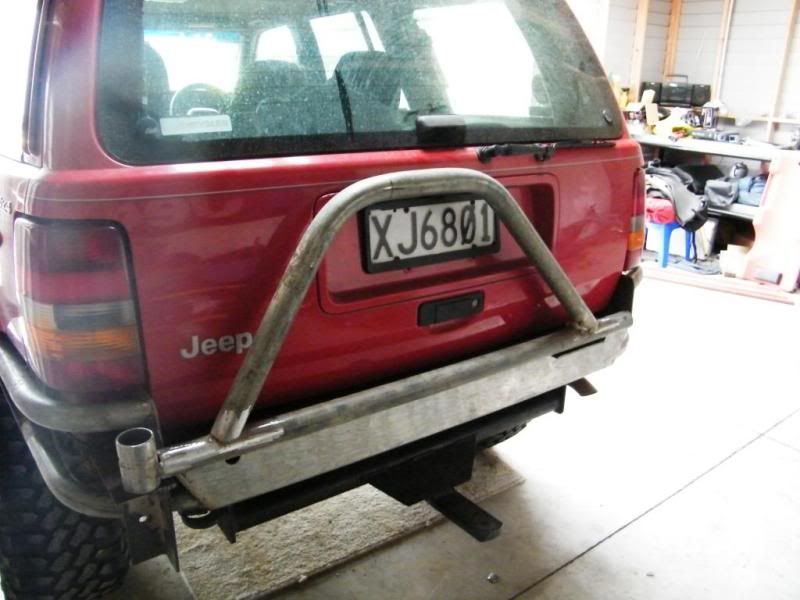
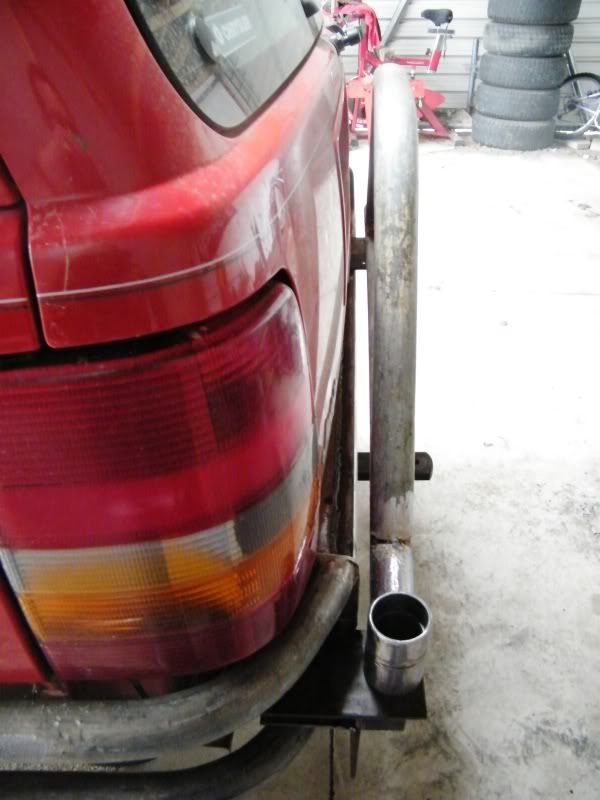
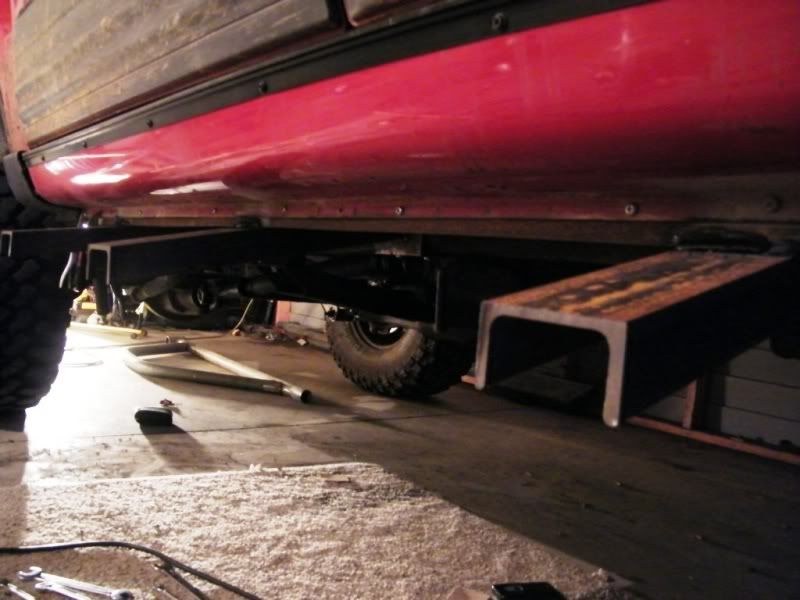
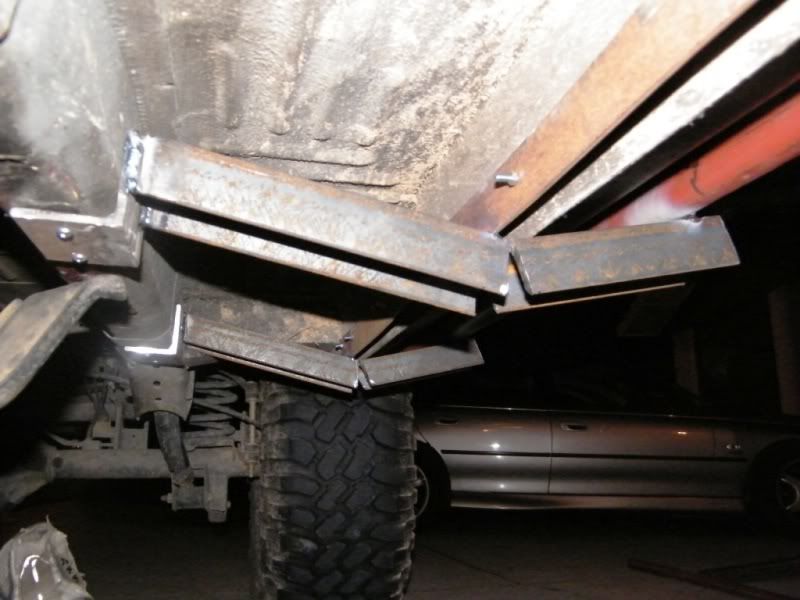
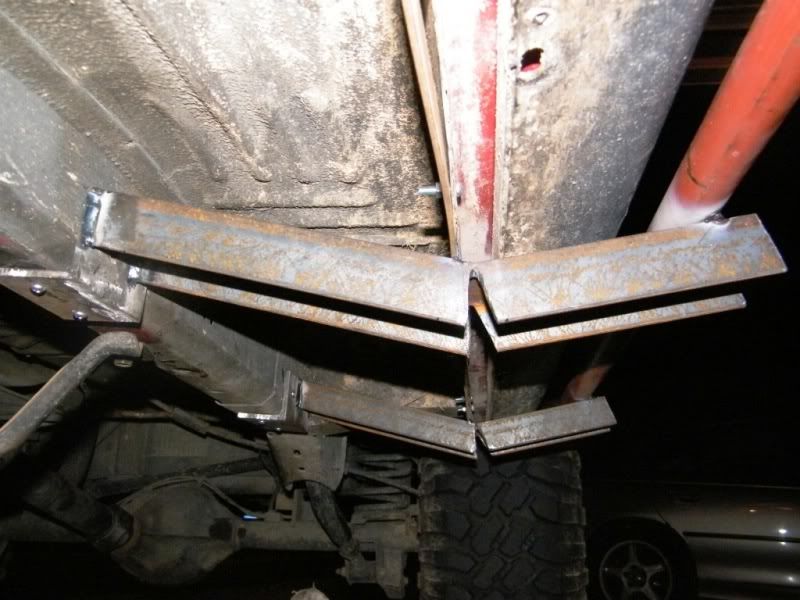
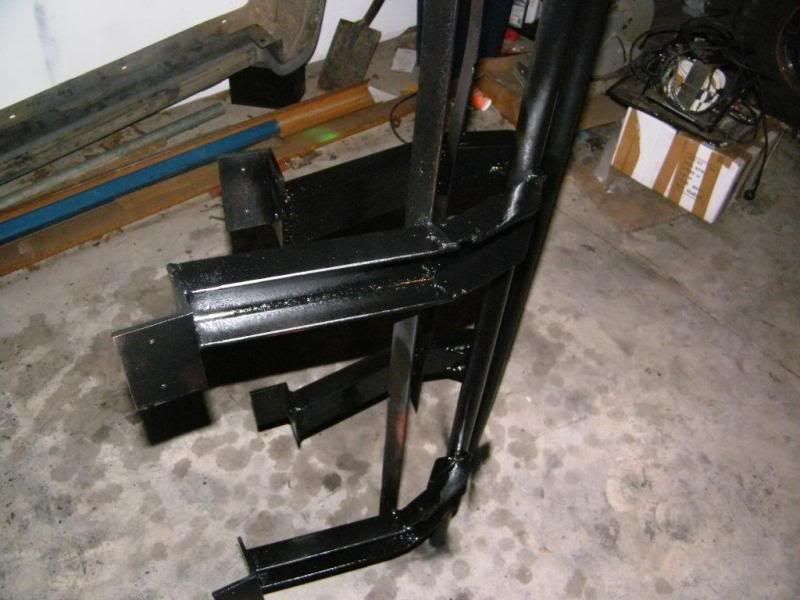
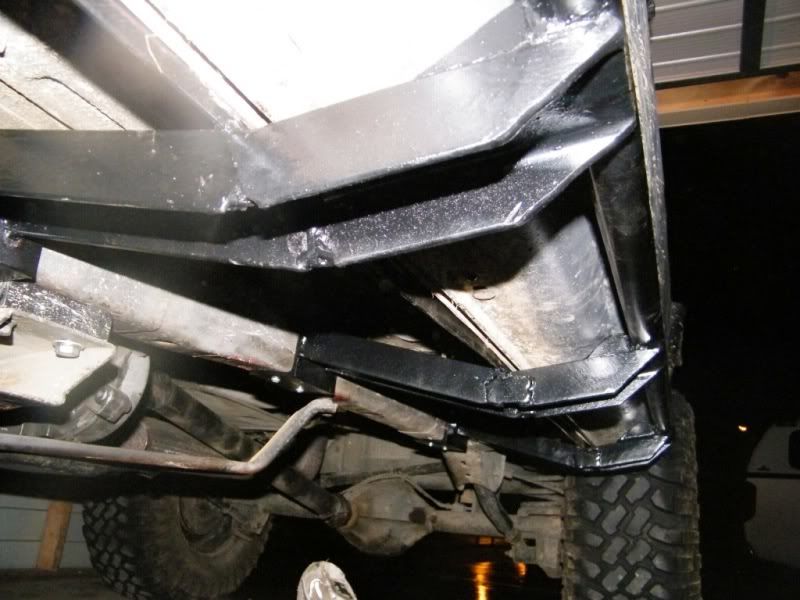
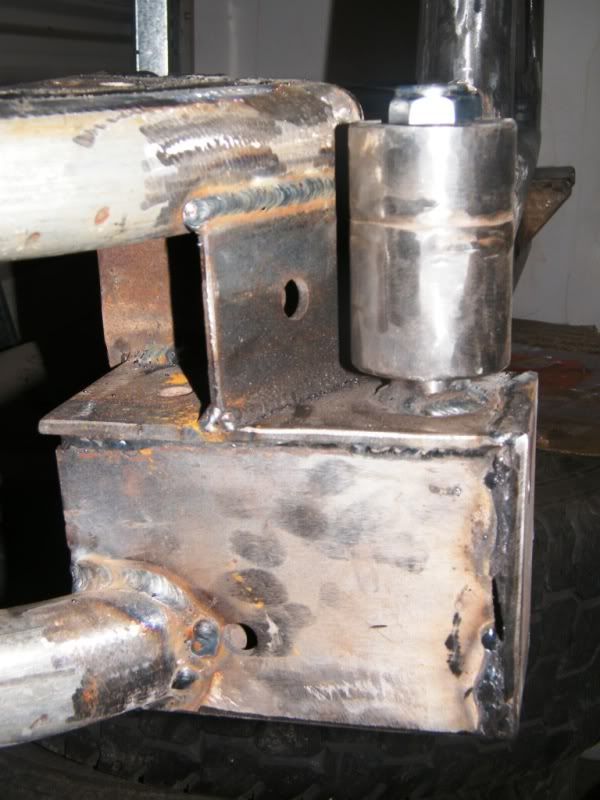
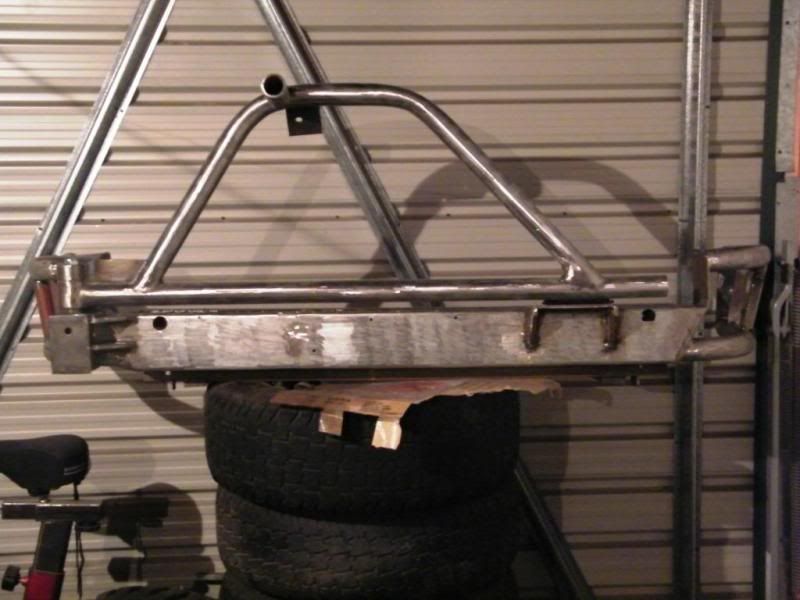
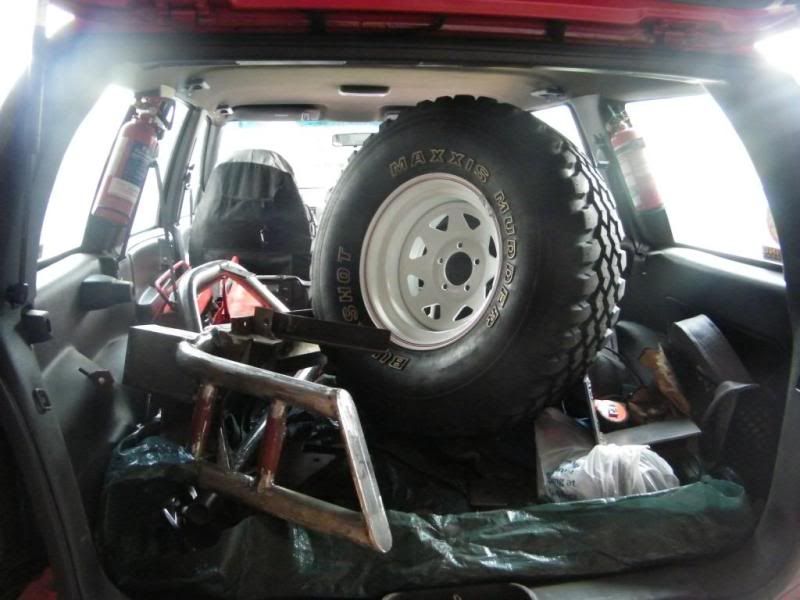
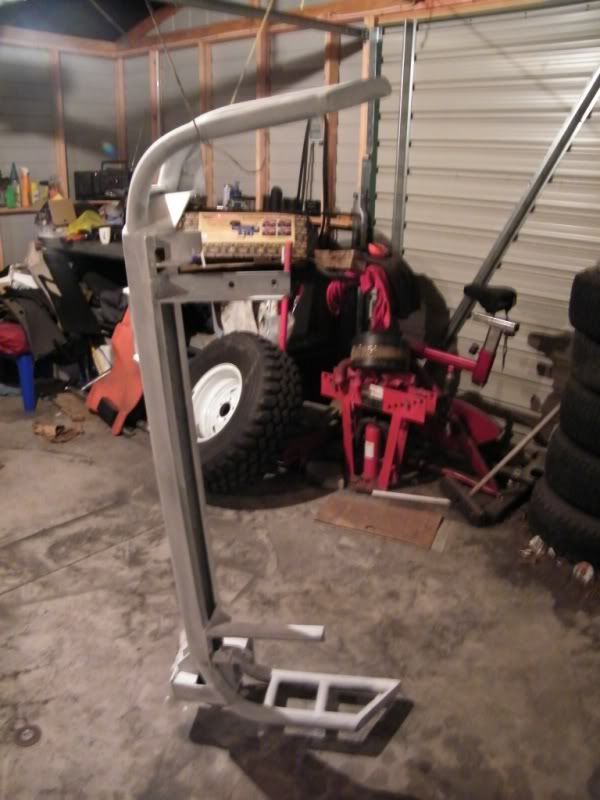
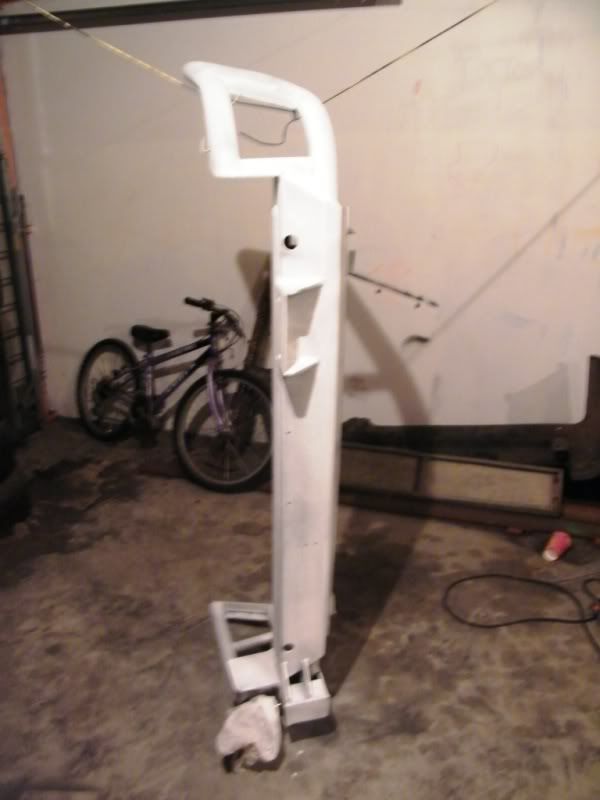
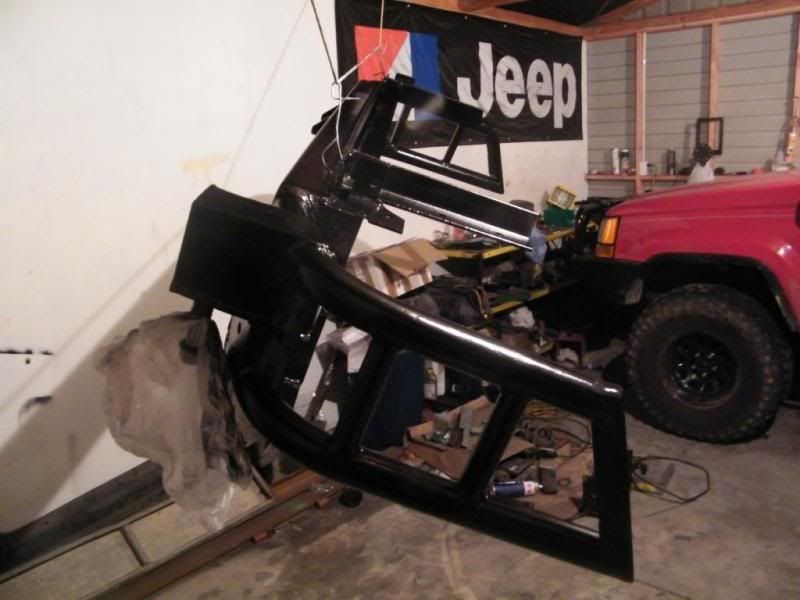
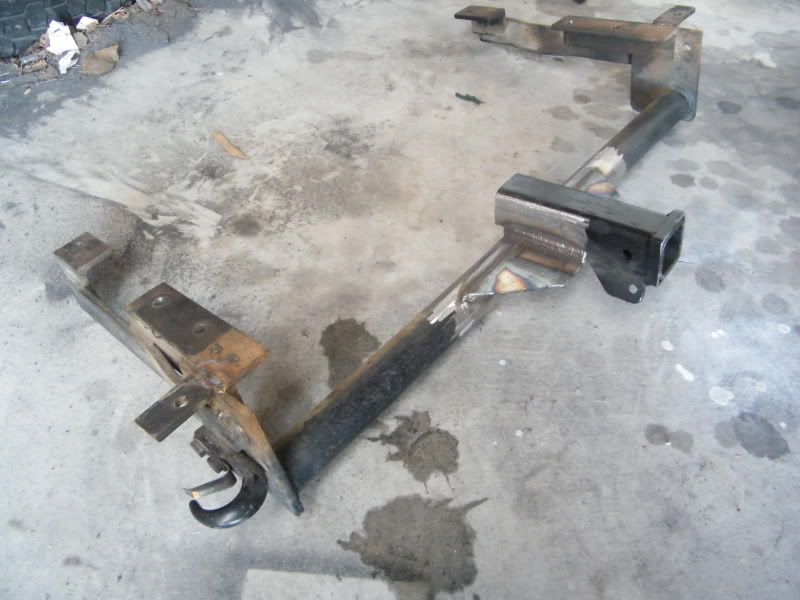
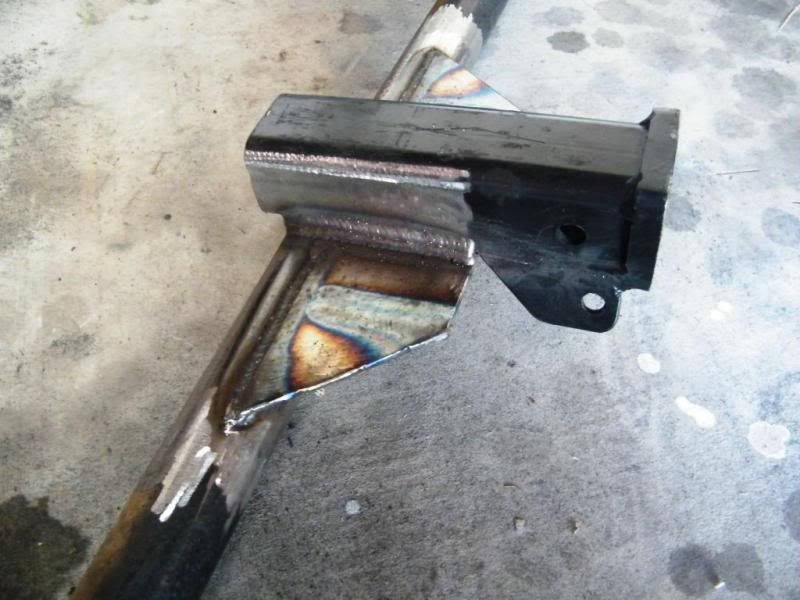
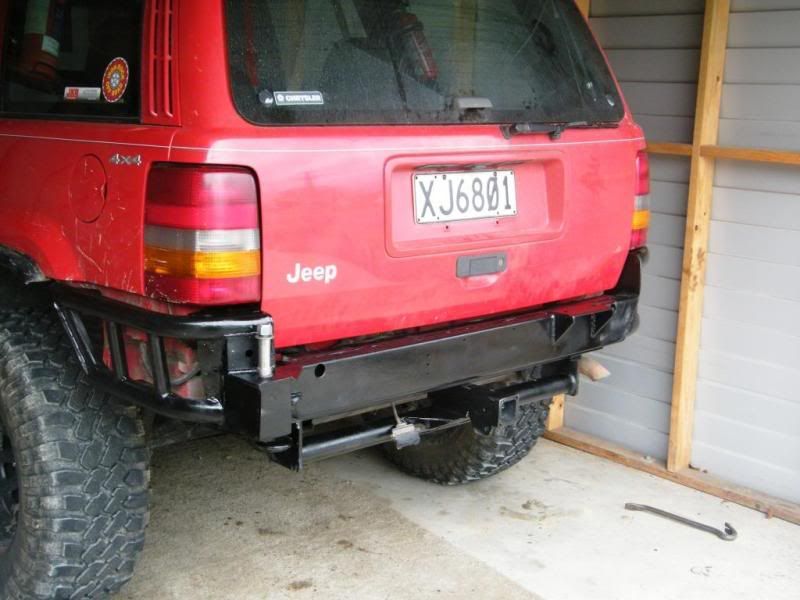
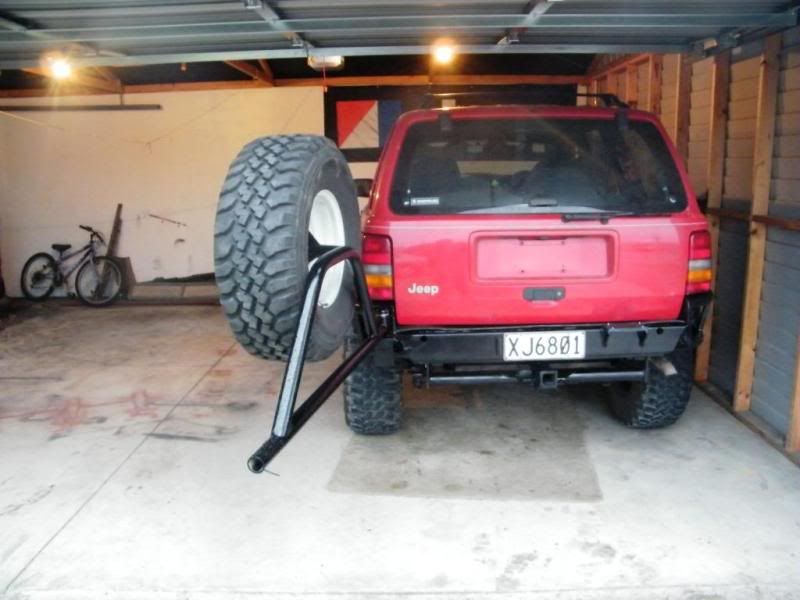
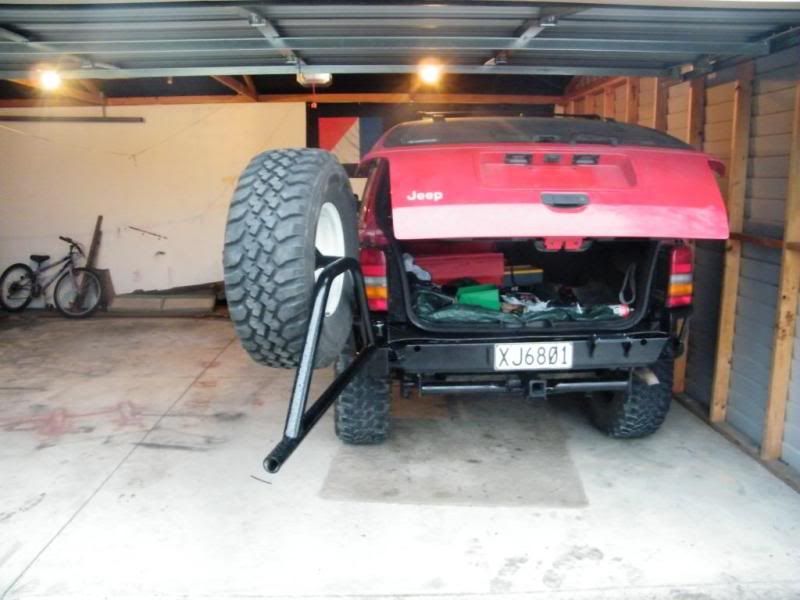
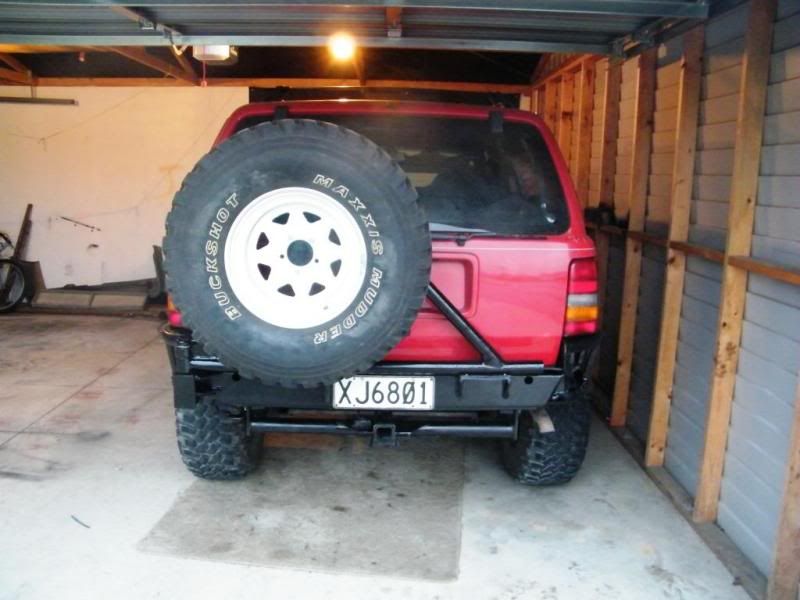
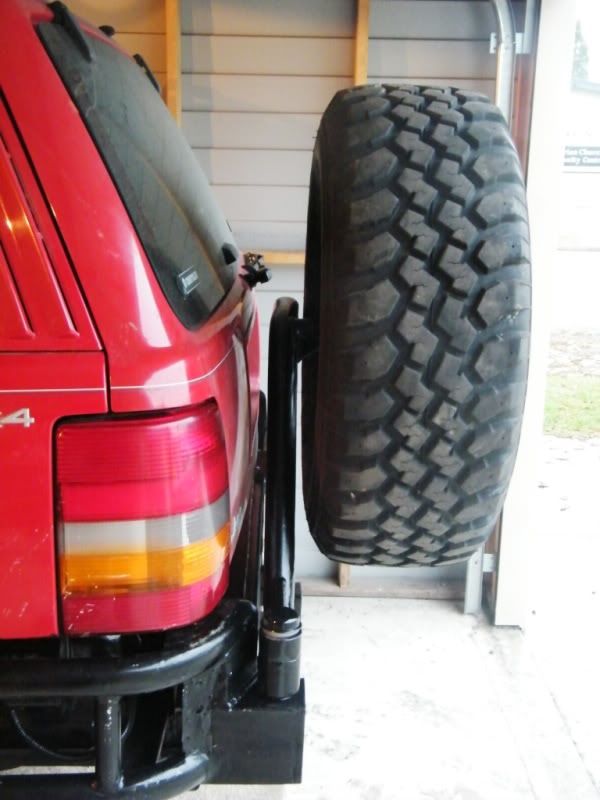
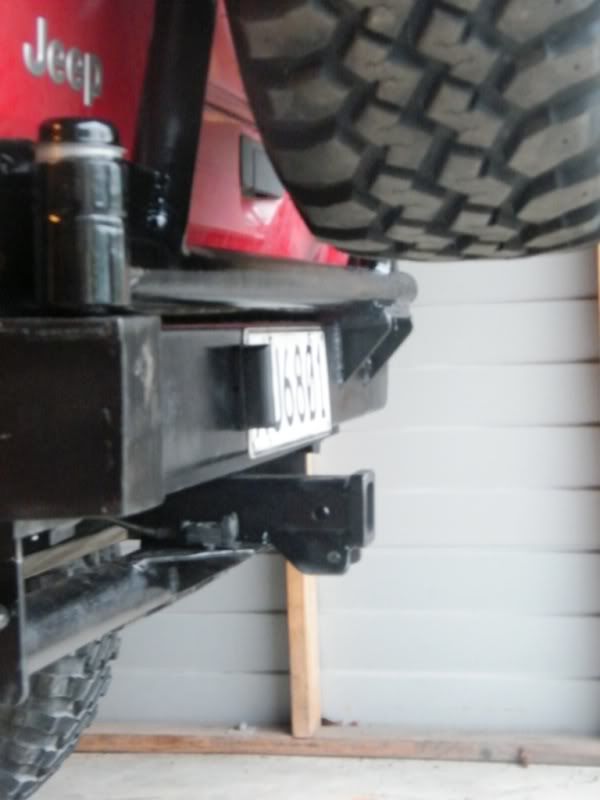
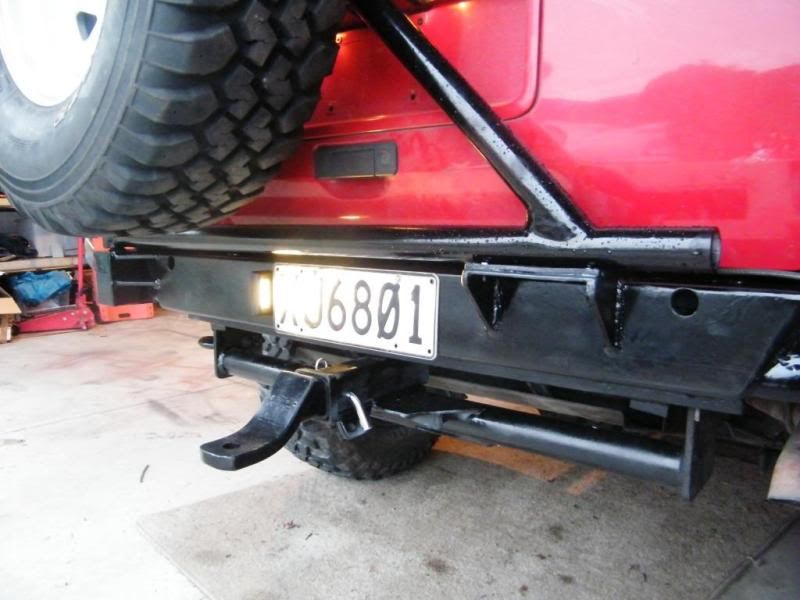
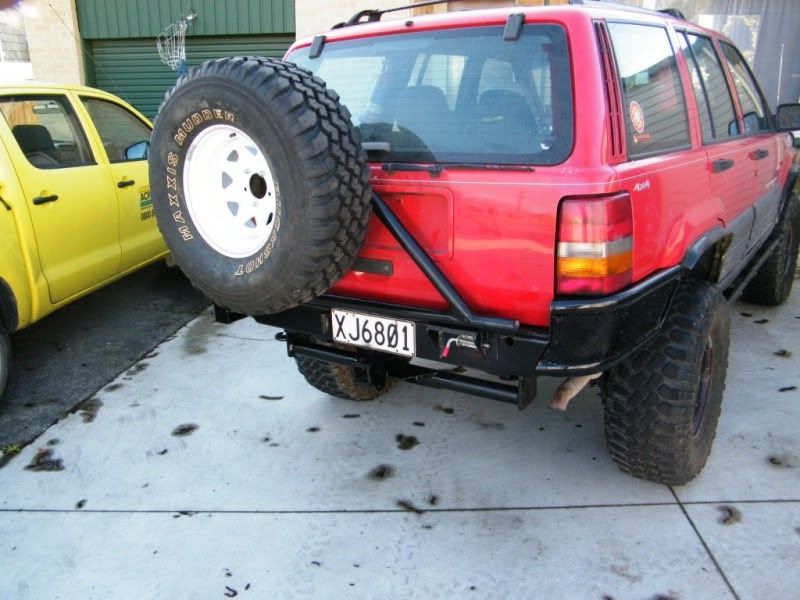
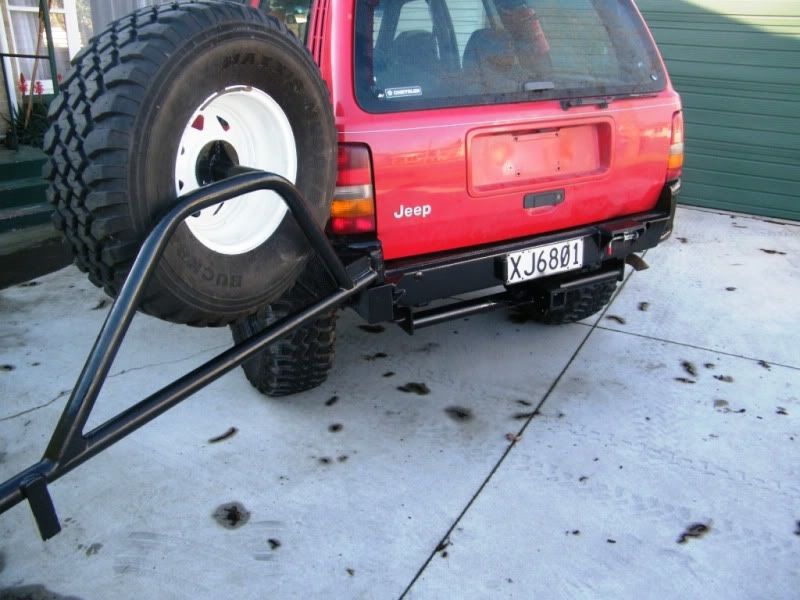
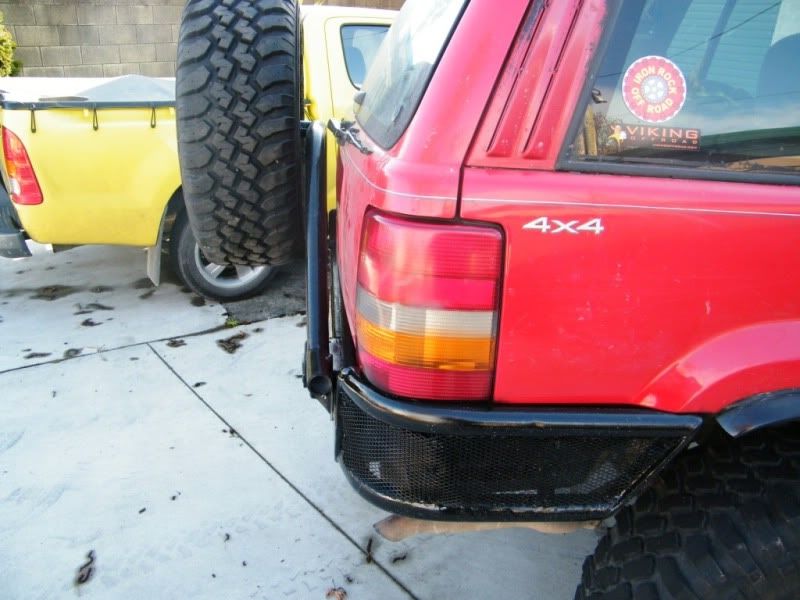
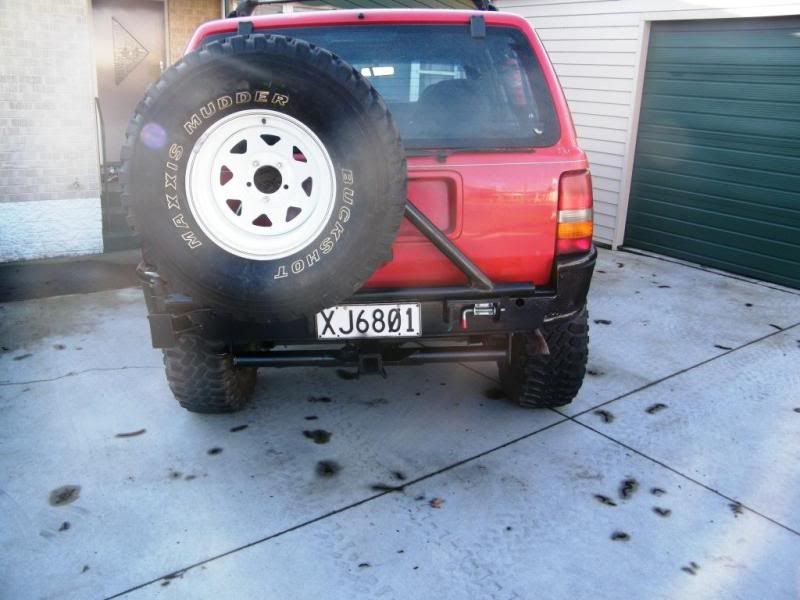
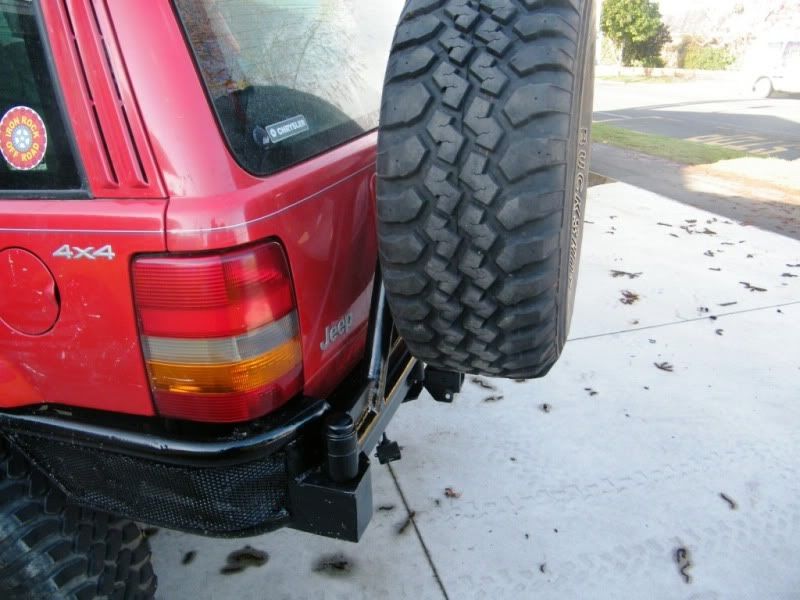
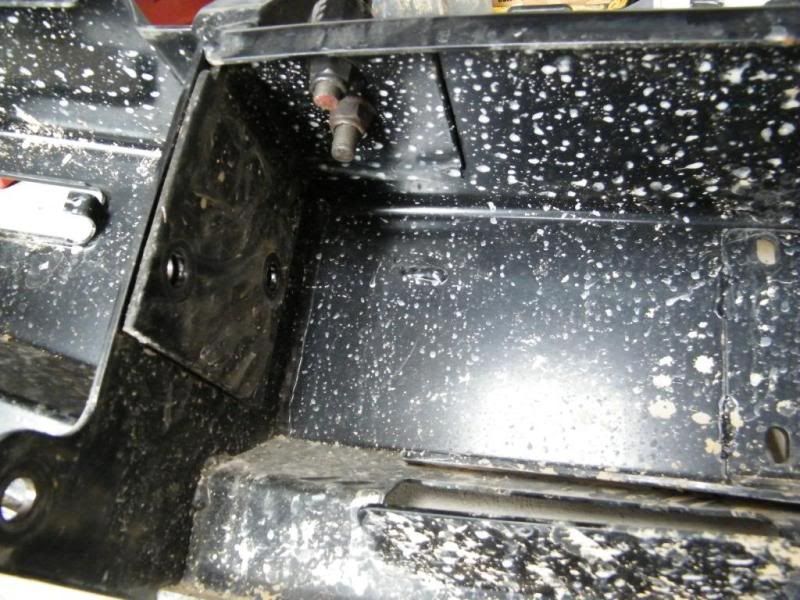
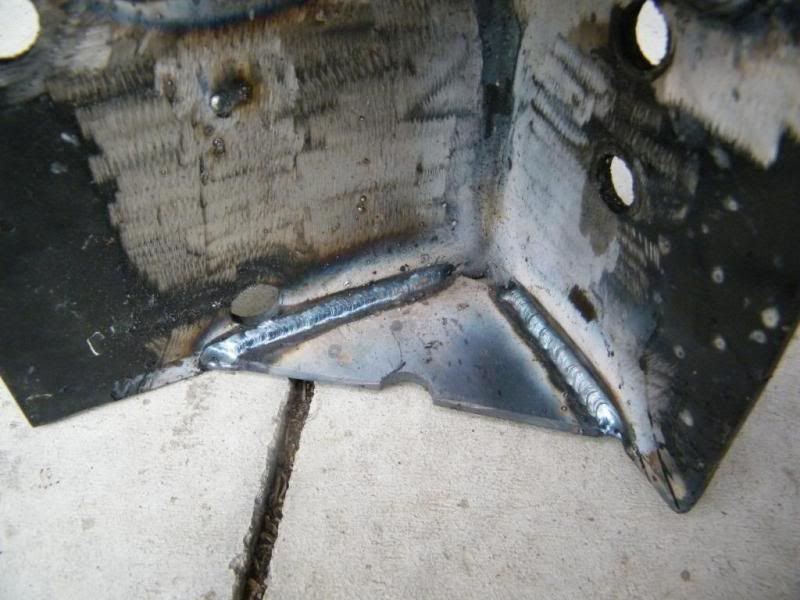
This weekend...... off with the plastic rear bar, and hoping to begin banging up a rear bar with swing out tyre carrier.... these stash the spare in the rear, and a 33 wont fit. its likely to be a combination of a tomkin carrier ( http://ep.yimg.com/ca/I/collinsbros_2114_8165137 ) a protofab steel rear bar for the centre to take the carrier ( ( http://www.protofab4x4.com/products.php?ID=00&ID2=63 ) and the protofab tube bar for the wrap around ( http://www.protofab4x4.com/products.php?ID=00&ID2=24 ) But we'll see how that goes. I really dont like how the yanks rely on shackles for their recoveries. Some of their bars arent actually held to the vehicle with f-all... in one case a bar I bought was to be held to a 2mm bit of panel steel with 8 x grade5 10mm bolts..... negro, puhlease!

After that..... well who knows....

Re: ZJ Build.....

Posted: Wed May 18, 2011 4:23 pm
by xj
Started the rear bar.... kinda had a plan in mind when starting, thats kinda evolving as I go on.... keep the laughing to a minimum hey biartches.....

All the steel has been scrounged and paid for in alcohol. $58.00 so far. Its currently only bolted to the stock (see flimsy) brackets, but will be tied into the unibody "chassis" at each corner. I also intend to cut the towbar tongue off, and flip it 180deg, and tie the crossmember (and therefore the 8 towbar mounting points) to the new bar also. Shouldnt move too far. Tube is going to wrap around the sides (lucky i know where to get tube too!)

I still have to get info on how to sleeve and bush the swing away pivot, which is going to be mounted on the left side (so it opens on the footpath side of the road) off tabs coming off the top and bottom of the bar...... well, thats the plan anyway.... no doubt it will change tomorrow.


Before pics.....
Image

Image

Image

Image

Image

And tonights progress.......

Image

Image

Image

Image

Image

Image

Image

Image

Re: ZJ Build.....

Posted: Wed May 18, 2011 4:24 pm
by xj
Didnt achieve much today. got to it at midday after the lads soccer, then had a procession of visitors.... told the wife "its ok dear, Ive only got 4 bends and two holes to do....." about 5 hrs later.....

Image
Notice anything? (and no jokes about pink bits!!! the camera was having a "moment")

Image

Image

Image

Image

Its just tacked at the mo. Theres still some angles to get right. The white tape is showing the proposed final angle of the bar.

Any constructive comments/advise are welcome, like i said, ive never done one before, so any help is appreciated.

Oh..... picked up these today.... pop them in tomorrow and sort the trasfer case linkages before arseing about with the bar again. (and the one inch tube was for a roofrack, but i dunno now, must be something else i can do with it?
Image

Re: ZJ Build.....

Posted: Wed May 18, 2011 4:25 pm
by xj
The proposed pivot/hinge (before), courtesy of Wholesale Industrial
Image

and after
Image

Banged up a couple of brackets to tie into the body/unibody chassis. Hopefully some decent progress tomorrow.

Image

Re: ZJ Build.....

Posted: Wed May 18, 2011 4:27 pm
by yeti
why ditch the locker mark.....looking good by the way....

Re: ZJ Build.....

Posted: Wed May 18, 2011 4:27 pm
by xj
got some "racing mesh" from SCA for the infills in the side tubes. I cringed when the bloke behind the counter asked me what i was driving, and spieled on about the cool mesh in the grills of his mates subarus and toyotas.... anyhoo, ill try that in the side. Would like to tack it in, but its so thin i doubt it will handle ANY heat, might have to bend and rivet instead.

got the carrier bent up... it didnt quite hit the angles i wanted, but the height dimension was the vital one i wanted to get....
Image

distance off the vehicle is not quite far enough off what i wanted, but there's still room for the rear wiper, I may have to revisit the proposed hilift placement though
Image

got the pivot bracket nearly done, just need to bang the holes in and stitch the stub axle in and we're all but there..... (yeah right)
Image Image

Slowly learning that these things take some time, and theres no point in rushing.

The plate the end of the swing out is sitting on is bracketed back to the bar, and will take a led light below it plumbed into the reversing lights. The lic plate is going to go to the centre of the bar, with another led beside it to light things up and stay on the right side of JohnQ

The tow ball tongue is going, and will have a reciever sitting atop the towbar x-member instead, a couple of shackle eyes will be added (work to be done by someone more competent than I) and, if theres enough "racing mesh" left, ill fill in the gap between new bar and existing tow bar with it.

Perhaps some "KITT" lights too.

Or how about this for bling??!!.......................... Image

Re: ZJ Build.....

Posted: Wed May 18, 2011 4:28 pm
by xj
yeti wrote:why ditch the locker mark.....looking good by the way....


its staying now...... historical commentary...

Re: ZJ Build.....

Posted: Wed May 18, 2011 4:31 pm
by xj
So, sacked the rear bar for today (suffering from attention deficit disorder - also known as a "low give a fuk factor") and ripped into the sliders.

First problem with these things is that the "chassis" (the boxed part of the unibody that is formed like a chassis) sits higher than the sides of the truck. So while the bracket can be fixed at right angles with the "chassis" the sliders supporting members need to be angled. So the first mission was to cut the 2inch angle, place it on the "chassis" and get the angle sorted for the supports.

Then stitch em up, then cut two and re-stitch em the right way up. :flipoff

Once they were welded, they were fixed to the "chassis" with some self tappers (yup i know, i know, but there's method in the madness) and checked for the right angle.

Image

Image

Once happy with where they were, a strip of steel was cut to the length of the sills, and placed on the inside of the pinch seam, with about 10mm protruding below, with the edge sitting on top of the supports.

Image

Once happy with that, I "blazed" (just for you wop) the supports to the steel strip. So now, if we're following along here, theres 12 self tappers in the "chassis" and 10 machine bolts through the pinch seam and steel strip. According to the way the Americans manufacture sliders for these things, this is the way to do it.... and when have the Americans ever been wrong?

Once that was sorted, a vertical cut was made on either side of the supports, and the steel beyond the pinch seam was bent up, and the tube placed and tacked in position.

Image

Image

Image

Then the command came to get inside. Not bad for an afternoons work (1 side very nearly done as far as the nutting out of the this and that...)

From here, some wedges will be placed in the gap created by the cut and bend in the support, the steel below the tube will be cut and bevelled back, some gussets will be added in, the ends of the tube to be cut to an angle and capped.... and that should be about it.

Not a bad set of sliders for a box of beer (for the tube) a couple of cutting discs and some welding rods. With the cost of paint to come, the total will be about $85.00. Beats buying em for $300USD and then another coupla of hundred for freighting em here.

Re: ZJ Build.....

Posted: Wed May 18, 2011 4:32 pm
by xj
Finished the sliders at 11.30 last night, with the intent of heading up Thommos this morning, but canned the outing idea when pressed to get the rear bar done. I couldnt be arsed takinf it off etc and it would have gotten muddified and rusty..... so pressed on with that this arvo (with not alot of headway)... but back to the sliders....

Image

Image

Image

Image

Re: ZJ Build.....

Posted: Wed May 18, 2011 4:33 pm
by xj
Back to the rear bar....

PROGRESS.....................
Image

Re: ZJ Build.....

Posted: Wed May 18, 2011 4:33 pm
by xj
Image

Image

Image

Image

getting there..... getting there..

Re: ZJ Build.....

Posted: Wed May 18, 2011 4:35 pm
by xj
Ahhhh FUK IT...... DONE

Image

Re: ZJ Build.....

Posted: Wed May 18, 2011 4:36 pm
by xj
Is there inappropriate self touching going on in my house tonight...... ohhh yeah..... :smokin

HD tie rod
Image

Cold air induction (in place of a snork on my wish list)
Image

And an offer i just couldnt pass up, 10500lbs of rebranded Smittybilt for $700.00
Image

Re: ZJ Build.....

Posted: Wed May 18, 2011 4:37 pm
by xj
Getting there...... getting there......

I think the shed needs a clean
Image

Image

Image

Image

Re: ZJ Build.....

Posted: Wed May 18, 2011 4:38 pm
by xj
Almost there.....

Not entirely rapt with the differences in the placement of the tube from side to side, but hey, when you spend most of the time making it kneeling on the garage floor I guess I cant expect it to be overly precise.

Cheers to Dixie for his outstanding stitching.
Image

Image

Image

Image

Sitting at its unassisted stopping point, sheer fluke that, but i'll take it.
Image

Image

Image

Image

Image

Image

Might have to shimmy the tyre over as its not quite clear of the tail-lights when standing directly behind, ill see what happens when in comes Warrent Of Fitness time.

Still have the latch to sort out.... just cant get my head around what option to take.

Mesh still to place inbetween the tubes

Need to locate the bottom seal for the pivot bearing too before tightning it all up

Plenty of room for hi-lift too..... but thats for another day

Re: ZJ Build.....

Posted: Wed May 18, 2011 4:38 pm
by xj
ight.. thats it... finito..............

Image

Image

Image

Image

Image

Image

Theres still avenue for fitment of spade and hi-lift, but for the meantime they can mount on the roof racks.

All up (including butchering the tow bar and fitting the reciever and detachable ball which wasnt on the original plan) it totalled $630.00, the sliders ended up about $100.00 after reviewing my reciepts, so for swing out carrier, bar, sliders and removable hitch the total was $730.00NZD ($520.00USD, or $575.00AUD) Which by my maths aint too bad. Theres some "discrepancy" as to where the end height of the tubes at the respective sides ended up, but hey, for (the most part) kneeling on the cold concrete with nout but a grinder, an arc and some scrap steel to work with I'm a fairly happy chappie with the end result.


NEXTTTTTTTTTTTTTTTTTTTTTTTTTTTTTTTTTTTTTTTTTTTTTTTTTTTTTTTTTTTTTTTTT

Re: ZJ Build.....

Posted: Wed May 18, 2011 4:39 pm
by xj
fitted up the rt's and slipped a little supercheap compressor under the rear seat too. Still aint got to mounting the winch, or fitting up the wifes hot water unit for the shower yet.
Additionally the diff ratios need changing up to a 4.10 too... the 33's suck the guts out of 2nd gear something horrid.

Things still to do, things still to do.

Re: ZJ Build.....

Posted: Wed May 18, 2011 4:40 pm
by xj
While removing my bar to fit my winch. I thought Id adapt the previous owners idea for fitting hooks to make it a little more sturdy. I often see people bitching about the lack of towhooks on an ARB bar, yet no-one ever seems to come up with any solutions (might have something to do with the "if you screw with the bar youre a naughty boy" sticker on the indside of the bar perhaps.)

Previous owners plate:
Image

With an addittion: :tongue
Image

Now i feel a little better about recovering off them: :smokin
Image

The plates bolt back through the original bracket mounting holes, also into the top of the bar/through the hooks. (I'll post a decent shot of the top tomorrow) I wasnt too comfortable about pulling off them as they were, even with the use of a bridle, as there was too much pull from what i percieved as being a mildly reinforced horizontal plane. Now, with them gussetted, I dont see too much of an issue as the load now passes through to a verticle member that ties back into the vehicle. To pull out they'd need to rip the entire bar out of the chassis, which although Im sure it is possible, I cant see it happening.

Mark

(note to self: put some washers in there tomorrow too)

Re: ZJ Build.....

Posted: Wed May 18, 2011 4:41 pm
by xj
And while Im on the subject of the Winch.......... I'm just about over arseing about with the nuances of the f*****g Jeeps..... anyway......

I got my hands on a Rugged Ridge (see: T-Max) 10500lb winch about 6 weeks ago. Two weeks later I thought I'd pull out the tape and see what kind of room there was to slip the new winch into. :cry:

The previous owner had attempted to fit a Runva winch in and had found that the clutch lever was positioned in a manner that it struck the vehicle before being able to fit the winch, in short, the overall dimension of the depth of the winch was too much for the gap available. "musta been a Runva thing" I thought, until i too found the required gap was approximately 20mm too small for the winch. :confused: (i had asked the RR agent if it would fit and although vague and non-commital, he couldnt see why it wouldnt)

I shot off to the local Warn dealer, figuring that if Warn and ARB work in together, perhaps their 9500lb-er would fit.... but no.... again, the clutch lever was an issue. :?

Seems it was a ARB issue then, rather than any particular winch design. Simply, the bar is too darned close to the vehicle to accommodate winches of a certain lever type as they come out of the box. (and researching this problem earlier I didnt come up with anything about anyone else having the same issue... maybe its a Me thing?!?!)
I was picking that the only one that would work was the type with the sliding "collar" the activated the clutch, but I had what I had, and it needed to work. :twisted:

I got to thinking along the way that the 9500i that i had in the XJ was always a pain to get to the lever if needing to use it, reaching up underneath the front bar is a bit uncomfortable at times, like when knee deep in mud for example.... :x ...... soooooooo :idea .... (solutions, its all about solutions!!)

2 and 2 started to make four..... and I got a little adventurous one sunday and figured I ought to be able to unbolt the clutch and motor ends of the winch and turn em 90 degrees (or as near too as possible) without too much drama.... and lo it worked, although the manufacturers warrenty is now voided.

Today It was time to test the theory.

Off with the bar:
Image

.....and after taking off the clutch lever (out with the grinder to butcher a hole in the top of the bar for that!) a trial fit
Image

then out with the grinder..... ( :flipoff take that biartch... see prior post re: emending ARB bars)
Image

Not the prettiest hole, but ill get a little edging onto it to tidy it up. Now not only does the winch fit, but it can be accessed from the top of the bar. Water etc may be a little bit of an issue (no more than having it submersed in mud and water when mounted underneath though) but i have a little waterproofing plan for that too. It involves velcro and PVC. (but in a not so pervy manner as some of you may be thinking, well.....)

Next little hurdle was the fairlead..... the f****r was too small. Fairlead too small, winch too big, who would have guessed.

Top on showing just how much smaller the fairled was:
Image

Awesome...... out with the grinder and the drill (to add some holes that now tie the winch, the fairlead and the bar together on the verticle, and also hold the fairled from the top on the horizontal) and we'll sort that little faux par out!
Image

I ended up there tonight, winch is in, fairlead is on, bar is now functional. tomorrow the box needs to be located and plumbed and we're away. Still not sure where to position the box, but something will come to me tomorrow.


(addendum: before fitting it today I wired it all up and after swapping the position of the motor and clutch, everything still works how it should)

Re: ZJ Build.....

Posted: Wed May 18, 2011 4:41 pm
by xj
I borrowed half this idea from another source, but took it a little further.

I was looking at the options surrounding disconnects and figured there must be something available aside from JKS and Terraflex, and hopefully something cheaper. (A set of JKS ones on TM is asking $390.00nzd for a set..... F*****G burglar!)
In the process of looking near and far I stumbled upon an idea using clevis pins, washers and R clips.

I sourced a box of various clevis pins, and a box of assorted washers and set to work.

Required items:
Image

In place:
Image

Image

and disconnected in a stowed position:
Image

Image

The original idea didnt go so far as to suggest how to stow them, so a hole in each side of the stock skidplate sufficed. Simply remove the two r clips, slide out the clevis from the mount, pop the clevis back in the skidplate hole, slip the swaybar link back over, and pin it back together again.

Total cost worked out to $1.13 plus some time.

The question of the durability of the clevis came to me, and upon talking to an engineer acquaintance, my questions were satisfied. However, an alternate plan if one were concerned about the clevis pins, would be to simply remove the stock nut from the stock bolt, centrepunch a mark where an R clip (or similar) could go. Drill out a hole for the clip, and again, with the removal of the clip, you can disconnect in seconds without paying through the nose (probably about what.... 10c for some clips if bought seperately?)

It took 48 seconds to remove the swaybar form the stowed position, and replace in drive position. (admittedly on the garage floor, it will take a little longer at the end of a trail I'm sure)

I'm running our of things to do.......

Re: ZJ Build.....

Posted: Wed May 18, 2011 4:42 pm
by xj
And......

4.10:1 R and P are now in, theres a "Jet" chip module plugged into the cpu as well......

Re: ZJ Build.....

Posted: Wed May 18, 2011 4:45 pm
by xj
..... and as of today, have decided that I dont like the rear bar wrap arounds.

Might have to chop em off and make something a little more solid, not that the one on there arent solid enough, I just dont like them any more.

Re: ZJ Build.....

Posted: Wed May 18, 2011 4:52 pm
by SP450andLE
To sum up what i think about this truck....

NIIIIIIIICE!! :mrgreen: :mrgreen:

Re: ZJ Build.....

Posted: Wed May 18, 2011 9:10 pm
by zukmeista
SP450andLE wrote:To sum up what i think about this truck....

NIIIIIIIICE!! :mrgreen: :mrgreen:

Yep, pretty cool for a heep :P

Re: ZJ Build.....

Posted: Wed May 18, 2011 9:35 pm
by coxsy
and your disconects idea better than mine :(

Re: ZJ Build.....

Posted: Wed May 18, 2011 9:40 pm
by yeti
like the sliders bits mark ,may copy,,,much trimming of the guards....ya muddies sit better under the guards than on my xj that's why i have to have the tj flares,,,,also may have to get more info on tire carrier,,sick of having spare in the back.....so how do you rate the zj over the other jeeps ya have had....

Re: ZJ Build.....

Posted: Wed May 18, 2011 9:44 pm
by coop
Awesome rig xj. Don't know when you typed that up but if you still have those tubes then I could be interested in buying them, or the whole rear bar off you if you want to get rid of it.

Do you have a pic of where the front bar mounts to? I'm in the process of mounting tow hooks on the front and it looks like a c. of a job. Might have to pull the radiator and make use of the angle grinder from the looks of things.

Re: ZJ Build.....

Posted: Wed May 18, 2011 9:51 pm
by xj
yeti wrote:like the sliders bits mark ,may copy,,,much trimming of the guards....ya muddies sit better under the guards than on my xj that's why i have to have the tj flares,,,,also may have to get more info on tire carrier,,sick of having spare in the back.....so how do you rate the zj over the other jeeps ya have had....


Gudday Bud

No guard trimming, though disconnected fronts could do with a nip/tuck when stretching up, and the back could do with my bar being a little shorter
Image


The carrier was just a "thing" that evolved, kinda started with a plan, found there were things that i hadnt planned on, and worked through them.

Hard to rate it really. Definately up on the two XJ's and the CJ. Horses for courses comparing it with the TJ. the longer wheelbase has it climbing realy well compared to the TJ, but in the tight stuff the TJ is so more manoeuvarable. The TJ, by virtue of being about 800kg lighter and sharing the same donk gives more grunt ot the ground, but the 4 spd auto in the ZJ certainly has its benefits.
All in all Id say the TJ was much more fun, the ZJ is much more practical, and as for performance.... id honestly have to say theyre on a par. A couple of spots on the weekend that a v8 safari/jeep/350 chev hybrid had problems, the ZJ walked up at about 1/4 throttle. It had f-all to do with the power plant or the driving, but had everything to do with the longer wheelbase....
As i said, horses for courses.

Re: ZJ Build.....

Posted: Wed May 18, 2011 9:55 pm
by xj
coop wrote:Awesome rig xj. Don't know when you typed that up but if you still have those tubes then I could be interested in buying them, or the whole rear bar off you if you want to get rid of it.

Do you have a pic of where the front bar mounts to? I'm in the process of mounting tow hooks on the front and it looks like a c. of a job. Might have to pull the radiator and make use of the angle grinder from the looks of things.


Dixie nicked the tube I didnt use

Pretty sure if you go to wooders website theres a bolt on bracket for the front hooks, $100.00-ish if i recall correctly. Easier than arseing about with grinders etc.

Ive just been toying with the idea of making another rear bar (something to do over winter and keep me out of the house), hmmmmm

Re: ZJ Build.....

Posted: Wed May 18, 2011 10:14 pm
by xj
coupla vids from late last year, first time with it out in anger.... you are allowed to laugh at the end of the 2nd one...


http://s58.photobucket.com/albums/g264/ ... CF1463.mp4

http://s58.photobucket.com/albums/g264/ ... CF1464.mp4