A/C onboard air conversion build

Garage talk. Anything from mounting a winch to water proofing the electrics.
Post Reply
User avatar
dutchy
Hard Yaka
Posts: 114
Joined: Sun Jun 02, 2013 10:32 am
Location: Welly city

A/C onboard air conversion build

Post by dutchy »

rsz_img_0869.jpg


rsz_img_0870.jpg


Take your truck to a aircon place and get it degassed - they did it for free and doesnt take long.

This is only a guide that worked for me. I do not take any responsibility for anything that doesn't work or is unique to your vehicle.

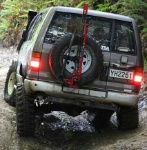
I Installed this into a kzn130 surf but i dont see how it would be much different for anyone else

Parts required.

-Fuse and fuse holder
-Adjustable Pressure switch (or any type, i got a single phase from Airquip Services.)
-Over pressure release valve (i got a 160psi from airquip)
-Oiler (i got one off trademe)
-Water trap (i got one off trademe)
-1/4bsp thread to barb x5 I kept the high temp existing hose from the A/C and cut the cooper pipe about 40mm from the joint, flared the end and joined onto that, if you cant do that you will need a hose joiner (barb to barb)
-1/4bsp thread female couple/quick disconnect x2
- Male coupler/quick disconnect to barb x2 (all from bunnings)
-1/4bsp Gauge (got mine from an old tyre inflator, make sure it's 1/4bsp)
-12mm rocker cover breather
-Hose clamps x9 (used two in some areas that were slightly leaking)
- Length of airline. (I got 10m)
-Roll of thread tape

lets start from the intake side - connect a small piece of hose onto the air filter
Use thread tape and put on a 1/4bsp to barb on each side of the oiler take note of the direction for airflow and connect to the air filter.
Connect the other side to the intake of your A/C.

Figure out where you want the water trap in your engine bay and connect another 2 1/4bsp to barb with thread tape.

Take note of direction and cut a piece of hose to size and connect the other end of the A/C to the water trap (mine came with a regulator, make sure the psi setting is as high as it will go or you will blow lines off the fittings with a big bang)

Figure out where you want the pressure switch and connect another 1/4bsp to barb, over pressure valve, female coupler and the gauge all with thread tape.

Cut a piece of hose to suit and connect

put the fuse holder on the battery connect to pressure switch, connect pressure switch to the compressor clutch switch and check that it works.

the remaining male and female couplers are for the hose to pump up tyres and with the last male connector i filled it with silicone and put it in the female on the pressure switch to stop anything getting inside it.

Make sure you decompress the system after use as there is no check valve meaning the A/C compressor will always be under pressure.

a bit long winded and teaching how to suck eggs but is very simple and doesnt cost much

I pump 33x12.5r15 from 10psi to 38psi in 2min 20sec without a tank

Once you have it to this stage adding a tank is very simple.

Hopefully this answers any questions you may have about converting to onboard air. If anyone would like me to post more detailed pics and point out the parts i'm referring to in this guide I am more than happy to. On the other hand if you're Wellington based feel free to drop me a pm and come have a look :).

Cheers
Chris
Surf - 50mm lift, front bar, integrated winch etc

contactable on 0220901730
User avatar
Mattman
Hard Yaka
Posts: 1643
Joined: Sun Mar 05, 2006 12:00 pm
Location: Kapiti

Re: A/C onboard air conversion build

Post by Mattman »

Nice setup.

I have done something similar except I plumbed my air feed into the air box. I also used a relay between my pressure switch and compressor.

I also have a hand throttle and cranking it to 2000rpm males a massive difference to the airflow.

Matt.
happy das
Driver/Navigator
Posts: 22
Joined: Tue Jan 15, 2013 4:55 pm

Re: A/C onboard air conversion build

Post by happy das »

What oil are you using in the oiler for as ac gas has oil in it lubricating compressor
User avatar
Mattman
Hard Yaka
Posts: 1643
Joined: Sun Mar 05, 2006 12:00 pm
Location: Kapiti

Re: A/C onboard air conversion build

Post by Mattman »

I just use general purpose oil and put a few squirts in the intake pipe before I head out for the day.

I don't run an oiler as they restrict the flow too much on the intake side.

Matt.
User avatar
CLUMZ1
Hard Yaka
Posts: 800
Joined: Tue Jun 12, 2012 10:06 am
Location: Wellywood

Re: A/C onboard air conversion build

Post by CLUMZ1 »

We could have done with using your on board air today Matt!
Image
User avatar
Mattman
Hard Yaka
Posts: 1643
Joined: Sun Mar 05, 2006 12:00 pm
Location: Kapiti

Re: A/C onboard air conversion build

Post by Mattman »

Haha sorry man! Its wicked, best mod I have done.

Thanks again for a great day.
User avatar
dutchy
Hard Yaka
Posts: 114
Joined: Sun Jun 02, 2013 10:32 am
Location: Welly city

Re: A/C onboard air conversion build

Post by dutchy »

I use air tool oil.
Yeah I use idle up switch aswell.
I tried it without the oiler 1st and then with. The difference wasn't worth the hassle IMO. It's like saying don't use a air filter because it restricts the flow but is handy and extends the life.
Surf - 50mm lift, front bar, integrated winch etc

contactable on 0220901730
User avatar
Mattman
Hard Yaka
Posts: 1643
Joined: Sun Mar 05, 2006 12:00 pm
Location: Kapiti

Re: A/C onboard air conversion build

Post by Mattman »

I have a dual tire chuck hose and can air two tires from 18 psi to 36 psi at once in under a minute.

I put a non return valve after the compressor so that the compressor isn't under load all the time.

I fitted a tank under the truck so that I can run air tools without having the compressor running all the time. Makes no difference for filling tires tho.

I fitted a quality female disconnect fitting on my rear bar so I don't need to open the bonnet and have a cover for it so no dirt gets in there.

The air is handy for blowing stuff out on the trail, rattle gun to change wheels, and air for inflating or reseating tires.

Matt.
Post Reply

Return to “Tool Shed”