I am assuming that the people who will use these instructions have enough computer experience to understand the terms I have used, but have made them thorough enough so hopefully all who need help, will be able to follow them.
First task is to make sure you have your pics on your computer, stored in their own folder like My Pictures etc.
Next think about what you want to name your album, as it may be easier to just go by your user name and add sub albums with special sets of pics (I will go into sub albums after the initial set up set of instructions).
A good idea here is to have a look at some others albums before you start yours and have a plan in mind when you set out
Open an ORE forum page, in the left hand menu, under Community: you will find a shortcut labelled Photo Albums, click on this link and this page will appear.
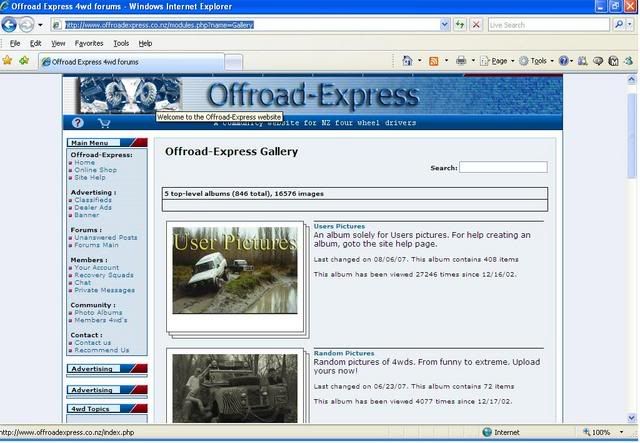
If at any stage during this set of instructions a screen fails to appear as described. It may be due to your computers popup blocking settings, these will probably be displayed in a couple of different ways, either by a thin bar at the top of the page that will appear saying something like popups blocked. click here to see your options, or you may have a popups box in the top tool bar.
Either way you need to turn off popup blocking for the ORE Forum site, to be able to upload photos.
Choose which set of albums you want to include yours into, decide if it’s just a usual set of pictures, so would be fine in User Pictures.
Or are the photos from an event and be more suited to the Events album.
Once you have chosen the album that is most suited click on it and you will get a screen that looks like this.
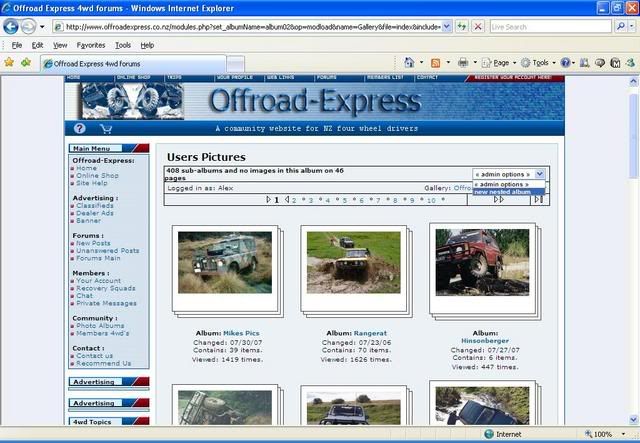
In the top right corner you will see a box that says Admin Options, if you click on this box a drop down menu will appear that says new nested album
When you click on it you will get a screen like this.
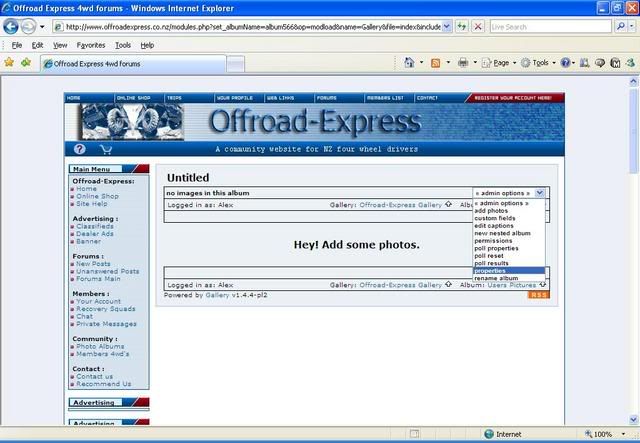
Before you follow the instructions, and add some photos, this is a good opportunity to name your album.
In the above Screen pic I have highlighted properties in the admin options drop box, if you click on it you will get this screen.
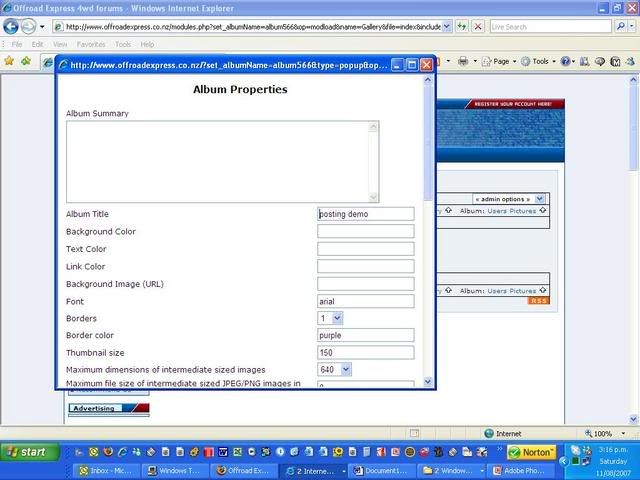
Change the Album Title box from the default of Untitled. to the album name of your choice, and scroll to the bottom of the Album Properties page and click apply
If you have chosen to add sub albums and need to do this now, just click on the album you have created and click on the admin options drop box again, then choose new nested album, you can add as many albums to your main album as you want (as far as I am aware) and can also add extra albums into these albums, and so on.
Now you are ready to start putting the pictures in the album/albums.
If you have created your album and renamed it you should be at a screen that looks like this.
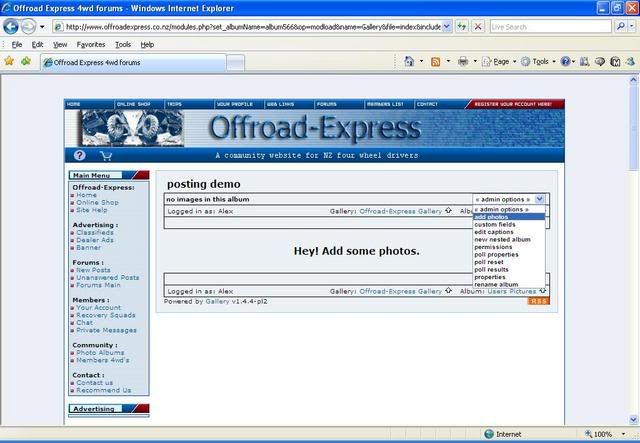
Click on add photos under admin options and this screen will appear.
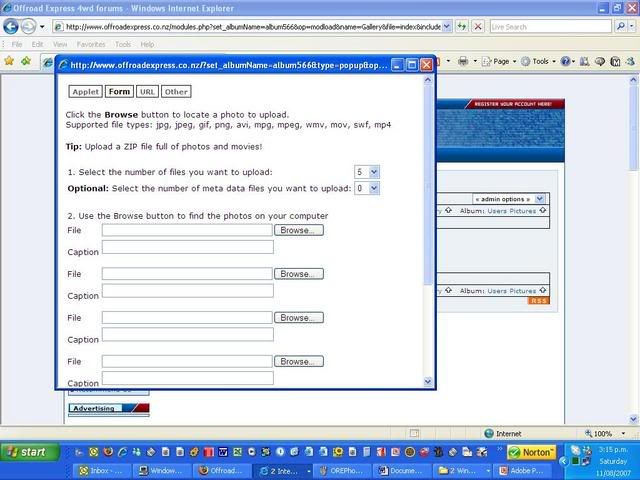
If you click on the browse box you will get a screen similar to this, it will depend on your computer, but should look similar to this.
It should find on your computer the most common place pictures you have are stored.
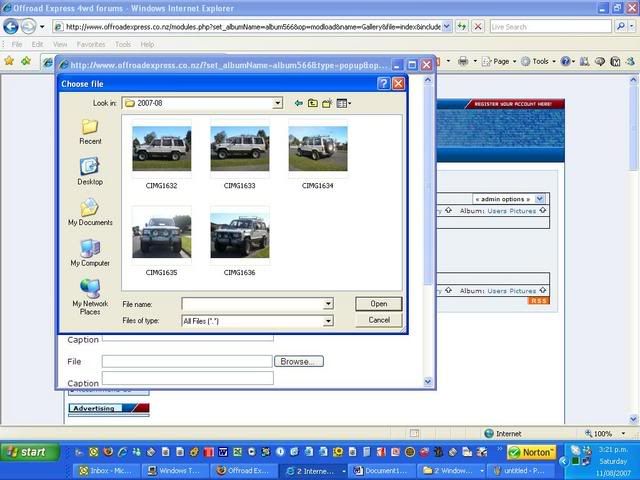
Just click on the pictures you want to include in your album, and click Upload Now at the bottom of the page.
There are a number of things you can do at this point to customise your pictures, like captions and alike, but these can also be sorted out once you have all your pics in the albums if you prefer.
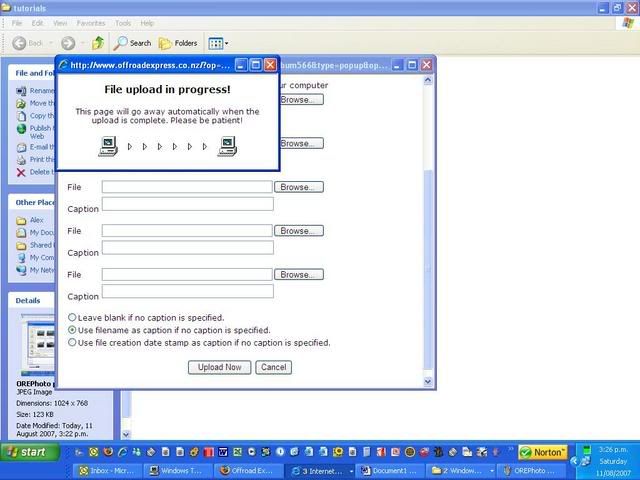
Once you have clicked the Upload Now button you should see a small box like this one.
Once the Pics have finished loading you may see a screen like this,
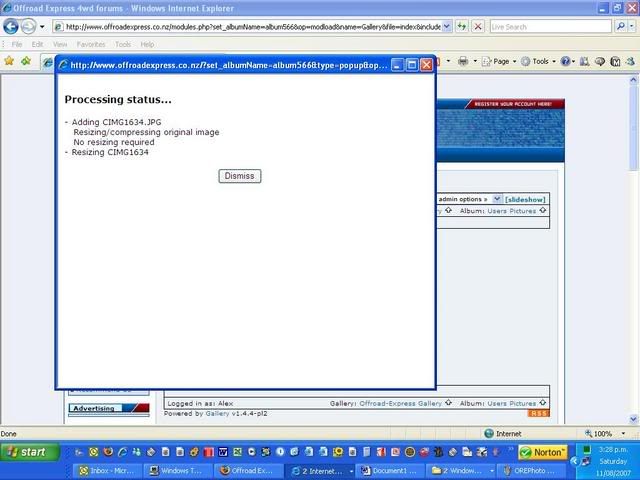
Just click Dismiss and you should be back at your album with photos included.
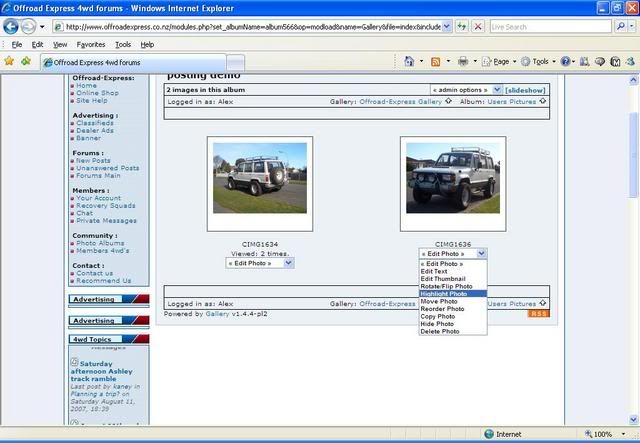
As mentioned earlier you can change most thing about your pics by clicking on the edit photo drop down box in the album, this is where you choose the album cover pic, by selecting "highlight photo"in the drop down list.
It looks like this.
OK, so now you have your pics in your album it’s just a matter of inserting the pics you want into a post as you need to.
To do this you will need to have both a post open and at the same time another browser page with you photo album open as well.
To insert the photo you want into a post, first decide how you want it to display.
Most commonly it will be as a link (opens the pic when you click on it).
Or so it shows in the body of the post.
The only difference to how this is done is by selecting if the link you will copy is just pasted into the post, or has IMG markers at the start and end to make it display in the body of the post.
So with the album open click on the picture you want to use and open it, while it is open, right mouse button click on it and select properties
Looks like this in Internet explorer.
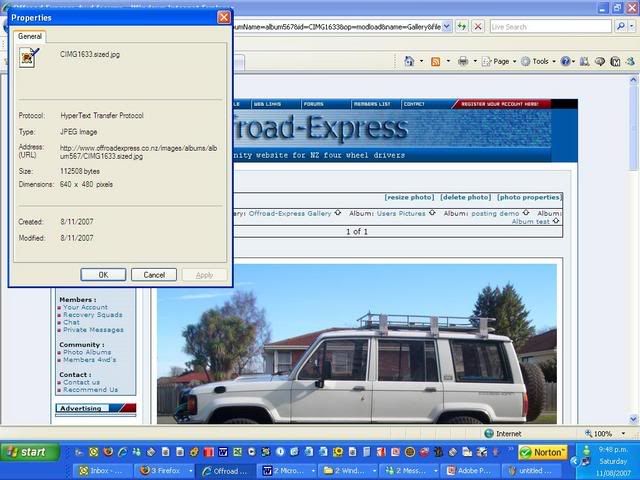
Here you would highlight the address (URL) looks like this in the example
(http://www.offroadexpress.co.nz/images/ ... .sized.jpg)
And then right click on it while highlighted and select copy.
There are some subtle differences for other operating systems like Firefox etc, but I have to assume that if you have departed from Mr Microsoft, you will probably know enough to work these out.
Everything else is done in the post window.
Firstly try clicking into the body of your post, then right mouse button click and select paste.
This option will display in the post as a link and will look like this when previewed.
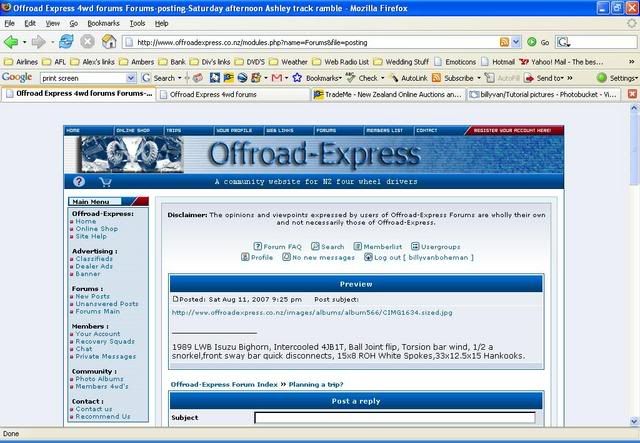
So the people who read your post will need to click on the link to view the picture, the short comings of this option are the fact that they need to be clicked to view, and the links can be very long.
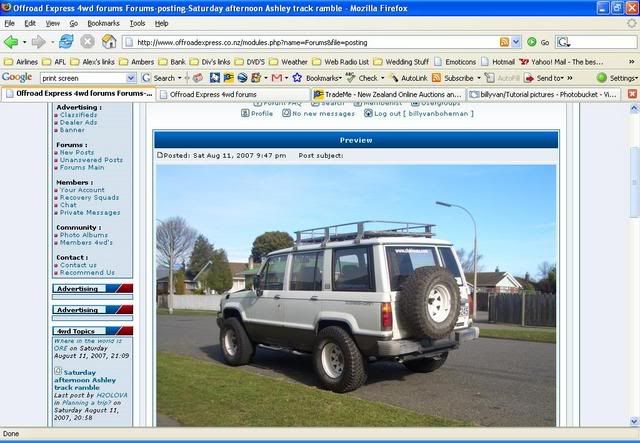
The other option is to paste the link between Image markers to make the link show the entire picture in the body of the post.
The catch to watch out for here is the markers (either typed as or clicking on the Img box at the top of your message body twice so that these markers appear at the start and end of the picture link.
(will end up looking like this)
If you click in between the two and then right mouse button and select paste you should end up with what you need.
And will display in you post when previewed like this.
One catch to watch out for here is if you decide to add a picture, in the middle of text you have already typed, if you click the Img button the [img] tag will appear at the very end of your message.
This set of instructions is a work in progress and by all means if you have any questions or suggestions to improve, please feel free to PM me.
I hope between all of us we can make this into a helpful set of instructions that can be attached to the site help to possibly make photo posting less daunting.
