Page 5 of 9
Re: It Has begun... "Project Wombat"
Posted: Thu Sep 29, 2011 7:10 am
by DieselBoy
Re: It Has begun... "Project Wombat"
Posted: Thu Sep 29, 2011 8:01 am
by UBZ
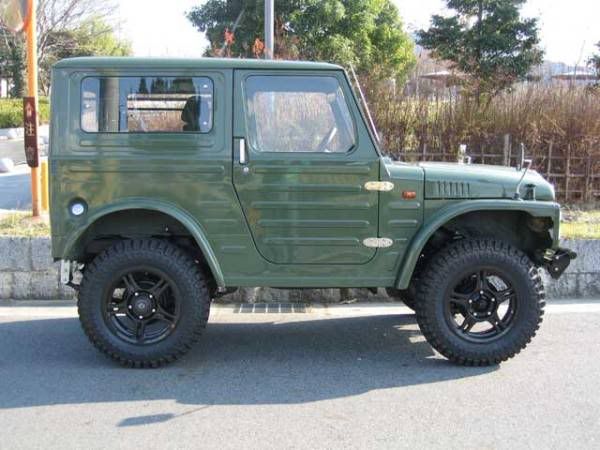
That hardtop is

Way better than the NZ glass ones , and just about as good as the bling German ones.
Re: It Has begun... "Project Wombat"
Posted: Thu Sep 29, 2011 9:13 pm
by Heath
Where do you find these lil gems?
Id be keen on one for a project (trailer queen of course), but the wife says they look cute so maybe not...LOL.
Re: It Has begun... "Project Wombat"
Posted: Tue Oct 04, 2011 9:50 pm
by DieselBoy
Buggered if I can find the camera tonight, so its not going to be an up to date update

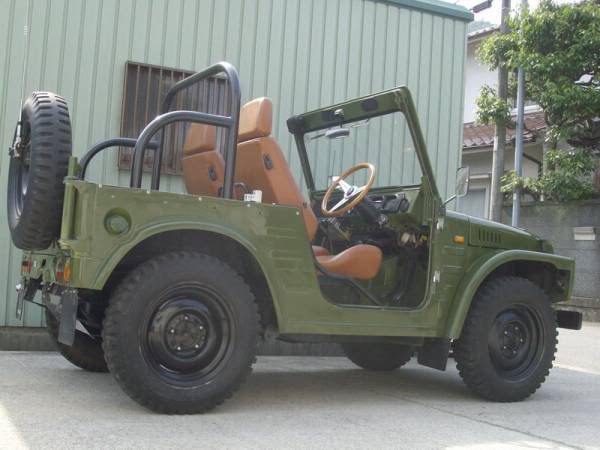
As you will have gathered from the previous post, things have taken a major turn for the better, in that I was put onto another LJ50 by my LJ spy network (nzhunter takes credit for this one, lilpigzuk was close second) , and as such, I now have a proper LJ50 tub for Wombat!!!!
So what to do with the tub I have been working on?? I have put a LOT of hours into it, and it feels funny not finishing it, but oh well

After bouncing idea's around people, I decided that the best thing to do was to stop were I was and preserve it. It has all of the rust removed and about 50% repaired/patched. Its never going to be mint due to the trans tunnel patch up.
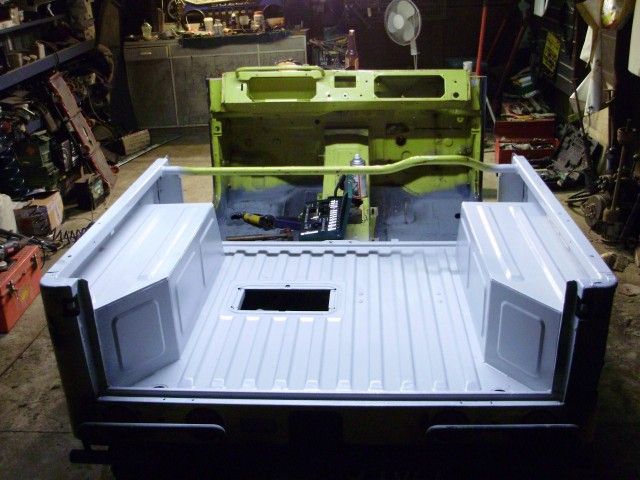
I drew the line, and covered it industrial epoxy primer to seal it up and preserve it for a while. It will be going on to The50, which was always supposed to have a full tub, I just couldn't find a good one at the time. Sound familiar

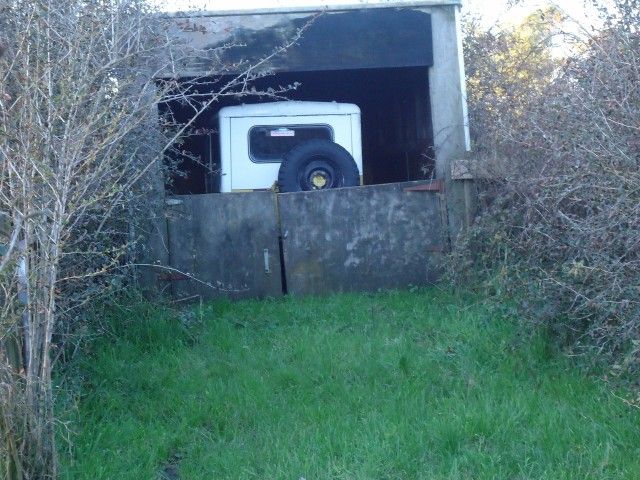
Next up was to have a quick clean out of parts that were no longer required. Misc doors, bonnets, windscreens and assorted fiberglass stuff. Dragged it all over and stashed it away for safe keeping

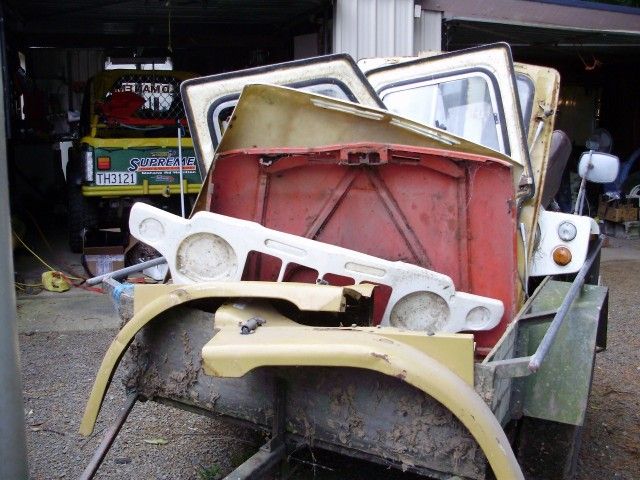
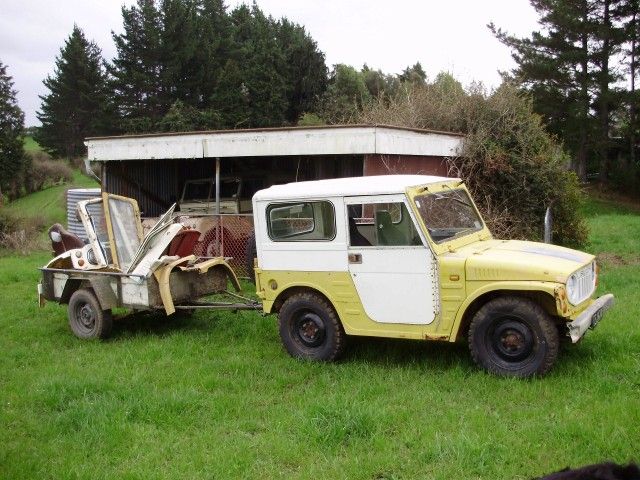
And this is were it sits waiting for its future use.
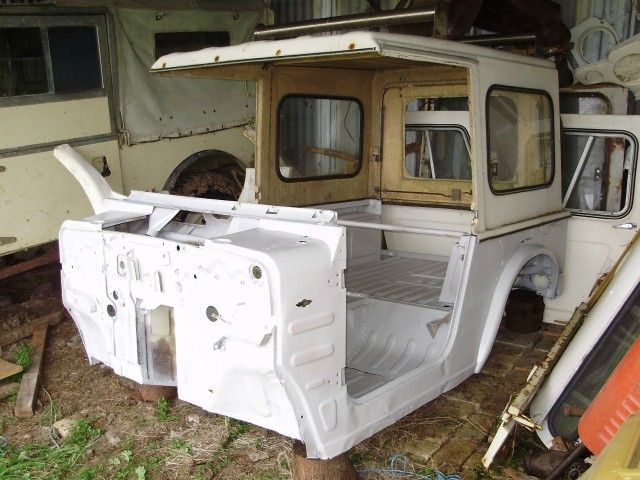
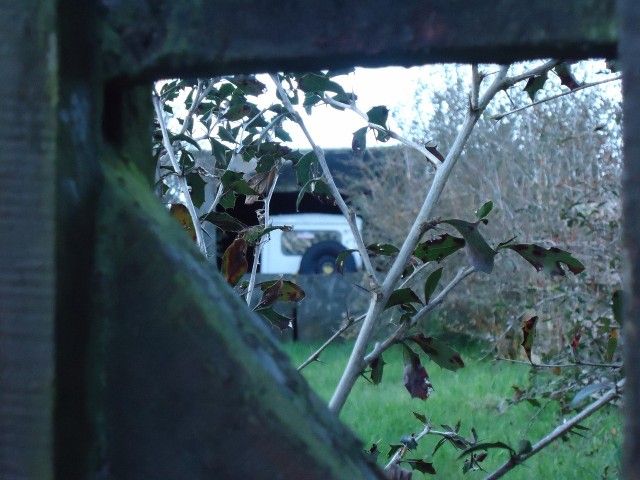
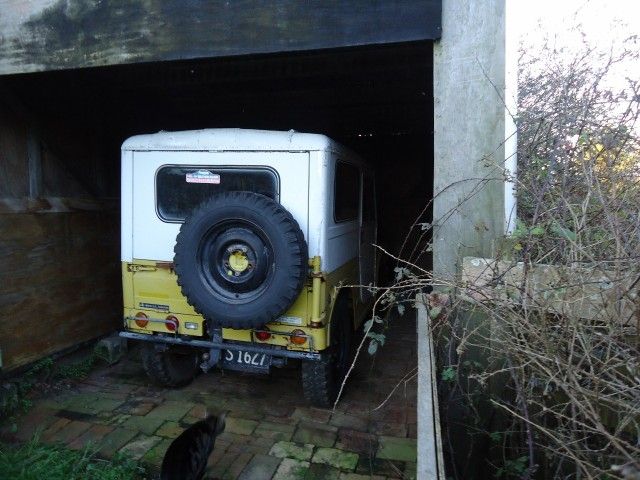
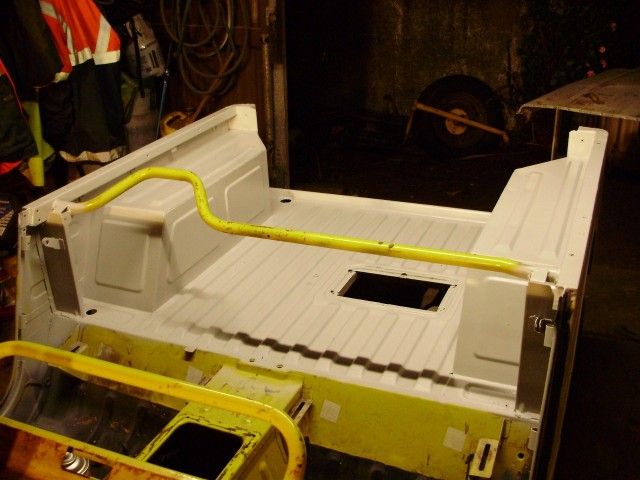
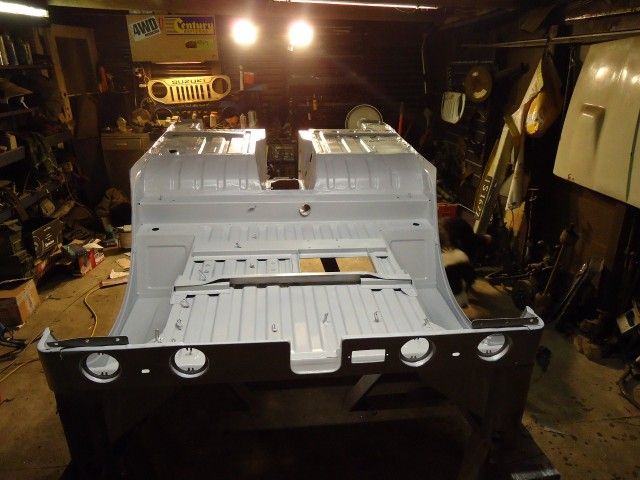
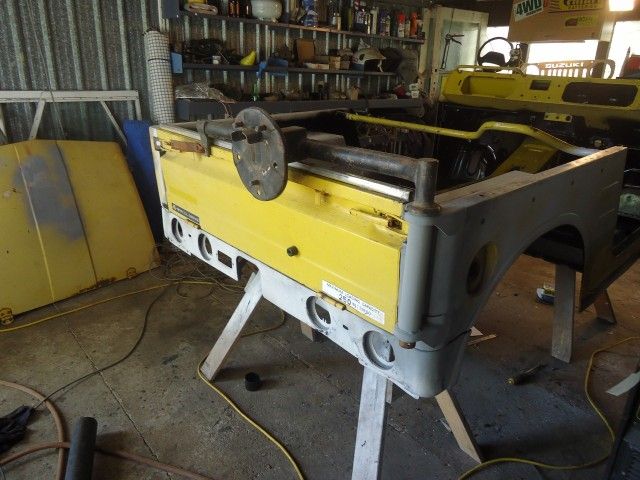
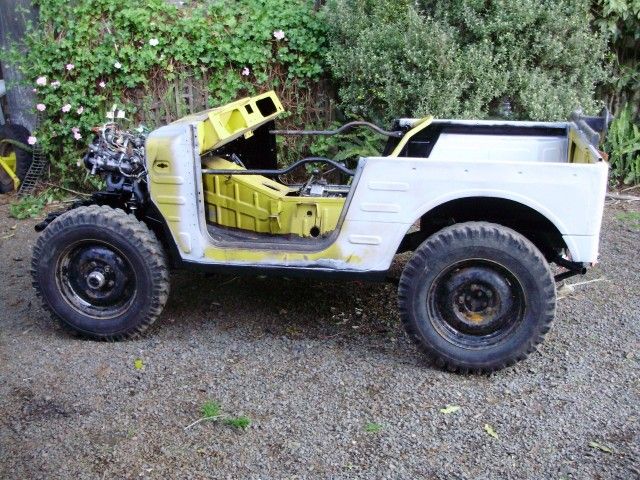
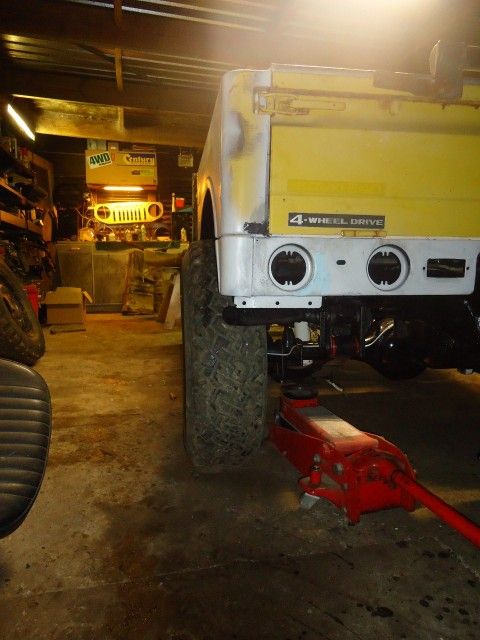
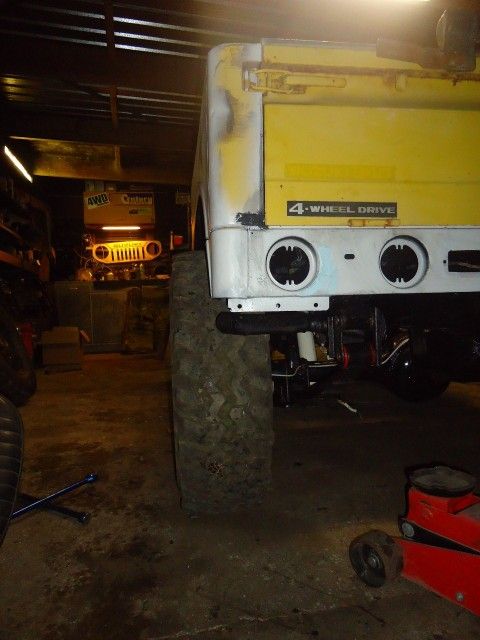
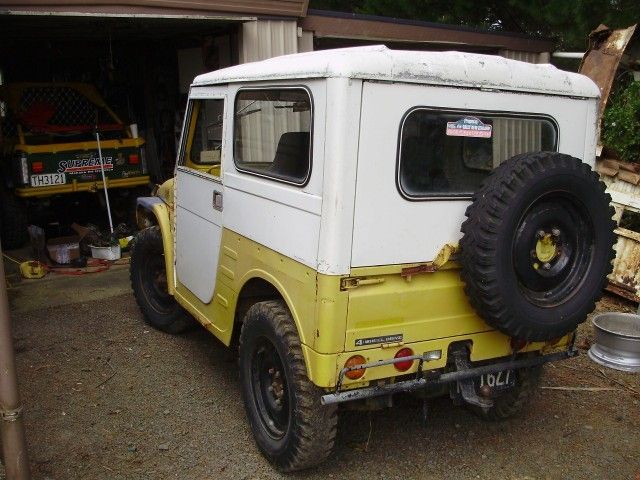
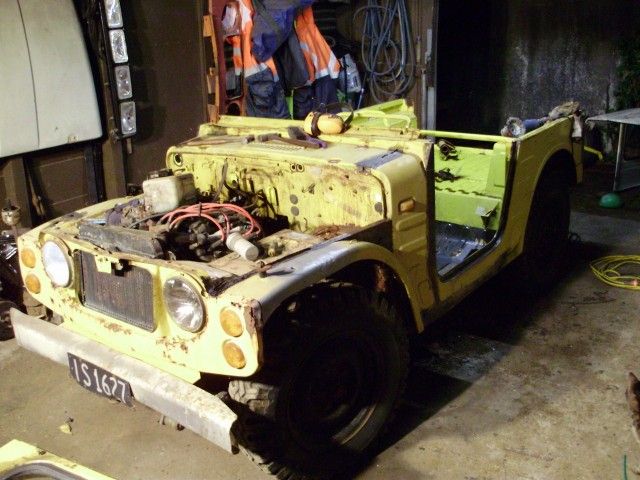
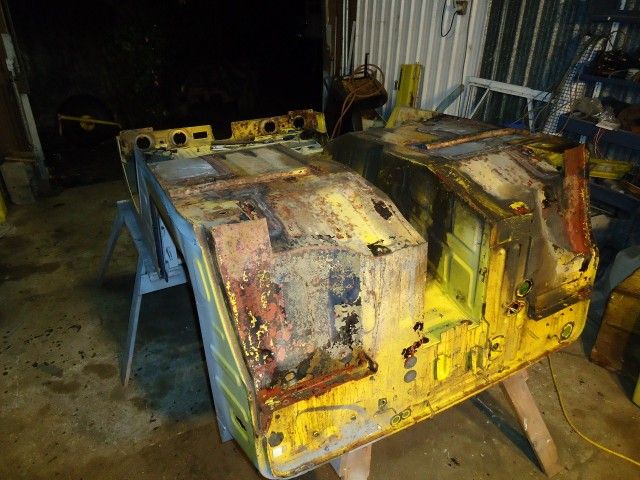
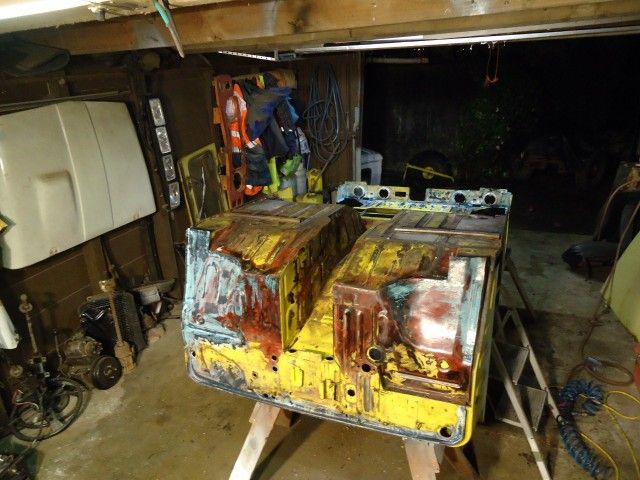
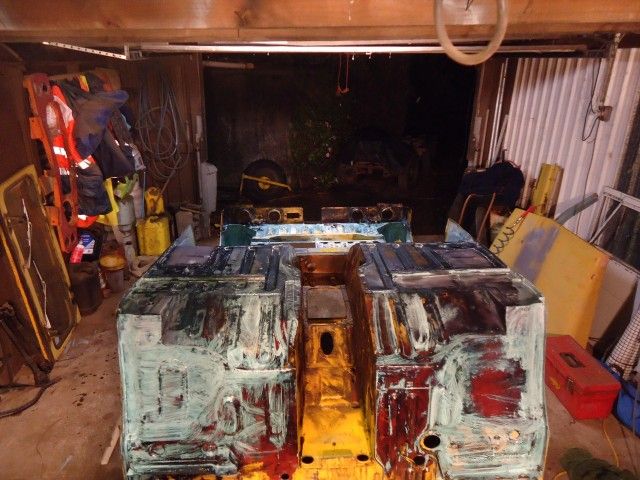
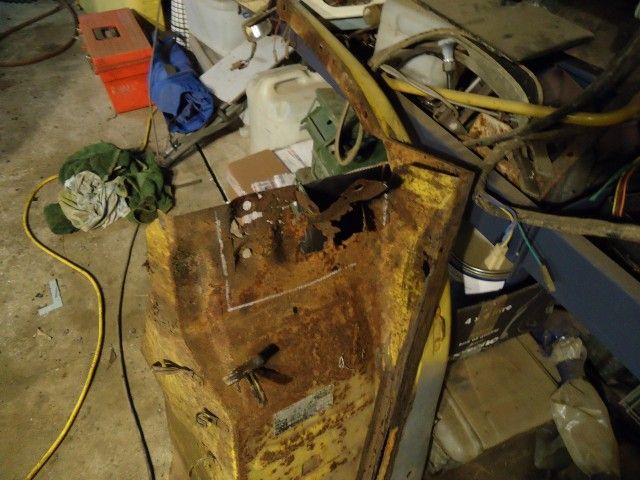
Right, onto the new Tub. Just incase your under any illusions that I'm taking some kind of short cut, I'm not. Its rusty as fawk, but not as rusty in the sides of the rear guards as the other tub.
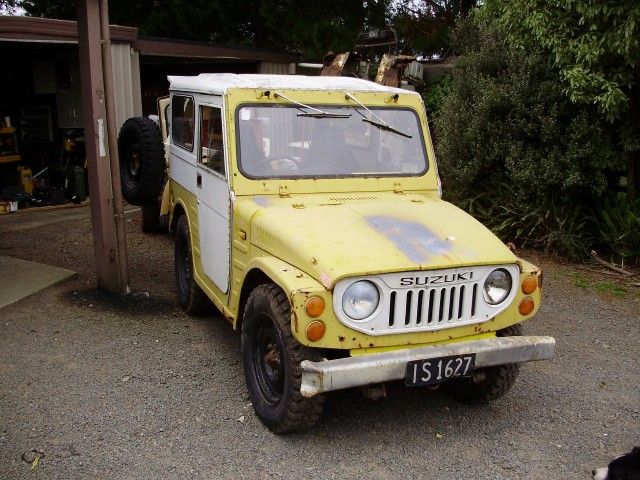
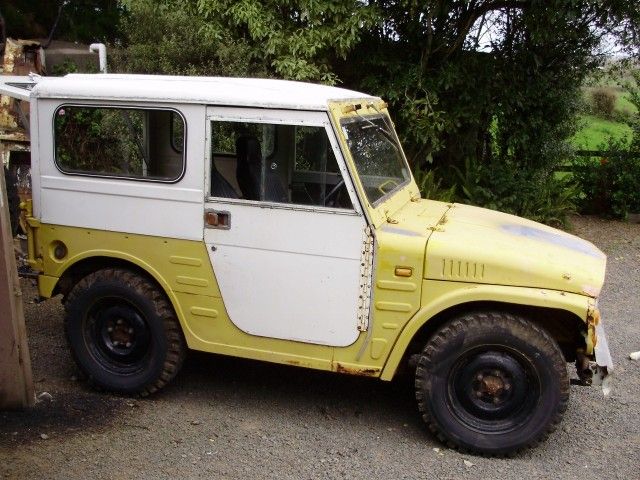
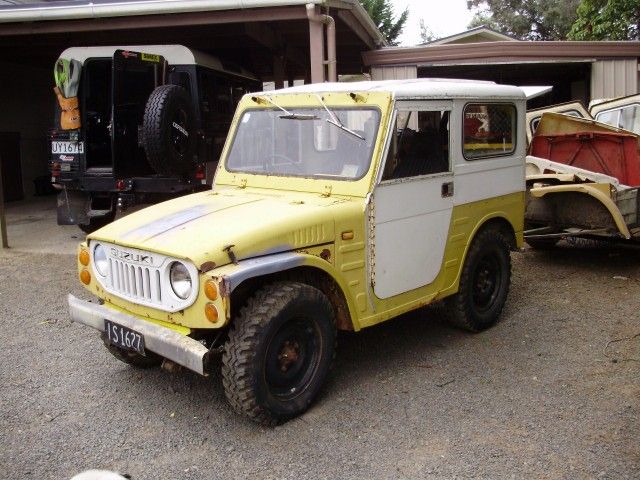
The main thing is that its a an LJ50 tub. There are subtle differences between LJ80 and LJ50. Enough differences to make it quite obvious if your into them.
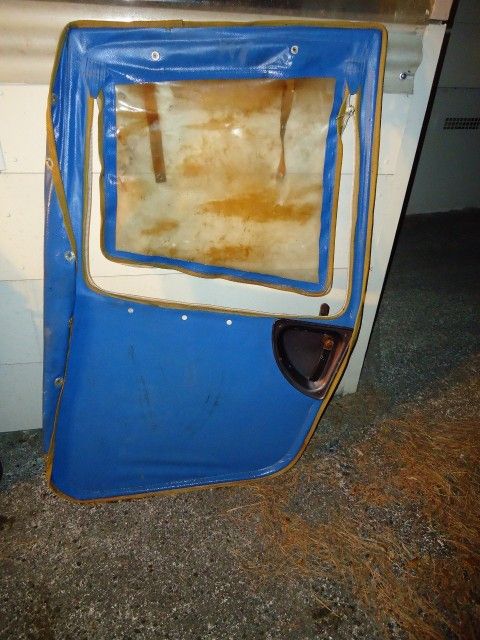
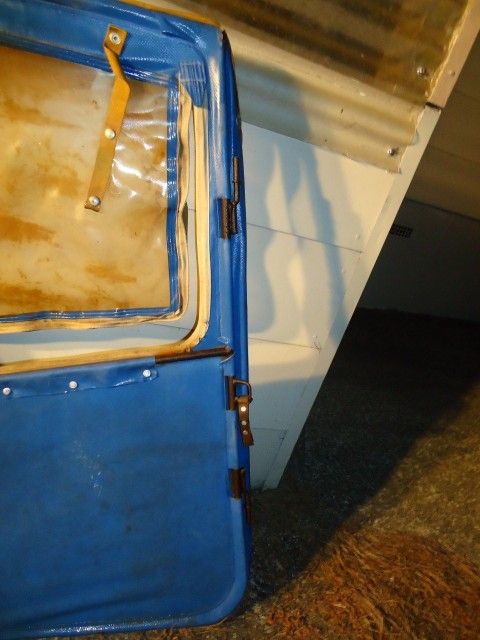
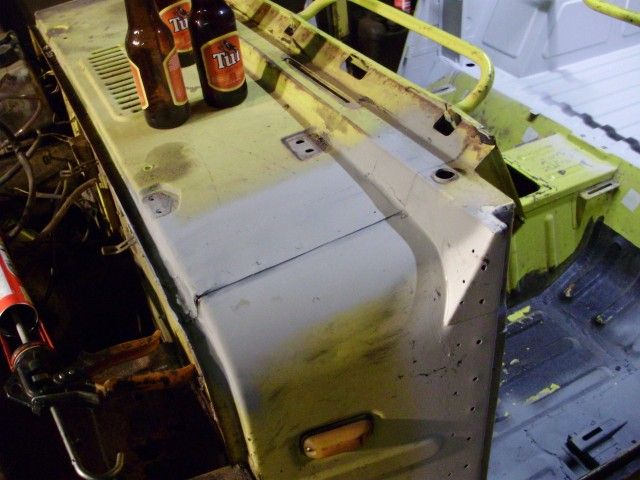
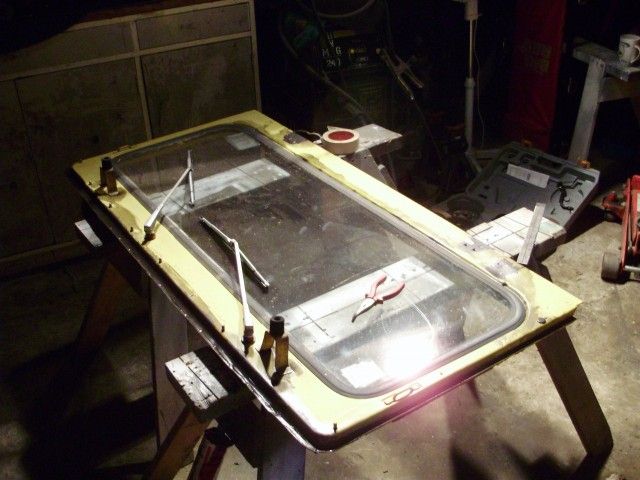
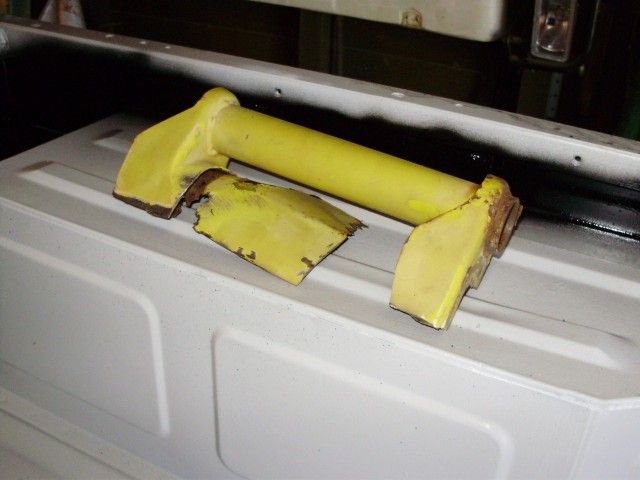
The hard top on this one its Aluminum. Its quite well made, probably by a coach builder outfit maybe??
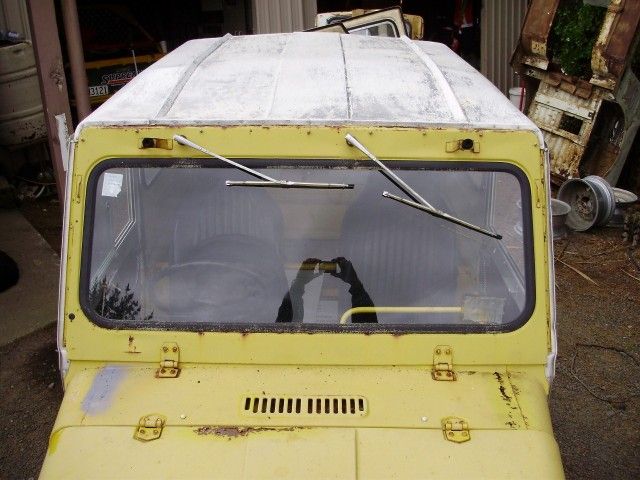
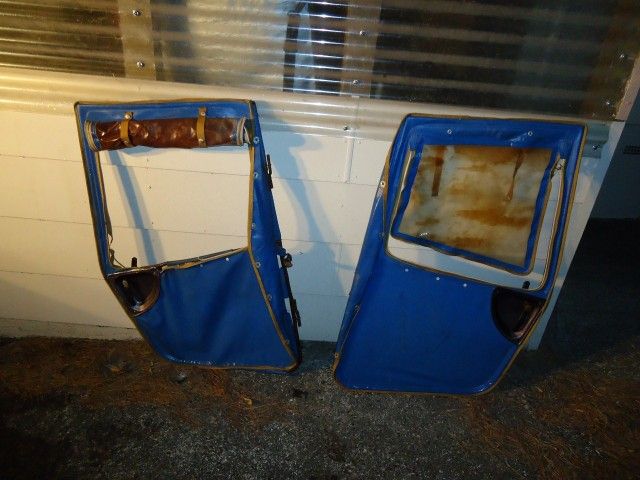
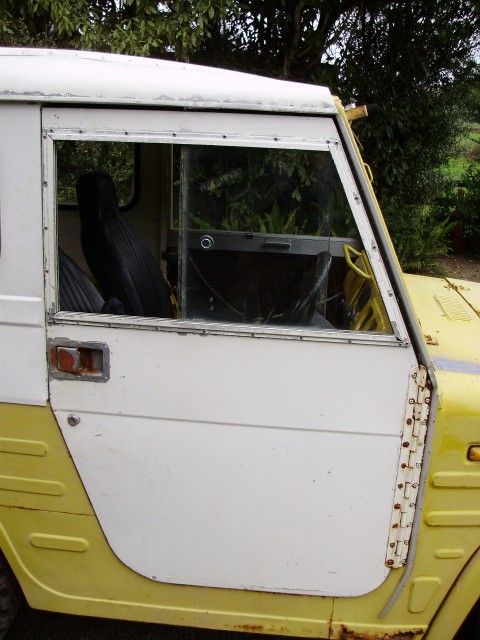
The door hinges, well what can you say??
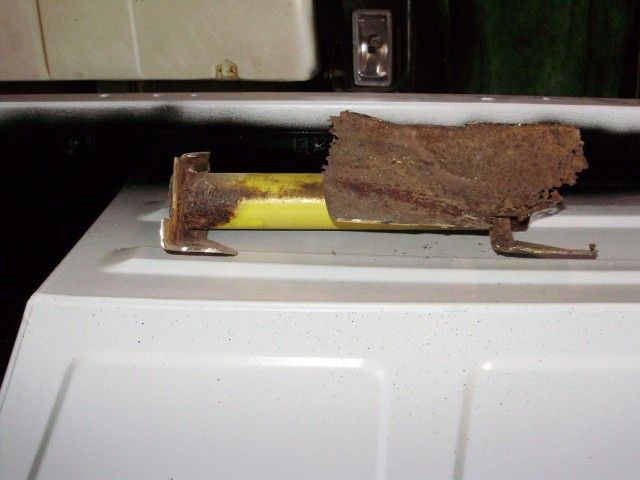
Its done a great job of preserving the windscreen!!!!
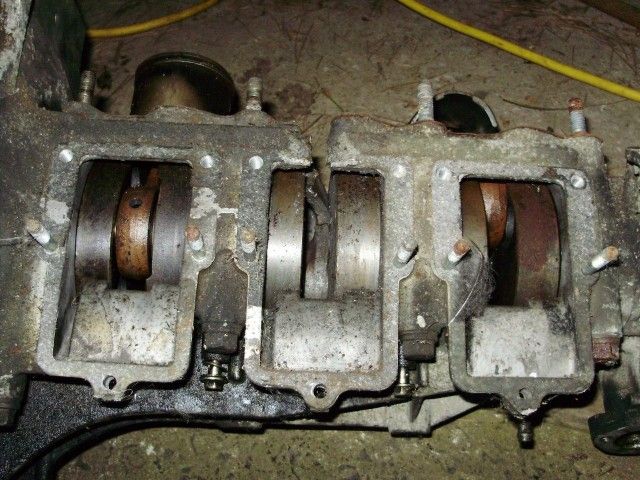
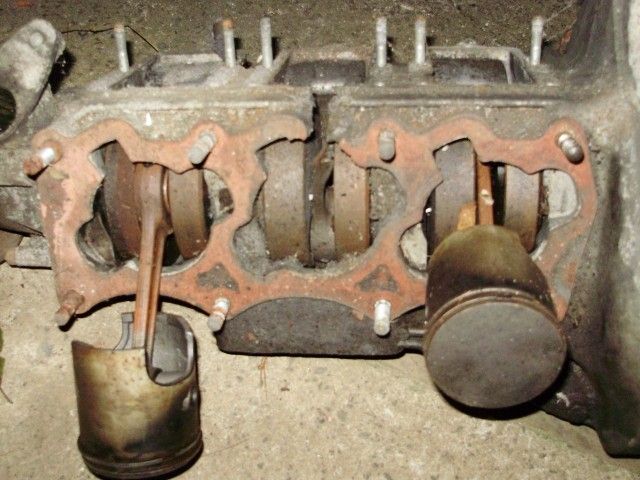
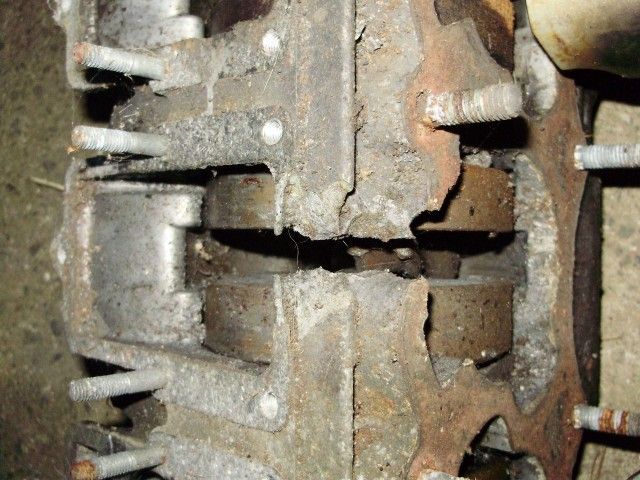
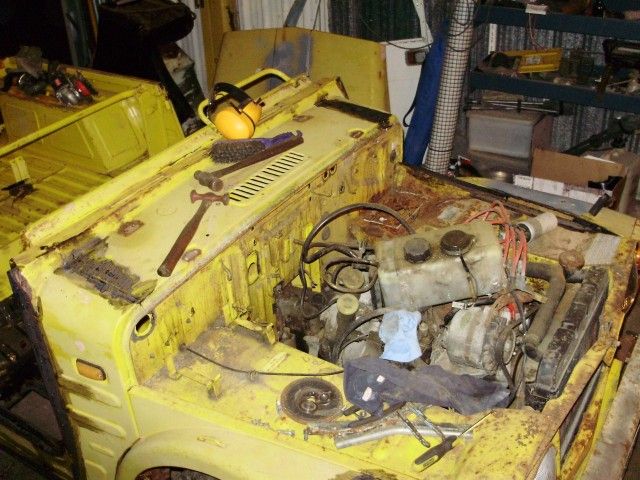
The dude gave me the original 3 pot screamer. Me thinks this would have been a cool bang
Big end seized up.
So the race is on, I want it done for summer, Sandy's booked into the paint shop in weeks time, so I better get moving!!!!!!!
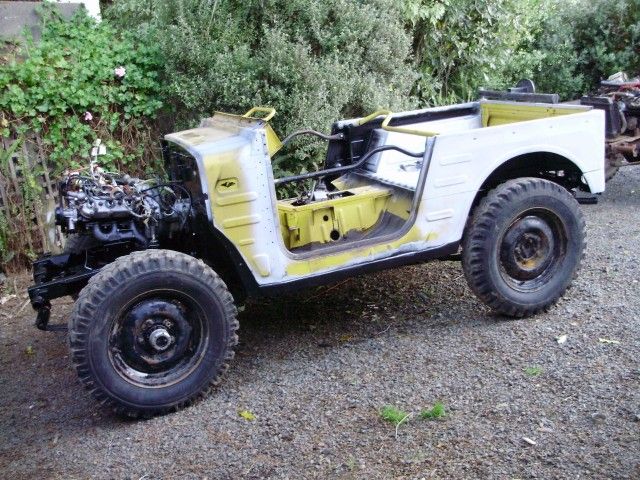
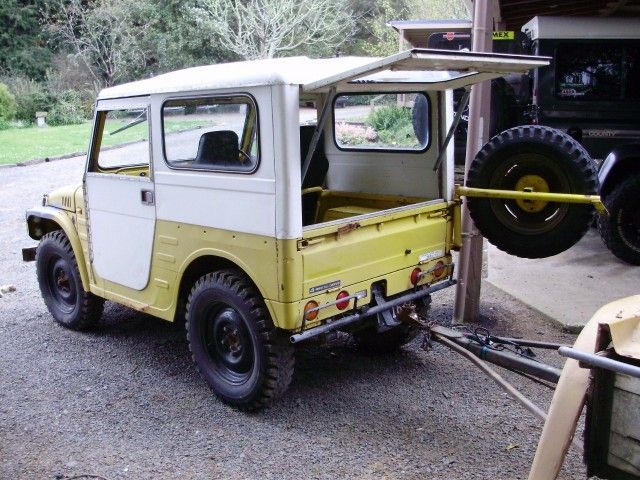
And just to prove I haven't be buggering around, I just went out and grabbed some pic's . This is were its at as of tonight
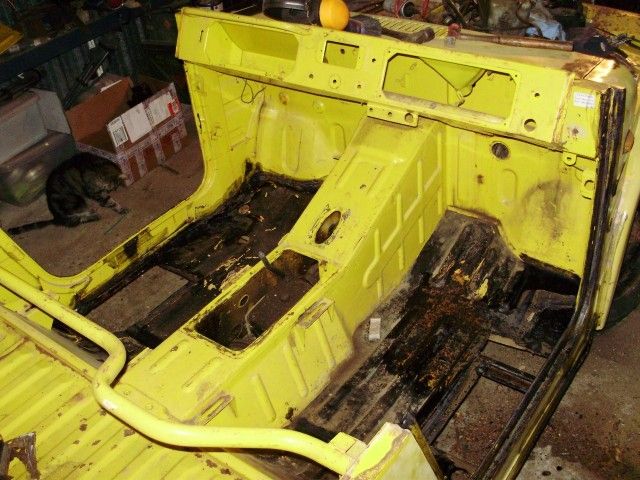
I wasn't kidding about the rust

Re: It Has begun... "Project Wombat"
Posted: Sun Oct 09, 2011 10:21 pm
by DieselBoy
Re: It Has begun... "Project Wombat"
Posted: Wed Oct 12, 2011 11:32 pm
by DieselBoy
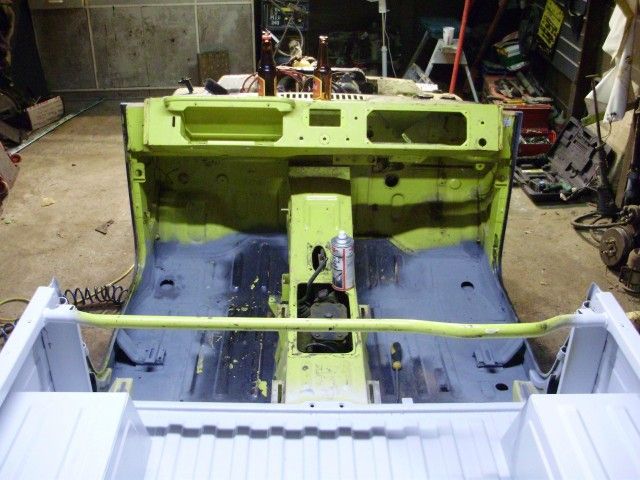
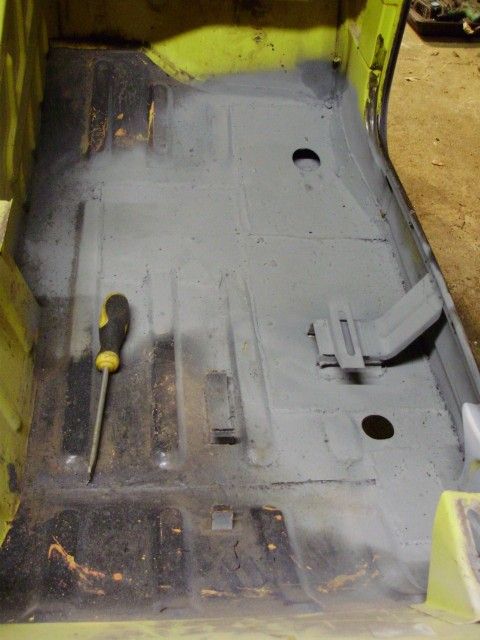
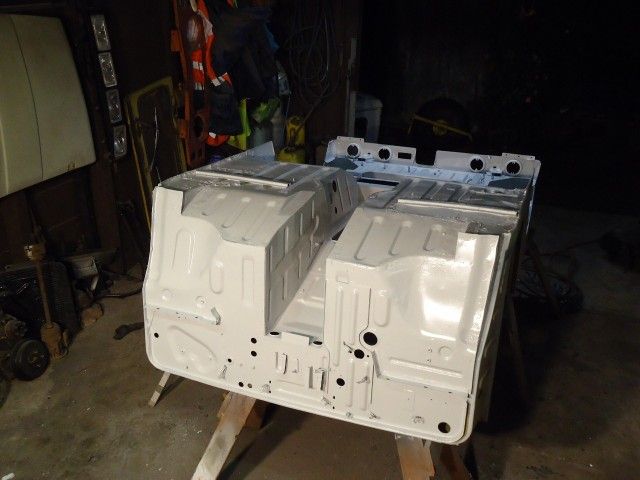
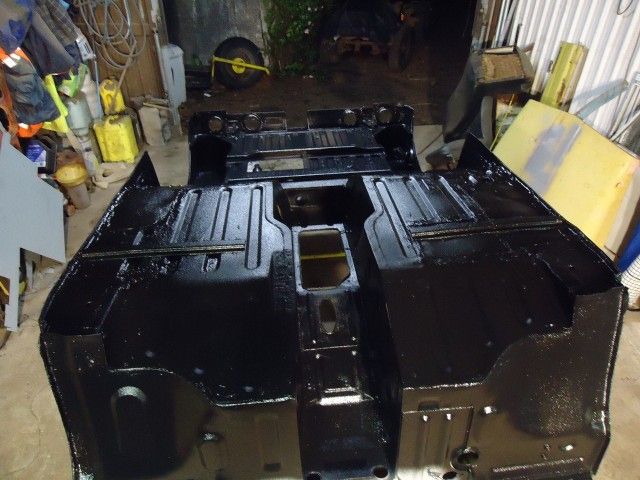
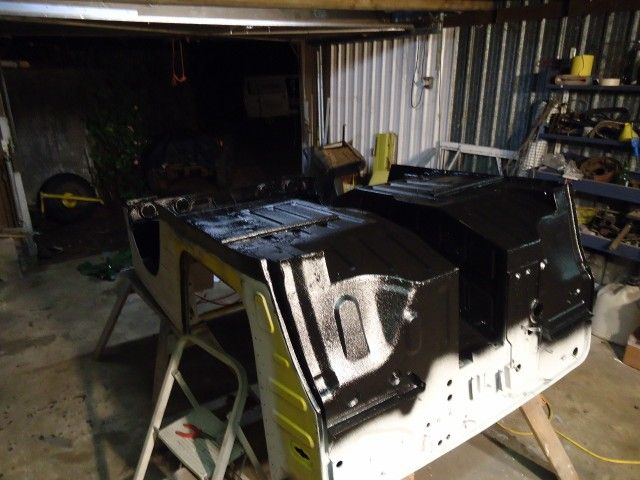
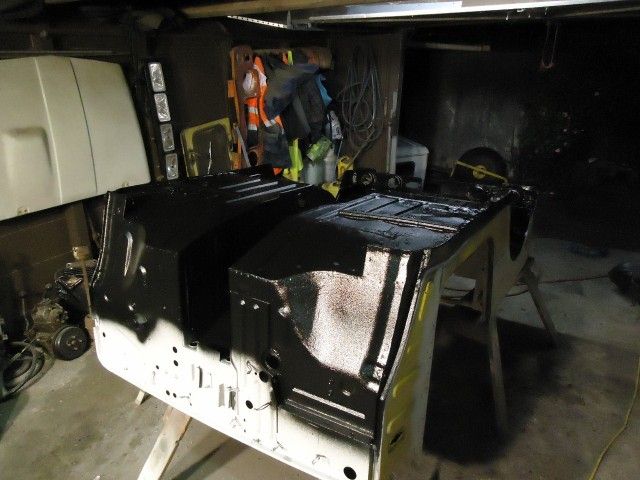
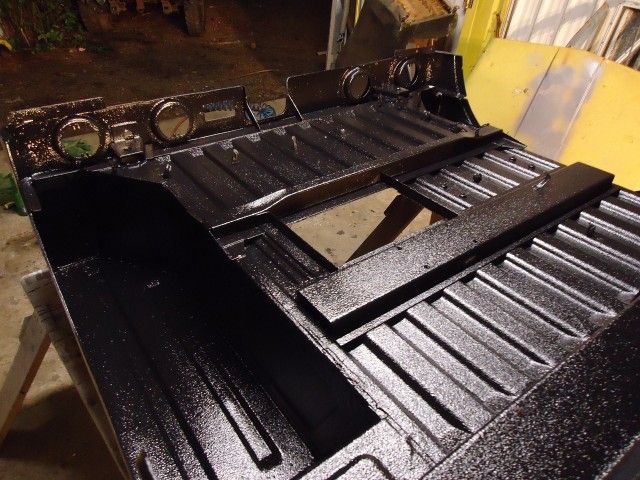
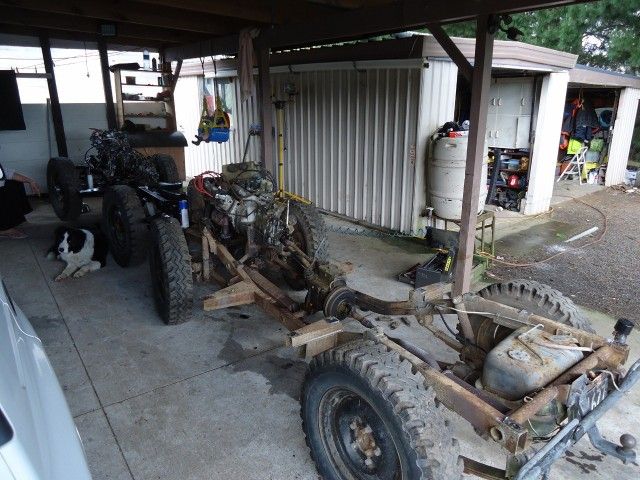
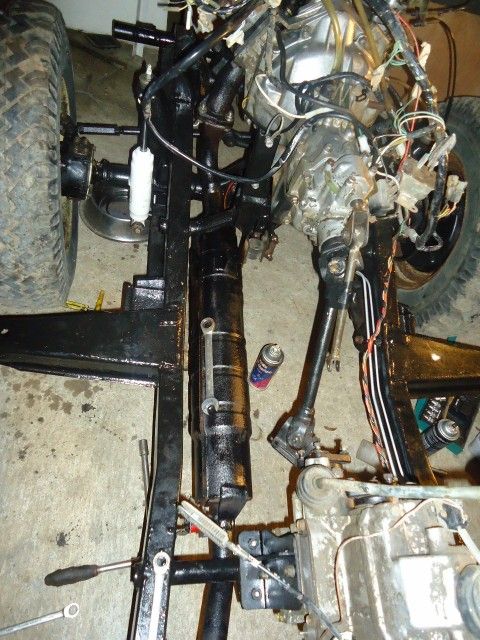
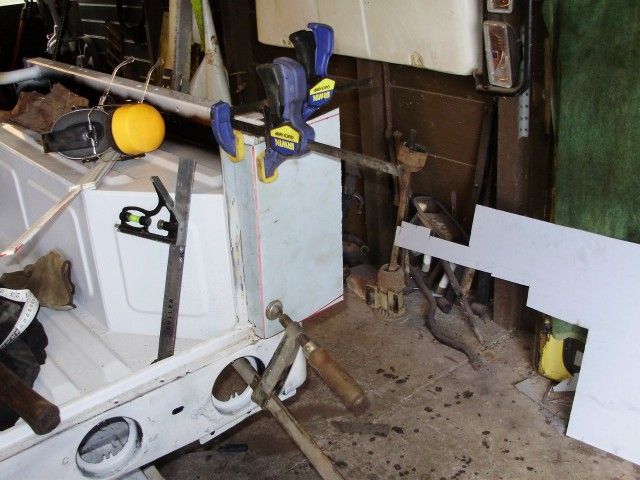
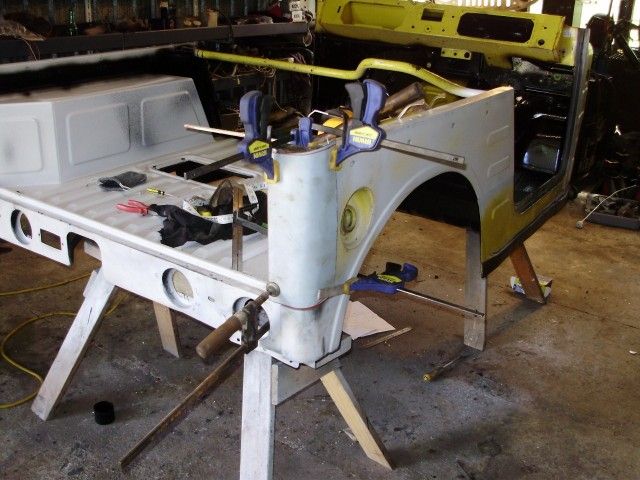
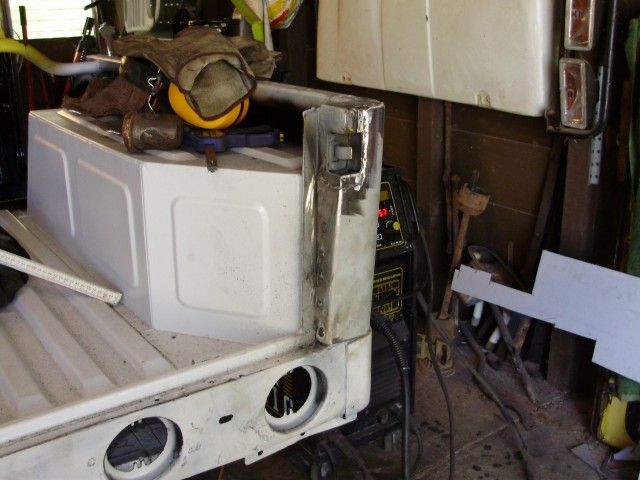
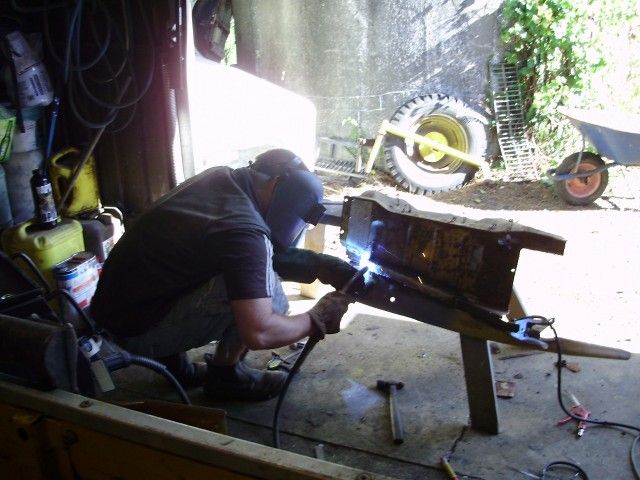
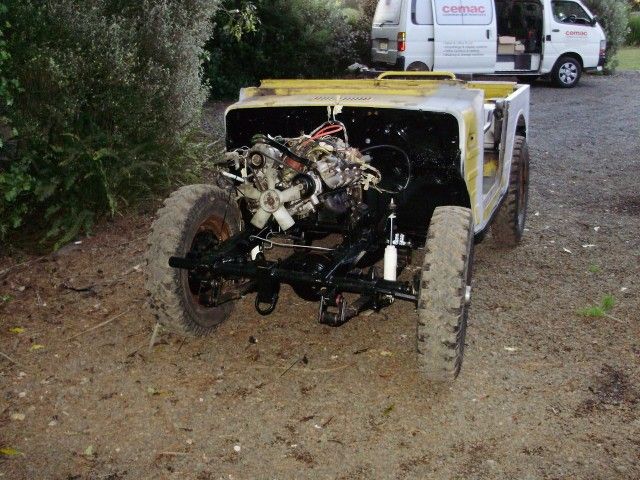
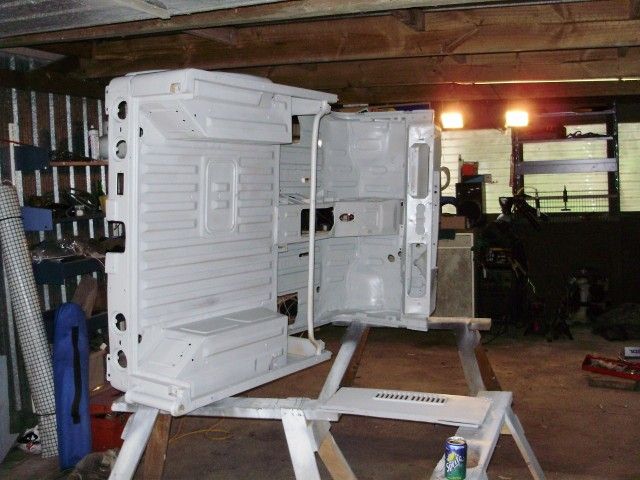
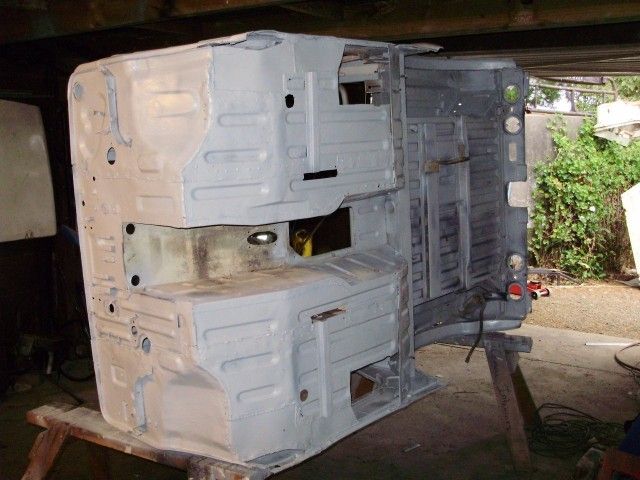
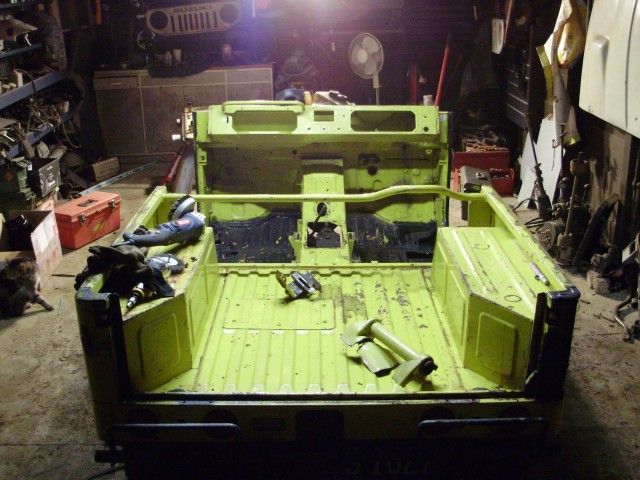
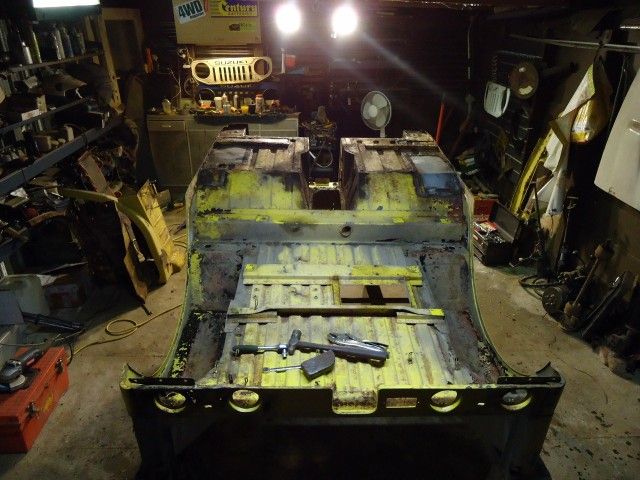
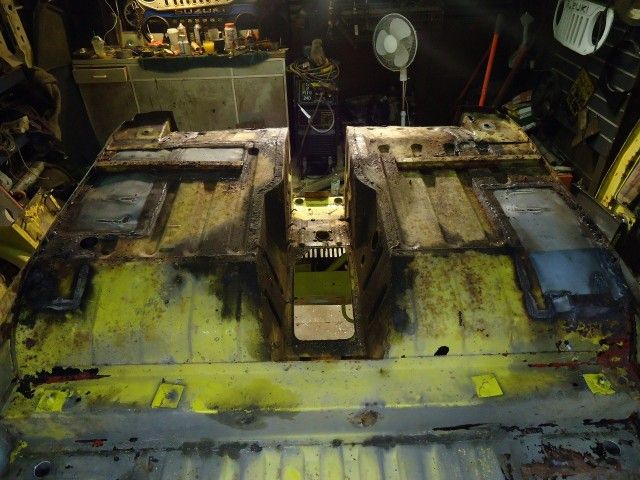
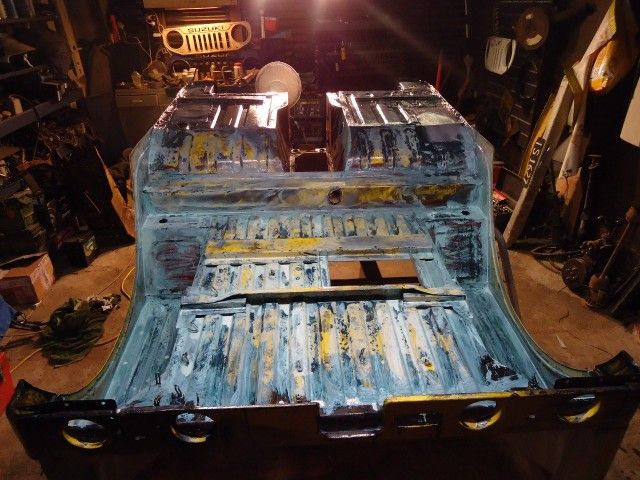
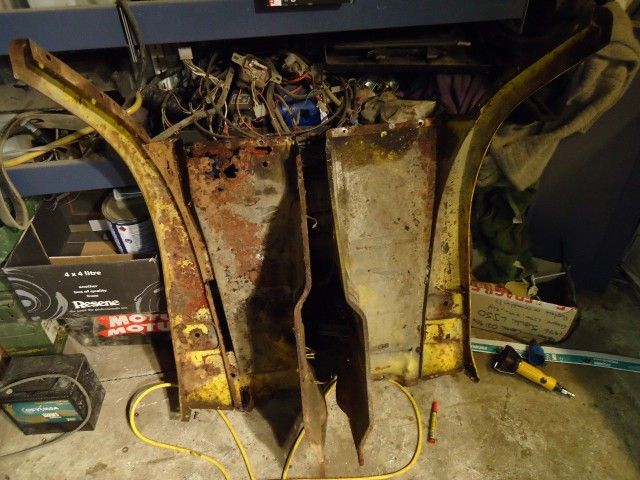
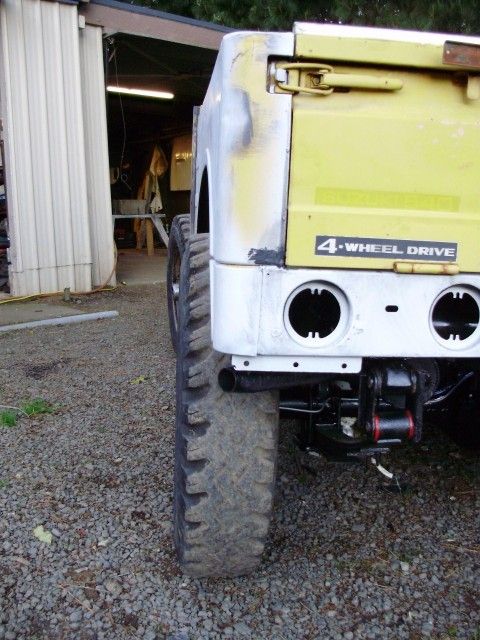
Last night the tub came off the chassis and flipped up side down ready for some attention.
It wasn't half as bad under there as what I was expecting. A bit of rust starting in places, but really nothing a good wire brushing and some rust inhibitor wouldn't fix:
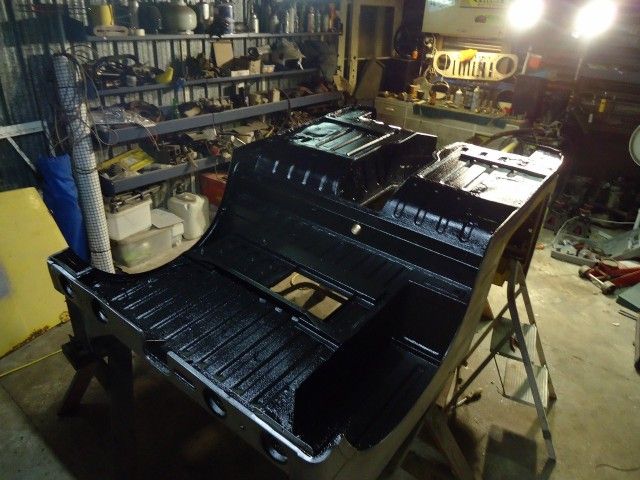
The patches looked good, and welding then in from this side was going to be straight forward:
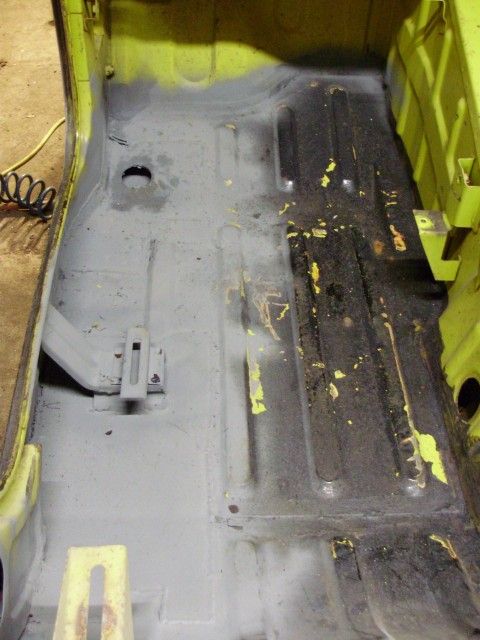
Passengers floor pan:
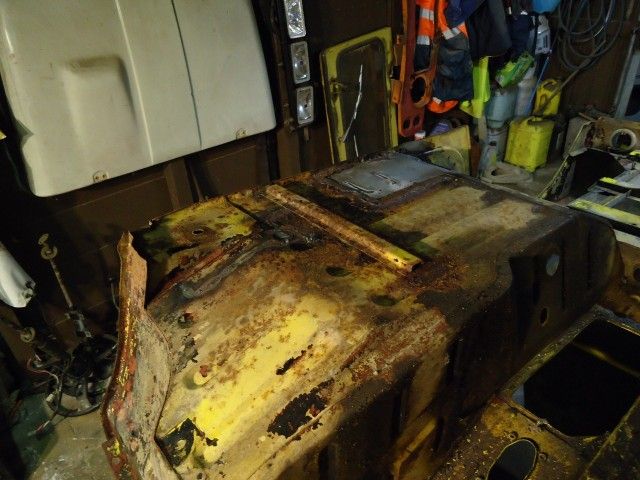
Drivers floor pan:

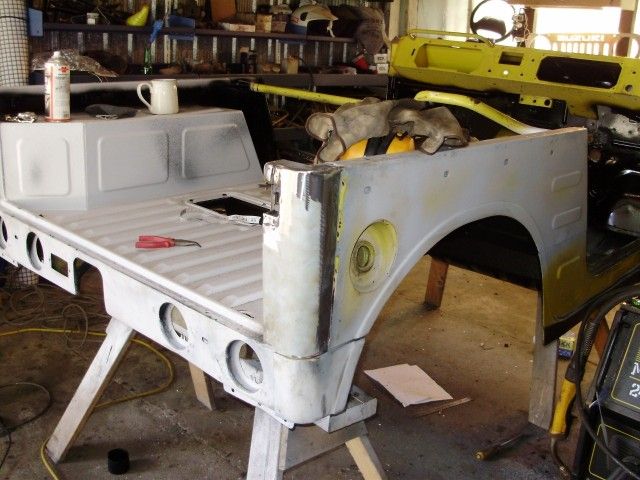
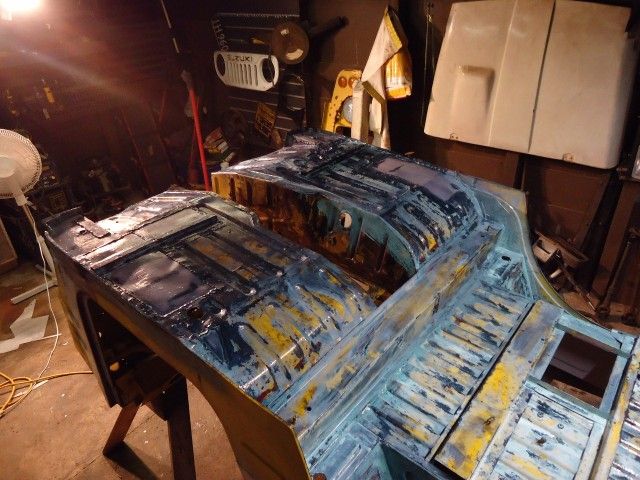
So after a few hours with the wire brush and strip disc, and then realising I didn't have must rust treatment left, this is where its stopped. It was looking really good!!!
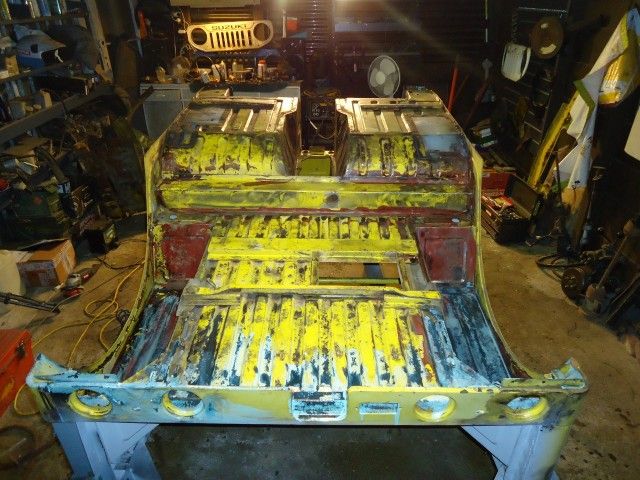
Tonights missions was to make the last 4 or 5 little patches and blaze them on, and then go round all of the other big patches and weld then in from this side. Then hit the whole thing with rust convertor/inhibitor.
Co's when your welding your in the "zone", and also wearing heavy gloves, a helmet and choking on the fumes of burning suzuki seam sealer mixed with rust killer and weld through primer smoke, I never get pic's
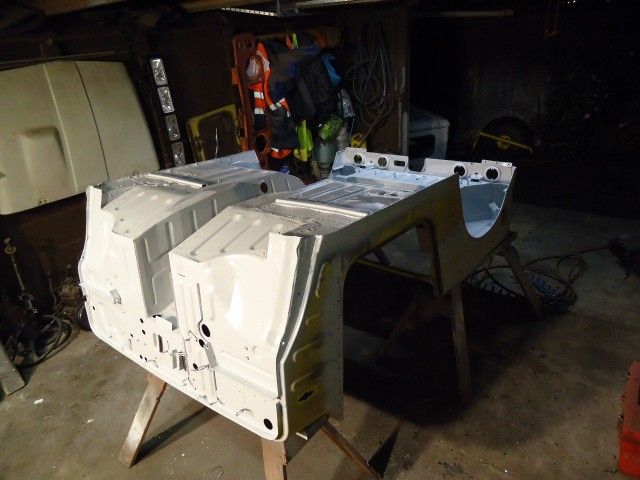
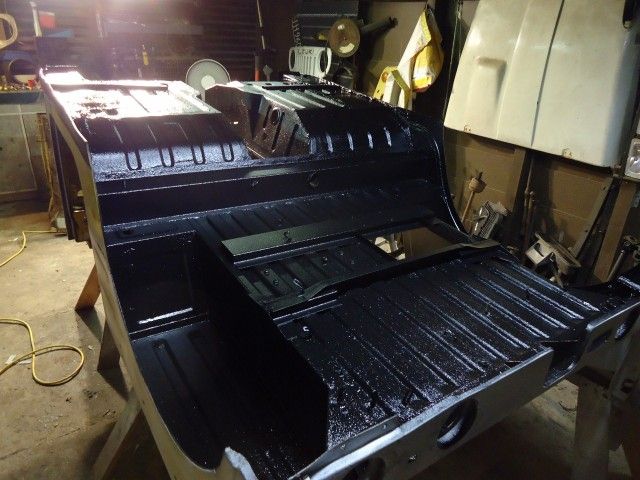
But here it is at the end of play tonight. All welded up and liberally coated with rust convertor stuff.
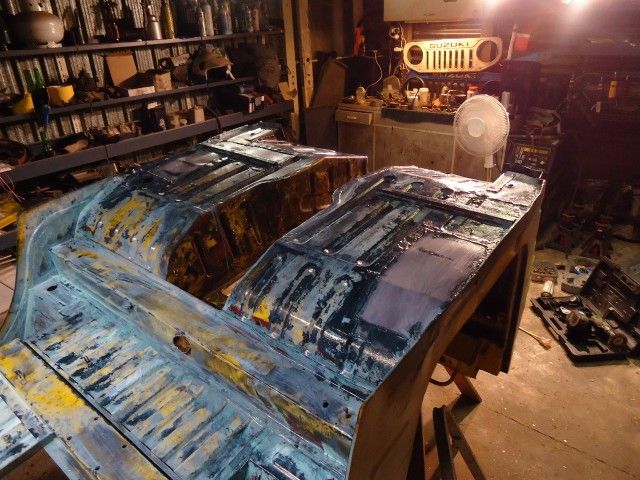
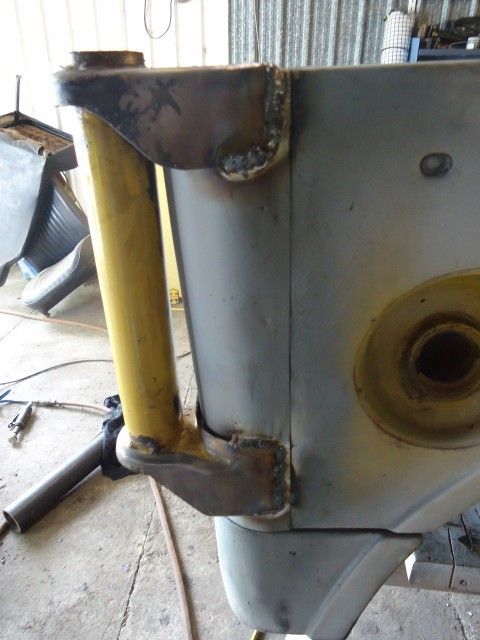
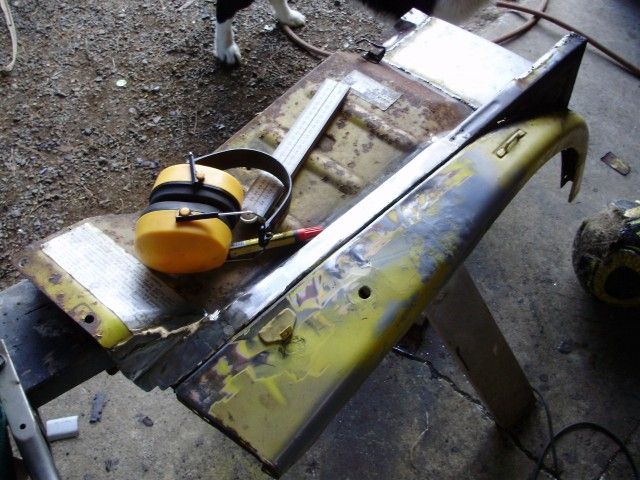
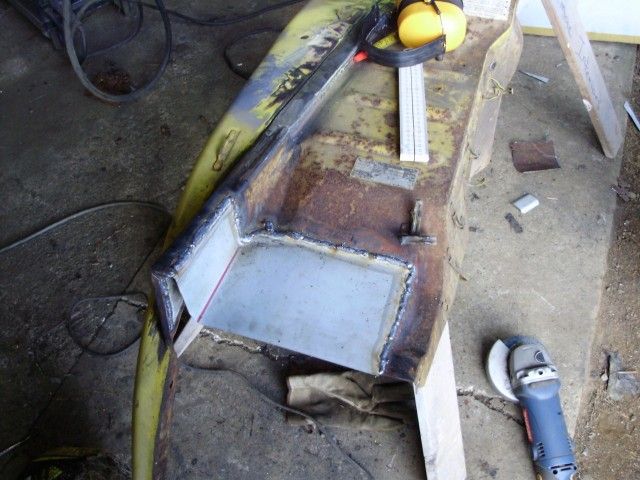
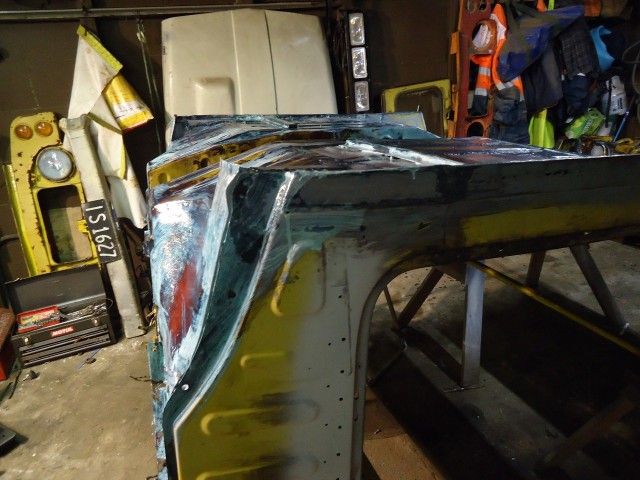
Couple of mongrel patches that will be visible from the out side. To get those right and looking good is a job for a professional, they got called some ugly names as the everything slowly warped and rippled with the gentle heat as I tacked them on. Grrrr, amature. Just makes for more work dressing it all up to look good.
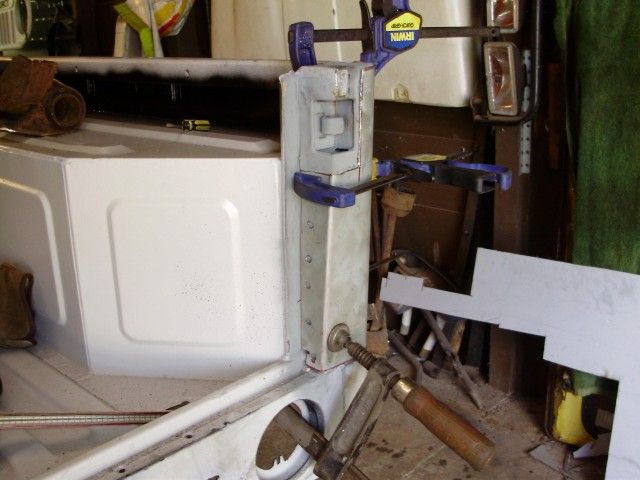
Passengers side sill patch
Drivers side sill patch
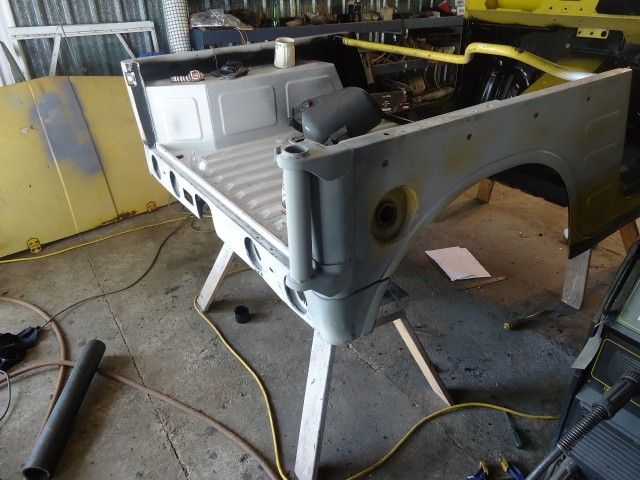
Hopefully do some seam sealing tomorow night and its ready to go!!!
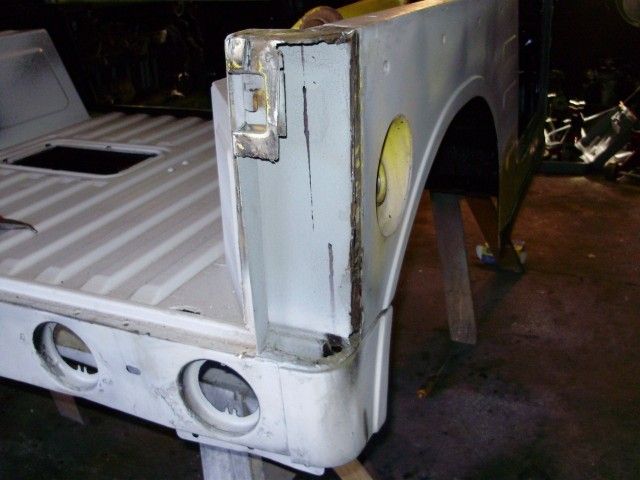
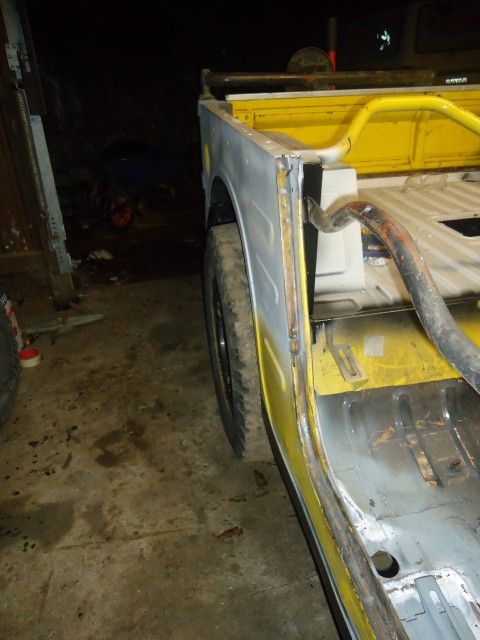
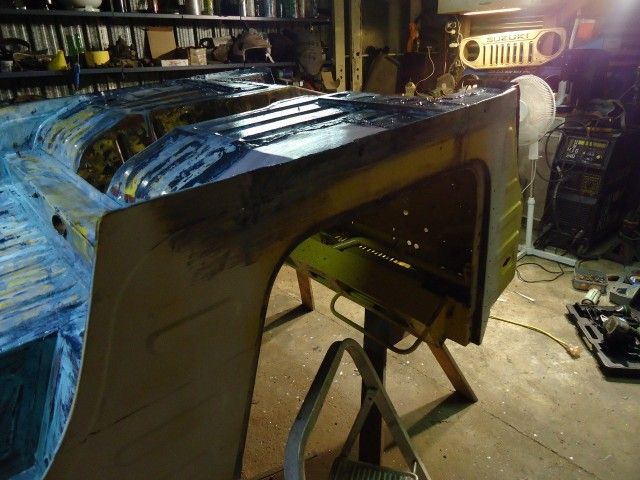
And then its onto the front clip to deal with the passengers side front guard. Its a mess
Re: It Has begun... "Project Wombat"
Posted: Thu Oct 13, 2011 12:10 am
by UBZ
f#~£en b*#%}d
Know I really want to take my tub off and do the underneath too

Was chattin with a mate tonight about welding LJ tinfoil . He reaconed brazing would be best for visible stuff as the low heats involved wouldnt warp panels as much.
Re: It Has begun... "Project Wombat"
Posted: Thu Oct 13, 2011 7:06 am
by DieselBoy
Yeah, the windscreen frame on The50 had the repairs brazed in. That'l be why!!
I still have the corner panel behind the spare wheel mount to make and put on, and then the spare wheel mount on top of it, plus the bonnet needs some repairs too, so I need to get it sorted.
I'm reckon I just not going slow enough, not letting it cool down enough between bursts and probably should start from the middle and work out, a bit like bolting a head down.
I'm going to go ask Dan
Getting there though
Re: It Has begun... "Project Wombat"
Posted: Thu Oct 13, 2011 9:42 pm
by DieselBoy
Re: It Has begun... "Project Wombat"
Posted: Fri Oct 14, 2011 11:21 pm
by DieselBoy
Re: It Has begun... "Project Wombat"
Posted: Sat Oct 15, 2011 5:39 am
by tomsoffroad
Nice work there fella
Re: It Has begun... "Project Wombat"
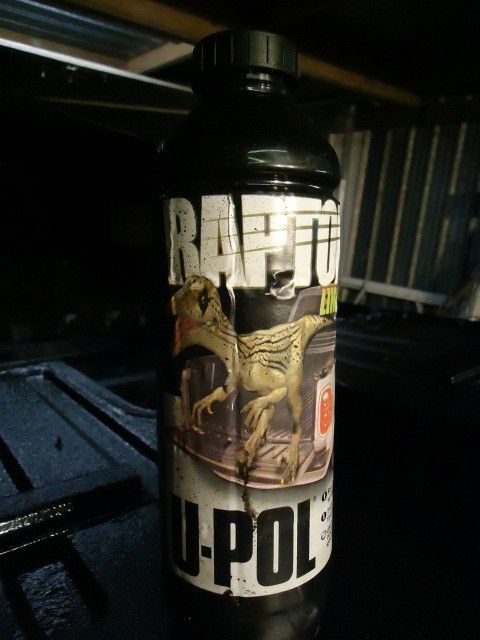
Posted: Sat Oct 15, 2011 11:09 am
by monaro427
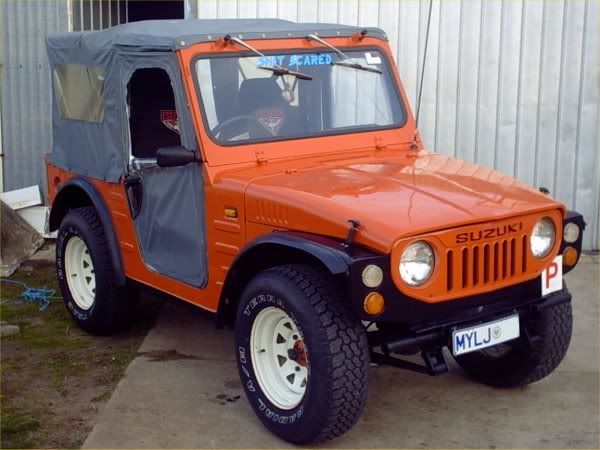
where did you pick that raptor up from DB
Re: It Has begun... "Project Wombat"
Posted: Sat Oct 15, 2011 11:47 am
by DieselBoy
Re: It Has begun... "Project Wombat"
Posted: Sun Oct 16, 2011 9:45 pm
by DieselBoy
Re: It Has begun... "Project Wombat"
Posted: Sun Oct 16, 2011 9:52 pm
by niblik
veddy good veddy noice...
so whats the colour plan on the outer tub to be fella?
Re: It Has begun... "Project Wombat"
Posted: Sun Oct 16, 2011 10:31 pm
by DieselBoy
Re: It Has begun... "Project Wombat"
Posted: Sun Oct 16, 2011 10:46 pm
by nzhunter
dude that rear corner repair..... wicked man
heck heapsa work done since I last saw it on Monday
*cough* paint it matt green *cough*
Re: It Has begun... "Project Wombat"
Posted: Sun Oct 16, 2011 10:51 pm
by MNC
Mate, that tub is coming up very nice! Body back on the chassie already - now that is impressive.
PS. My vote is for this one:
DieselBoy wrote:
Very cool

Re: It Has begun... "Project Wombat"
Posted: Mon Oct 17, 2011 11:45 am
by UBZ

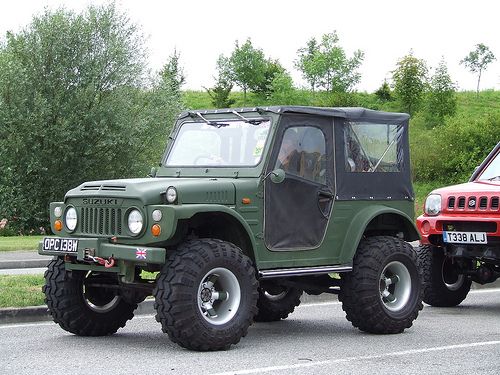
I still like this one . green is just to Jeep IMHO
Re: It Has begun... "Project Wombat"
Posted: Mon Oct 17, 2011 11:51 am
by UBZ
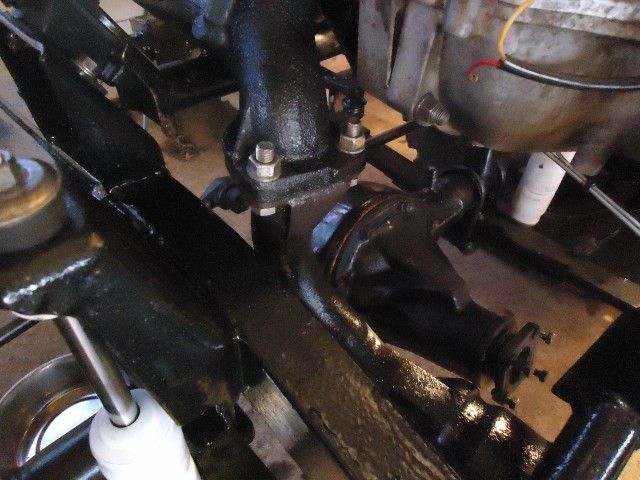
That's some fat offset with the 80 diffs. even on the skinny rims.
Have you got a stock SJ rim to chuck on and compare the difference for me.
Re: It Has begun... "Project Wombat"
Posted: Mon Oct 17, 2011 12:13 pm
by Heath
probably telling ya to suck eggs but when I did thin stuff at work we used a lump of brass behind the welded spot to absosrb the heat from the weld and stop the steel warping. Of course you gotta get it into the gap first

Looking good mate, I vote for the olive drab one too MNC suggested.
Heath
Re: It Has begun... "Project Wombat"
Posted: Mon Oct 17, 2011 4:13 pm
by pjb
Considered white? Some pretty cool looking white ones on google images.
Re: It Has begun... "Project Wombat"
Posted: Mon Oct 17, 2011 10:48 pm
by DieselBoy
Re: It Has begun... "Project Wombat"
Posted: Tue Oct 18, 2011 7:21 pm
by Sketchy_Racer
Awesome build have enjoyed watching the progress, I notice earlier that you mentioned getting a Stainless steel chamber made, going from my experience in two stroke road race bikes, I would advise against it, SS is a basterd of a thing for work hardening from the vibrations and cracking it may not be as bad on the Zuk but will not out live a mild steel equivalent.
I do know that there are some heat resistant Stainless steels out there (cant remember the specs) but even they failed on the bikes.
It would be good fun to build 3 chambers for each cylinder as the 3 into 1 wont be doing a great deal.
Do you know the port timing, RPM range, head volume and cylinder CC?
Cheers,
-Sketchy
Re: It Has begun... "Project Wombat"
Posted: Tue Oct 18, 2011 7:40 pm
by IcedJohnno
UBZ wrote:f#~£en b*#%}d
Was chattin with a mate tonight about welding LJ tinfoil . He reaconed brazing would be best for visible stuff as the low heats involved wouldnt warp panels as much.
Best not to braze any sheet metalwork on vehicles especially anywhere that is not really rigid.
What happens is that the steel fatigue cracks along the edge of the bronze at the heat effected zone. It is something to do with the chemical reaction between bronze and steel. Any panel that has the slightest ability to flex will fatigue crack.
I learnt this on a 100E Prefect rallycar that I have. (The Hungry E) It has twincam Escort flares on the front. One had been brazed and the other steel welded also with gas, before I owned it. The steel welded one was always fine and the bronze welded one continually cracked. Still is to date!
Also once bronzed the only option is to cut the bronze out and replace with steel as you can't arc, mig or gas weld steel over an existing bronze weld.
I think pretty much anything other than a mig set up with fine wire will put more heat into the panels. The only other option would be a TIG set up pulsing or foot controlled using fine mig wire for filler.
Hey DB, I've just read all 10 pages today. A great read and some awesome work. Keep up the detailed commentary, it is inspiring.
Hmm..... Maybe it's time to venture forth to my own garage! Plenty to do out there!
Re: It Has begun... "Project Wombat"
Posted: Wed Oct 19, 2011 7:54 pm
by Cleary
Orange is coolio!!! just doooo eeeeeeet!
Re: It Has begun... "Project Wombat"
Posted: Thu Oct 20, 2011 7:48 pm
by Dr_PC
Got to agree with Cleary, really should be the Orange one
Re: It Has begun... "Project Wombat"
Posted: Thu Oct 20, 2011 7:56 pm
by suzukisport
Paint it bright green
Re: It Has begun... "Project Wombat"
Posted: Fri Oct 21, 2011 8:06 am
by zukmeista
RED!!!!!! Like my samurai
Re: It Has begun... "Project Wombat"
Posted: Fri Oct 21, 2011 8:52 am
by muddyhilux
just checked out the last few pages,very nice work mate,i agree with a couple of comments,bronze or copper under whatever your welding really helps or a tig is what i use,also the brassing comment was good and correct.id also agree in that getting the wrong green will end up looking jeepish,good luck choosing,i'm sure it'll look mint with whatever you choose