The opinions and viewpoints expressed by users of Offroad-Express Forums are wholly their own and not necessarily those of Offroad-Express. https://www.offroadexpress.kiwi:443/Forums/
Trust me, I will choose some very random colour to paint it
Its gotta be a real 70's colour
Something that not many people would probably choose
But it has to be cool enough that when posed on the front lawn I can't help but go #### yeah
1am the other night, on a mission
Re: It Has begun... "Project Wombat"
Posted: Fri Oct 21, 2011 10:10 am
by DieselBoy
Sketchy_Racer wrote:Awesome build have enjoyed watching the progress, I notice earlier that you mentioned getting a Stainless steel chamber made, going from my experience in two stroke road race bikes, I would advise against it, SS is a basterd of a thing for work hardening from the vibrations and cracking it may not be as bad on the Zuk but will not out live a mild steel equivalent.
I do know that there are some heat resistant Stainless steels out there (cant remember the specs) but even they failed on the bikes.
It would be good fun to build 3 chambers for each cylinder as the 3 into 1 wont be doing a great deal.
Do you know the port timing, RPM range, head volume and cylinder CC?
Cheers,
-Sketchy
Cheers man, I love talking expansion chambers!!!
Not many people can get their heads around them
In a few months or so after getting it legal, I will go there with the expansion chamber, I have the design and measurements for the aftermarket off the shelf chambers that you can buy in Japan, they are set up for top end. It would be real interesting to go through the science and see if it can be tweaked to better suit what I use it for.
If the design is good, it may be just a case of shortening the distance from the lip of the exhaust port to far end of the deflector cone.
If any one wants to do some reading, here's one of the best articles on expansion chambers I have ever come across. Its old skool, and to the point
I'm open to anyone else's opinions on them too of course
Re: It Has begun... "Project Wombat"
Posted: Fri Oct 21, 2011 11:42 am
by SP450andLE
Paint it this colour. It's definitely 70s!
I reckon it would look awesome
Re: It Has begun... "Project Wombat"
Posted: Fri Oct 21, 2011 5:26 pm
by skid
DieselBoy wrote:Trust me, I will choose some very random colour to paint it Its gotta be a real 70's colour Something that not many people would probably choose But it has to be cool enough that when posed on the front lawn I can't help but go #### yeah
So I googled 70's 4wd paint job images and this seems to be the norm for that era................
also googled just 70's paint job..............
Re: It Has begun... "Project Wombat"
Posted: Fri Oct 21, 2011 10:10 pm
by MNC
skid wrote:
DieselBoy wrote:Trust me, I will choose some very random colour to paint it Its gotta be a real 70's colour Something that not many people would probably choose But it has to be cool enough that when posed on the front lawn I can't help but go #### yeah
So I googled 70's 4wd paint job images and this seems to be the norm for that era................
also googled just 70's paint job..............
The main problem being you need to be stoned to fully appreciate them (actually they do look pretty cool)
Re: It Has begun... "Project Wombat"
Posted: Tue Oct 25, 2011 5:07 pm
by Del Fuego
two tone, Orange and Beige for my money
Re: It Has begun... "Project Wombat"
Posted: Tue Oct 25, 2011 6:25 pm
by SP450andLE
Or this:
Or this:
Re: It Has begun... "Project Wombat"
Posted: Tue Oct 25, 2011 11:30 pm
by DieselBoy
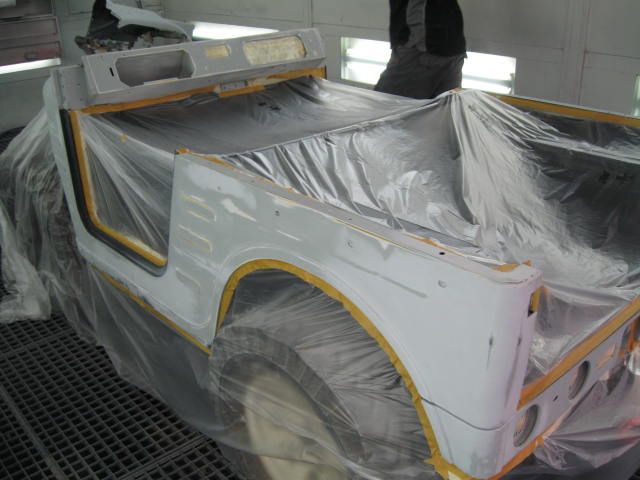
Been a bit slack with photo's this weekend, it sort of disappeared on me
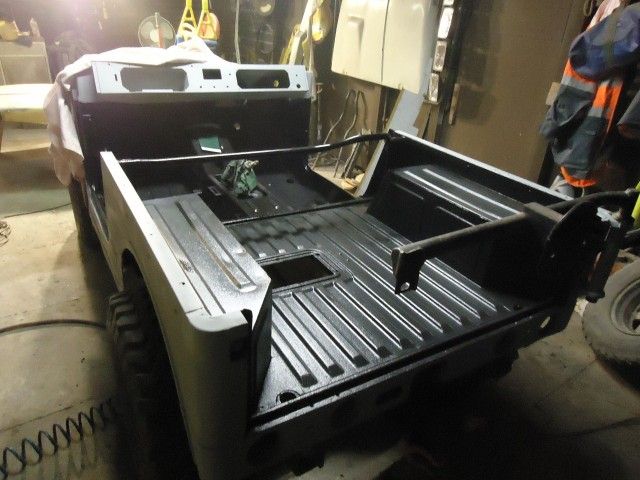
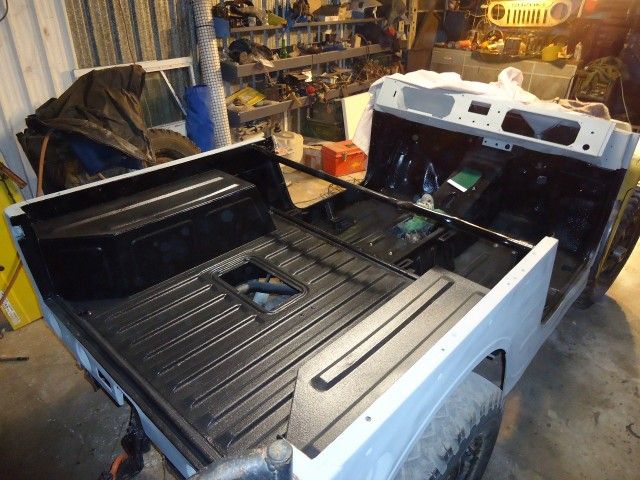
On Friday night I got the out side of the tub finished and coated in Hi-build primer. That's ready for a rub down with 200 and the 400 grit paper just before painting.
On Saturday I managed to get the inside of the tub completed. I masked off a whole lot of parts I didn't want to get covered with Raptor liner, and then let loose with the gun. I followed that up with a dose of gloss black to certain area's to bring the bling
Finished result looks good.
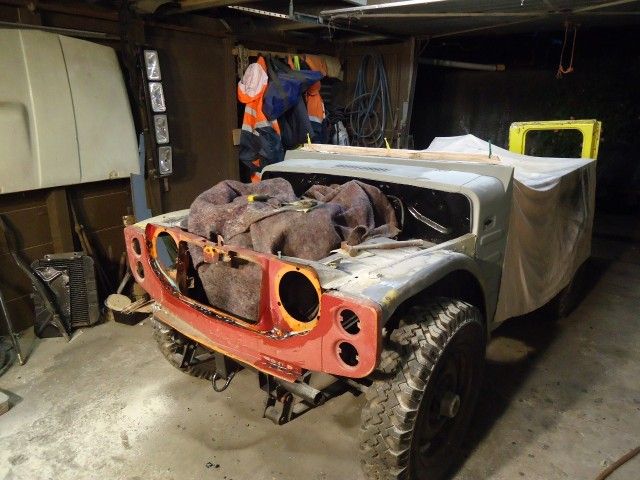
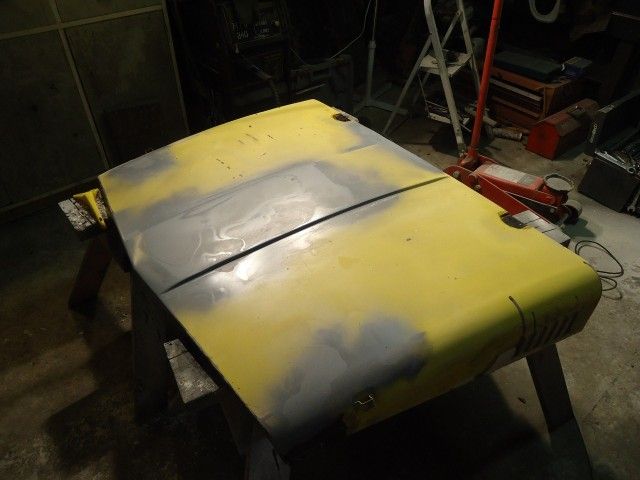
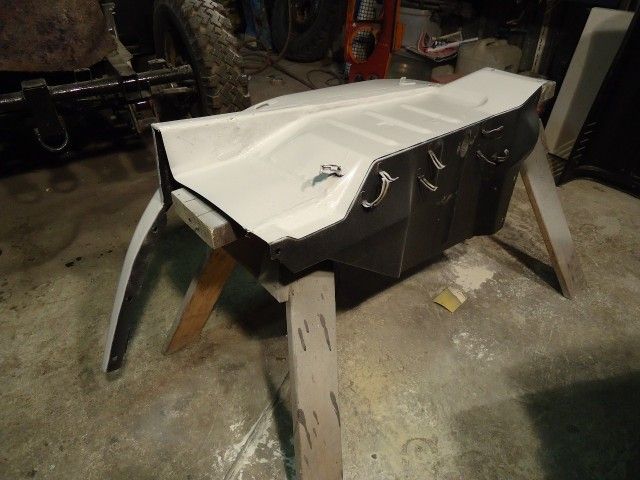
I also made a start on the bonnet and guards, and finished them off tonight. The bonnet was a bitch. It was rusty and badly dented. Its is now slightly less rusty and a bit less dented. Its not mint, buts its presentable
I grabbed some quick pic's tonight for a short update.
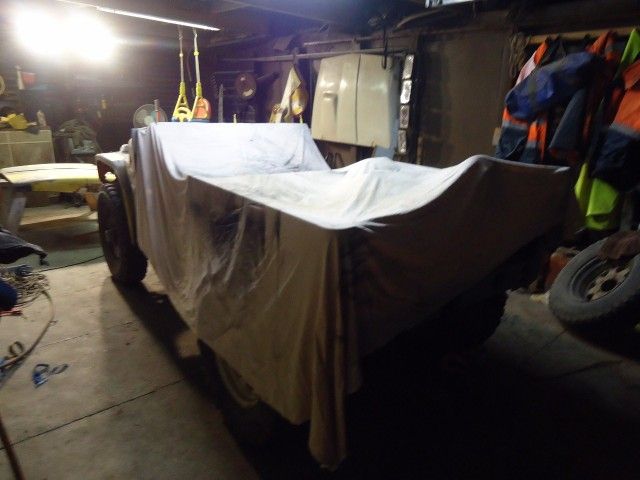
Front clip mocked up, with guards fitted. Made dressing the top of the guards easier: and hiding under the cover keeping the dust out......
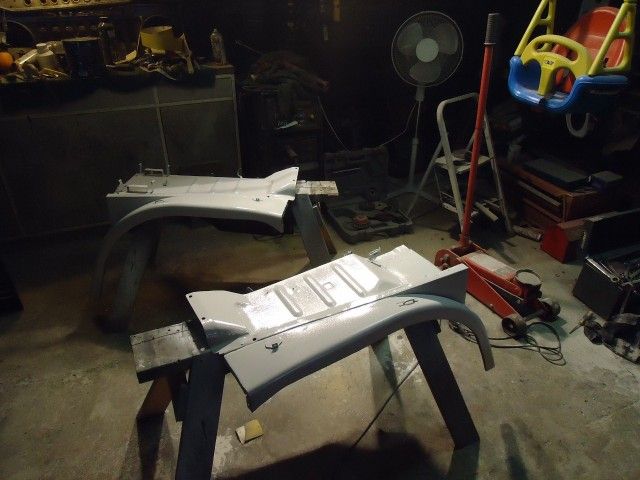
Is a finished interior. Looks good, hope the liner lasts for a bit The bonnet after a few hours of shagging around with a hammer and dolly, carefull work with a sanding board and three or four attempts at dressing the center raised part to it somewhere close to the right line. It looks promising after a coat of epoxy primer!!! Maybe it will look straight enough after all The guards are finished too. They look good with the under side coated in raptor liner. Here's to hoping it stays on for a while.
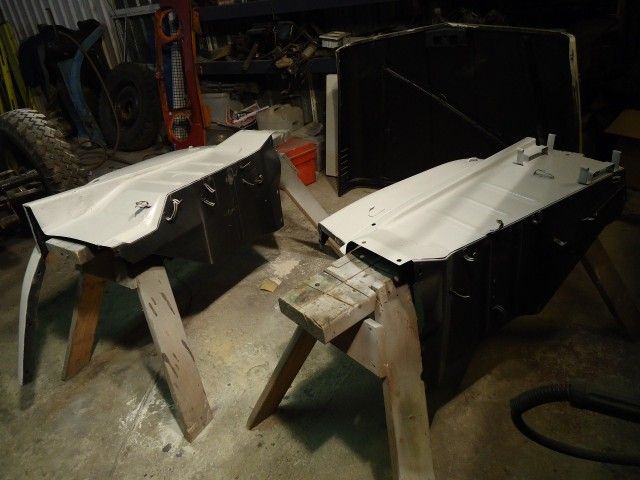
Next up are these two: The saying of the weekend has to be "rough enough"
Re: It Has begun... "Project Wombat"
Posted: Wed Oct 26, 2011 7:47 am
by badnuz
if i have said it before i will say it again, Petes Rough Enuf is generally mint to us mere mortals!
Re: It Has begun... "Project Wombat"
Posted: Fri Oct 28, 2011 7:11 pm
by suzookyman
suzukisport wrote:Paint it bright green
x 2
Re: It Has begun... "Project Wombat"
Posted: Fri Oct 28, 2011 9:11 pm
by MNC
Looking Mint Pete!!!!!!!
Re: It Has begun... "Project Wombat"
Posted: Sat Oct 29, 2011 3:31 pm
by zukmeista
suzookyman wrote:
suzukisport wrote:Paint it bright green
x 2
But red = faster and you need all the help you can get in a zook
Re: It Has begun... "Project Wombat"
Posted: Thu Nov 10, 2011 7:54 pm
by DieselBoy
Sanding high build primer is GHEY
Sand the entire truck with 220 grit until smooth......
Then go over the entire thing again with 400 grit until REALLY smooth.......
Then go over it again looking for the bits you missed
Re: It Has begun... "Project Wombat"
Posted: Thu Nov 10, 2011 8:07 pm
by MNC
DieselBoy wrote:Sanding high build primer is GHEY
Sand the entire truck with 220 grit until smooth......
Then go over the entire thing again with 400 grit until REALLY smooth.......
Then go over it again looking for the bits you missed
I'm feeling your pain... lucky mine is just a bush truck and I stopped at a rough 220
Re: It Has begun... "Project Wombat"
Posted: Thu Nov 10, 2011 8:48 pm
by UBZ
I'm still sanding 2pac with dull 120 your miles ahead of me.
Dude, you have an illness... 1:37am Suppose you are going to work today too?
That is commitment right there, no wonder you get stuff finished so quickly.
Good stuff
Re: It Has begun... "Project Wombat"
Posted: Fri Nov 11, 2011 7:36 am
by DieselBoy
No work for me today
Re: It Has begun... "Project Wombat"
Posted: Fri Nov 11, 2011 8:22 pm
by DieselBoy
Following the 1:30am finish after sanding everything 3 times, it was a 7am start this morning.
I got the call on Thursday afternoon that there was an opening in the schedule at the panel shop and the booth was going to be free for the day on Friday if I was ready.
I was no where near ready as I had been out of town working, but wasn't going to pass up the opportunity, you gotta grab these things with both hands!!!!!
I shuffled my work round and managed to get the Friday (today) off work, grabbed a stack of sand paper on my way home and HIT IT. Solid sanding, 5:30pm through to 1:30am on two Burbons and a packet of corn chips
This morning I had to bolt the body to the chassis, load all the parts into the van, push the Wombat out of the shed and winch it on to the trailer. Hard work all by yourself
Once at the shop, I went over everything again with 400 grit (4th time over it all ) and had to draw the line at that. Its not mint, but good enough for a rough job in my dusty ol' shed.
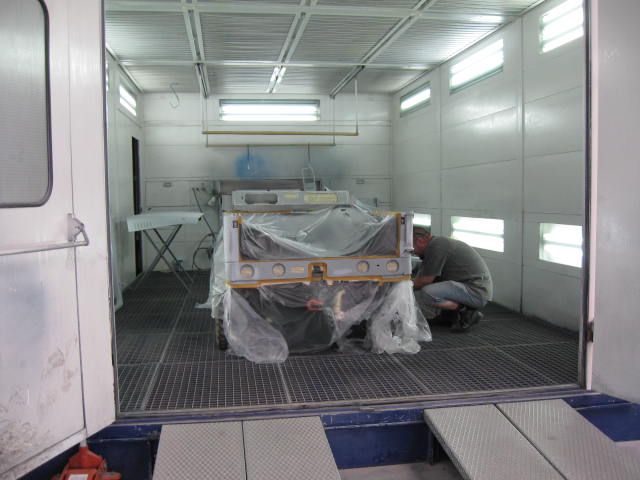
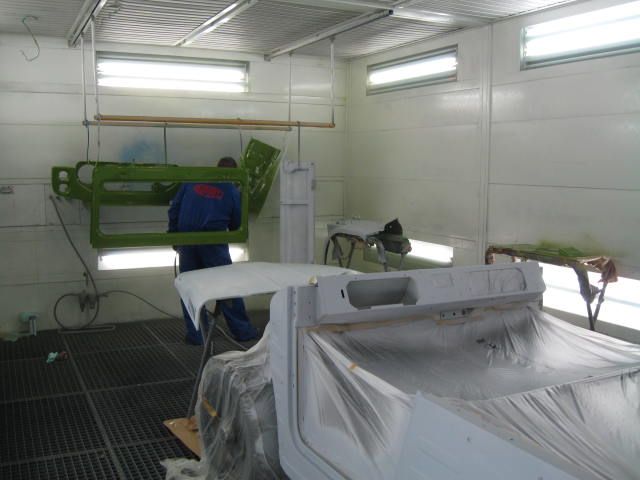
All ready for masking up:
Swapped places with the Coon and heaved it in to the booth. Let the blinging begin
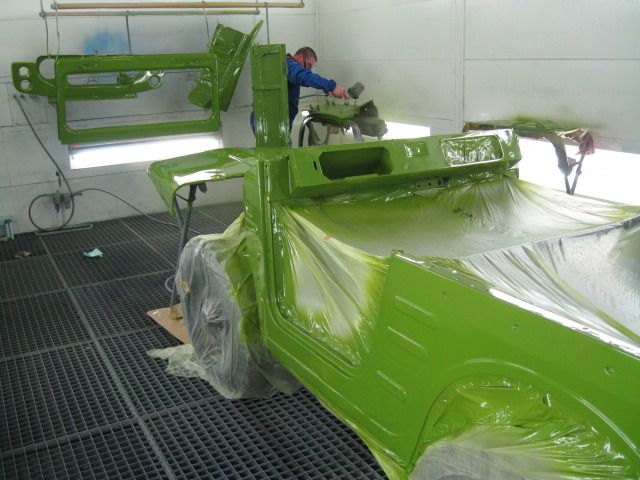
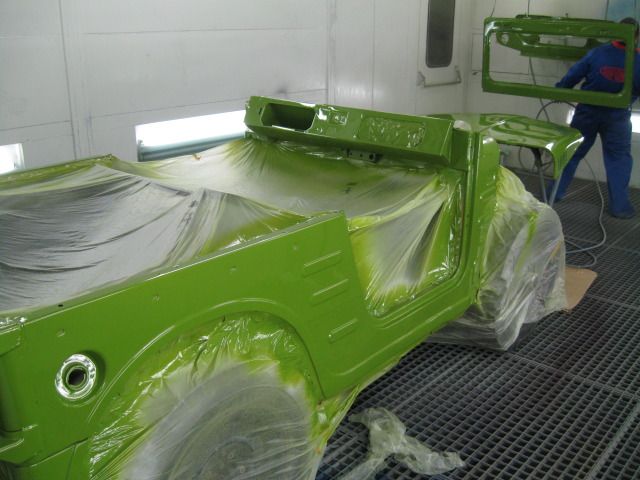
Layin down some colour:
Can't wait to it out in the daylight, the camera's having a hard time with the freaky colour
Head down to the shop to pick it up tomorrow morning as we decided to leave it in the booth over night to cure properly. It's going to be hard to sleep tonight
Now it can start to go back together, all the black detailing that's ready to go on is going to look mint
Re: It Has begun... "Project Wombat"
Posted: Fri Nov 11, 2011 8:44 pm
by badnuz
LOVE IT cant wait to see it in the flesh in a few weeks
Re: It Has begun... "Project Wombat"
Posted: Fri Nov 11, 2011 9:26 pm
by muddyhilux
good colour choice i say,will definitly stand out from the crowd
Re: It Has begun... "Project Wombat"
Posted: Fri Nov 11, 2011 9:34 pm
by lilpigzuk
DieselBoy wrote:
what was Dan drinking to deal with the colour
Re: It Has begun... "Project Wombat"
Posted: Fri Nov 11, 2011 9:39 pm
by tomsoffroad
Gotta love green Hangin to see tomorrows pix without the masking
Re: It Has begun... "Project Wombat"
Posted: Sat Nov 12, 2011 1:37 pm
by DieselBoy
lilpigzuk wrote:
DieselBoy wrote:
what was Dan drinking to deal with the colour
Nah, just co's it was Friday morning smoko
It's way less bright lime green and more khaki/olive than the camera would have you believe
Hundreds and hundreds of little jobs, but getting there.
Sifting through box's of parts choosing the best, scrounging some parts from this and a bit from that to make something that works, tapping out the threads in captive nuts filled with paint, what wires went where, is that wired up right or does it just not work?? I have four of these, which one is the best?? Arrrrrg
The main things left to sort out are:
the steering so the wheels point straight ahead, the carb to clean again as the idle circut sounded like it was bloked on the test run a few months ago fuel pump to sort out (make one out of 3 or 4 shitty ones) Brake hoses to source Rear wheel brake cylinders to source, I have none that are any good Brake system to bleed and test cooling system to piece together out of parts collection windscreen wiper system to piece together from the junk collection
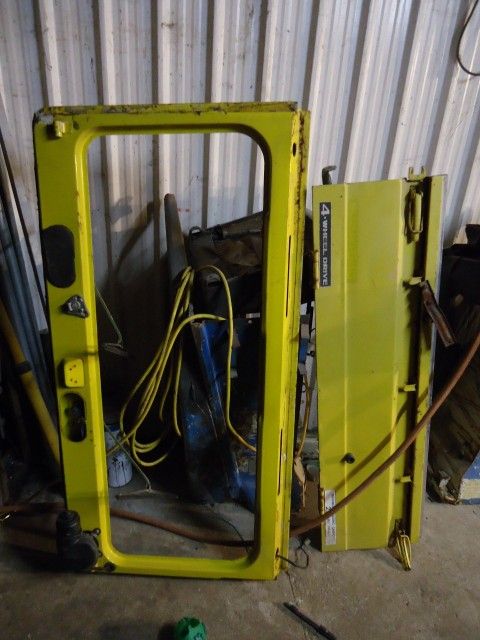
Then there is the roof and doors and roll hoop and rear seat and front bar and rear bar and flares and winch and radio and stuff
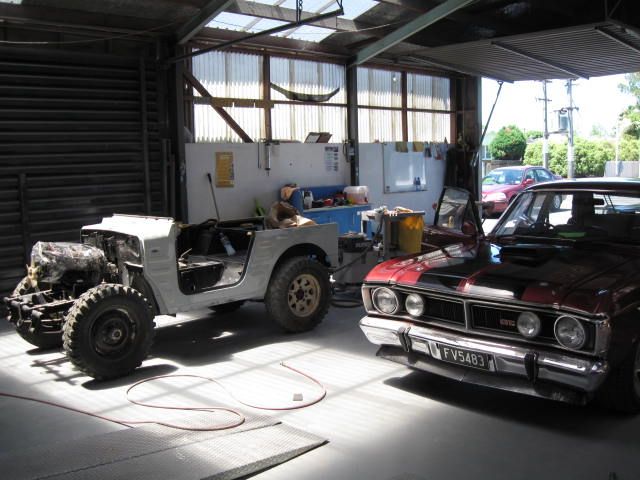
But at least it's starting to look like a truck again Any idea how hard it is to capture its awesomeness in the garage with a camera, can't wait to get it out in the natural light on the front lawn
Re: It Has begun... "Project Wombat"
Posted: Tue Nov 29, 2011 3:24 pm
by DieselBoy
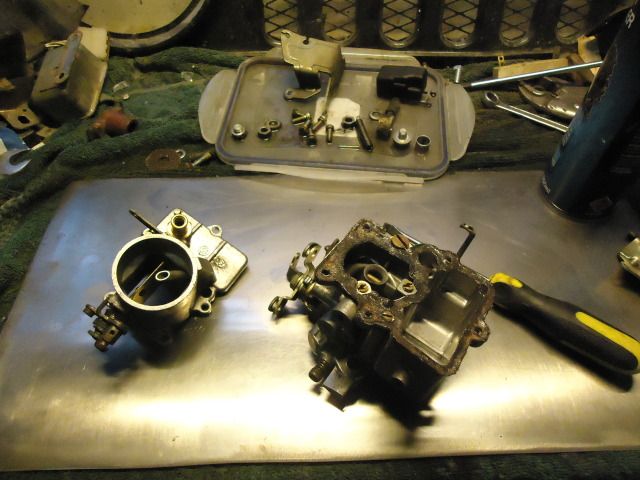
A bit of shagging around with caburattors and fuel pumps the other night.
I managed to make a fuel pump go, but its only working half as well as it should be due to a spring on one side of the diaphram being wrecked. Rebuild kit from Oz I guess.
The carb was interesting, I have always had issues with the carb on The50 having a really sensitive idle jet. It blocks up all the time as the hole through the jet is TINY. I took one of an engine I've had for a while and gave it a scrub:
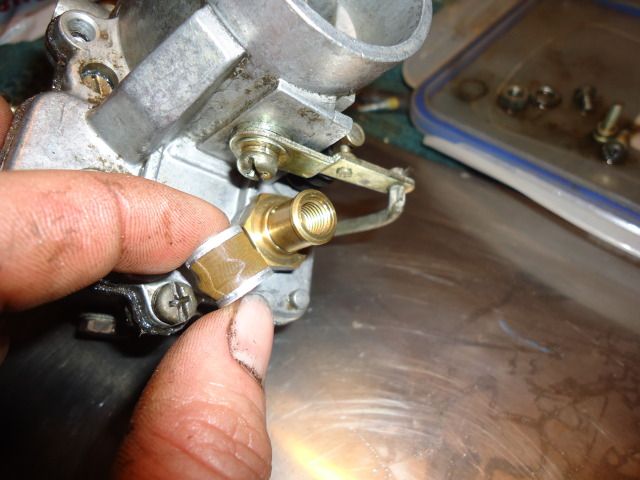
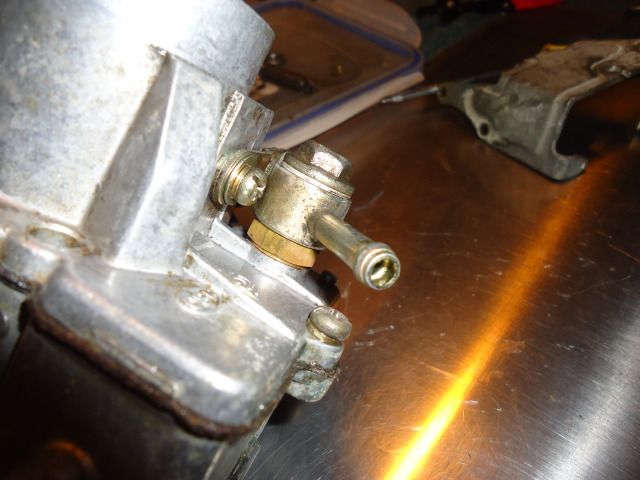
It had this cool little gauze filter before the needle valve into the float bowl:
It fits in here:
I bet it keeps the idle jet clean for longer
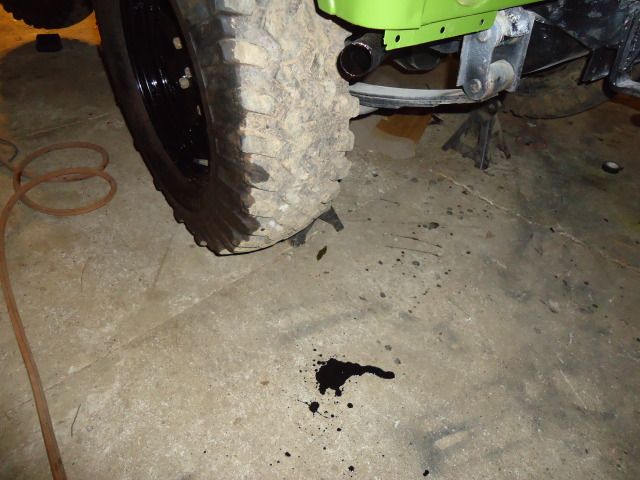
So after a bit of playing and checking, it was time to turn the key
I had the control leaver on the CCI pump cabled tied full open to purge any air out of the system and get plenty of lube in seeing as the motor has sat for may years.
You know its getting plenty of oil when it starts running out of the exhaust and makes a pool on the ground and then sprays oil all over the wall