The opinions and viewpoints expressed by users of Offroad-Express Forums are wholly their own and not necessarily those of Offroad-Express. https://www.offroadexpress.kiwi:443/Forums/
woot!! awesomeness of the three ringed circus cuzzy!!
it must be soooo advantageous for you to have the 'neighbours' you do...
it continually surprises me the size of these things when i'm used to workin on vomitron or teh fawdy.. think i'd love to throw one thats modified slightly differently into the stable at some stage..
nice form on the build pete, she sounds coolies styles.
Re: It Has begun... "Project Wombat"
Posted: Fri Jul 15, 2011 10:55 am
by badnuz
note: thread started june 13th..... currently one month later and look how much is done? at this rate you could charge for 4x4 rebuilds on a weekly rate it would be affordable as!!
loving it!
ps: LJ plates are still for sale you know who to contact
Re: It Has begun... "Project Wombat"
Posted: Fri Jul 15, 2011 4:44 pm
by noexitroad
those insert thingys for the spark plugs are quite versatile, after taking the oil sump plug out of my (new) falcon, ex police car and also taxi with 350,000 k"s on the clock, found the thread on the sump was stripped, the plug had been rtv'd in!! of course it was 4pm on a sunday so off to ripco i went. i now have a spark plug for a sump plug and it has been in for nearly 4 years.
Re: It Has begun... "Project Wombat"
Posted: Fri Jul 15, 2011 5:37 pm
by Overkill
Lovin reading the build Also love the fist pump at the end of the vid, "yes I dunnit" fist pump....Well done!!!!!!
Re: It Has begun... "Project Wombat"
Posted: Tue Jul 19, 2011 10:09 am
by DieselBoy
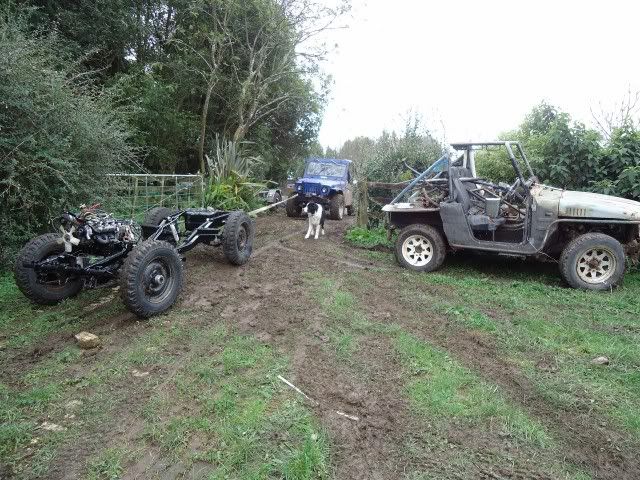
Not much exciting progress this weekend, had to work on Sunday
Although some shuffling around did take place.
One parts truck got booted out of its shed, that involvced putting wheels on it and connecting the steering and winching it out of the shed and towing it against the fence
Then dragged the Wombat chassis up the driveway and lowered carefully down the greesy slope to the shed for storage.
Did I mention its the middle of winter and we have had 3 weeks of rain, this being the first fine day for age's
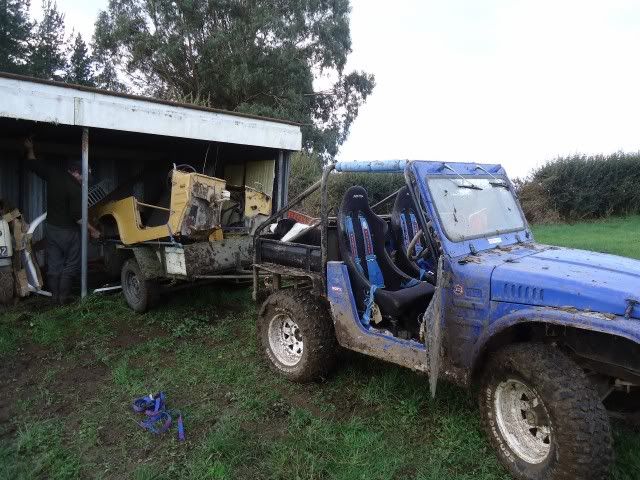
Figured out how to attach a trailer to The50 with a chain, and dragged the trailer accros the causeway to the hay shed and loaded up what has been nicknamed the:
"Big Brown Patch"
why??
Because this is whats patching up all the rust holes on the other Tub
Lock and loaded. It might be a fun trip back accros to the house!!!
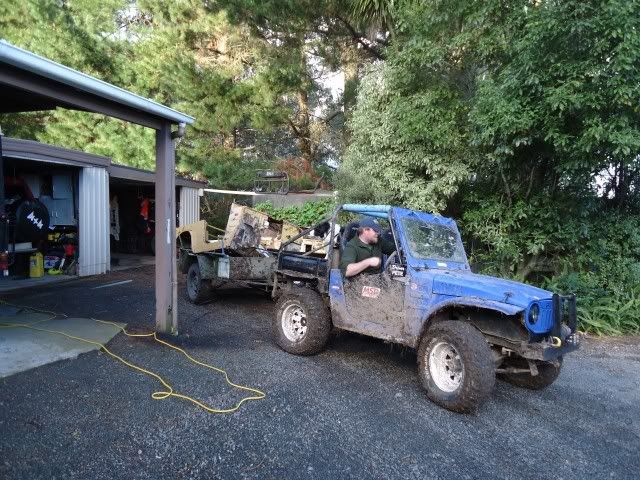
And just incase it all went wrong, I had to have the camera watching. Unfortunately just a vid off the little sony camera, no zoom, and buggered if I know why its so dark, its the middle of the day!!!!
and safe and sound ready to enter the workshop. There's going to be a fair few hours work, but I can't wait to see the finished result, especially as once its done, the trucks ready to go!!!!
Off to Tongariro National Park to play in the snow this weekend, so the Defender needs prepping this week so will make a start on the Tub next week!!!
Re: It Has begun... "Project Wombat"
Posted: Wed Jul 27, 2011 6:27 am
by DieselBoy
After a weekend away, it was time to step back into the shed and get cranking again
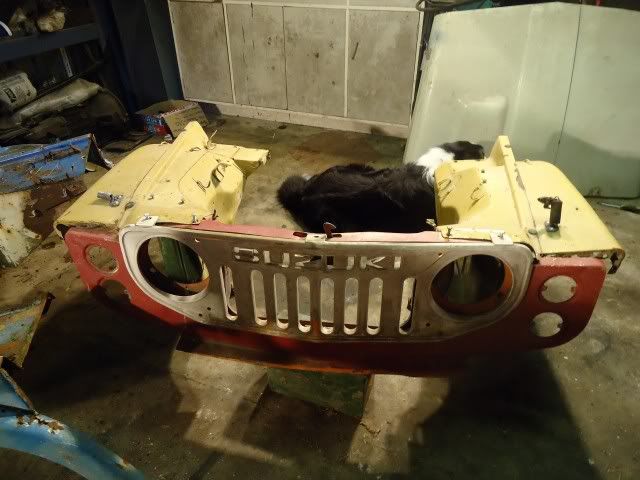
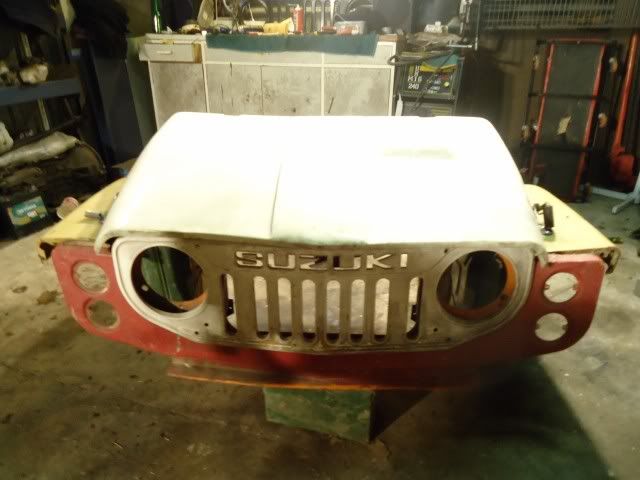
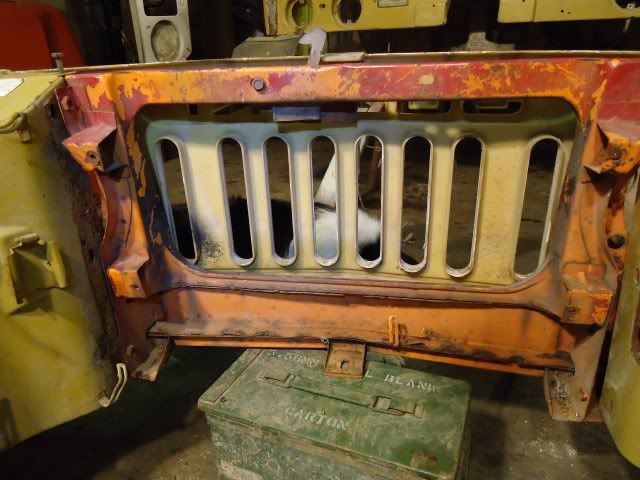
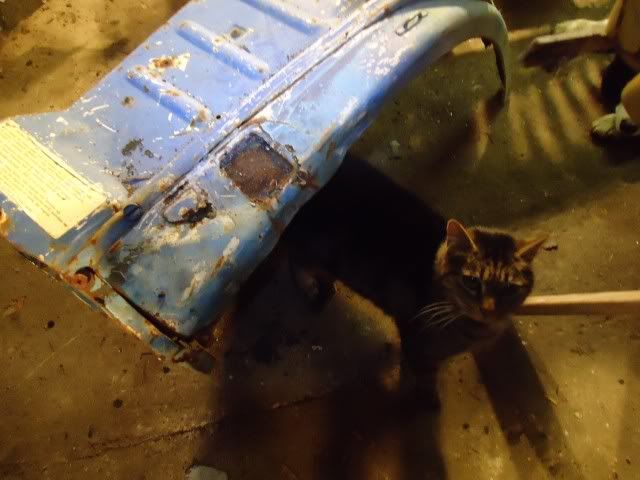
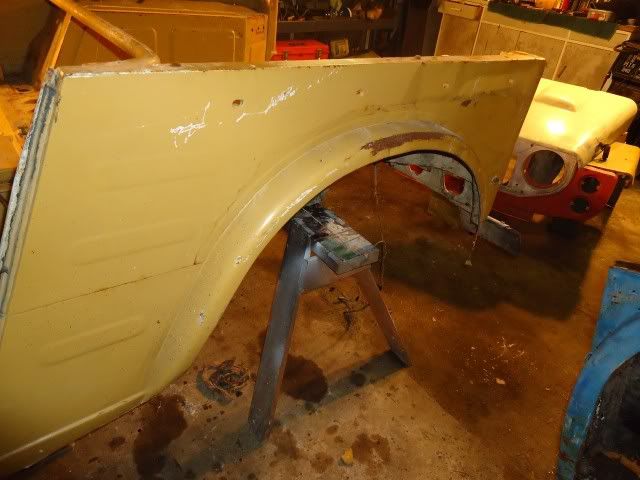
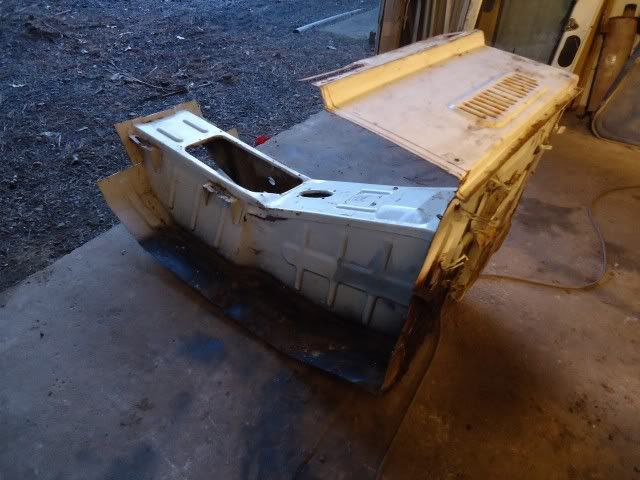
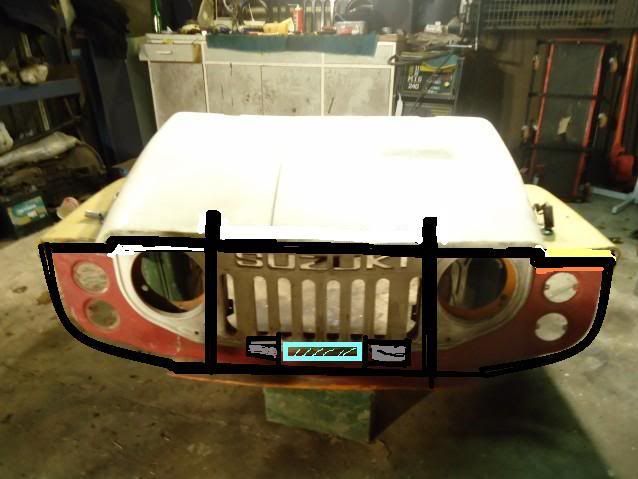
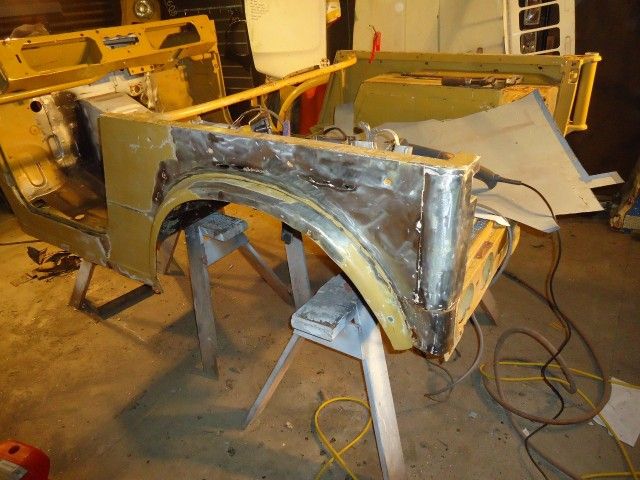
I scavanged an early LJ50 front panel so I can run the grill and bonnet I want, but the best way to make it fit out of what I have is another story.
I intended to make it fit the wider LJ80 gaurds, but now I have the panel I can't bring my self to cut it up and widen it.
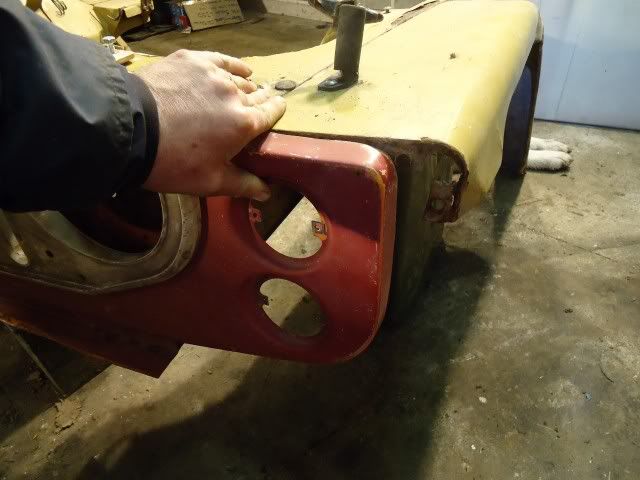
Heres the front clip mocked up. Its about 50mm to short on each side
This is the extra thats would need dealing with:
And the headlight buckets would need modifiying:
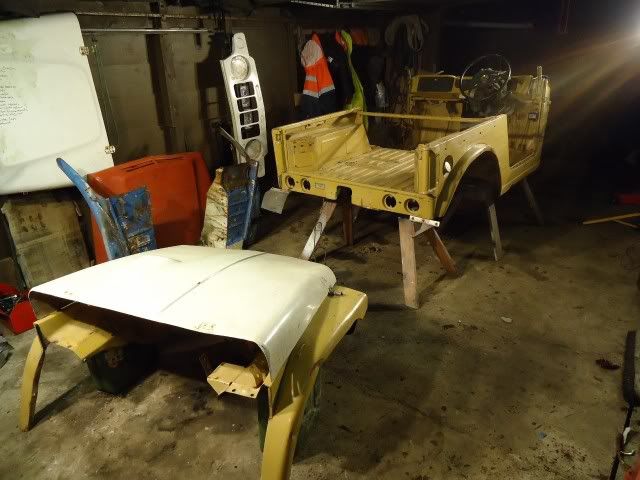
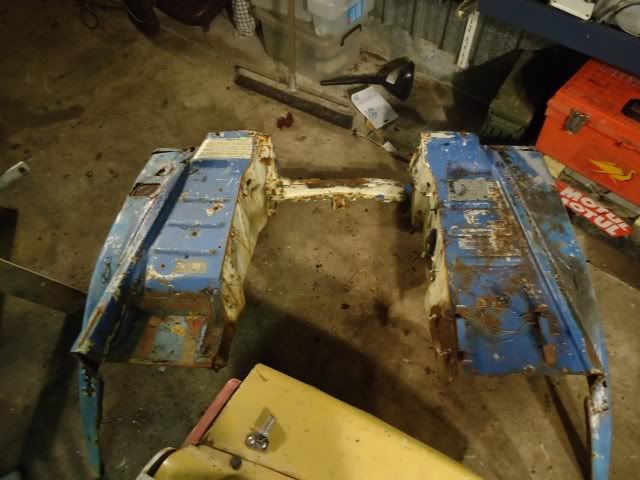
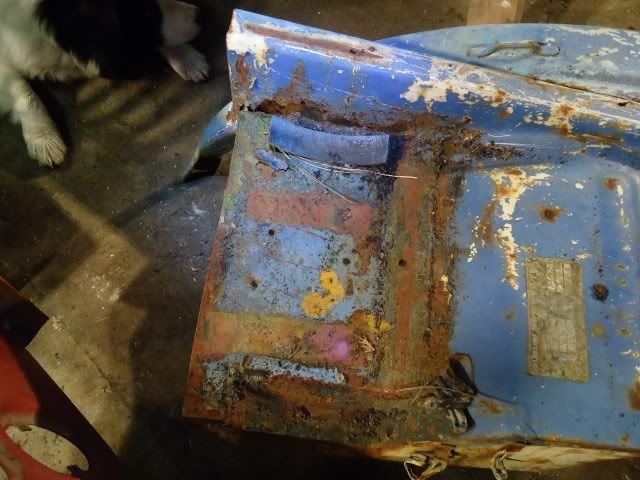
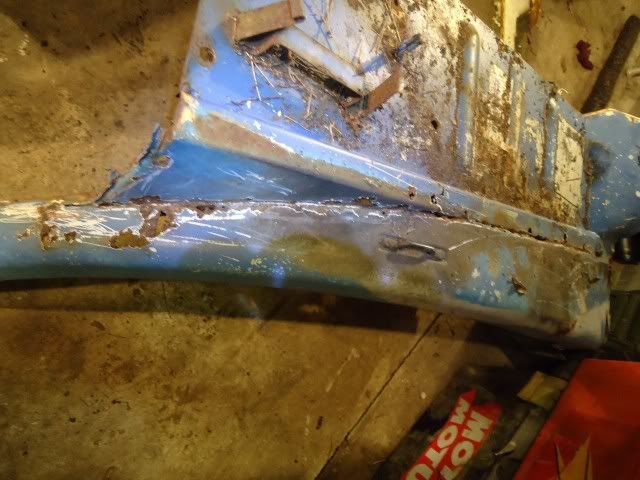
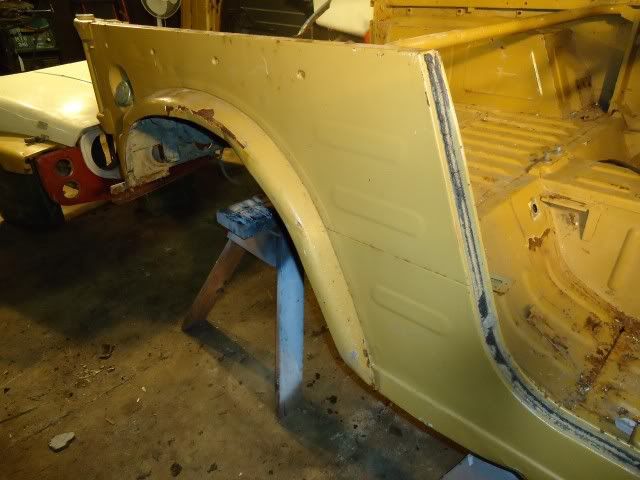
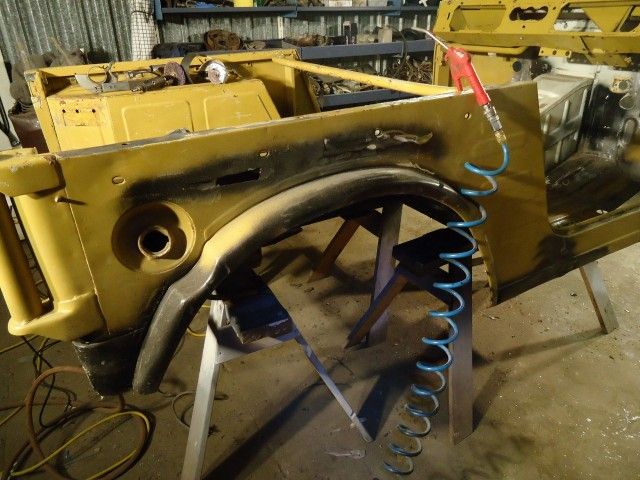
So out came the LJ50 front gaurds I have floating around. Horrible rusty things that they are.
The difference between the two is obvious:
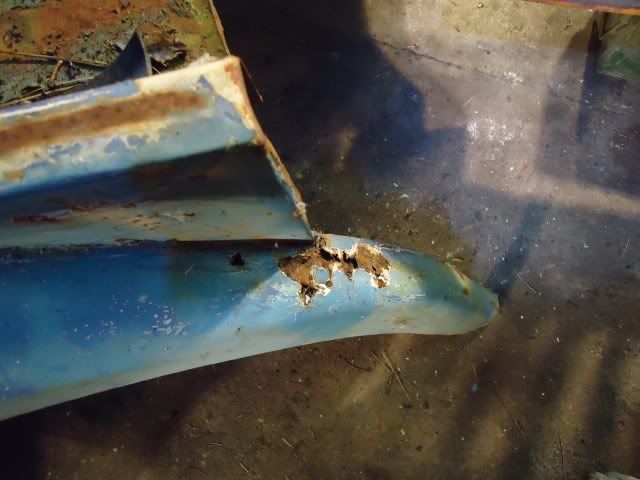
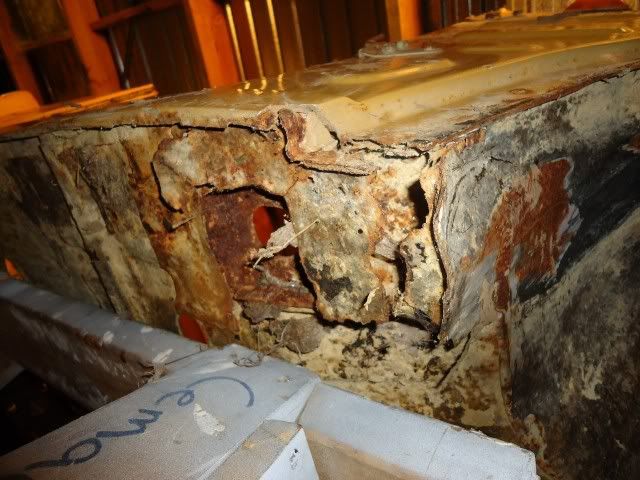
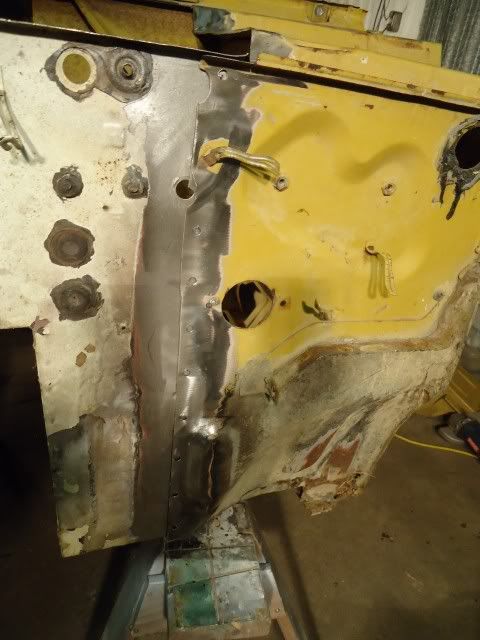
Seems like the best option sure, but then I have to fix up this
These are the repairs the tub needs so far:
Oh, and did I mention the tub is missing a little bit???? Got some cut and shut work to be done
Gotta start somewhere I guess
Re: It Has begun... "Project Wombat"
Posted: Mon Aug 01, 2011 12:58 am
by DieselBoy
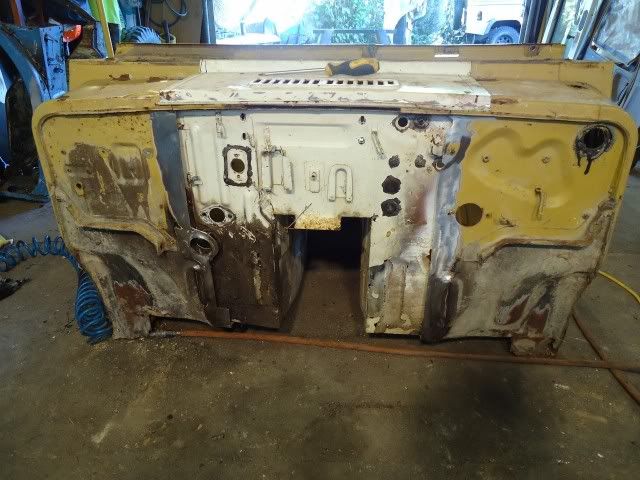
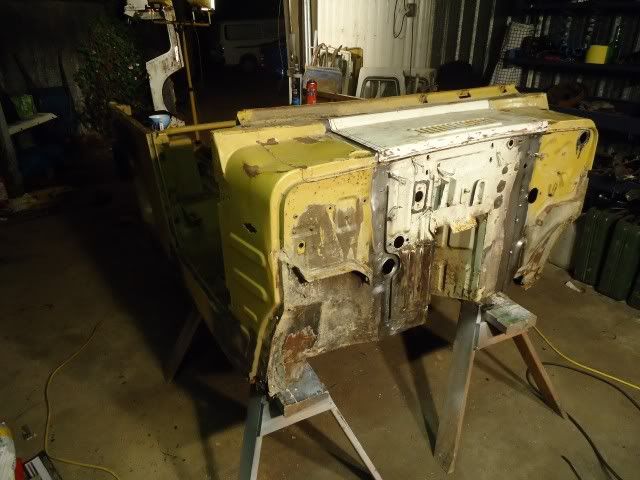
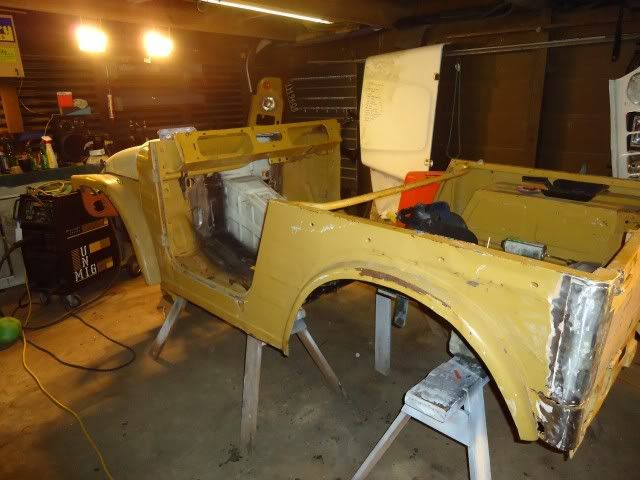
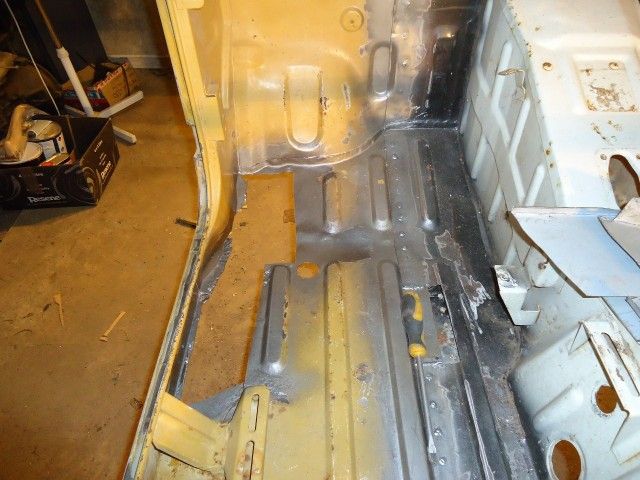
Hours and hours and hours later.............
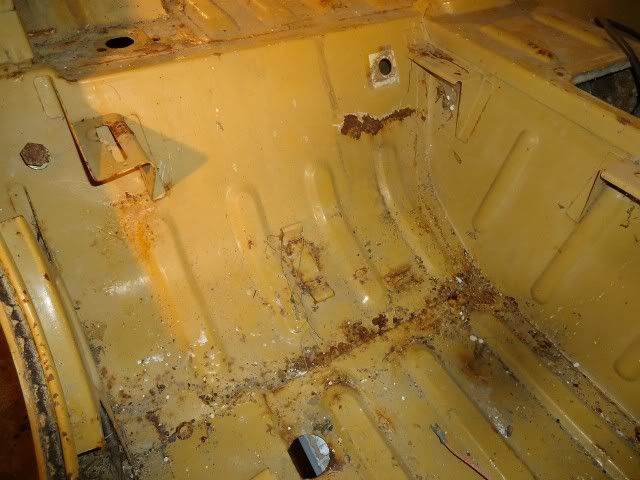
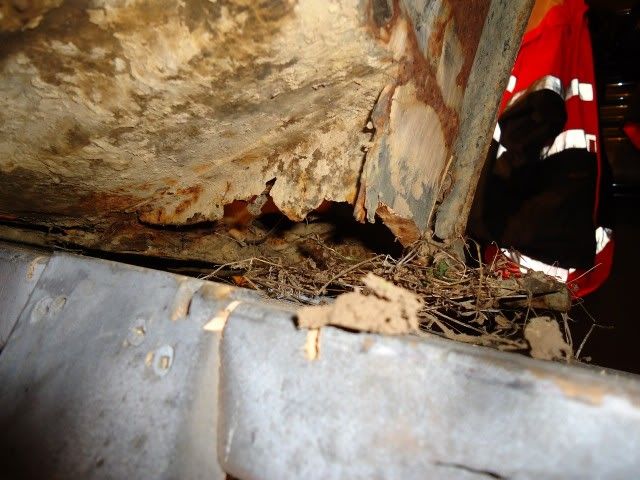
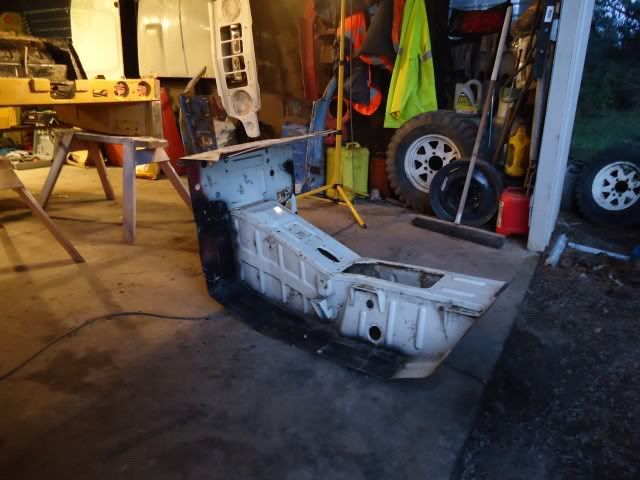
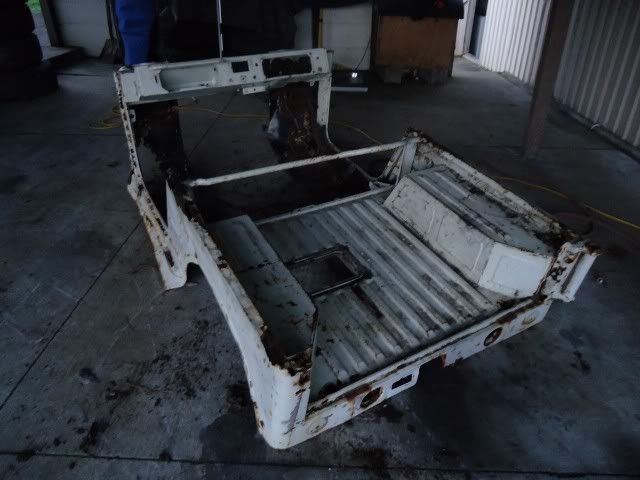
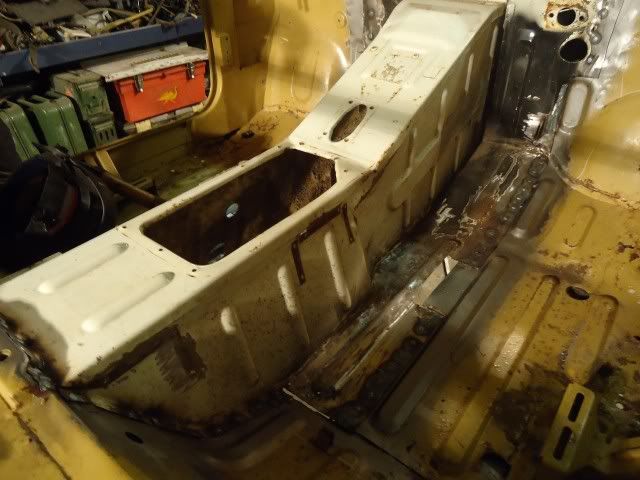
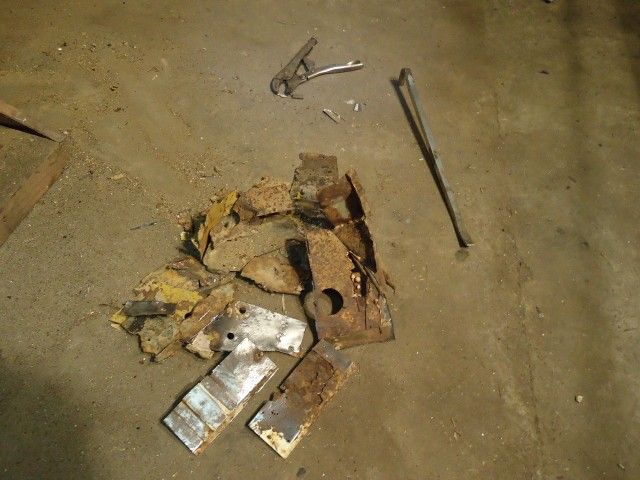
Big weekend on it this weekend, started off with the angle grinder and the panel saw on the original tub and cut the rust out of it.
Here is the original tub with all the rust removed
This is pile of rusty scrap that I had to cut off
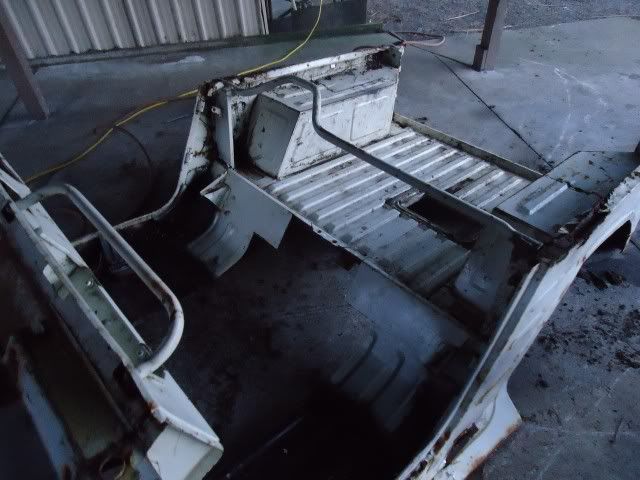
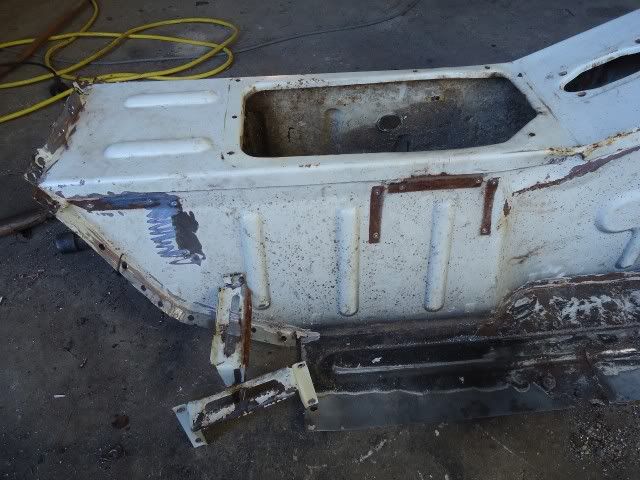
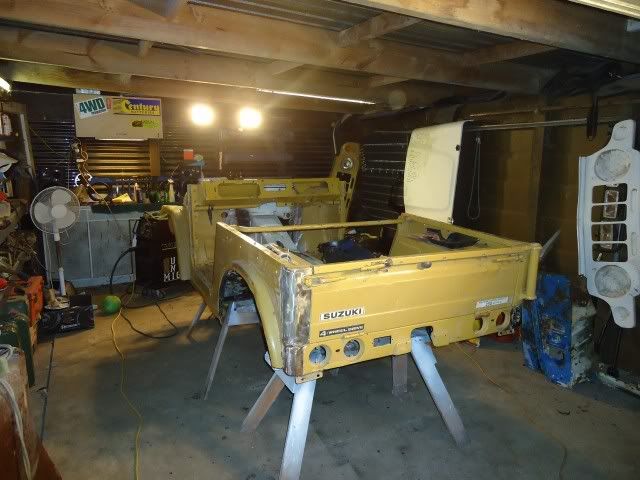
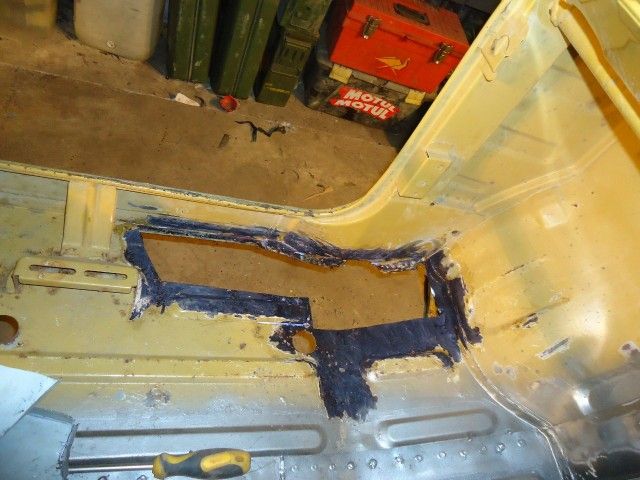
Some measuring later, it was time to trim the Big Brown Patch to fit the space left over following the rust removal of the orginal tub
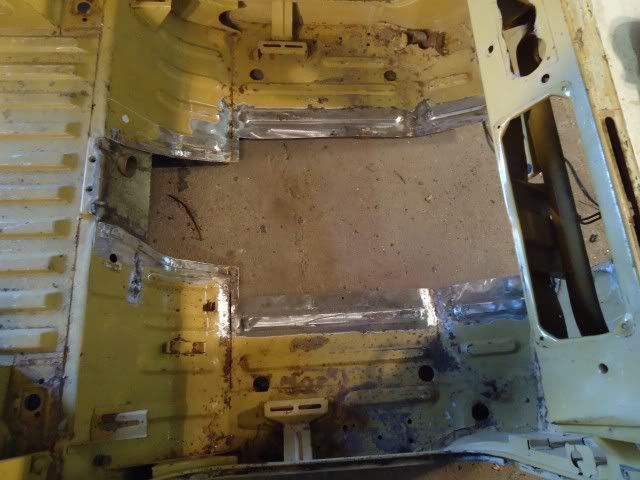
A bit of un-stitching was required with the spot weld drill to get things to fit properly:
But the first test fit was very encouraging:
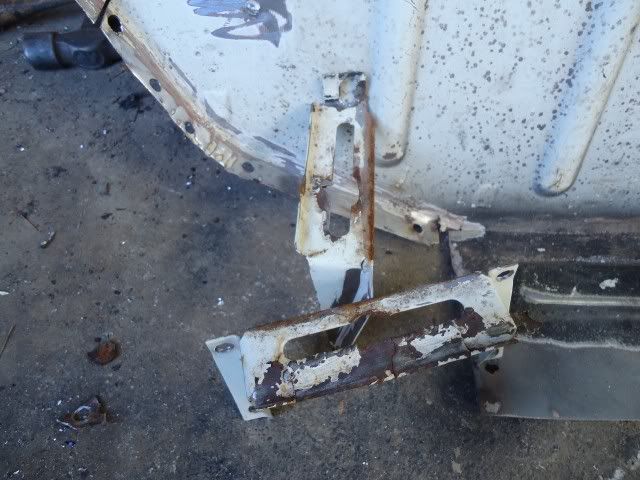
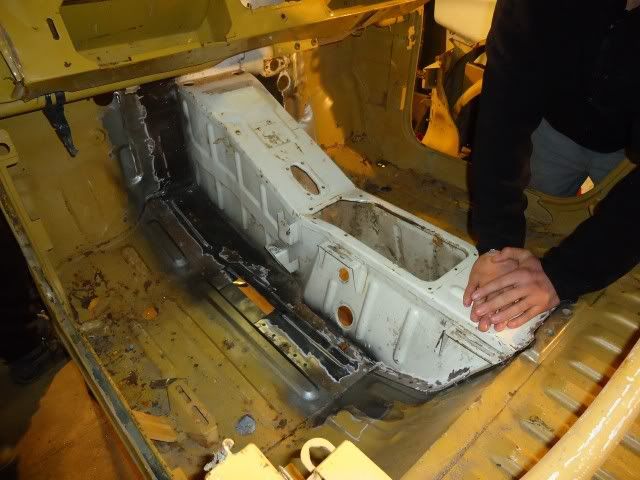
While the spot weld drill was in the action I pulled the drivers side seat mounts off as they were stuffed:
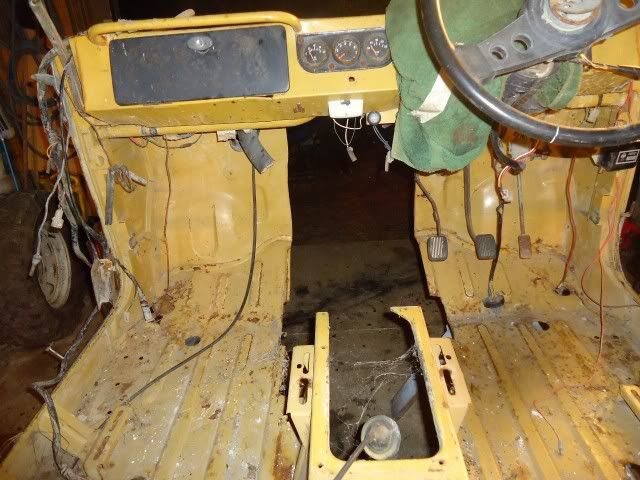
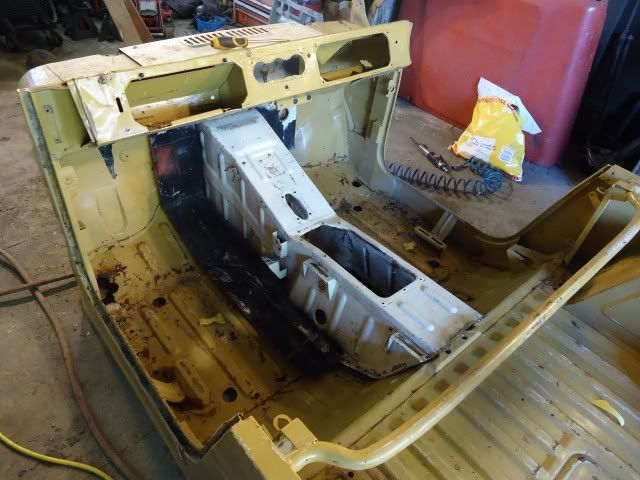
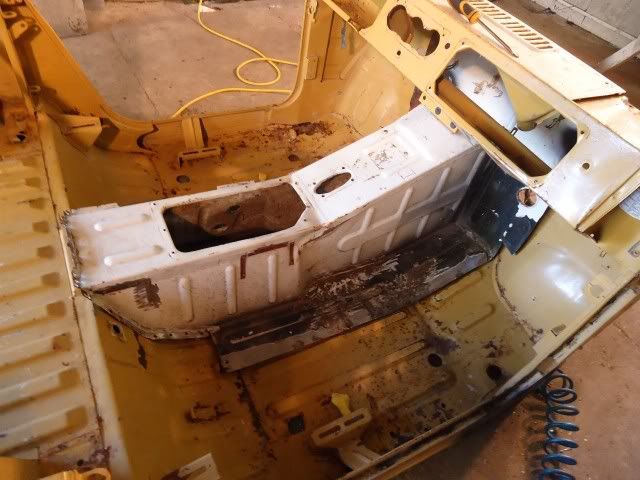
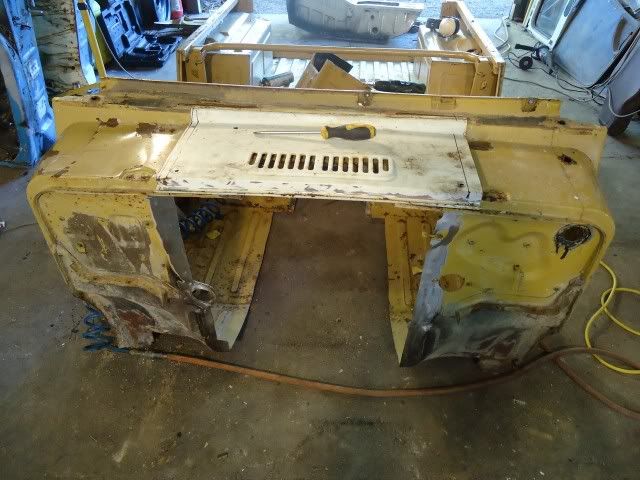
A bit more chopping, stripping and massaging and it was coming together. Was cool to see the top panel test fitted!!
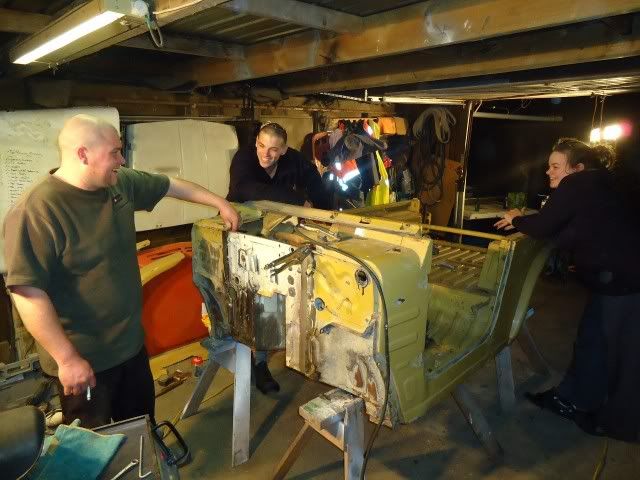
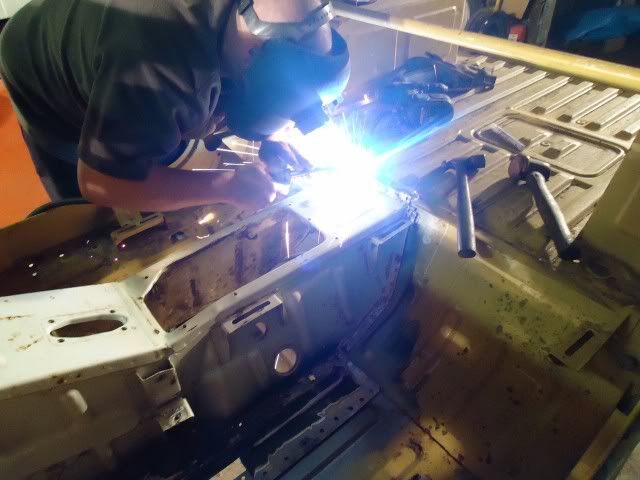
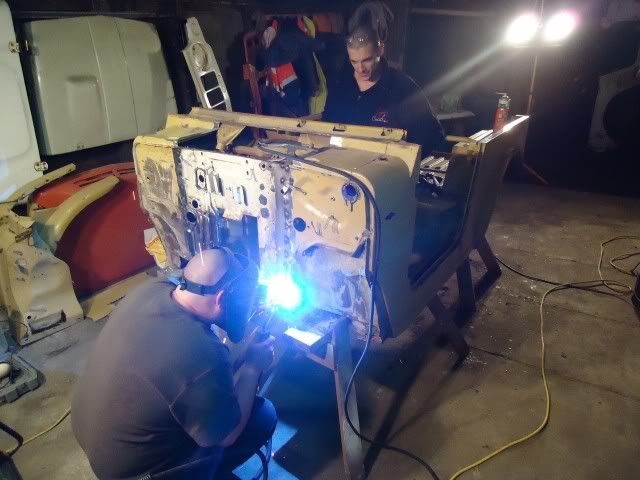
Roped Mudslut in, as he is a certified welder just in case I have to get a repair cert for re-vinning, and the big blaze up started (at 8:30pm Sunday night ), the Bro inlaw dropped by to say Hi and quickly got put to use also!!!!!
See the the glowy bit by his foot??
This is why
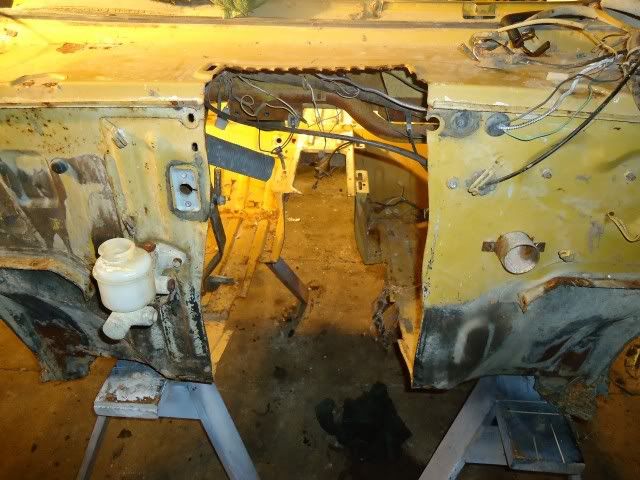
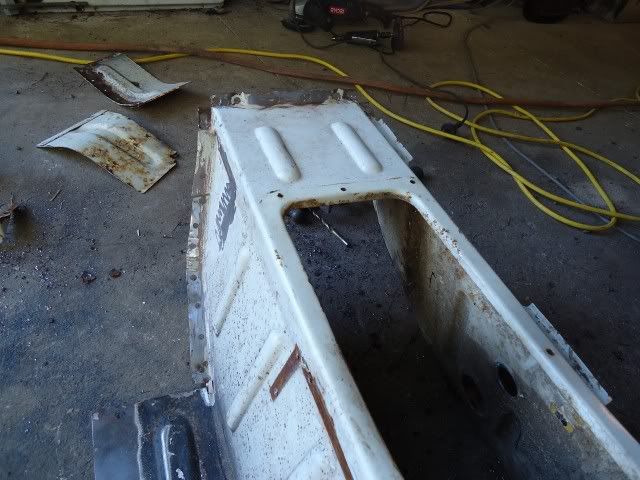
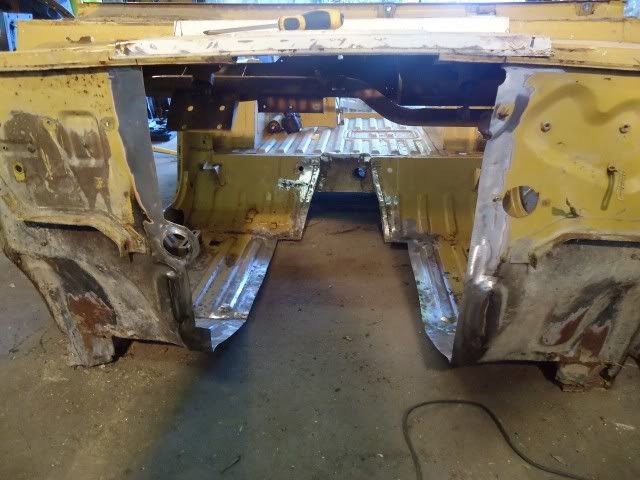
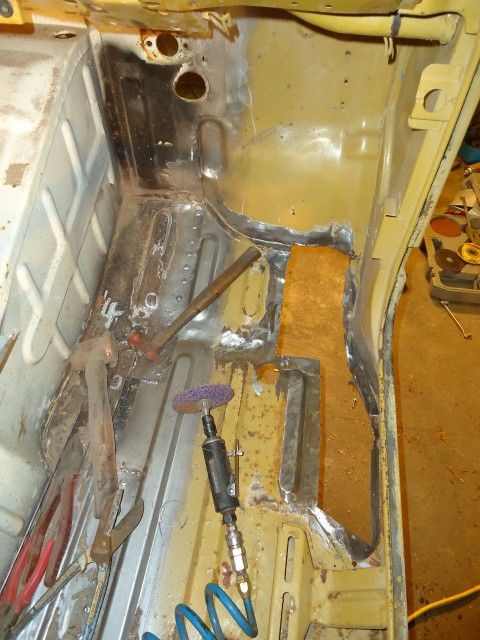
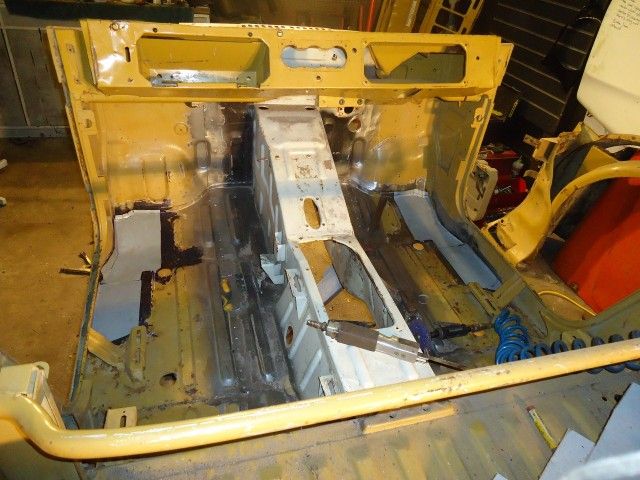
So the end of the weekend, the firewall and tunnel are plug welded in. They still need stitching from both sides, but that's a mission for one night this week
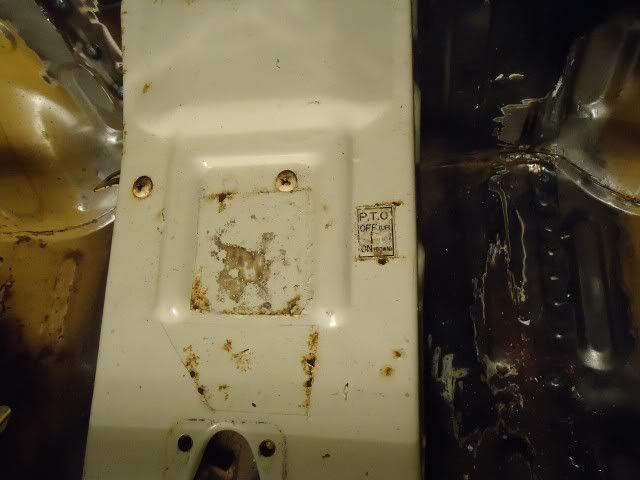
Satalite found this cool label hidden under the paint on the trans tunnel!!!!
Re: It Has begun... "Project Wombat"
Posted: Mon Aug 01, 2011 8:45 pm
by MNC
DieselBoy wrote:... the Bro inlaw dropped by to say Hi and quickly got put to use also!!!!!
Good to see that your nissan driving brother in law is good for something
He gives me plenty of sh!t on how long my lexus build is taking so feels good to deal some back
Awesome progress DB - as always!
What will you use to clean up the tub? Wire brush on an angle grinder, orbital sander, other?
Re: It Has begun... "Project Wombat"
Posted: Mon Aug 01, 2011 10:46 pm
by DieselBoy
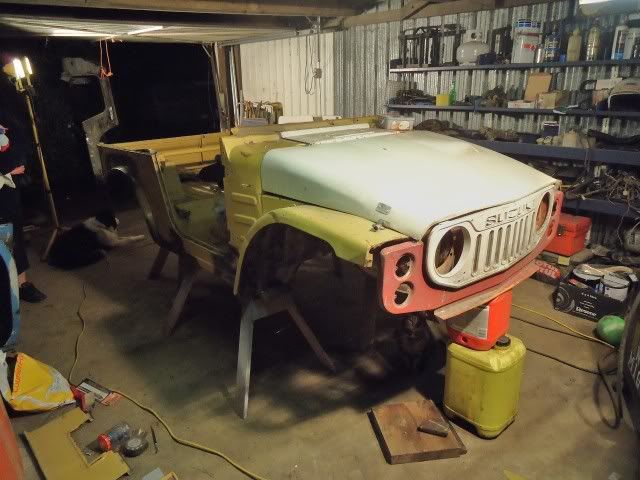
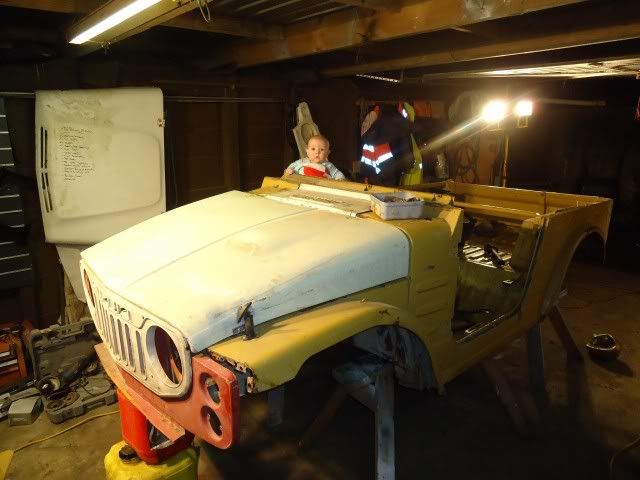
After the monster weekend mission, I couldn't help but have a play tonight and dream about the finished result
I should have been cutting out rust and welding in patch's, but this was way more fun!!!!
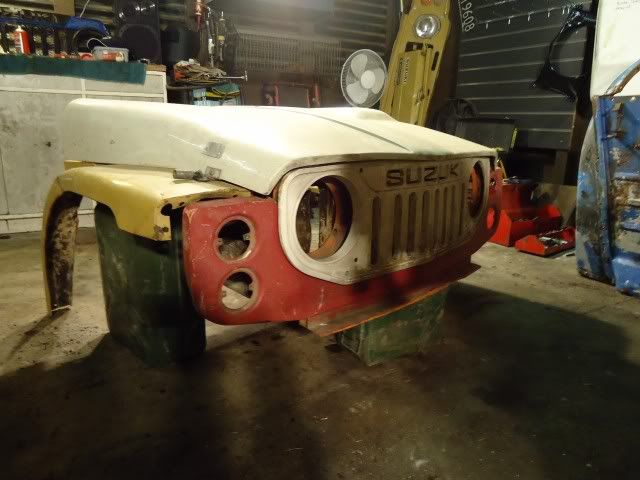
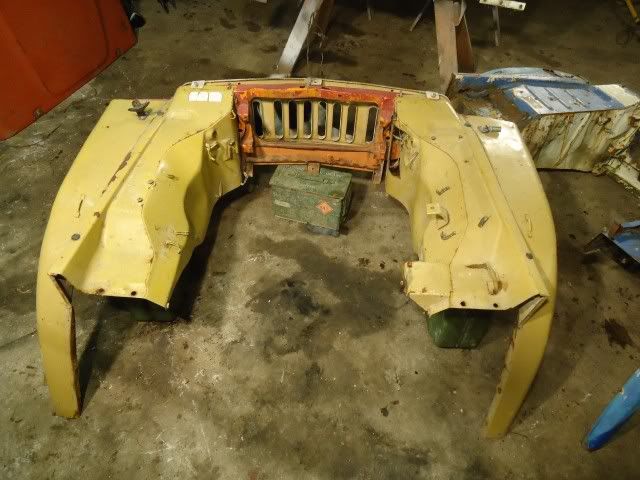
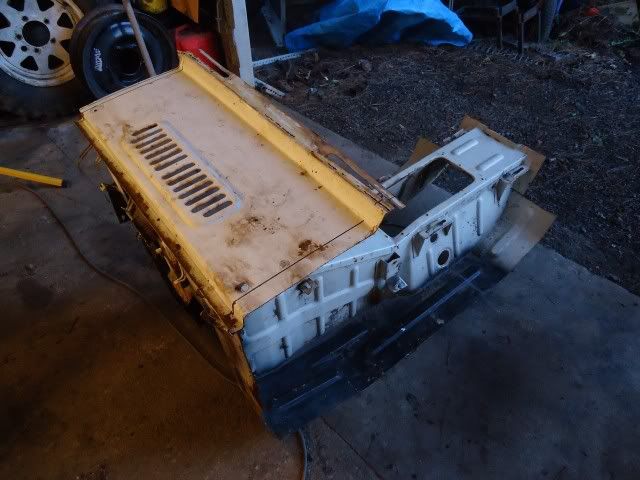
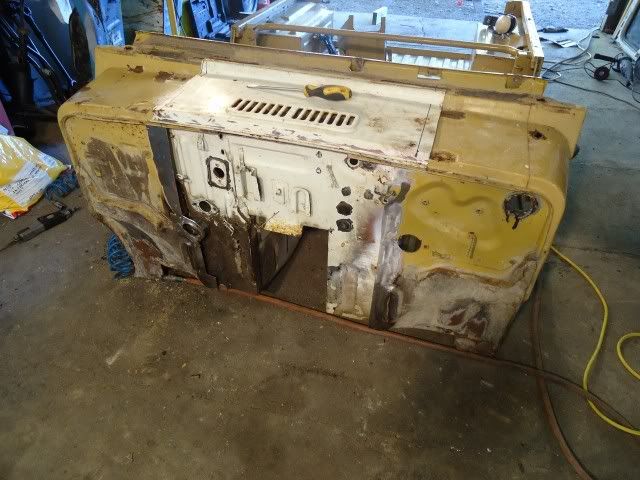
I chucked the front clip together and bolted it loosely to the tub. Its gonna be so cool!!!!
I'm think of leaving the guards and grill as they are, and running a bar around the corners of the front panel to hide the mismatched overlap of LJ80 and LJ50 parts
Fished the tail gate out of the pile of junk and cliped that in place for a laugh too!!!!!
I better do some rust work tomorrow night I think
Re: It Has begun... "Project Wombat"
Posted: Tue Aug 02, 2011 7:11 am
by niblik
i wanna see alex's 'L' plates on there if he's driving...
as for matching the front clips widths.. what about narrowing the rest to suit the front grill? it'd just be a simple thin pizza slice from the guards and then similar to the bonnet...
Re: It Has begun... "Project Wombat"
Posted: Tue Aug 02, 2011 10:28 am
by DieselBoy
niblik wrote:i wanna see alex's 'L' plates on there if he's driving...
as for matching the front clips widths.. what about narrowing the rest to suit the front grill? it'd just be a simple thin pizza slice from the guards and then similar to the bonnet...
Haha, he's gonna be in the navi seat for a while yet
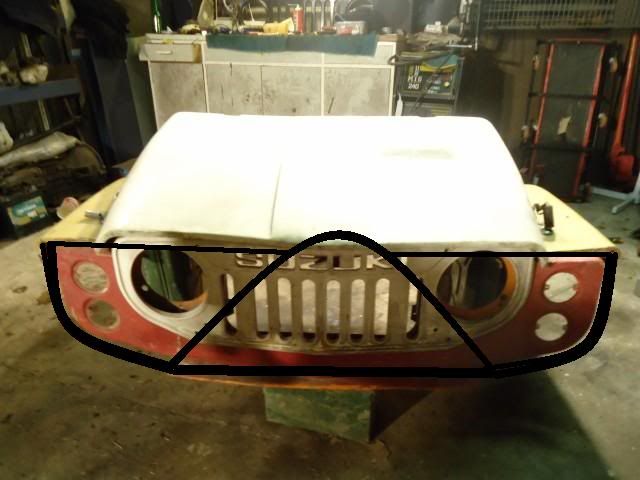
As for the front clip issues, I have enough junk there to make something work.
Its a LJ50 bonnet and Front Panel, and LJ80 Guards. The LJ80 guards are 50mm wider to accommodate the wider diffs.
Seeing as I have fitted the wider diffs to the LJ50 Chassis, it would be mint to keep the wider front guards somehow.
So I either chop the front panel and widen it on each side to suit, or hide the overlap with some cool bar work
I dunno, 5 mins of playing on M.Paint goes something like this
Re: It Has begun... "Project Wombat"
Posted: Tue Aug 02, 2011 1:11 pm
by kernels
Awesome as always. Look forward to your next post every time!
Re: It Has begun... "Project Wombat"
Posted: Tue Aug 02, 2011 3:47 pm
by DieselBoy
Or 2mins at afternoon smoko
Hahaha, I seriously lack talent
Re: It Has begun... "Project Wombat"
Posted: Tue Aug 02, 2011 3:49 pm
by badnuz
DieselBoy wrote:Or 2mins at afternoon smoko
Hahaha, I seriously lack talent
now is that THE understatement of the year or what!!!
more talent in your toe than most i think
Re: It Has begun... "Project Wombat"
Posted: Tue Aug 02, 2011 4:31 pm
by niblik
my votes for the widening of the parts to match the guards as opposed to tryin to cover the gap..
depending on which pic ya look at, it looks like either a mildy amused or angry pokemon....
as you were..
Re: It Has begun... "Project Wombat"
Posted: Tue Aug 02, 2011 6:08 pm
by DieselBoy
One of the guy's at work walked past while I was doodling on the photo and said" what the blardy ell's that?? Looks like Johnny 5 or something!!!!"
Now all I wanna do is head down to the video shop and see if I could get it out
I know it wont be as strong but what about something more like this:
PS. Cool winch, is it hydraulic
Re: It Has begun... "Project Wombat"
Posted: Tue Aug 02, 2011 11:32 pm
by DieselBoy
MNC wrote:
DieselBoy wrote:Or 2mins at afternoon smoko
Hahaha, I seriously lack talent
Oh man - I'm a big fan of MS Paint.
So hard to get it right
I know it wont be as strong but what about something more like this:
PS. Cool winch, is it hydraulic
Who needs CAD when you have MS Paint!!!!
I have a nice bar in the shed (UBZ's LJ80 stuff ) that needs a test fit on something so that might be a good option to replicate.
The winch, well, PTO powered hydraulic maybe?? Using a little GM power steering pump of the PTO V Belt pully maybe??
How small and light is the littlest hydraulic winch though
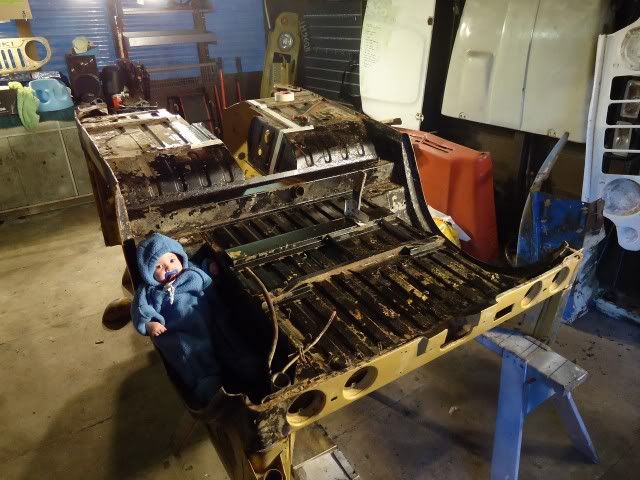
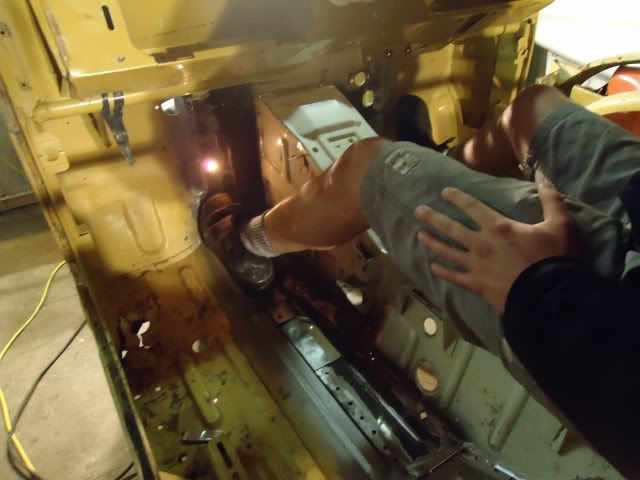
Boring shit tonight, just cut four big holes in the floor to remove rust. Spose they are gonna want to patched up too at some stage
Re: It Has begun... "Project Wombat"
Posted: Tue Aug 02, 2011 11:46 pm
by UBZ
DieselBoy wrote: I have a nice bar in the shed (UBZ's LJ80 stuff ) that needs a test fit on something so that might be a good option to replicate.
Might have to accommodate that request this weekend
Ive got Suzzie to look after ,good excuse for a roady so Zuki can meet her.
Re: It Has begun... "Project Wombat"
Posted: Tue Aug 02, 2011 11:53 pm
by DieselBoy
Mean, sounds like a plan!! I gotta work Sunday though, dumb retail fitouts grrrrrrr
Re: It Has begun... "Project Wombat"
Posted: Wed Aug 03, 2011 7:15 am
by mercutio
you know where there is a cheap supply of various hydraulic pumps
Re: It Has begun... "Project Wombat"
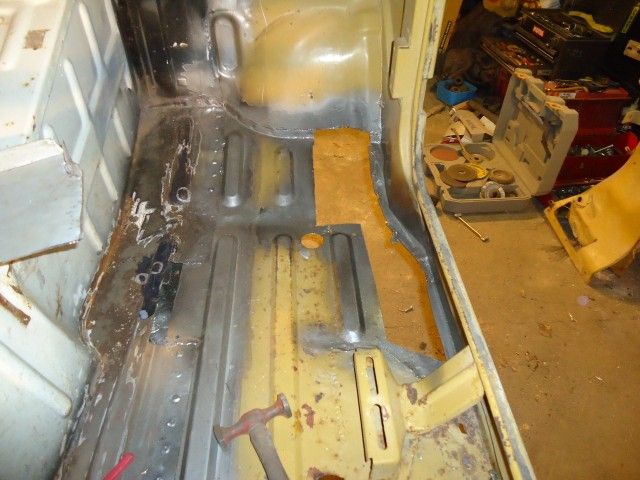
Posted: Fri Aug 05, 2011 11:52 pm
by DieselBoy
More hours and hours and hours
Panel repair work is time consuming, like really really time consuming.
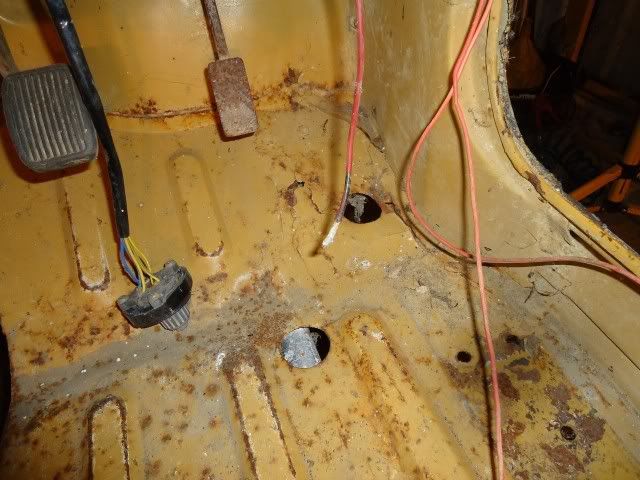
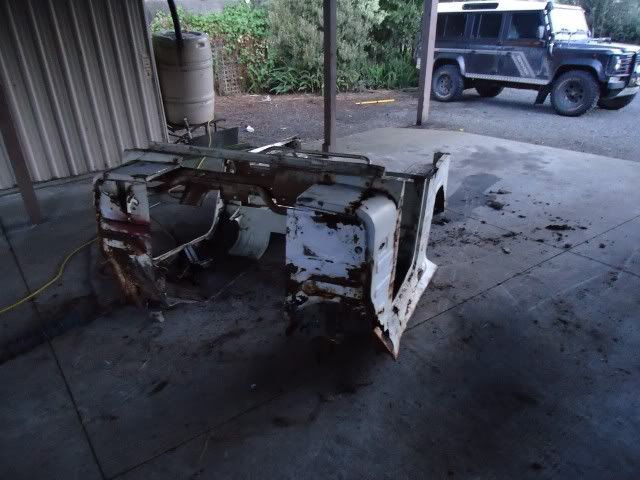
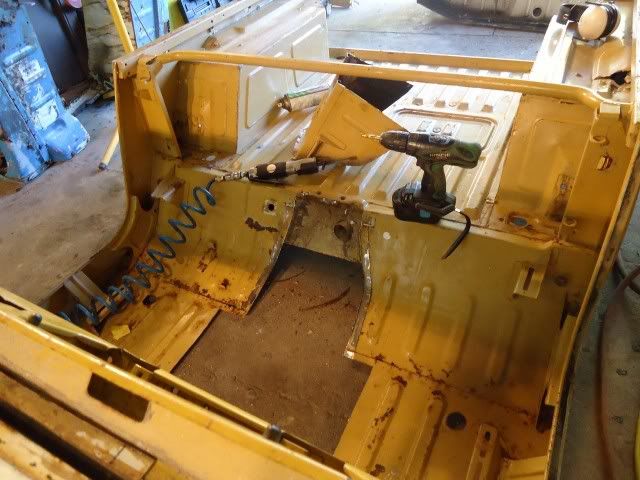
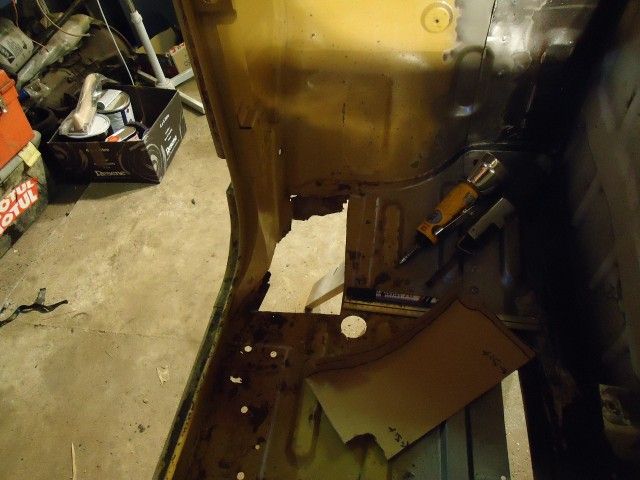
Nice pile of rusty shrapnel cut from the floor pans. I think there's the remains of what was left of the two front body mounts in that pile too.
So it started off by cuting the rusty body mounts off, then the fusty floor pan above them. The plan is to repair the floor pan, then flip the body over and rebuild the body mounts and attach them to the repaired floor pan.
Just a small square cut out to start with on each side:
After some more scratching around, it turned out more needed to be cut from the floor.
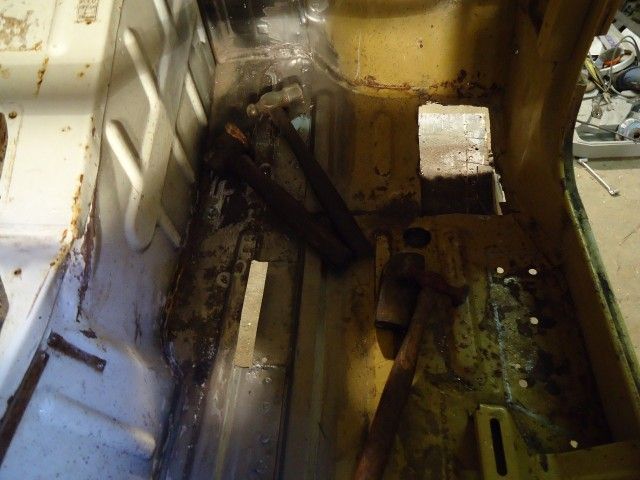
Here's the drivers side floor with all the rust removed, paint stripped back and dressed up ready for a dose of Wurth Rust Killer:
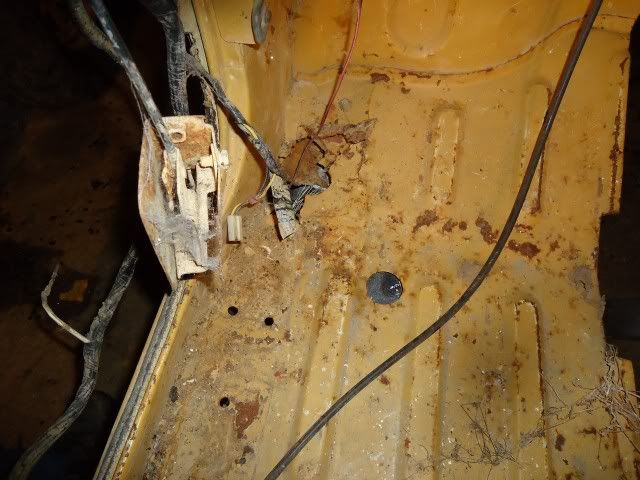
Heres the passengers side with the same gaping hole, with the Wurth Rust Killer doing its thing. It turns purple when its done
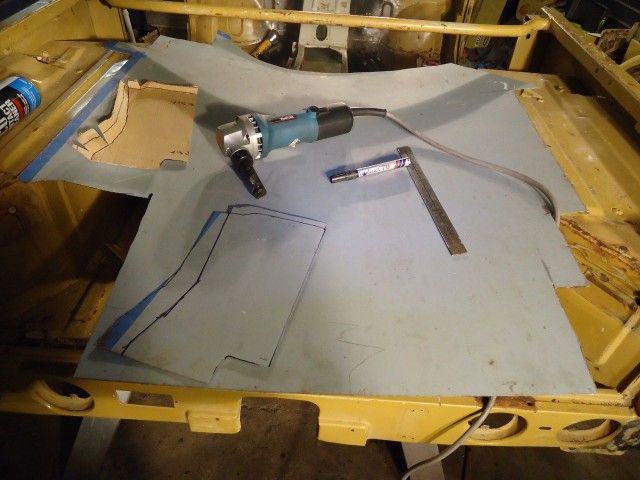
While the rust killer was doing its thing, it was time to make some card board templates then cut and fold some fresh new panel steel for the patches.
It ended up something like this:
By the time the patches were finished, the rust killer had been on long enough to dry, so it was time to give it all a good coat of weld through primer and let that dry over night. Blaze the patches in tomorrow
Wurth Weld through primer applied and drying:
I also got board with patching, so cured that by cutting loose with the strip disc onb the grinder and stripped back the passengers side rear to see why it looked so ugly:
Drivers side is not much better:
I WILL get there in the end
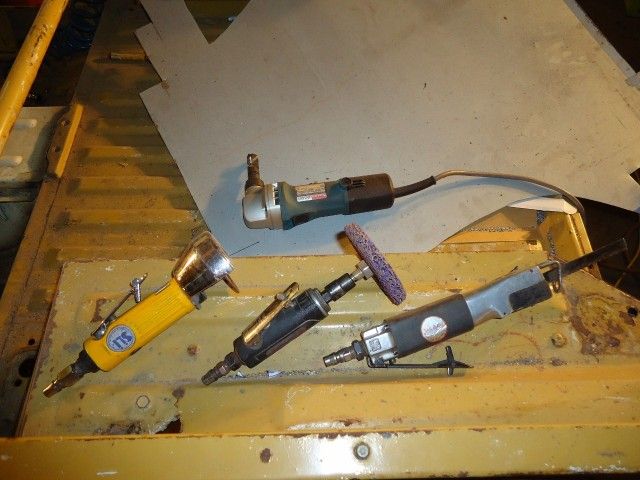
Some one on one of the forums asked what tools I was using:
Mostly using air tools, from Left to right, cut off tool, die grinder with strip disc attachment and purple 3M stripping wheels, panel saw and in the back ground is a Nibbler I have been using for cutting out patches.
Of course you can't forget the angle grinder with a selection of different shaped wire brushes, cutting discs, flap discs, strip disc's etc etc.
Re: It Has begun... "Project Wombat"
Posted: Sat Aug 06, 2011 12:08 am
by mudslut
Lookin good mate,nice work
Re: It Has begun... "Project Wombat"
Posted: Sat Aug 06, 2011 12:12 am
by DieselBoy
mudslut wrote:Lookin good mate,nice work
Cheers man, I'm learning from the Master
Re: It Has begun... "Project Wombat"
Posted: Mon Aug 08, 2011 3:45 pm
by NJV6
Hey DB, something I managed to digitise.....
A 2stroke getting a hiding on a club trip back in 1983!!!
Enjoy
If you don't want it on ya post just let me know and i'll delete it, Glen
Re: It Has begun... "Project Wombat"
Posted: Mon Aug 08, 2011 4:32 pm
by DieselBoy
Hahaha, that's AWESOME Glen!!!!!
It might inspire Rex to finally dig out his collection of old Nat's vids for me!!!!
And just to be ghey, that's a LJ50-II, which is the first one I have seen in NZ!!!!