I'll work through this in stages, as each side can take several hours to do and writing this up will probably take just as long.
If you need a rebuild kit, wheel bearing kits or any other parts to do this repair then please flick me an email at steve@4wdstuff.co.nz as I can supply them. Alternatively I can do the whole job for you, saving you a great deal of time and mess
If you have questions about a part I haven't covered yet then please hang on to them until I cover it, if you have questions about a step I have covered then ask - or if you disagree about a particular method I use then please post it up - This isn't about me, its about rebuilding a knuckle and the best way to do it.
Once complete, I'll have it trimmed, fixed and the extraneous crap removed then post it in the tech section.
Ok, so on with the tech.
Before you begin, assemble the following items:
one knuckle service kit (commonly configured with the part number SH4)
2 tubes of good quality GP grease (I use red-i marine grease) per side
a sh&tload of rags
and tools:
17mm deep socket
10mm socket with thin walls
12mm socket
ratchet and short extension
torque wrench
circlip pliers
ball-joint puller
diags (sidecutters)
soft drift
hammer
prybar
a container or two for nuts and bolts
a parts washer or a container with parts wash fluid (or kero) in it and a stiff brush
Ok, so first park the vehicle on the flat, jack it up as high as practical and put a jack-stand under the axle to support the side you're working on. Undo the 6 10mm head bolts holding the free-wheeling hub cap in place (if you have a non-factory brand hub this cap may be secured with cap-screws or something else). There is not a great deal of room around the bolt heads so you may need to grind a 10mm socket down a little to fit as I have done here. Also put a rag on the floor under the area you are working as much dirt and grease will end up down there. Note how clean the one I am using is now... check it again later in the process...

Slide the cap straight off and place it in a container - if you are not planning to clean and re-grease the manual hub then wrap or cover it to keep it free of dirt while the knuckle is being rebuilt.

Then undo the 6 nuts holding the hub body on using a 12mm socket. Do not completely remove them, just unscrew then so the end of the nut is flush with the end of the stud. At this point you may want a pry-bar or something similar wedged between a stud and the body and the ground to stop it turning while undoing these nuts as they will (should) be tight.
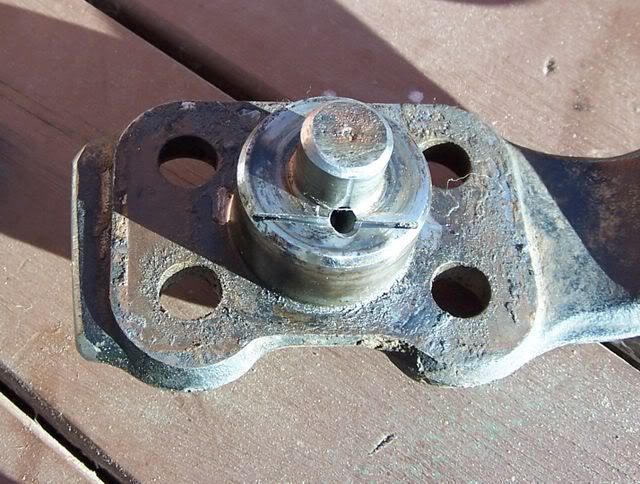
The reason for having the nuts flush is that the next step is to crack the tapered cone washers free of the hub body - and these jam in quite tight. I use a brass drift on the top of the stud and prefer to have the nut to both spread the shack and support the end of the drift while hitting it. Shocking the end of the stud will loosen the cone washer allowing them to be removed.

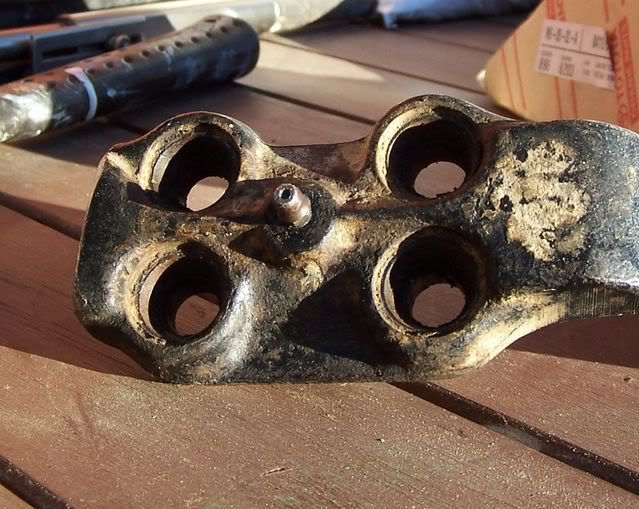
Note the previous person to do this job used another method to remove the cone washers - one I don't approve of - the sides of the hub body flange have been hit, which deforms them, popping the cone washer out... this is not a good method as it deforms and weakens the body - although as a last resort it is usually effective.

Once all 6 cone washers have been loosened they can be removed and placed in your container, and the circlip on the end of the CV can be removed (carefully - they can be a right pain in the arse to find if it 'pings' off across the garage). Note that in many of the steps that follow you may need to wipe grease out of the way to see what you are doing.

The hub body can now be removed

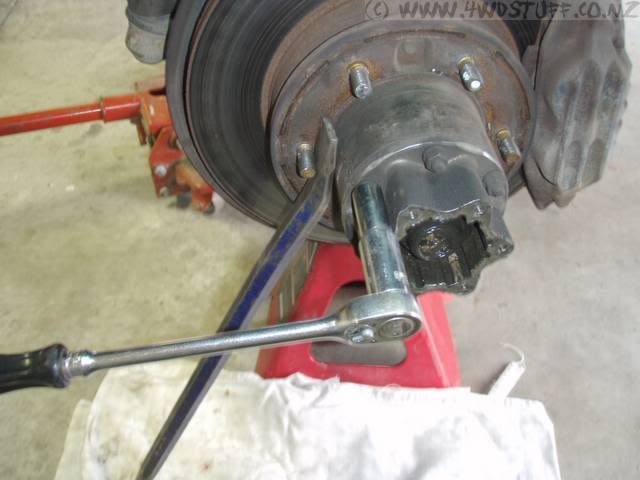
Next the 2 nuts and locking tab-washer need to be removed. Use a screw-driver or a small cold-chisel to knock the tab(s) facing out back flat so that the first nut can be undone.

Then remove the nut and the tab washer (it may need some extra help to be removed, they get bound up on the threads - your rebuild kit should have a new one so don't sweat too much about damaging it unless you are only tightening the wheel bearing).

Then remove the second nut and the rotor section is almost ready to remove - all that remains is to remove the brake caliper. This can be done by pulling the spring clip that holds the short hard line from the caliper to the flexy-line and then undoing the 2 17mm head bolts on the back of the caliper and carefully positioning it out of the way (sometimes its best to tie it to the leaf spring with a bungy or a zip-tie).


At this point the rotor section can be removed - be aware there will probably be a bit of grease and muck coming from within if the seal has been gone for a while and its leaked diff oil into the knuckle. Also, the outer wheel bearing and a thick washer will fall out as the rotor section is pulled off.